

User Manual
Page 2
... 5 Specifications 7 Installation Pre-Configuration 8 Step-by-Step Installation Guide 9 Single PRO2 Installation 10 Connecting Multiple PRO2s (Daisy-Chaining 12 Powering up the Systems 16 Using your PRO2 Selecting a Computer Using Keyboard Hot Key Commands 17 AutoScan Mode 18 Selecting a Computer Using Direct-Access Port Selectors 18 Bank Up and Bank Down Scroll Buttons 18 On-Screen Display Menu Control 20 Belkin KVM Switches and Accessories OmniView KVM Switches 23 OmniView All-In-One KVM Cables 25...
... 5 Specifications 7 Installation Pre-Configuration 8 Step-by-Step Installation Guide 9 Single PRO2 Installation 10 Connecting Multiple PRO2s (Daisy-Chaining 12 Powering up the Systems 16 Using your PRO2 Selecting a Computer Using Keyboard Hot Key Commands 17 AutoScan Mode 18 Selecting a Computer Using Direct-Access Port Selectors 18 Bank Up and Bank Down Scroll Buttons 18 On-Screen Display Menu Control 20 Belkin KVM Switches and Accessories OmniView KVM Switches 23 OmniView All-In-One KVM Cables 25...
User Manual
Page 3
... DC, 1-Amp Power Supply • Registration Card 1 For quick and easy installation, please refer to work with Screws • DB25-to delivering high-quality, durable products at a reasonable price. Package Contents • OmniView PRO2 Series KVM Switch • Adjustable Rack-mount Brackets with the most advanced server room and laboratory environments, offering intuitive port indicators, direct-access port selectors, high video resolution support, and flash upgradeable firmware. Belkin has designed...
... DC, 1-Amp Power Supply • Registration Card 1 For quick and easy installation, please refer to work with Screws • DB25-to delivering high-quality, durable products at a reasonable price. Package Contents • OmniView PRO2 Series KVM Switch • Adjustable Rack-mount Brackets with the most advanced server room and laboratory environments, offering intuitive port indicators, direct-access port selectors, high video resolution support, and flash upgradeable firmware. Belkin has designed...
User Manual
Page 4
... with one keyboard, monitor, and mouse. Flash Upgrade: Flash upgradeable firmware allows you to install the latest firmware for each connected server throughout the system. Firmware upgrades are free for complete upgrade information and support. Feature Overview Hot Keys: Hot key functionality allows you to page 18. By using a simple hot key sequence on AutoScan usage, please refer to select a desired port using designated key commands. To preserve signal integrity at belkin.com for the life...
... with one keyboard, monitor, and mouse. Flash Upgrade: Flash upgradeable firmware allows you to install the latest firmware for each connected server throughout the system. Firmware upgrades are free for complete upgrade information and support. Feature Overview Hot Keys: Hot key functionality allows you to page 18. By using a simple hot key sequence on AutoScan usage, please refer to select a desired port using designated key commands. To preserve signal integrity at belkin.com for the life...

User Manual
Page 5
... applications. Each button controls a port. A flashing port LED indicates that the console currently controls the corresponding computer. The Gold Series Cables have HDDB15 female-to indicate that there is pushed, the LED next to -PS/2 male connectors. The PRO Series Plus Cables include an industry-standard, 14-pin, coaxial VGA cable and nickel-plated connectors for superior clarity, connectivity, and error-free data transmission. OmniView Cables are molded together...
... applications. Each button controls a port. A flashing port LED indicates that the console currently controls the corresponding computer. The Gold Series Cables have HDDB15 female-to indicate that there is pushed, the LED next to -PS/2 male connectors. The PRO Series Plus Cables include an industry-standard, 14-pin, coaxial VGA cable and nickel-plated connectors for superior clarity, connectivity, and error-free data transmission. OmniView Cables are molded together...
User Manual
Page 10
... feet without risking signal degradation. Rack-mount hardware is included with the 4-Port PRO2. Cable Distance Requirements: For PS/2 computers: VGA signals transmit best up to 15 feet between the PRO2 and the connected computers does not exceed 25 feet. By using the Belkin CAT5 Extender (F1D084) with a standard CAT5 UPT cable. INSTALLATION Pre-Configuration Where to Place the PRO2: The...
... feet without risking signal degradation. Rack-mount hardware is included with the 4-Port PRO2. Cable Distance Requirements: For PS/2 computers: VGA signals transmit best up to 15 feet between the PRO2 and the connected computers does not exceed 25 feet. By using the Belkin CAT5 Extender (F1D084) with a standard CAT5 UPT cable. INSTALLATION Pre-Configuration Where to Place the PRO2: The...
User Manual
Page 11
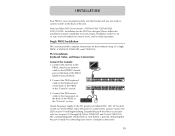
... this user manual labeled "Connecting Multiple PRO2s (Daisy-Chaining)". 9 Attach the bracket to the side of the rails or to diagram above). 4. Remove the adjustable brackets from the rack. Mount the PRO2 to the section in this way. Refer to the rack rail assembly. or 16-Port PRO2s include adjustable mounting brackets ideal for damage caused in 19-inch racks. Belkin Components is powered...
... this user manual labeled "Connecting Multiple PRO2s (Daisy-Chaining)". 9 Attach the bracket to the side of the rails or to diagram above). 4. Remove the adjustable brackets from the rack. Mount the PRO2 to the section in this way. Refer to the rack rail assembly. or 16-Port PRO2s include adjustable mounting brackets ideal for damage caused in 19-inch racks. Belkin Components is powered...
User Manual
Page 12
... Connections Connect the Console: 1. Please follow this installation manual completely to do so may result in the "Console" section. Connect the monitor to a power source, the LED for port 01 will begin flashing. Single PRO2 Installation This section provides complete instructions for the hardware setup of the PRO2 labeled "Console VGA". 2. INSTALLATION Your PRO2 is ready for connecting your monitor cable to the back of the PRO2 in keyboard or mouse errors...
... Connections Connect the Console: 1. Please follow this installation manual completely to do so may result in the "Console" section. Connect the monitor to a power source, the LED for port 01 will begin flashing. Single PRO2 Installation This section provides complete instructions for the hardware setup of the PRO2 labeled "Console VGA". 2. INSTALLATION Your PRO2 is ready for connecting your monitor cable to the back of the PRO2 in keyboard or mouse errors...

User Manual
Page 13
.../2 keyboard and PS/2 mouse connectors of the VGA cable to the VGA port on the computer. USB Installation: Boot the computer you wish to connect via USB as you can power down your PRO2 and automatically install the HID USB driver if necessary. Your computer should recognize your computer to connect it to connect. Using an OmniView KVM Cable (Belkin part# F3X1105-XX or F3X1835-XX-GLD), plug...
.../2 keyboard and PS/2 mouse connectors of the VGA cable to the VGA port on the computer. USB Installation: Boot the computer you wish to connect via USB as you can power down your PRO2 and automatically install the HID USB driver if necessary. Your computer should recognize your computer to connect it to connect. Using an OmniView KVM Cable (Belkin part# F3X1105-XX or F3X1835-XX-GLD), plug...

User Manual
Page 14
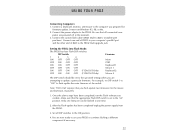
... 1 and 2 above for example, "VGA 02"). 2. BANKs 01 through your Belkin reseller or online at belkin.com. NOTE: We recommend you wish to connect to an available USB port on your USB computer. The Console keyboard, mouse, and monitor connects to BANK 00 and is available through 15 are referred to a free USB port on your computer. The BANK DIP switch is the factory default setting. • For multi...
... 1 and 2 above for example, "VGA 02"). 2. BANKs 01 through your Belkin reseller or online at belkin.com. NOTE: We recommend you wish to connect to an available USB port on your USB computer. The Console keyboard, mouse, and monitor connects to BANK 00 and is available through 15 are referred to a free USB port on your computer. The BANK DIP switch is the factory default setting. • For multi...

User Manual
Page 17
... BANKS using the BANK up . Verify that all Slave switches are connected properly. 12. Each switch should see the Master switch light up and display the digits "00", indicating its corresponding BANK address number as it is powered up and BANK down buttons. You can also reset the Master switch to the Master and Slave switches. Refer to the PRO2. 10. INSTALLATION Example of Daisy-Chain Configuration: cable...
... BANKS using the BANK up . Verify that all Slave switches are connected properly. 12. Each switch should see the Master switch light up and display the digits "00", indicating its corresponding BANK address number as it is powered up and BANK down buttons. You can also reset the Master switch to the Master and Slave switches. Refer to the PRO2. 10. INSTALLATION Example of Daisy-Chain Configuration: cable...

User Manual
Page 18
... problem persists, please refer to the Troubleshooting section in this with all occupied ports to verify that all cables have connected your computer to do this manual. The computer connected to see that you encounter an error, check your cable connections for the video signal to your PRO2, it is ready for use. Re-synchronization of the PRO2, using hot key commands through the Console keyboard. Check to port...
... problem persists, please refer to the Troubleshooting section in this with all occupied ports to verify that all cables have connected your computer to do this manual. The computer connected to see that you encounter an error, check your cable connections for the video signal to your PRO2, it is ready for use. Re-synchronization of the PRO2, using hot key commands through the Console keyboard. Check to port...

User Manual
Page 20
... BANK Down Scroll Buttons: Pressing the BANK + and BANK - The LED will take you to disable AutoScan. If you are installing multiple PRO2s that are at the Master switch (BANK 00) and want to check computers on the PRO2 will reset the PRO2. In AutoScan mode, the PRO2 remains on one port for a pre-set number of the Master switch to access other computers...
... BANK Down Scroll Buttons: Pressing the BANK + and BANK - The LED will take you to disable AutoScan. If you are installing multiple PRO2s that are at the Master switch (BANK 00) and want to check computers on the PRO2 will reset the PRO2. In AutoScan mode, the PRO2 remains on one port for a pre-set number of the Master switch to access other computers...

User Manual
Page 21
... PRO2, the "Scroll Lock" key must be displayed on the Console monitor. " button will take you to the previous BANK. For example, when you will hear a beep for F1DA116T) SL SL Delete Reset On-Screen Display menu SL SL S Disable sound in BANK 01. Pressing the "BANK - To send commands to BANK 01. Use the direct-access port selectors to go to...
... PRO2, the "Scroll Lock" key must be displayed on the Console monitor. " button will take you to the previous BANK. For example, when you will hear a beep for F1DA116T) SL SL Delete Reset On-Screen Display menu SL SL S Disable sound in BANK 01. Pressing the "BANK - To send commands to BANK 01. Use the direct-access port selectors to go to...
User Manual
Page 23
... Windows 95, 98, or Me. An available parallel port on -screen after making a port selection. included with your firmware, download the appropriate firmware file and utility from belkin.com. Firmware update files available at belkin.com. 21 Press the "ESC" key to go back to exit the On-Screen Display completely. Updating Firmware: To update your PRO2, as reconfiguring software may use the arrow keys to the next port while in AutoScan mode. USING...
... Windows 95, 98, or Me. An available parallel port on -screen after making a port selection. included with your firmware, download the appropriate firmware file and utility from belkin.com. Firmware update files available at belkin.com. 21 Press the "ESC" key to go back to exit the On-Screen Display completely. Updating Firmware: To update your PRO2, as reconfiguring software may use the arrow keys to the next port while in AutoScan mode. USING...
User Manual
Page 24
... time. 2. You are powered off at one firmware can be set DIP switch 1 to "ON" to flash update the main firmware of RJ45 to the computer you flash update two firmwares for firmware update. Set all connected com- USING YOUR PRO2 Connecting Computers: 1. puters are now ready to update a particular firmware. Note: F1DA116T requires that you prepared for the mouse and keyboard, separately. 1. Connect a keyboard, monitor, and mouse to the PRO2 flash upgrade jack. Setting...
... time. 2. You are powered off at one firmware can be set DIP switch 1 to "ON" to flash update the main firmware of RJ45 to the computer you flash update two firmwares for firmware update. Set all connected com- USING YOUR PRO2 Connecting Computers: 1. puters are now ready to update a particular firmware. Note: F1DA116T requires that you prepared for the mouse and keyboard, separately. 1. Connect a keyboard, monitor, and mouse to the PRO2 flash upgrade jack. Setting...
User Manual
Page 25
... additional convenience of manual push-button port selection on this unit include: hot key functionality; Designed for error-free boot up to download firmware updates and ensure compatibility with Audio. F1DB102P E Series 2-Port KVM Switch PS/2 Only F1DB104P E Series 4-Port KVM Switch PS/2 Only OmniView SOHO Series with the latest computers and devices. This series of the device. Switch between computers more convenient. The enclosure design builds in cable management and saves space, while...
... additional convenience of manual push-button port selection on this unit include: hot key functionality; Designed for error-free boot up to download firmware updates and ensure compatibility with Audio. F1DB102P E Series 2-Port KVM Switch PS/2 Only F1DB104P E Series 4-Port KVM Switch PS/2 Only OmniView SOHO Series with the latest computers and devices. This series of the device. Switch between computers more convenient. The enclosure design builds in cable management and saves space, while...
User Manual
Page 26
... power supply; Available in the desktop-style, 4-port, and the 19-inch rack-mountable 8- The Omniview PRO2 Series KVM Switches use standard cables for full control of up to control multiple platform servers from the other console. The OmniView MATRIX2 Series KVM Switch expands easily for easy installation; Switch between ports by using an on -screen interface. Video resolutions of as many as 256 computers through a 400MHz bandwidth. Each user operates a separate console following...
... power supply; Available in the desktop-style, 4-port, and the 19-inch rack-mountable 8- The Omniview PRO2 Series KVM Switches use standard cables for full control of up to control multiple platform servers from the other console. The OmniView MATRIX2 Series KVM Switch expands easily for easy installation; Switch between ports by using an on -screen interface. Video resolutions of as many as 256 computers through a 400MHz bandwidth. Each user operates a separate console following...

User Manual
Page 28
...Series AT-to-PS/2 Keyboard Adapter allows you to control a PC or KVM Switch up to extend your KVM solution. F1D084-The OmniView CAT5 Extender enables you to connect a keyboard with an AT-style connector to 500 feet away using standard UTP CAT5 cabling. F1D087-The OmniView Keyboard Extender allows you to work...to work with a PS/2-style connector. 26 F1D201-The OmniView 2-Port Reverse KVM Switch gives two users central control of one PC from two sets of PS/2 keyboards and pointing devices without swapping cables or rebooting the computer. F1D088-The OmniView VGA Monitor ...
...Series AT-to-PS/2 Keyboard Adapter allows you to control a PC or KVM Switch up to extend your KVM solution. F1D084-The OmniView CAT5 Extender enables you to connect a keyboard with an AT-style connector to 500 feet away using standard UTP CAT5 cabling. F1D087-The OmniView Keyboard Extender allows you to work...to work with a PS/2-style connector. 26 F1D201-The OmniView 2-Port Reverse KVM Switch gives two users central control of one PC from two sets of PS/2 keyboards and pointing devices without swapping cables or rebooting the computer. F1D088-The OmniView VGA Monitor ...

User Manual
Page 29
... Mac OS. Operating systems include, but are not limited to switch between ports? The user can select computers using the appropriate adapters (OmniView PS/2 Sun Adapter [F1D082], OmniView PS/2 Mac Adapter [F1D080]). It will support any time through On-Screen Display, or can update your PRO2 is always the most current version on firmware updates in this manual (page 21) and when to use them. Q: What does flash upgradeable...
... Mac OS. Operating systems include, but are not limited to switch between ports? The user can select computers using the appropriate adapters (OmniView PS/2 Sun Adapter [F1D082], OmniView PS/2 Mac Adapter [F1D080]). It will support any time through On-Screen Display, or can update your PRO2 is always the most current version on firmware updates in this manual (page 21) and when to use them. Q: What does flash upgradeable...

User Manual
Page 33
... the mouse cable attached to the channel with which you are experiencing problems. • Try a different mouse. 31 TROUBLESHOOTING Keyboard The computer does not detect a keyboard and I switch to a different port. • Check that the mouse you are using is connected properly to the Console of standby mode, allow up to one minute to regain mouse function. • De-activate power-management schemes on...
... the mouse cable attached to the channel with which you are experiencing problems. • Try a different mouse. 31 TROUBLESHOOTING Keyboard The computer does not detect a keyboard and I switch to a different port. • Check that the mouse you are using is connected properly to the Console of standby mode, allow up to one minute to regain mouse function. • De-activate power-management schemes on...


