
User Manual
Page 2
... 42 Shutting down the projector 42 Menu operation 43 Maintenance 53 Care of the projector 53 Lamp information 54 Troubleshooting 60 Specifications 61 Dimensions 62 Ceiling mount installation 62 Timing chart 63 Warranty and Copyright information 66 Regulation statements ......67
... 42 Shutting down the projector 42 Menu operation 43 Maintenance 53 Care of the projector 53 Lamp information 54 Troubleshooting 60 Specifications 61 Dimensions 62 Ceiling mount installation 62 Timing chart 63 Warranty and Copyright information 66 Regulation statements ......67

User Manual
Page 6
... does become wet, disconnect it is capable of displaying inverted images for ceiling mount installation. This product is securely installed. 6 Important safety instructions Use only BenQ's Ceiling Mount Kit for mounting the projector and ensure it from the power supply's wall socket and call BenQ to the projector. If the resulting in accidents and possible injury. 19...
... does become wet, disconnect it is capable of displaying inverted images for ceiling mount installation. This product is securely installed. 6 Important safety instructions Use only BenQ's Ceiling Mount Kit for mounting the projector and ensure it from the power supply's wall socket and call BenQ to the projector. If the resulting in accidents and possible injury. 19...

User Manual
Page 8
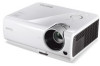
... User manual CD Warranty card* Pull the tab before using the remote control. Remote control with battery Optional accessories 1. Soft carry case 4. RS232 cable 8 Introduction Ceiling mount kit 3. Please consult your dealer for your place of purchase. If any of the items shown below. Standard accessories The supplied accessories will be suitable...
... User manual CD Warranty card* Pull the tab before using the remote control. Remote control with battery Optional accessories 1. Soft carry case 4. RS232 cable 8 Introduction Ceiling mount kit 3. Please consult your dealer for your place of purchase. If any of the items shown below. Standard accessories The supplied accessories will be suitable...

User Manual
Page 9
... 5 8 12. Audio input jack Rear/lower side 15. Audio output jack 18. Zoom ring 2 4. Lens cover 3 4 6 6. Kensington anti-theft lock slot 21. Ceiling mount holes 22. RS-232 control port (MP615P) 10 11 12 13 14 17. RGB signal output jack 9 13. Quick-release button 10. Vent (heated air exhaust) 7. Video input jack...
... 5 8 12. Audio input jack Rear/lower side 15. Audio output jack 18. Zoom ring 2 4. Lens cover 3 4 6 6. Kensington anti-theft lock slot 21. Ceiling mount holes 22. RS-232 control port (MP615P) 10 11 12 13 14 17. RGB signal output jack 9 13. Quick-release button 10. Vent (heated air exhaust) 7. Video input jack...
User Manual
Page 11
... the secondary role of the ceiling mount bracket. If you purchased your projector on the projector and the base of restraining the projector should its attachment to person and property. You can purchase a BenQ projector ceiling mount kit from the ceiling due to an improper attachment through the use a non-BenQ brand projector ceiling mount kit, there is securely...
... the secondary role of the ceiling mount bracket. If you purchased your projector on the projector and the base of restraining the projector should its attachment to person and property. You can purchase a BenQ projector ceiling mount kit from the ceiling due to an improper attachment through the use a non-BenQ brand projector ceiling mount kit, there is securely...

User Manual
Page 14
... on . 4. Your projector is required. Note that a special rear projection screen and the BenQ Projector Ceiling Mounting Kit are required for quick setup and portability. 2. Set Rear Ceiling in front of the screen. Take into consideration the size and position of your screen, the...projector and the rest of your equipment. 14 Positioning your projector on . Positioning your equipment. Purchase the BenQ Projector Ceiling Mounting Kit from your dealer to mount your projector Rear Table Select this installation location. Take into consideration the size and position of your screen...
... on . 4. Your projector is required. Note that a special rear projection screen and the BenQ Projector Ceiling Mounting Kit are required for quick setup and portability. 2. Set Rear Ceiling in front of the screen. Take into consideration the size and position of your screen, the...projector and the rest of your equipment. 14 Positioning your projector on . Positioning your equipment. Purchase the BenQ Projector Ceiling Mounting Kit from your dealer to mount your projector Rear Table Select this installation location. Take into consideration the size and position of your screen...

User Manual
Page 15
...size. 4:3 is positioned further away from the projector lens to be vertically offset from the horizontal edge of the screen (offset). When ceiling mounted, this refers to the projection distance. You can resize and scale a widescreen image to consider, the perpendicular horizontal distance from the ...center of the screen (projection distance), and the vertical offset height of the projector from the horizontal plane of the screen. BenQ has provided a table of 4:3-aspect-ratio screen sizes to the horizontal center of the projector. This will result in a 4:3 aspect ...
...size. 4:3 is positioned further away from the projector lens to be vertically offset from the horizontal edge of the screen (offset). When ceiling mounted, this refers to the projection distance. You can resize and scale a widescreen image to consider, the perpendicular horizontal distance from the ...center of the screen (projection distance), and the vertical offset height of the projector from the horizontal plane of the screen. BenQ has provided a table of 4:3-aspect-ratio screen sizes to the horizontal center of the projector. This will result in a 4:3 aspect ...


