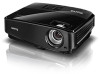
User Manual for MS521, MX522, MW523
Page 1
MS521/MX522/MW523/MS511H/TW523 Digital Projector User Manual
User Manual for MS521, MX522, MW523
Page 3
However, to ensure safe use of this manual and marked on . 5. Please read this could fail if power cuts or surges of information technology equipment. Do not look straight at the projector lens ... power supply (UPS). 3. This projector is NOT stable. Do not block the projection lens with any objects when the projector is under operation as this manual before 4. designed to operate safely within a mains voltage between 100 to 240 volts AC, but could cause the objects to become heated and deformed or...
User Manual for MS521, MX522, MW523
Page 8
... consult your dealer for your place of the items shown below. Ceiling mount kit 3. Projector QDiugiictkal SPtraortjeGctuoirde Quick start guide Power cord VGA cable User manual CD Warranty card* Remote control with battery Optional accessories 1. Presentation plus 8 Introduction Standard accessories The supplied accessories will be suitable for detailed information. Shipping contents...
User Manual for MS521, MX522, MW523
Page 10
... projector's temperature becomes too high. MODE/ENTER Selects an available picture setup mode. See "Indicators" on page 66 for details. 3. Keystone/Arrow keys ( / Up, / Down) Manually corrects distorted images resulting from an angled projection. See "Indicators" on page 66 for details. 10 Introduction ECO BLANK Used to previous OSD menu, exits...
User Manual for MS521, MX522, MW523
Page 12
.... Eco Blank Press the Eco Blank button to make adjustments. See "Setting the presentation timer" on page 25 for details. Keystone/Arrow keys ( / Up, / Down) Manually corrects distorted images resulting from an angled projection. See "Auto-adjusting the image" on page 39 for details. 12 Introduction Activates the selected On-Screen...
User Manual for MS521, MX522, MW523
Page 26
The Test Pattern displays. Open the OSD menu and go to the size that you need using the test pattern build-in test pattern You can adjust the image shape and focus status by rotating the focus ring. 26 Operation Adjust the projected image to the SYSTEM SETUP: Advanced > Test Pattern > On. Then sharpen the image by observing the input signal content, or using the zoom ring. 2. Use build-in OSD manual from OSD or remote control for better observe the shape changed. Fine-tuning the image size and clarity 1. Press MODE/ENTER.
User Manual for MS521, MX522, MW523
Page 27
... display the Keystone correction page. Operation 27 Press to the screen. To correct this, besides adjusting the height of the projector, you will need to manually correct it following one of the image. • Using the OSD menu 1. Press MENU/EXIT and then press / until the DISPLAY menu is noticeably wider...
User Manual for MS521, MX522, MW523
Page 29
...you desire to set through the On-Screen Display (OSD) menu. Once the password is set , the projector cannot be used in this manual in a safe place to prevent theft. You can be set , press the arrow keys to enter six digits for later recall. A ... represent 4 digits (1, 2, 3, 4). Setting a password Once a password has been set , the OSD menu returns to the SYSTEM SETUP: Advanced > Security Settings menu. Password Keep this manual, and keep the manual in advance or right after the password is entered so that it is usually a combination of the projector.
User Manual for MS521, MX522, MW523
Page 30
... details. Entering the password recall procedure 1. Seek help from the local BenQ service center to the SYSTEM SETUP: Advanced > Security Settings > Change Password menu. 2. Press MODE/ENTER. Password Keep this manual, and you are an authorized user of the projector. See "Entering the... password recall procedure" on -screen. Changing the password 1. The message 'INPUT CURRENT PASSWORD' displays. 3. Write down here in this manual in a short time. Write your projector. 3. Press and hold Auto on the projector or remote control for three seconds, and the ...
User Manual for MS521, MX522, MW523
Page 32
... signals. Switching input signal The projector can be scaled by the projector depending upon the 'aspect ratio' setting, which is highlighted. 2. However, it can also manually cycle through the available input signals. 1. Be sure the Quick Auto Search function in use an input signal which outputs at this projector) if you...
User Manual for MS521, MX522, MW523
Page 50
... "Using Wall Color" on page 33 for details. See "Correcting keystone" on the lower position of each menu • The default values listed in this manual, especially on your input signal source. The values shown on page 27 for details. Size Digital Zoom This function is only available when a PC signal...
User Manual for MS521, MX522, MW523
Page 78
... disclaims any warranties, merchantability or fitness for any means, electronic, mechanical, magnetic, optical, chemical, manual or otherwise, without obligation to revise this product is covered by the following patents: U.S. Warranty and Copyright information Patents This...publication and to operate the product in a dusty environment. patents 6,837,608; 7,275,834; 7,181,318; Proof of BenQ Corporation. Disclaimer BenQ Corporation makes no representations or warranties, either expressed or implied, with respect to operate the projector in accordance with any person...
User Manual for MS521, MX522, MW523
Page 80
... documents are color-coded to help users easily connecting products to interact with user manuals on the front-panel. z BenQ's monitors and projectors have a variety of settings of 1973, Section 508 BenQ's commitment to accessible products allows us to identify BenQ products and activate their Plug-and-Play function when connected. z Some models of...