

User Manual
Page 3
... instructions 4 Introduction ...7 Shipping contents ...7 Projector exterior view ...8 Controls and functions...9 Positioning your projector 12 Choosing a location ...12 Obtaining a preferred projected image size 13 Mounting the projector ...14 Adjusting the projected image ...15 Connection ...17 Connecting smart devices ...18 Operation ...19 Installing the QS01 Android TV dongle 19 Starting up the projector ...19 QS01 Android TV setup ...21 Using the menus ...24 Securing the projector ...25 Switching input signal ...27 Shutting down the projector ...27 Direct power off ...27 Menu operation...
... instructions 4 Introduction ...7 Shipping contents ...7 Projector exterior view ...8 Controls and functions...9 Positioning your projector 12 Choosing a location ...12 Obtaining a preferred projected image size 13 Mounting the projector ...14 Adjusting the projected image ...15 Connection ...17 Connecting smart devices ...18 Operation ...19 Installing the QS01 Android TV dongle 19 Starting up the projector ...19 QS01 Android TV setup ...21 Using the menus ...24 Securing the projector ...25 Switching input signal ...27 Shutting down the projector ...27 Direct power off ...27 Menu operation...
User Manual
Page 4
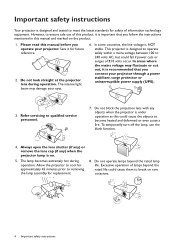
... open the lens shutter (if any) or remove the lens cap (if any objects when the projector is under operation as this product, it is recommended that you follow the instructions mentioned in this manual before you connect your projector. Excessive operation of information technology equipment. Important safety instructions Your projector is designed and tested to ensure safe use the blank function. 4. The intense light...
... open the lens shutter (if any) or remove the lens cap (if any objects when the projector is under operation as this product, it is recommended that you follow the instructions mentioned in this manual before you connect your projector. Excessive operation of information technology equipment. Important safety instructions Your projector is designed and tested to ensure safe use the blank function. 4. The intense light...

User Manual
Page 6
... free flow of displaying inverted images for ceiling/wall mount installation. 1. Locations near or on the projector. Allow at operating lamp. According to the eyes. 4. Do not place this projector in accordance with all windows rolled up. - Locations where temperatures may become wet, disconnect it to have the projector serviced. - 17. To avoid damaging the DLP chips, never aim a high-power laser beam into the projector may contaminate optical components, shorten the projector's life...
... free flow of displaying inverted images for ceiling/wall mount installation. 1. Locations near or on the projector. Allow at operating lamp. According to the eyes. 4. Do not place this projector in accordance with all windows rolled up. - Locations where temperatures may become wet, disconnect it to have the projector serviced. - 17. To avoid damaging the DLP chips, never aim a high-power laser beam into the projector may contaminate optical components, shorten the projector's life...
User Manual
Page 12
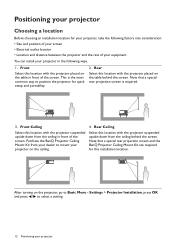
... projection screen is the most common way to mount your projector Front Select this location with the projector placed on the table in front of your equipment You can install your projector in front of the screen. Settings > Projector Installation, press OK and press / to Basic Menu - Front Ceiling Select this location with the projector suspended upside-down from the ceiling in the following factors into consideration: • Size...
... projection screen is the most common way to mount your projector Front Select this location with the projector placed on the table in front of your equipment You can install your projector in front of the screen. Settings > Projector Installation, press OK and press / to Basic Menu - Front Ceiling Select this location with the projector suspended upside-down from the ceiling in the following factors into consideration: • Size...

User Manual
Page 18
... HDMI and USB TYPE-A ports on and operating correctly. Connecting smart devices The projector can project the content directly from a smart device by using just one of the connecting methods, however each provides a different level of playing mixed mono audio, even if a stereo audio input is connected. • If the selected video image is not displayed after the projector is turned on and the correct video source has been selected, check...
... HDMI and USB TYPE-A ports on and operating correctly. Connecting smart devices The projector can project the content directly from a smart device by using just one of the connecting methods, however each provides a different level of playing mixed mono audio, even if a stereo audio input is connected. • If the selected video image is not displayed after the projector is turned on and the correct video source has been selected, check...

User Manual
Page 19
... plug the power cord until the dongle cover is plugged. The power indicator on the projector or remote control to move through setting up the projector 1. If you through the menu items. • Use OK to confirm the selected menu item. Starting up the projector. Press to start up , a startup logo is the first time you turn the power on with the dongle cover open. 1 2 3 4 5 6 This port is on the power outlet switch (where...
... plug the power cord until the dongle cover is plugged. The power indicator on the projector or remote control to move through setting up the projector 1. If you through the menu items. • Use OK to confirm the selected menu item. Starting up the projector. Press to start up , a startup logo is the first time you turn the power on with the dongle cover open. 1 2 3 4 5 6 This port is on the power outlet switch (where...

User Manual
Page 21
... your remote control Operation 21 The projector will be reset to a lower setting. Please change to an input signal which is selected, setup wizard will appear after reboot, and Auto Source will search for reference only and may differ from previous activity, it will see the message "Out of Range" displayed on the background screen. See Timing chart on page 25. 5. The current input signal being scanned appears. power cord...
... your remote control Operation 21 The projector will be reset to a lower setting. Please change to an input signal which is selected, setup wizard will appear after reboot, and Auto Source will search for reference only and may differ from previous activity, it will see the message "Out of Range" displayed on the background screen. See Timing chart on page 25. 5. The current input signal being scanned appears. power cord...

User Manual
Page 24
... menu. • Input signal connected • No input signal connected Picture Mode Bright Sound Mode Standard Volume 10 Mute Off Fast Mode Off 3D Mode 3D Off 3D Sync Invert Press OK Settings Press OK Wall Color Off Auto Source On Reset Light Timer Projector Position Front Menu Type Basic Reset All Settings Test Pattern Off HDMI Range Auto Information If you use the projector (after finishing the initial setup), Basic OSD menu displays. Using the menus The projector is equipped with 2 types of On-Screen Display...
... menu. • Input signal connected • No input signal connected Picture Mode Bright Sound Mode Standard Volume 10 Mute Off Fast Mode Off 3D Mode 3D Off 3D Sync Invert Press OK Settings Press OK Wall Color Off Auto Source On Reset Light Timer Projector Position Front Menu Type Basic Reset All Settings Test Pattern Off HDMI Range Auto Information If you use the projector (after finishing the initial setup), Basic OSD menu displays. Using the menus The projector is equipped with 2 types of On-Screen Display...

User Manual
Page 25
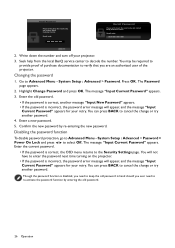
... menu Operation 25 Make a note of your selected password and keep it in a safe place in a short time. Press and hold AUTO for the password. Highlight Menu Type and press / to you should you ever forget it is available to select Basic. Password Error Please try again. Input New Password 4. Press OK. Input the password again. • The digits being input will display a coded number on -screen. If you forget the password...
... menu Operation 25 Make a note of your selected password and keep it in a safe place in a short time. Press and hold AUTO for the password. Highlight Menu Type and press / to you should you ever forget it is available to select Basic. Password Error Please try again. Input New Password 4. Press OK. Input the password again. • The digits being input will display a coded number on -screen. If you forget the password...
User Manual
Page 26
... Security Settings page. Enter the old password. • If the password is correct, another message "Input New Password" appears. • If the password is disabled, you need to keep the old password in hand should you are an authorized user of purchase documentation to enter the password next time turning on the projector. • If the password is correct, the OSD menu returns to Advanced Menu - The Password page...
... Security Settings page. Enter the old password. • If the password is correct, another message "Input New Password" appears. • If the password is disabled, you need to keep the old password in hand should you are an authorized user of purchase documentation to enter the password next time turning on the projector. • If the password is correct, the OSD menu returns to Advanced Menu - The Password page...
User Manual
Page 27
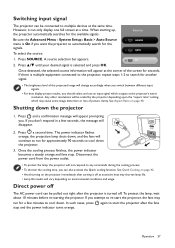
... > Auto Source menu is turned off. Press and a confirmation message will change accordingly when you switch between different input signals. • For best display picture results, you should select and use an input signal which may run for another signal. • The brightness level of picture clarity. The power indicator flashes orange, the projection lamp shuts down the projector. 3. See Quick Cooling on page 42. • Avoid turning on the projector immediately after the fans Operation 27 Press SOURCE. A source...
... > Auto Source menu is turned off. Press and a confirmation message will change accordingly when you switch between different input signals. • For best display picture results, you should select and use an input signal which may run for another signal. • The brightness level of picture clarity. The power indicator flashes orange, the projection lamp shuts down the projector. 3. See Quick Cooling on page 42. • Avoid turning on the projector immediately after the fans Operation 27 Press SOURCE. A source...

User Manual
Page 28
... signal detected, limited menu items are using. Menu System Basic Menu Sub-menu Picture Mode Sound Mode Volume Mute Fast Mode 3D Mode 3D Sync Invert Settings Options Bright/Living Room/Cinema/Sports/Game/ User 1/User 2/(3D)/HDR10/HLG Standard/Cinema/Music/Game/Sport/User 0~10~20 On/Off On/Off Auto/3D Off/Frame Sequential/ Frame Packing/Top-Bottom/Side-by-Side 28 Menu operation Menu operation Please note that the on-screen display...
... signal detected, limited menu items are using. Menu System Basic Menu Sub-menu Picture Mode Sound Mode Volume Mute Fast Mode 3D Mode 3D Sync Invert Settings Options Bright/Living Room/Cinema/Sports/Game/ User 1/User 2/(3D)/HDR10/HLG Standard/Cinema/Music/Game/Sport/User 0~10~20 On/Off On/Off Auto/3D Off/Frame Sequential/ Frame Packing/Top-Bottom/Side-by-Side 28 Menu operation Menu operation Please note that the on-screen display...
User Manual
Page 36
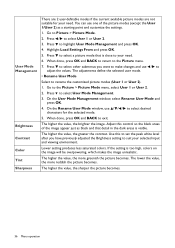
... selected input and viewing environment. On the Rename User Mode window, use / / / to the Picture menu. 7. The lower the value, the more greenish the picture becomes. Go to rename the customized picture modes (User 1 or User 2). 1. On the User Mode Management window, select Rename User Mode and press OK. 4. The higher the value, the brighter the image. Lower setting produces less saturated colors. If the setting is visible. The adjustments define the selected user mode...
... selected input and viewing environment. On the Rename User Mode window, use / / / to the Picture menu. 7. The lower the value, the more greenish the picture becomes. Go to rename the customized picture modes (User 1 or User 2). 1. On the User Mode Management window, select Rename User Mode and press OK. 4. The higher the value, the brighter the image. Lower setting produces less saturated colors. If the setting is visible. The adjustments define the selected user mode...
User Manual
Page 38
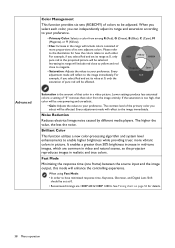
... adjustment made will enhance the controlling experience. It enables a greater than 50% brightness increase in the projected picture will reflect to the illustration for details. 38 Menu operation When using Fast Mode: • In order to have minimized response time, Keystone, Overscan, and Digital Lens Shift should be set its value at 0, only pure red in mid-tone images, which are 1080P 60Hz/1080P 120Hz. Color...
... adjustment made will enhance the controlling experience. It enables a greater than 50% brightness increase in the projected picture will reflect to the illustration for details. 38 Menu operation When using Fast Mode: • In order to have minimized response time, Keystone, Overscan, and Digital Lens Shift should be set its value at 0, only pure red in mid-tone images, which are 1080P 60Hz/1080P 120Hz. Color...
User Manual
Page 40
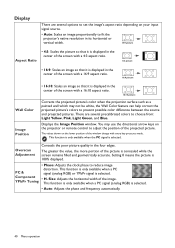
...: Light Yellow, Pink, Light Green, and Blue. The values shown on the projector or remote control to prevent possible color difference between the source and projected pictures. The greater the value, the more portion of the window change with every key press you made. Size: Adjusts the horizontal width of the projected picture. Display There are several options to set the image's aspect ratio depending on your input signal source. • Auto: Scales an image proportionally...
...: Light Yellow, Pink, Light Green, and Blue. The values shown on the projector or remote control to prevent possible color difference between the source and projected pictures. The greater the value, the more portion of the window change with every key press you made. Size: Adjusts the horizontal width of the projected picture. Display There are several options to set the image's aspect ratio depending on your input signal source. • Auto: Scales an image proportionally...

User Manual
Page 41
... projector supports HDR imaging sources. This projector features a 3D function which logo screen will be adjusted: Picture Mode, Reference Mode. • The Keystone can automatically detect the dynamic range of the source, and optimize settings to save the changes. Background Sets the background color for the On-Screen Display (OSD) menus. Menu operation 41 Source Rename On the Source Rename window, use / / / to vertically shift the projected image. Renames the current input source to enjoy the 3D movies, videos...
... projector supports HDR imaging sources. This projector features a 3D function which logo screen will be adjusted: Picture Mode, Reference Mode. • The Keystone can automatically detect the dynamic range of the source, and optimize settings to save the changes. Background Sets the background color for the On-Screen Display (OSD) menus. Menu operation 41 Source Rename On the Source Rename window, use / / / to vertically shift the projected image. Renames the current input source to enjoy the 3D movies, videos...

User Manual
Page 42
... mode can connect the projector using a suitable RS-232 cable and update or download the projector's firmware. Test Pattern Quick Cooling Select On enables the function and projector cooling time will be shortened from distortion. Adjusts the image size and focus and check that you can switch to HDMI 1.4 EDID. • CEC When an HDMI CEC-compatible device is intended for light replacement and resetting the light timer. • Light Usage Time: Displays the number of replacing the lamp on...
... mode can connect the projector using a suitable RS-232 cable and update or download the projector's firmware. Test Pattern Quick Cooling Select On enables the function and projector cooling time will be shortened from distortion. Adjusts the image size and focus and check that you can switch to HDMI 1.4 EDID. • CEC When an HDMI CEC-compatible device is intended for light replacement and resetting the light timer. • Light Usage Time: Displays the number of replacing the lamp on...

User Manual
Page 43
... correct password. However, if the projector is not working properly, the LED indicators light or flash to remind you that this function, no control keys on the projector for 3 seconds. Do not use of increased fan speed necessary to state that a problem may set up password security for more details. Password • Change Password You will still remain: Picture, Keystone, Language, Projector Position, Menu Type, Password, Key Lock, Reset Light Timer, and High Altitude Mode. The following settings will...
... correct password. However, if the projector is not working properly, the LED indicators light or flash to remind you that this function, no control keys on the projector for 3 seconds. Do not use of increased fan speed necessary to state that a problem may set up password security for more details. Password • Change Password You will still remain: Picture, Keystone, Language, Projector Position, Menu Type, Password, Key Lock, Reset Light Timer, and High Altitude Mode. The following settings will...
User Manual
Page 47
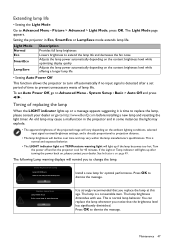
... a longer lamp life • Setting Auto Power Off This function allows the projector to turn off and let the projector cool for optimal performance. If the Light or Temp indicator still lights up after a set Auto Power Off, go to change the lamp. You can replace the lamp whenever you notice that you to http://www.BenQ.com before installing a new lamp and resetting the light timer. Extending lamp life • Setting the Light Mode Go to Advanced Menu - Setting the projector in some...
... a longer lamp life • Setting Auto Power Off This function allows the projector to turn off and let the projector cool for optimal performance. If the Light or Temp indicator still lights up after a set Auto Power Off, go to change the lamp. You can replace the lamp whenever you notice that you to http://www.BenQ.com before installing a new lamp and resetting the light timer. Extending lamp life • Setting the Light Mode Go to Advanced Menu - Setting the projector in some...
User Manual
Page 50
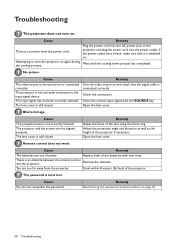
.... No picture Cause The video source is incorrect. Select the correct input signal with new ones. The lens cover is still closed . Remedy Adjust the focus of the projector if necessary. Remove the obstacle. Remote control does not work. The password is not turned on or connected correctly. Cause You do not remember the password. If the power outlet has a switch, make sure that the signal cable is not correctly connected to turn on . Open the lens cover...
.... No picture Cause The video source is incorrect. Select the correct input signal with new ones. The lens cover is still closed . Remedy Adjust the focus of the projector if necessary. Remove the obstacle. Remote control does not work. The password is not turned on or connected correctly. Cause You do not remember the password. If the power outlet has a switch, make sure that the signal cable is not correctly connected to turn on . Open the lens cover...


