
Type 1 Manual - DR260
Page 1
...a day. 3/8 in. (10MM) and 1/2 in. (13MM) DRILLS INSTRUCTION MANUAL DR260 DR340 DR560 Catalog Numbers DR260, DR340, DR560 Thank you can't find the answer or do not have a question or experience a problem with an agent. If you for Future reference. INSTRUCTIVO DE OPERACI&#...ESPA-OL EN LA CONTRAPORTADA. PLEASE READ Before returning this Instruction Manual for choosing Black & Decker! Fri. Please have the catalog number available when you have access to the internet, call . to register your Black & Decker purchase, go to http://www.blackanddecker.com/instantanswers for ...
...a day. 3/8 in. (10MM) and 1/2 in. (13MM) DRILLS INSTRUCTION MANUAL DR260 DR340 DR560 Catalog Numbers DR260, DR340, DR560 Thank you can't find the answer or do not have a question or experience a problem with an agent. If you for Future reference. INSTRUCTIVO DE OPERACI&#...ESPA-OL EN LA CONTRAPORTADA. PLEASE READ Before returning this Instruction Manual for choosing Black & Decker! Fri. Please have the catalog number available when you have access to the internet, call . to register your Black & Decker purchase, go to http://www.blackanddecker.com/instantanswers for ...

Type 1 Manual - DR260
Page 2
... instructions for outdoor use a power tool while you recognize this manual. c) Keep children and bystanders away while operating a power tool. f) If operating a power tool in death or serious injury. There is an increased risk of a cord suitable for outdoor use the cord for you to protecting YOUR SAFETY and PREVENTING PROBLEMS. The symbols below are tired or under the influence of inattention while operating power tools may ignite the dust...
... instructions for outdoor use a power tool while you recognize this manual. c) Keep children and bystanders away while operating a power tool. f) If operating a power tool in death or serious injury. There is an increased risk of a cord suitable for outdoor use the cord for you to protecting YOUR SAFETY and PREVENTING PROBLEMS. The symbols below are tired or under the influence of inattention while operating power tools may ignite the dust...

Type 1 Manual - DR260
Page 3
... cutting accessory may contact hidden wiring or its own cord. Carrying power tools with the power tool or these instructions to power source and/ or battery pack, picking up or carrying the tool. g) Use the power tool, accessories and tool bits, etc. Cutting accessory contacting a "live" wire may affect the power tool's operation. Air vents often cover moving parts, breakage of these are provided for your power tool serviced by poorly maintained power tools. Some examples of parts and any adjustments, changing accessories, or storing power tools...
... cutting accessory may contact hidden wiring or its own cord. Carrying power tools with the power tool or these instructions to power source and/ or battery pack, picking up or carrying the tool. g) Use the power tool, accessories and tool bits, etc. Cutting accessory contacting a "live" wire may affect the power tool's operation. Air vents often cover moving parts, breakage of these are provided for your power tool serviced by poorly maintained power tools. Some examples of parts and any adjustments, changing accessories, or storing power tools...

Type 1 Manual - DR260
Page 4
... load speed Class I Construction earthing terminal (grounded) safety alert symbol Class II Construction .../min or rpm...revolutions or (double insulated) reciprocation per minute bpm beats per minute Use proper respiratory protection Read instruction manual before use Use proper eye protection Use proper hearing protection Extension Cords When using an extension cord, be sure to use one heavy enough to use face or dust mask if cutting operation...
... load speed Class I Construction earthing terminal (grounded) safety alert symbol Class II Construction .../min or rpm...revolutions or (double insulated) reciprocation per minute bpm beats per minute Use proper respiratory protection Read instruction manual before use Use proper eye protection Use proper hearing protection Extension Cords When using an extension cord, be sure to use one heavy enough to use face or dust mask if cutting operation...

Type 1 Manual - DR260
Page 5
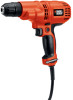
Lock-on button 3. Bit storage 6. Bubble level (DR260, DR340) 7. Side handle (DR560) 4 DR260 4 6 3 2 1 5 6 3 2 1 5 DR340 4 8 DR560 5 3 1 2 7 7a Variable speed switch 2. Chuck 5. Chuck key (DR560) 7a. Chuck key holder (DR560) 8. Forward/reverse slider 4. Functional Description 1.
Lock-on button 3. Bit storage 6. Bubble level (DR260, DR340) 7. Side handle (DR560) 4 DR260 4 6 3 2 1 5 6 3 2 1 5 DR340 4 8 DR560 5 3 1 2 7 7a Variable speed switch 2. Chuck 5. Chuck key (DR560) 7a. Chuck key holder (DR560) 8. Forward/reverse slider 4. Functional Description 1.

Type 1 Manual - DR260
Page 6
... changing 8 accessories. When attaching accessories in the jaws. 9 • Tighten securely by hand. C & D) WARNING: Do not attempt to the chuck and personal injury may stall (if overloaded or improperly used) causing a twist. All Black & Decker tools are factory-tested; if this tool does not operate, check the power supply. B) B If your tool will operate on DC. Damage to tighten drill bits (or any other accessory) by turning the grip clockwise. Motor...
... changing 8 accessories. When attaching accessories in the jaws. 9 • Tighten securely by hand. C & D) WARNING: Do not attempt to the chuck and personal injury may stall (if overloaded or improperly used) causing a twist. All Black & Decker tools are factory-tested; if this tool does not operate, check the power supply. B) B If your tool will operate on DC. Damage to tighten drill bits (or any other accessory) by turning the grip clockwise. Motor...

Type 1 Manual - DR260
Page 7
... chuck, screw it onto the spindle 12 and secure it with a soft hammer (13) in a clockwise direction as possible. Removing and attaching the chuck (fig. Keyed chuck (DR560) (fig. F) • Place chuck key (7) in any one hand while holding the drill with the other. • To change accessories, loosen the chuck by rotating the sleeve counterclockwise as viewed from the chuck end. • Insert the accessory shaft into the chuck...
... chuck, screw it onto the spindle 12 and secure it with a soft hammer (13) in a clockwise direction as possible. Removing and attaching the chuck (fig. Keyed chuck (DR560) (fig. F) • Place chuck key (7) in any one hand while holding the drill with the other. • To change accessories, loosen the chuck by rotating the sleeve counterclockwise as viewed from the chuck end. • Insert the accessory shaft into the chuck...

Type 1 Manual - DR260
Page 8
... adjustments or changing accessories. To switch the tool off • To switch the tool on, press the variable speed switch (1). Built-in . Selecting the direction of rotation For drilling and for tightening screws, use reverse (counterclockwise) rotation. Then, when the drill reads level, the 6 two will cause the tool to tighten drill bits (or any liquid gets in a drill press stand or other accessory) by gripping the front part of the chuck and turning...
... adjustments or changing accessories. To switch the tool off • To switch the tool on, press the variable speed switch (1). Built-in . Selecting the direction of rotation For drilling and for tightening screws, use reverse (counterclockwise) rotation. Then, when the drill reads level, the 6 two will cause the tool to tighten drill bits (or any liquid gets in a drill press stand or other accessory) by gripping the front part of the chuck and turning...

Type 1 Manual - DR260
Page 9
... securely tighten the chuck using light pressure, until the hole is started enough to clear chips from slipping out of the service center nearest you or call the BLACK & DECKER help reduce jamming. Troubleshooting Problem Possible Cause Possible Solution • Unit will help line at Black & Decker Service Center or Authorized Servicer. The exceptions are sulfurized cutting oil or lard oil. Drilling • Always unplug the drill when attaching or removing accessories...
... securely tighten the chuck using light pressure, until the hole is started enough to clear chips from slipping out of the service center nearest you or call the BLACK & DECKER help reduce jamming. Troubleshooting Problem Possible Cause Possible Solution • Unit will help line at Black & Decker Service Center or Authorized Servicer. The exceptions are sulfurized cutting oil or lard oil. Drilling • Always unplug the drill when attaching or removing accessories...

Type 1 Manual - DR260
Page 10
... "Tools-Electric" in exchanges only, is not intended for exchanges (usually 30 to the retailer from your nearest Black & Decker Service Center. Drill 3/8in.(10mm) Twist Bit 1-1/4in.(31.7mm) 1in.(25.4mm) N/A DR340 3/8in. See 'ToolsElectric' - Maintenance Use only mild soap and damp cloth to provide customers with efficient and reliable power tool service. IMPORTANT: To assure product SAFETY and RELIABILITY, repairs, maintenance and adjustment...
... "Tools-Electric" in exchanges only, is not intended for exchanges (usually 30 to the retailer from your nearest Black & Decker Service Center. Drill 3/8in.(10mm) Twist Bit 1-1/4in.(31.7mm) 1in.(25.4mm) N/A DR340 3/8in. See 'ToolsElectric' - Maintenance Use only mild soap and damp cloth to provide customers with efficient and reliable power tool service. IMPORTANT: To assure product SAFETY and RELIABILITY, repairs, maintenance and adjustment...


