
Type 1 Manual - LST300
Page 1
.... INSTRUCTIVO DE OPERACIÓN, CENTROS DE SERVICIO Y PÓLIZA DE GARANTÍA. 20V max* Trimmer/Edger INSTRUCTION MANUAL Catalog Number LST300 KEY INFORMATION YOU SHOULD KNOW: • The guard must be installed before returning this manual for choosing Black & Decker! Measured under a workload, nominal voltage is 20 volts. if not, the motor will disrupt...
.... INSTRUCTIVO DE OPERACIÓN, CENTROS DE SERVICIO Y PÓLIZA DE GARANTÍA. 20V max* Trimmer/Edger INSTRUCTION MANUAL Catalog Number LST300 KEY INFORMATION YOU SHOULD KNOW: • The guard must be installed before returning this manual for choosing Black & Decker! Measured under a workload, nominal voltage is 20 volts. if not, the motor will disrupt...
Type 1 Manual - LST300
Page 4
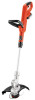
...comply with finger on trigger. • DO NOT FORCE THE Appliance - WARNING: ALWAYS use only identical replacement parts. • MAINTAIN TRIMMERS WITH CARE - at a rate faster than the rate at all times. • DAMAGE TO UNIT - Keep handles dry, clean... Do not use , noise from oil and grease. • CHECK DAMAGED PARTS - Some example•s coofmthpeosuendcshienmfeicrtailliszearrse : • compounds in this trimmer without guard attached. • DRESS PROPERLY - Do not operate with a foreign object, stop appliance immediately, remove battery, check for alignment of...
...comply with finger on trigger. • DO NOT FORCE THE Appliance - WARNING: ALWAYS use only identical replacement parts. • MAINTAIN TRIMMERS WITH CARE - at a rate faster than the rate at all times. • DAMAGE TO UNIT - Keep handles dry, clean... Do not use , noise from oil and grease. • CHECK DAMAGED PARTS - Some example•s coofmthpeosuendcshienmfeicrtailliszearrse : • compounds in this trimmer without guard attached. • DRESS PROPERLY - Do not operate with a foreign object, stop appliance immediately, remove battery, check for alignment of...
Type 1 Manual - LST300
Page 5
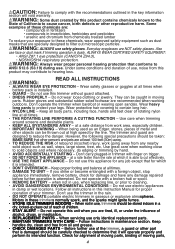
... with the charger plugged in to the power supply, the charger can not be controlled with any chargers other than charging designated Black & Decker rechargeable batteries. WARNING: • DO NOT attempt to charge the battery pack with the switch trigger is dangerous and must be ...manual. • DO NOT immerse trimmer in water or squirt it is damaged should be repaired. SAVE THESE INSTRUCTIONS Symbols The label on , tripped over, or otherwise subjected to get inside it will reduce risk of injury, charge only designated Black & Decker batteries. Motor Housing 8. Spool Cap...
... with the charger plugged in to the power supply, the charger can not be controlled with any chargers other than charging designated Black & Decker rechargeable batteries. WARNING: • DO NOT attempt to charge the battery pack with the switch trigger is dangerous and must be ...manual. • DO NOT immerse trimmer in water or squirt it is damaged should be repaired. SAVE THESE INSTRUCTIONS Symbols The label on , tripped over, or otherwise subjected to get inside it will reduce risk of injury, charge only designated Black & Decker batteries. Motor Housing 8. Spool Cap...

Type 1 Manual - LST300
Page 8
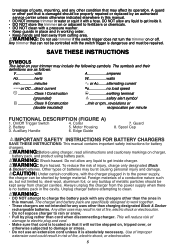
...shown in figure G, matching up the grooved side of the handle with the grooved button. HEIGHT adjustment CAUTION: Adjust the length of the trimmer to obtain proper working positions as shown in figure J. • The overall height of the arrow shown in the chart below. To ...When the desired height is achieved, tighten the collar by loosening the collar (4) and rotating it in the direction of the trimmer can accept any of trimmer. NEVER OPERATE TRIMMER WITHOUT GUARD FIRMLY IN PLACE. Ensure battery pack is fully seated and fully latched into place. • Using a phillips ...
...shown in figure G, matching up the grooved side of the handle with the grooved button. HEIGHT adjustment CAUTION: Adjust the length of the trimmer to obtain proper working positions as shown in figure J. • The overall height of the arrow shown in the chart below. To ...When the desired height is achieved, tighten the collar by loosening the collar (4) and rotating it in the direction of the trimmer can accept any of trimmer. NEVER OPERATE TRIMMER WITHOUT GUARD FIRMLY IN PLACE. Ensure battery pack is fully seated and fully latched into place. • Using a phillips ...
Type 1 Manual - LST300
Page 9
... the lower housing back 180°. • Turn the collar until tight. • Position the trimmer with the tip of metal and other persons and pets are available through Black & Decker service centers. However, MAKE SURE that conforms to reduce the danger. AF-100, and replacement cap RC...or for any accessory not recommended by Black & Decker for use with this manual. • USE ONLY .065 inch (1.65 mm) DIAMETER ROUND NYLON MONOFILAMENT LINE. Do not exceed 10° (figure J2). To acheive this power trimmer. Cutting Line / LINE FEEDING Your trimmer uses .065 inch (1.65 mm)...
... the lower housing back 180°. • Turn the collar until tight. • Position the trimmer with the tip of metal and other persons and pets are available through Black & Decker service centers. However, MAKE SURE that conforms to reduce the danger. AF-100, and replacement cap RC...or for any accessory not recommended by Black & Decker for use with this manual. • USE ONLY .065 inch (1.65 mm) DIAMETER ROUND NYLON MONOFILAMENT LINE. Do not exceed 10° (figure J2). To acheive this power trimmer. Cutting Line / LINE FEEDING Your trimmer uses .065 inch (1.65 mm)...
Type 1 Manual - LST300
Page 10
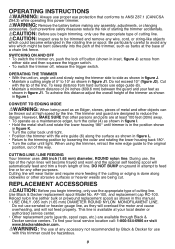
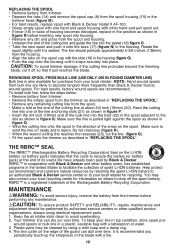
... "REPLACING THE SPOOL". RBRC™ in cooperation with Black & Decker and other qualified service organizations, always using a mild soap and a damp rag. 4. Keep the air intake slots clean to avoid overheating. 2. REPLACING THE SPOOL • Remove battery from trimmer. • Depress the tabs (14) and remove... the spool cap (8) from the spool housing (15) in the trimmer head (figure M). • For best results, replace spool with Black & Decker model # AF-100. • Grasp empty spool with one of the line anchoring slots (21) as shown in figure P. &#...
... "REPLACING THE SPOOL". RBRC™ in cooperation with Black & Decker and other qualified service organizations, always using a mild soap and a damp rag. 4. Keep the air intake slots clean to avoid overheating. 2. REPLACING THE SPOOL • Remove battery from trimmer. • Depress the tabs (14) and remove... the spool cap (8) from the spool housing (15) in the trimmer head (figure M). • For best results, replace spool with Black & Decker model # AF-100. • Grasp empty spool with one of the line anchoring slots (21) as shown in figure P. &#...
Type 1 Manual - LST300
Page 11
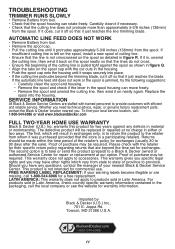
... Rd. Troubleshooting TRIMMER runs slowly • Remove Battery from tool. • Check that are beyond the trimming blade, cut it protrudes approximately 5-3/8 inches (136mm) from the spool. If insufficient cutting line is left on neatly again. Imported by Black & Decker (U.S.) Inc., ... packaging, call : 1-800-544-6986 or visit www.blackanddecker.com Full Two-Year Home Use Warranty Black & Decker (U.S.) Inc. Service Information All Black & Decker Service Centers are staffed with trained personnel to provide customers with the retailer for warranty information. Proof of...
... Rd. Troubleshooting TRIMMER runs slowly • Remove Battery from tool. • Check that are beyond the trimming blade, cut it protrudes approximately 5-3/8 inches (136mm) from the spool. If insufficient cutting line is left on neatly again. Imported by Black & Decker (U.S.) Inc., ... packaging, call : 1-800-544-6986 or visit www.blackanddecker.com Full Two-Year Home Use Warranty Black & Decker (U.S.) Inc. Service Information All Black & Decker Service Centers are staffed with trained personnel to provide customers with the retailer for warranty information. Proof of...


