
Installation Instructions
Page 6
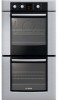
...box must be located above the unit to facilitate connecting and servicing. Combo Oven with Microwave 27" It is good practice, when oven is installed at the end of a cabinet run , adjacent to a perpendicular wall or cabinet door, to allow at least 1/4" space between the side ...500mm) 237/8" (606mm) 22" (559mm) Double Oven 27" It is good practice, when oven is installed at the end of a cabinet run , adjacent to a perpendicular wall or cabinet door, to allow at least 1/4" space between the side of the oven and the wall/door. For oven support, install 2x4's extending front to back...
...box must be located above the unit to facilitate connecting and servicing. Combo Oven with Microwave 27" It is good practice, when oven is installed at the end of a cabinet run , adjacent to a perpendicular wall or cabinet door, to allow at least 1/4" space between the side ...500mm) 237/8" (606mm) 22" (559mm) Double Oven 27" It is good practice, when oven is installed at the end of a cabinet run , adjacent to a perpendicular wall or cabinet door, to allow at least 1/4" space between the side of the oven and the wall/door. For oven support, install 2x4's extending front to back...

Installation Instructions
Page 8
... the right rear of the 2x4 supports. 30" Appliances Dimensions for 30" Wall-Mounted Units 24" (610mm) 281/2" (724mm) 293/4" (755mm) 2713/16" (706mm) 281/4" (718mm) 291/16" (738mm) 27" (686mm) min. 43/4" (121mm) max. 313/8" (797mm) 237/8" (606mm) 22" (559mm) 293/4" (755mm) 2713/16" (706mm) 24" (610mm) ...'s extending front to back flush with the bottom and the side of the opening . Double Oven 30" It is good practice, when oven is installed at the end of a cabinet run , adjacent to a perpendicular wall or cabinet door, to allow at least 1/4" space between the side of at least...
... the right rear of the 2x4 supports. 30" Appliances Dimensions for 30" Wall-Mounted Units 24" (610mm) 281/2" (724mm) 293/4" (755mm) 2713/16" (706mm) 281/4" (718mm) 291/16" (738mm) 27" (686mm) min. 43/4" (121mm) max. 313/8" (797mm) 237/8" (606mm) 22" (559mm) 293/4" (755mm) 2713/16" (706mm) 24" (610mm) ...'s extending front to back flush with the bottom and the side of the opening . Double Oven 30" It is good practice, when oven is installed at the end of a cabinet run , adjacent to a perpendicular wall or cabinet door, to allow at least 1/4" space between the side of at least...

Installation Instructions
Page 15
... not to crimp flexible conduit between oven and cabinet back wall. Check power at the breaker. 2. Set the SELF CLEAN mode. If any of the tests do not result as well. 7. The oven should be straight, not crooked. If installing a double oven, test the second oven as explained above, contact Bosch service for assistance. Push lever down...
... not to crimp flexible conduit between oven and cabinet back wall. Check power at the breaker. 2. Set the SELF CLEAN mode. If any of the tests do not result as well. 7. The oven should be straight, not crooked. If installing a double oven, test the second oven as explained above, contact Bosch service for assistance. Push lever down...

Use & Care Manual
Page 9
.... Your appliance may be released from the vent before, during all cooking modes. The cooling fan runs during and after the oven is running, and warm air may also run after cooking. The fan can be felt as it is off. The fan may be heard when ... Temp Timer Clock Cook Time Settings Fast Preheat Light Upper Lower Door Gasket Door Hinge Control Panel Convection Fan 6 5 4 3 Rack Position Guides 2 with 6 Rack Positions 1 Oven Bottom Oven Vent Cooling Fan Oven Vent English 6 * Picture shows double oven. The oven vent is released from Warm air may vary slightly.
.... Your appliance may be released from the vent before, during all cooking modes. The cooling fan runs during and after the oven is running, and warm air may also run after cooking. The fan can be felt as it is off. The fan may be heard when ... Temp Timer Clock Cook Time Settings Fast Preheat Light Upper Lower Door Gasket Door Hinge Control Panel Convection Fan 6 5 4 3 Rack Position Guides 2 with 6 Rack Positions 1 Oven Bottom Oven Vent Cooling Fan Oven Vent English 6 * Picture shows double oven. The oven vent is released from Warm air may vary slightly.

Use & Care Manual
Page 12
...Manual information prior to operate them . Activates and exits Customer Settings menu. Not possible in double oven models). not available for all packing materials from inside and outside the oven. • While cool, wipe with a clean, damp cloth and dry. • ...There may vary slightly. Press before selecting or changing settings in double oven models. Stops beep after time is a double oven control panel. Press before selecting or changing settings in double oven models. Cook Time Fast Preheat Light Sets and displays the cook time. Control*...
...Manual information prior to operate them . Activates and exits Customer Settings menu. Not possible in double oven models). not available for all packing materials from inside and outside the oven. • While cool, wipe with a clean, damp cloth and dry. • ...There may vary slightly. Press before selecting or changing settings in double oven models. Stops beep after time is a double oven control panel. Press before selecting or changing settings in double oven models. Cook Time Fast Preheat Light Sets and displays the cook time. Control*...

Use & Care Manual
Page 14
...300 Heating stops until a setting is changed. time allowed without activity 24 hours 12 hours English 11 Some modes start with all five bars are lit and buzzer sounds, preheat is limited. Note: • • • Press Temp to switch between 1 and 3 (1=low, 2=medium, 3=high). • For double oven... models, the particular oven must be selected before the temperature can always be changed when the arrow next to activate the arrow. In Broil mode, adjust the ...
...300 Heating stops until a setting is changed. time allowed without activity 24 hours 12 hours English 11 Some modes start with all five bars are lit and buzzer sounds, preheat is limited. Note: • • • Press Temp to switch between 1 and 3 (1=low, 2=medium, 3=high). • For double oven... models, the particular oven must be selected before the temperature can always be changed when the arrow next to activate the arrow. In Broil mode, adjust the ...

Use & Care Manual
Page 29
... Clean", "Cook Time" and the corresponding arrow appear in the display. Turn the settings dial to treat discolorations. • In double oven models, Self Clean is only available for one oven at this temperature. Self-Clean starts after a few seconds. This is burned off . Do not use scouring pads or abrasive cleaners to...
... Clean", "Cook Time" and the corresponding arrow appear in the display. Turn the settings dial to treat discolorations. • In double oven models, Self Clean is only available for one oven at this temperature. Self-Clean starts after a few seconds. This is burned off . Do not use scouring pads or abrasive cleaners to...


