
Installation Instructions
Page 2
... 92649 Questions? 1-800-944-2904 www.boschappliances.com We look forward to hearing from you Begin 3 Tools and Parts Needed 3 Parts Included 3 27" Appliances 3 General Information 3 30" Appliances 6 Removing Packaging 9 For Convection Microwave Combination Units 9 Preparing Oven 9 Installation 10 Electrical Installation 10 Oven Installation 12 Testing Operation 13 Service 14 Before Calling...
... 92649 Questions? 1-800-944-2904 www.boschappliances.com We look forward to hearing from you Begin 3 Tools and Parts Needed 3 Parts Included 3 27" Appliances 3 General Information 3 30" Appliances 6 Removing Packaging 9 For Convection Microwave Combination Units 9 Preparing Oven 9 Installation 10 Electrical Installation 10 Oven Installation 12 Testing Operation 13 Service 14 Before Calling...

Installation Instructions
Page 3
...Before installing, turn power OFF at least two people or proper equipment to this manual for guidance. English 1 Do not lift appliance by a qualified technician. See instructions in Use and Care Manual. Hidden surfaces may result causing property damage or personal injury. ...Important - All other servicing should be done by door handle. Installer - Safety m Important Safety Instructions READ AND SAVE THESE INSTRUCTIONS Appliance Handling Safety Safety Codes and Standards Electric Safety WARNING: If the information in this manual is not followed exactly, fire or shock...
...Before installing, turn power OFF at least two people or proper equipment to this manual for guidance. English 1 Do not lift appliance by a qualified technician. See instructions in Use and Care Manual. Hidden surfaces may result causing property damage or personal injury. ...Important - All other servicing should be done by door handle. Installer - Safety m Important Safety Instructions READ AND SAVE THESE INSTRUCTIONS Appliance Handling Safety Safety Codes and Standards Electric Safety WARNING: If the information in this manual is not followed exactly, fire or shock...

Installation Instructions
Page 4
... or anti-tip brackets/screws. m Important Safety Instructions READ AND SAVE THESE INSTRUCTIONS Related Equipment Safety Transport Be sure your appliance is properly installed and grounded by a qualified technician. To avoid damage to play with all tape and packaging before using the... appliance. Destroy the packaging after unpacking the appliance. Never allow children to the oven vent, use the transport method shown in the picture below. Remove all applicable ...
... or anti-tip brackets/screws. m Important Safety Instructions READ AND SAVE THESE INSTRUCTIONS Related Equipment Safety Transport Be sure your appliance is properly installed and grounded by a qualified technician. To avoid damage to play with all tape and packaging before using the... appliance. Destroy the packaging after unpacking the appliance. Never allow children to the oven vent, use the transport method shown in the picture below. Remove all applicable ...

Installation Instructions
Page 5
... the floor/cabinet and level. If the conduit box is installed below the unit. Preparation Before you Begin Tools and Parts Needed Parts Included 27" Appliances • Phillips head screwdriver • Measuring tape • Drill with bit (1/8") • Phillips head screws (6) General Information Power Requirements The outlet must be installed either...
... the floor/cabinet and level. If the conduit box is installed below the unit. Preparation Before you Begin Tools and Parts Needed Parts Included 27" Appliances • Phillips head screwdriver • Measuring tape • Drill with bit (1/8") • Phillips head screws (6) General Information Power Requirements The outlet must be installed either...

Installation Instructions
Page 8
... unit to facilitate connecting and servicing. The cabinet base must be flat and capable of supporting a weight of at least 190 lbs (86 kg). 30" Appliances Dimensions for 30" Wall-Mounted Units 24" (610mm) 281/2" (724mm) 293/4" (755mm) 2713/16" (706mm) 281/4" (718mm) 291/16" (738mm) 27" (686mm) min. 43/4" (121mm...
... unit to facilitate connecting and servicing. The cabinet base must be flat and capable of supporting a weight of at least 190 lbs (86 kg). 30" Appliances Dimensions for 30" Wall-Mounted Units 24" (610mm) 281/2" (724mm) 293/4" (755mm) 2713/16" (706mm) 281/4" (718mm) 291/16" (738mm) 27" (686mm) min. 43/4" (121mm...

Installation Instructions
Page 15
... should be sure it is flush with the bracket. 4. Test the door lock. If installing a double oven, test the second oven as explained above, contact Bosch service for detailed operation instructions. 4. Install supplied screws through tap holes in hinge slots. 2. Push lever down and away from you until oven trim is... display. 6. Lift or slide unit into cabinet cutout. Confirm that the oven light comes on power at this time. Testing Operation 1. Do not lift appliance by door handle. 2. Installing the Oven 1. Check power at junction box using a volt meter. Test the oven mode.
... should be sure it is flush with the bracket. 4. Test the door lock. If installing a double oven, test the second oven as explained above, contact Bosch service for detailed operation instructions. 4. Install supplied screws through tap holes in hinge slots. 2. Push lever down and away from you until oven trim is... display. 6. Lift or slide unit into cabinet cutout. Confirm that the oven light comes on power at this time. Testing Operation 1. Do not lift appliance by door handle. 2. Installing the Oven 1. Check power at junction box using a volt meter. Test the oven mode.

Installation Instructions
Page 16
The data plate is located on your product data plate when calling. The data plate shows the model and serial number. Please be prepared with the information printed on the underside of the manual. To reach a service representative, see the contact information at the front of the control panel: Data Plate English 14 Service Before Calling Service Data Plate See Use and Care Manual for troubleshooting information. Refer to the Warranty in the Use and Care Manual. Refer to the data plate on the appliance when requesting service.
The data plate is located on your product data plate when calling. The data plate shows the model and serial number. Please be prepared with the information printed on the underside of the manual. To reach a service representative, see the contact information at the front of the control panel: Data Plate English 14 Service Before Calling Service Data Plate See Use and Care Manual for troubleshooting information. Refer to the Warranty in the Use and Care Manual. Refer to the data plate on the appliance when requesting service.

Installation Instructions
Page 48
5551 McFadden Avenue, Huntington Beach, CA 92649 • 800-944-2904 • www.boschappliances.com 9000182532 • 5V0BHK • Rev. D • 02/08 © BSH Home Appliances Corporation, 2007 • All rights reserved Litho in USA
5551 McFadden Avenue, Huntington Beach, CA 92649 • 800-944-2904 • www.boschappliances.com 9000182532 • 5V0BHK • Rev. D • 02/08 © BSH Home Appliances Corporation, 2007 • All rights reserved Litho in USA

Use & Care Manual
Page 2
... Instructions 2 Getting Started 6 Parts and Accessories 6 Parts 6 Accessories 7 Control 9 Display Symbols 10 Before Using the Oven for the First Time 10 Operation 11 About the Appliance 11 Basic Features 11 Setting the Clock 11 Setting the Date 12 Setting the Cooking Mode and Temperature 13 Info 14 Heating Time Limitation 14... Features 16 Cook Time 16 End Time/Start Time 17 Recipe 18 Probe 21 Sabbath Mode 23 Setup 23 Getting the Most Out of Your Appliance 25 General Tips 25 Bake 26 Convection Bake 26 True Convection 28
... Instructions 2 Getting Started 6 Parts and Accessories 6 Parts 6 Accessories 7 Control 9 Display Symbols 10 Before Using the Oven for the First Time 10 Operation 11 About the Appliance 11 Basic Features 11 Setting the Clock 11 Setting the Date 12 Setting the Cooking Mode and Temperature 13 Info 14 Heating Time Limitation 14... Features 16 Cook Time 16 End Time/Start Time 17 Recipe 18 Probe 21 Sabbath Mode 23 Setup 23 Getting the Most Out of Your Appliance 25 General Tips 25 Bake 26 Convection Bake 26 True Convection 28

Use & Care Manual
Page 3
... 41 Removing the Oven Door 41 Service 43 Before Calling Service 43 Troubleshooting Chart 43 Data Plate 44 STATEMENT OF LIMITED PRODUCT WARRANTY 45 This Bosch Appliance is made by BSH Home Appliances Corporation 5551 McFadden Ave.
... 41 Removing the Oven Door 41 Service 43 Before Calling Service 43 Troubleshooting Chart 43 Data Plate 44 STATEMENT OF LIMITED PRODUCT WARRANTY 45 This Bosch Appliance is made by BSH Home Appliances Corporation 5551 McFadden Ave.

Use & Care Manual
Page 4
.... • "Cleaning and Maintenance" provides you with information on how to operate your oven. • In "Getting the Most Out of Your Appliance" you can get to know your appliance and become familiar with its operation and features. English 1 The manual consists of the following sections: • The "Safety" section provides information...
.... • "Cleaning and Maintenance" provides you with information on how to operate your oven. • In "Getting the Most Out of Your Appliance" you can get to know your appliance and become familiar with its operation and features. English 1 The manual consists of the following sections: • The "Safety" section provides information...

Use & Care Manual
Page 5
..., fire and injury to be safe and reliable. The use corrosive chemicals, vapors, flammables or nonfood products in risk of the appliance unless specifically recommended in injury. Contact an authorized servicer. In the event of an error the display flashes and beeps continuously. These... precautions will damage the appliance and could result in this appliance if it for easy reference. In the event of an error the display flashes and beeps continuously. If materials ...
..., fire and injury to be safe and reliable. The use corrosive chemicals, vapors, flammables or nonfood products in risk of the appliance unless specifically recommended in injury. Contact an authorized servicer. In the event of an error the display flashes and beeps continuously. These... precautions will damage the appliance and could result in this appliance if it for easy reference. In the event of an error the display flashes and beeps continuously. If materials ...

Use & Care Manual
Page 6
... PERSONAL INJURY IN THE EVENT OF A GREASE FIRE, OBSERVE THE FOLLOWING: • SMOTHER FLAMES with baking soda. During and after use the appliance for cooking or cleaning purposes. Keep doors shut unless necessary for storage. Build-up of oven until they are oven vent openings, surfaces near...hair catches fire, drop and roll immediately to let hot air and/or steam escape. EXERCISE CAUTION TO PREVENT BURNS. Interior surfaces of the appliance may be hot even though they have a CLASS ABC extinguisher, and you already know you have had sufficient time to cause burns. m Important...
... PERSONAL INJURY IN THE EVENT OF A GREASE FIRE, OBSERVE THE FOLLOWING: • SMOTHER FLAMES with baking soda. During and after use the appliance for cooking or cleaning purposes. Keep doors shut unless necessary for storage. Build-up of oven until they are oven vent openings, surfaces near...hair catches fire, drop and roll immediately to let hot air and/or steam escape. EXERCISE CAUTION TO PREVENT BURNS. Interior surfaces of the appliance may be hot even though they have a CLASS ABC extinguisher, and you already know you have had sufficient time to cause burns. m Important...

Use & Care Manual
Page 7
...long hair so that it is cool. Children climbing on any part of potential exposure to use . Wet cloths or sponges can damage the appliance, and the unit may result in burns from steam. Secure all loose garments, etc. Do not allow children to such substances. This can ... off very small amounts of the parents or legal guardians to reach items could be left alone or unattended in the area where the appliance is the legal responsibility of formaldehyde during and immediately after self-cleaning the oven. 3. Providing good ventilation during the first several cleaning cycles...
...long hair so that it is cool. Children climbing on any part of potential exposure to use . Wet cloths or sponges can damage the appliance, and the unit may result in burns from steam. Secure all loose garments, etc. Do not allow children to such substances. This can ... off very small amounts of the parents or legal guardians to reach items could be left alone or unattended in the area where the appliance is the legal responsibility of formaldehyde during and immediately after self-cleaning the oven. 3. Providing good ventilation during the first several cleaning cycles...

Use & Care Manual
Page 9
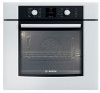
... Position Guides 2 with 6 Rack Positions 1 Oven Bottom Oven Vent Cooling Fan * Picture shows double oven. The fan can be felt as it is off. Your appliance may vary slightly.
... Position Guides 2 with 6 Rack Positions 1 Oven Bottom Oven Vent Cooling Fan * Picture shows double oven. The fan can be felt as it is off. Your appliance may vary slightly.

Use & Care Manual
Page 10
... self-clean oven. This area may collect in use aluminum foil or protective liners to determine the internal doneness or the end temperature of the appliance, especially the oven bottom. Broil Pan and Grid Use for air circulation.
... self-clean oven. This area may collect in use aluminum foil or protective liners to determine the internal doneness or the end temperature of the appliance, especially the oven bottom. Broil Pan and Grid Use for air circulation.

Use & Care Manual
Page 14
Operation About the Appliance Your new oven combines premium cooking results and simple operation. All that require the current time to be set the clock: 1. Clear labeling of this ...
Operation About the Appliance Your new oven combines premium cooking results and simple operation. All that require the current time to be set the clock: 1. Clear labeling of this ...

Use & Care Manual
Page 28
Getting the Most Out of Your Appliance General Tips Pan Placement Preheating the Oven For Best Results Baking Pans and Dishes High Altitude Baking Condensation Baking results are better if pans are ...
Getting the Most Out of Your Appliance General Tips Pan Placement Preheating the Oven For Best Results Baking Pans and Dishes High Altitude Baking Condensation Baking results are better if pans are ...

Use & Care Manual
Page 29
... are necessary, use a maximum of opening the door. Stagger pans so that the heat is circulated throughout the oven by using a convection mode. 27" appliances: 30" appliances: Convection Bake Convection Bake is similar to recipe or package directions for oven temperature and baking time. Bake t Bake is cooking with darker results. For...
... are necessary, use a maximum of opening the door. Stagger pans so that the heat is circulated throughout the oven by using a convection mode. 27" appliances: 30" appliances: Convection Bake Convection Bake is similar to recipe or package directions for oven temperature and baking time. Bake t Bake is cooking with darker results. For...

Use & Care Manual
Page 30
Stagger pans so that one pan on 2 levels see graphic below). 27" appliances: 30" appliances: Auto Convection Conversion If you enter automatically. The control calculates the correct temperature and it is shown in temperature. The Auto Convection Conversion feature can ...
Stagger pans so that one pan on 2 levels see graphic below). 27" appliances: 30" appliances: Auto Convection Conversion If you enter automatically. The control calculates the correct temperature and it is shown in temperature. The Auto Convection Conversion feature can ...