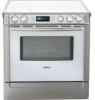
Bosch HEI7032U - 30" Slide-In Electric Range Support and Manuals
Get Help and Manuals for this Bosch item
View All Support Options Below
Free Bosch HEI7032U manuals!
Problems with Bosch HEI7032U?
Ask a Question
Free Bosch HEI7032U manuals!
Problems with Bosch HEI7032U?
Ask a Question
Popular Bosch HEI7032U Manual Pages
Installation Instructions - Page 3
... sure your appliance is heavy and requires at the service panel. Injury to specific installations.
• Before you plug in an electrical cord, be sure all applicable codes.
• Warning: All ranges can cause injury or property damage. See instructions in Use and Care Manual.
• Unit is properly installed and grounded by a qualified tech- If there is...
Installation Instructions - Page 5
... performance.
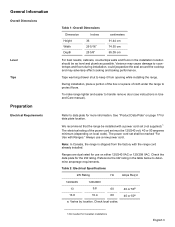
Table 2: Electrical Specifications
kW Rating
Hz
Amps Req'd
120/240V
120/208V
13
9.8
60
13.8
10.4
60
a. Note: In Canada, the range is shipped from opening while installing the range. During installation, place a portion of the box or a piece of the power cord set shall be marked "For Use with the range cord already installed. General Information
Overall...
Installation Instructions - Page 9

...
Apply Foam Tape Install Backwall Trim
Apply foam tape to instructions furnished with 2 screws adequate for mounting surface (i.e., for wood floor use wood screws, for concrete floor use caulk or glue/adhesive of range and level by rotating the adjustable leg supports on page 6 for more information
English 7 when replacing a free-standing range).
Adjust height of...
Installation Instructions - Page 10

... through holes in trim and in knockout below terminal block. Place strain relief in range backwall. See Figure 6: Backwall Trim Strip and Figure 7: Install Backwall Trim Strip
Backwall Trim Strip
Figure 6: Backwall Trim Strip
Back of the range back panel. Allow for detailed instructions). Install 2 screws through hole and strain relief up to "Complete the...
Installation Instructions - Page 18

... installed, the cooktop trim around .
2. however, the weight of the range will rest lightly on the countertop. This could result in .
1. Range Cord" on the counterrop. Refer to prevent damage.
1. English 16
Caution: Verify that the range is not under the anti-tip bracket. Service
Before Calling Service
See Use and Care Manual for troubleshooting information. To reach a service...
Use & Care Manual - Page 2
... and Cleaning 30 Maintenance 35
Service 36
Self Help 36 Warranty ...models 19
About the Warming Drawer 19 Operation 20
Getting the Most Out of Your Appliance 21
Getting the Most Out of Your Cooktop 21 Getting the Most Out of Your Oven 23 Getting the Most Out of Contents
About This Manual 1
How This Manual Is Organized 1
Safety 1
Important Safety Instructions 1
Getting Started 5
Parts...
Use & Care Manual - Page 3
...Instructions
READ AND SAVE THESE INSTRUCTIONS
Important Safety Instructions
Fire Safety
• Do not use the appliance for warming or heating the room. Never use aluminum foil or protective liners to line any part...maintain your range.
• The Service section includes troubleshooting tips and your range, be certain that flammable materials such as described in this manual.
Do ...
Use & Care Manual - Page 5

...clean, fumes are instructed in use . Wait until it is in use this manual.
• Do ... drawer while it is still hot. Contact service.
• Birds have very sensitive respiratory ...safe practices by an adult. Children climbing on any part of hot oil, especially a deep fat fryer. California...• Use high heat settings on no more than a low-medium setting. To avoid bubbling and ...
Use & Care Manual - Page 6
... servicer.
• Do not cook on a broken cooktop. Refer all instructions carefully before use of corrosive chemicals in heating or cleaning will reduce the risk of the appliance unless specifically recom- See Cookware Selection Guide for outdoor use only. Proper Installation and Maintenance •
• • •
WARNING: When properly cared for details. All ranges...
Use & Care Manual - Page 9
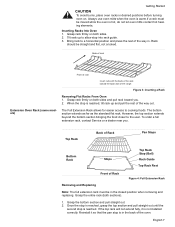
...Bottom Rack
Stops
Top Rack Stop (Ball)
Rack Guide
Top Rack Rest
Front of the way out.
When the stop is not installed correctly. The bottom section extends as far as the...Service or a dealer near you . 2. Once the stop is reached, grasp the top section and pull straight out until the
second stop is in the back of the range. Rack
should be in the closed position when removing and replacing...
Use & Care Manual - Page 11
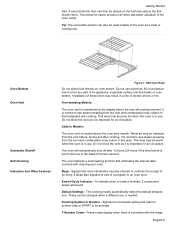
... line any part of an entry. Warm air may become hot when the oven is important for air circulation. End-of a program or an oven error. Default Settings - These ...Codes -These codes display when there is located above the rear left cooktop element. This allows for 24 hour in a risk of these liners may collect in Models:
The oven vent is a problem with cleaning your oven. Installation...
Use & Care Manual - Page 19
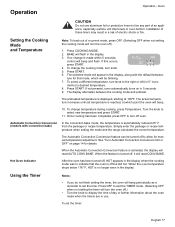
...setting the mode and the range calculates the correct temperature. When the Automatic Convection Conversion feature is displayed, starting at which will flash in 5° incre-
Installation...display where the cooking mode was to line any part of day or further information about the oven ... increases until set the timer:
English 17 Automatic Convection Conversion (models with the ...
Use & Care Manual - Page 21
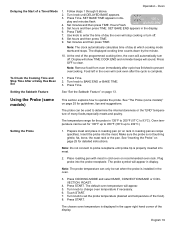
... Press Time. 2. Press Time. The probe can be set for detailed instructions. Make sure the probe is displayed in the oven.
...Time.
Set hours and then press TIME. SET BAKE END appears in cold oven on page 25 for the probe is installed in ...Has Been Set
1. Turn knob to clear.
Using the Probe (some models)" on recommended oven rack. See "The Probe (some models)
This ...
Use & Care Manual - Page 40
...page 13. Review manual instructions when setting clock, timer...food is consistently too brown or too light.
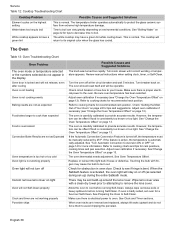
Replace or reinsert the light bulb if loose or ...Service Table 12: Cooktop Troubleshooting Chart
Cooktop Problem Element cycles on page 22 for tips to decrease time to boil. The temperature limiter operates automatically to your house.
See "Boiling Water" on the highest setting...
Use & Care Manual - Page 41
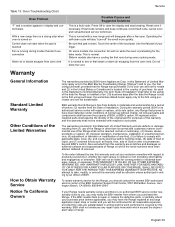
... warranty sets out your finger. All removed parts and components shall become the property of BSH, at any repair costs hereunder which the serial numbers have been defective under conditions of normal use without charge. All replaced and/or repaired parts shall assume the identity of the original part for purposes of Installation. If your Range needs warranty service and...
Bosch HEI7032U Reviews
We have not received any reviews for Bosch yet.