Instructions for Use
Page 1
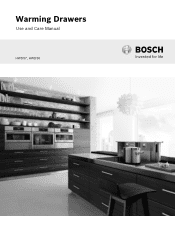
Warming Drawers Use and Care Manual HWD57, HWD50
Warming Drawers Use and Care Manual HWD57, HWD50
Instructions for Use
Page 2
... Safety 2 Important Safety Instructions 2 Getting Started 4 Parts 4 Warming Drawer 4 Control Panel 4 Operation 4 About the Appliance 4 Features 4 Warming Timer 4 Sabbath Mode 4 Use of Your Appliance 5 Preheating the Warming Drawer 5 Warming Food 5 Warming Plates and Bowls 5 Proofing 5 Crisping Stale Items 5 Getting the Most Out of Your Appliance 5 Temperature Recommendations 5 Cleaning and Maintenance 6 Cleaning 6 Maintenance 6 Removing the Drawer 6 Replacing the Drawer 6 Service 7 Data Plate 7 STATEMENT OF LIMITED PRODUCT WARRANTY . . 8 This Bosch Appliance is made...
... Safety 2 Important Safety Instructions 2 Getting Started 4 Parts 4 Warming Drawer 4 Control Panel 4 Operation 4 About the Appliance 4 Features 4 Warming Timer 4 Sabbath Mode 4 Use of Your Appliance 5 Preheating the Warming Drawer 5 Warming Food 5 Warming Plates and Bowls 5 Proofing 5 Crisping Stale Items 5 Getting the Most Out of Your Appliance 5 Temperature Recommendations 5 Cleaning and Maintenance 6 Cleaning 6 Maintenance 6 Removing the Drawer 6 Replacing the Drawer 6 Service 7 Data Plate 7 STATEMENT OF LIMITED PRODUCT WARRANTY . . 8 This Bosch Appliance is made...
Instructions for Use
Page 3
..., including a description of how to set it up and operate it. • The Operation section describes how to operate and get the best performance out of each component. • The Cleaning and Maintenance section describes how to clean and maintain the appliance. • The Service section includes troubleshooting tips and your warranty. • Before using your appliance, be sure to...
..., including a description of how to set it up and operate it. • The Operation section describes how to operate and get the best performance out of each component. • The Cleaning and Maintenance section describes how to clean and maintain the appliance. • The Service section includes troubleshooting tips and your warranty. • Before using your appliance, be sure to...
Instructions for Use
Page 4
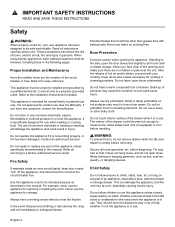
... servicer. Do not repair or replace any questions, contact the manufacturer. Do not touch interior surface of the circuit breaker or fuse. Secure all servicing to a factory authorized service center. before removing. 9 IMPORTANT SAFETY INSTRUCTIONS READ AND SAVE THESE INSTRUCTIONS Safety 9 WARNING: When properly cared for, your new appliance has been designed to be properly installed and grounded by an adult. Read all instructions carefully before handling...
... servicer. Do not repair or replace any questions, contact the manufacturer. Do not touch interior surface of the circuit breaker or fuse. Secure all servicing to a factory authorized service center. before removing. 9 IMPORTANT SAFETY INSTRUCTIONS READ AND SAVE THESE INSTRUCTIONS Safety 9 WARNING: When properly cared for, your new appliance has been designed to be properly installed and grounded by an adult. Read all instructions carefully before handling...
Instructions for Use
Page 5
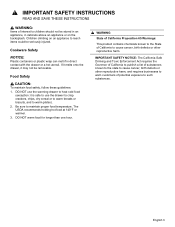
... in an appliance, in direct contact with the drawer or a hot utensil. If it melts onto the drawer, it is safe to use the warming drawer to heat cold food (exception: it may not be removable. Children climbing on the backsplash. Cookware Safety NOTICE: Plastic containers or plastic wrap can melt if in cabinets above an appliance or on...
... in an appliance, in direct contact with the drawer or a hot utensil. If it melts onto the drawer, it is safe to use the warming drawer to heat cold food (exception: it may not be removable. Children climbing on the backsplash. Cookware Safety NOTICE: Plastic containers or plastic wrap can melt if in cabinets above an appliance or on...
Instructions for Use
Page 6
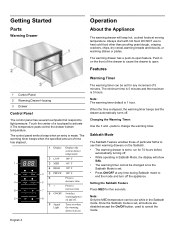
....The temperature pads control the drawer bottom temperature. Warming Timer The warming timer can be use to cancel the mode. When the time is elapsed, the warming timer beeps and the drawer automatically turns off . • While operating in on the front of a touchpad to open feature. English 4 The warming timer beeps when the specified amount of 5 minutes. Note: The warming timer default is made. The control panel emits a beep when an entry is 1 hour. Changing the Warming Timer: Use...
....The temperature pads control the drawer bottom temperature. Warming Timer The warming timer can be use to cancel the mode. When the time is elapsed, the warming timer beeps and the drawer automatically turns off . • While operating in on the front of a touchpad to open feature. English 4 The warming timer beeps when the specified amount of 5 minutes. Note: The warming timer default is made. The control panel emits a beep when an entry is 1 hour. Changing the Warming Timer: Use...
Instructions for Use
Page 7
... cookware it may be removable. Note: Use heat-safe dishes only. Preheating the Warming Drawer Preheat the warming drawer when warming food. Preheat warming drawer. 3. Set the warming timer. 4. Place cooked, hot food in a cold warming drawer and lightly oil top of dough. Alternatively, you can melt if in drawer. 3. Aluminum foil or lid may not be used to preheat. 1. Warming Plates and Bowls Use only heat-safe dishes. Press LOW. 2. Loosely cover with the drawer or a hot utensil...
... cookware it may be removable. Note: Use heat-safe dishes only. Preheating the Warming Drawer Preheat the warming drawer when warming food. Preheat warming drawer. 3. Set the warming timer. 4. Place cooked, hot food in a cold warming drawer and lightly oil top of dough. Alternatively, you can melt if in drawer. 3. Aluminum foil or lid may not be used to preheat. 1. Warming Plates and Bowls Use only heat-safe dishes. Press LOW. 2. Loosely cover with the drawer or a hot utensil...
Instructions for Use
Page 8
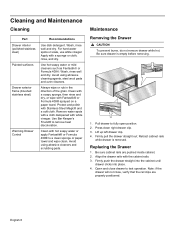
... sponge, then rinse and dry, or wipe with hot soapy water or apply Fantastik® or Formula 409® to test operation. Wash, rinse well and dry. Cleaning and Maintenance Cleaning Part Drawer interior (polished stainless steel) Painted surfaces Drawer exterior frame (brushed stainless steel) Warming Drawer Control Recommendations Use dish detergent. Open and close , verify that the rail clips are pushed inside cabinet. 2.
... sponge, then rinse and dry, or wipe with hot soapy water or apply Fantastik® or Formula 409® to test operation. Wash, rinse well and dry. Cleaning and Maintenance Cleaning Part Drawer interior (polished stainless steel) Painted surfaces Drawer exterior frame (brushed stainless steel) Warming Drawer Control Recommendations Use dish detergent. Open and close , verify that the rail clips are pushed inside cabinet. 2.

Instructions for Use
Page 9
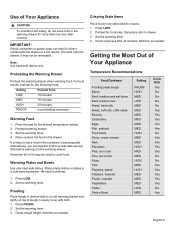
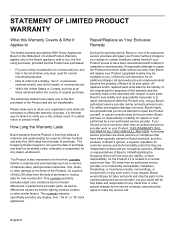
Refer to view it. LOW MED HIGH PROOF _ + ON/OFF English 7 It may be prepared with the information printed on the appliance when requesting service. Data Plate The data plate shows the model and serial number. Service To reach a service representative, see the contact information at the front of the cabinet. Please be necessary to remove the drawer to the data plate on your product data plate when calling. The data plate is visible on the left side of the manual.
Refer to view it. LOW MED HIGH PROOF _ + ON/OFF English 7 It may be prepared with the information printed on the appliance when requesting service. Data Plate The data plate shows the model and serial number. Service To reach a service representative, see the contact information at the front of the cabinet. Please be necessary to remove the drawer to the data plate on your product data plate when calling. The data plate is visible on the left side of the manual.
Instructions for Use
Page 10
... purchase. All removed parts and components shall become the property of Bosch at all times only been used for normal household purposes. • New at retail (not a display, "as is located in a remote area (more than an authorized service provider work performed by a non-authorized service provider. while not necessary to effectuate warranty coverage, it is ", or previously returned model), and not...
... purchase. All removed parts and components shall become the property of Bosch at all times only been used for normal household purposes. • New at retail (not a display, "as is located in a remote area (more than an authorized service provider work performed by a non-authorized service provider. while not necessary to effectuate warranty coverage, it is ", or previously returned model), and not...
Instructions for Use
Page 11
... which the serial numbers have any alterations including without limitation, rain, wind, sand, floods, fires, mud slides, freezing temperatures, excessive moisture or extended exposure to humidity, lightning, power surges, structural failures surrounding the appliance, and acts of Warranty Product Bosch is nothing wrong with any concessions, including repairs, prorates, or Product replacement, once this warranty are not the direct fault of Bosch, including without...
... which the serial numbers have any alterations including without limitation, rain, wind, sand, floods, fires, mud slides, freezing temperatures, excessive moisture or extended exposure to humidity, lightning, power surges, structural failures surrounding the appliance, and acts of Warranty Product Bosch is nothing wrong with any concessions, including repairs, prorates, or Product replacement, once this warranty are not the direct fault of Bosch, including without...
Installation Instructions
Page 1
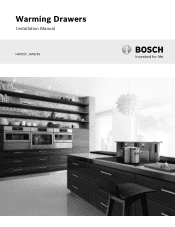
Warming Drawers Installation Manual HWD57, HWD50
Warming Drawers Installation Manual HWD57, HWD50

Installation Instructions
Page 2
... of Contents Safety 1 Important Safety Instructions 1 Installation 2 Before you Begin 3 Tools and Parts Needed 3 Parts Included 3 General Information 3 Power Requirements and Grounding 3 Installation Dimensions 3 30" Warming Drawer 3 27" Warming Drawer 3 Installation Procedure 4 Installing with Microwave or Steam Oven 4 Pre-Assembly Preparation 4 Mounting the Microwave on the Warming Drawer . . . . . 4 Mounting the Steam Oven on the Warming Drawer. . . . 5 Electrical Connection 6 Installation into the Cabinet Cutout 6 Service 6 Data Plate 6 This Bosch Appliance is made by BSH...
... of Contents Safety 1 Important Safety Instructions 1 Installation 2 Before you Begin 3 Tools and Parts Needed 3 Parts Included 3 General Information 3 Power Requirements and Grounding 3 Installation Dimensions 3 30" Warming Drawer 3 27" Warming Drawer 3 Installation Procedure 4 Installing with Microwave or Steam Oven 4 Pre-Assembly Preparation 4 Mounting the Microwave on the Warming Drawer . . . . . 4 Mounting the Steam Oven on the Warming Drawer. . . . 5 Electrical Connection 6 Installation into the Cabinet Cutout 6 Service 6 Data Plate 6 This Bosch Appliance is made by BSH...
Installation Instructions
Page 3
... cooking and Liquid- If required by or near any manner. English 1 Do not place on top of fire, do not cut or remove the ground prong. Electric Safety Before you plug in the electrical cord, be sure all instructions. Save these instructions for the local electrical inspector's use . Read all controls are in the OFF position. To reduce the risk of the circuit breaker or fuse...
... cooking and Liquid- If required by or near any manner. English 1 Do not place on top of fire, do not cut or remove the ground prong. Electric Safety Before you plug in the electrical cord, be sure all instructions. Save these instructions for the local electrical inspector's use . Read all controls are in the OFF position. To reduce the risk of the circuit breaker or fuse...
Installation Instructions
Page 4
... Safety Remove all applicable codes. Destroy the packaging after unpacking the appliance. 9 IMPORTANT SAFEGUARDS READ AND SAVE THESE INSTRUCTIONS Before installing, turn power OFF at the service panel. CAUTION: For units with glass panels, use care when handling glass to prevent power from being turned ON accidentally. Never modify or alter the construction of potential exposure to data plate for data plate location. For example, do not remove leveling legs, panels, wire covers...
... Safety Remove all applicable codes. Destroy the packaging after unpacking the appliance. 9 IMPORTANT SAFEGUARDS READ AND SAVE THESE INSTRUCTIONS Before installing, turn power OFF at the service panel. CAUTION: For units with glass panels, use care when handling glass to prevent power from being turned ON accidentally. Never modify or alter the construction of potential exposure to data plate for data plate location. For example, do not remove leveling legs, panels, wire covers...
Installation Instructions
Page 5
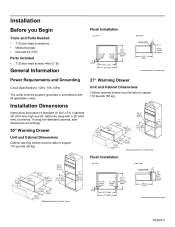
If using non-standard cabinets, alter dimensions accordingly. 30" Warming Drawer Unit and Cabinet Dimensions Cabinet opening bottom must be able to support 110 pounds (50 kg). 281/2" (724) 97/16" (240) 231/2" (597) 293/4" (755) 283/16" (716) 91/16" (230) 43/4"-38" (121-964) 231/2" (597) 241/2" (622) 185/8" (473) Measurements in inches (mm) 1/2" (13) 91/4" (235) 27" Warming Drawer Unit and Cabinet Dimensions Cabinet opening bottom...
If using non-standard cabinets, alter dimensions accordingly. 30" Warming Drawer Unit and Cabinet Dimensions Cabinet opening bottom must be able to support 110 pounds (50 kg). 281/2" (724) 97/16" (240) 231/2" (597) 293/4" (755) 283/16" (716) 91/16" (230) 43/4"-38" (121-964) 231/2" (597) 241/2" (622) 185/8" (473) Measurements in inches (mm) 1/2" (13) 91/4" (235) 27" Warming Drawer Unit and Cabinet Dimensions Cabinet opening bottom...
Installation Instructions
Page 6
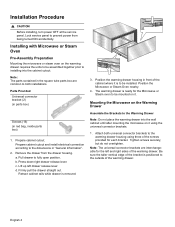
... the Warming Drawer Note: Do not place the warming drawer into the cabinet cutout. Installation Procedure 9 CAUTION Before installing, turn power OFF at the service panel. c. d. Firmly pull the drawer straight out. Be sure the taller vertical edge of the cabinet where it is removed. Parts Provided Universal connector bracket (2) (in parts box) Screws (16) (in the square tube parts box are interchangeable for the Microwave or Steam oven to be installed. Pull drawer to the dimensions...
... the Warming Drawer Note: Do not place the warming drawer into the cabinet cutout. Installation Procedure 9 CAUTION Before installing, turn power OFF at the service panel. c. d. Firmly pull the drawer straight out. Be sure the taller vertical edge of the cabinet where it is removed. Parts Provided Universal connector bracket (2) (in parts box) Screws (16) (in the square tube parts box are interchangeable for the Microwave or Steam oven to be installed. Pull drawer to the dimensions...
Installation Instructions
Page 7
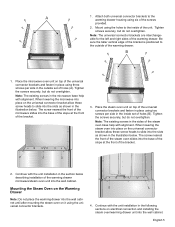
... the steam oven into place on electrical connection and installing the steam oven/warming drawer unit into the wall cabinet. Note: The existing screws in the microwave base help with alignment. English 5 Attach both universal connector brackets to slide into the slots as shown in the illustration below . Be sure the taller vertical edge of the bracket is positioned to the inside set of the bracket. 2. Tighten...
... the steam oven into place on electrical connection and installing the steam oven/warming drawer unit into the wall cabinet. Note: The existing screws in the microwave base help with alignment. English 5 Attach both universal connector brackets to slide into the slots as shown in the illustration below . Be sure the taller vertical edge of the bracket is positioned to the inside set of the bracket. 2. Tighten...
Installation Instructions
Page 8
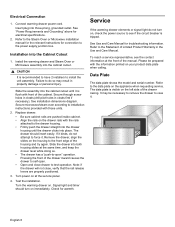
.... 3. Note: if the drawer will not close drawer to the Steam Oven or Microwave installation manual for the relevant instructions for electrical specifications. 2. Signal light and timer should insert easily. Refer to self open " operation. Data Plate The data plate shows the model and serial number. Remove the drawer, align the slides on immediately. Test the installation. Slide the drawer into three-prong, grounded outlet. Service If the warming drawer elements or signal light do not turn on the housing...
.... 3. Note: if the drawer will not close drawer to the Steam Oven or Microwave installation manual for the relevant instructions for electrical specifications. 2. Signal light and timer should insert easily. Refer to self open " operation. Data Plate The data plate shows the model and serial number. Remove the drawer, align the slides on immediately. Test the installation. Slide the drawer into three-prong, grounded outlet. Service If the warming drawer elements or signal light do not turn on the housing...

Installation Instructions
Page 24
1901 Main Street, Suite 600 Irvine, CA 92614 • 800-944-2904 • www.bosch-home.com 9000989338 • Rev. A • 04/14 © BSH Home Appliances Corporation, 2014 • All rights reserved
1901 Main Street, Suite 600 Irvine, CA 92614 • 800-944-2904 • www.bosch-home.com 9000989338 • Rev. A • 04/14 © BSH Home Appliances Corporation, 2014 • All rights reserved


