
Installation Instructions
Page 3
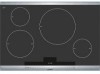
Table of contents Important Safety Instructions 4 Before you begin 5 Tools and parts needed 5 Parts included 5 Preparation 6 Installation procedure 9 Installing the heat shield 9 Secure the cooktop to countertop 10 Electrical installation 11 Test the installation 12 Technical service 13 3
Table of contents Important Safety Instructions 4 Before you begin 5 Tools and parts needed 5 Parts included 5 Preparation 6 Installation procedure 9 Installing the heat shield 9 Secure the cooktop to countertop 10 Electrical installation 11 Test the installation 12 Technical service 13 3
Installation Instructions
Page 10
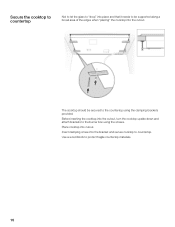
Use a wood block to the burner box using the clamping brackets provided. Insert clamping screw into cutout. Before inserting the cooktop into the cutout. Place cooktop into the bracket and secure cooktop to countertop. Secure the cooktop to countertop Not to let the glass to drop" into place and that it needs to be secured to the countertop using the screws. The cooktop should be supported along a broad area of the edges when placing" the cooktop into the cutout, turn the cooktop upside down and attach brackets to protect fragile countertop materials. 10
Use a wood block to the burner box using the clamping brackets provided. Insert clamping screw into cutout. Before inserting the cooktop into the cutout. Place cooktop into the bracket and secure cooktop to countertop. Secure the cooktop to countertop Not to let the glass to drop" into place and that it needs to be secured to the countertop using the screws. The cooktop should be supported along a broad area of the edges when placing" the cooktop into the cutout, turn the cooktop upside down and attach brackets to protect fragile countertop materials. 10