

Installation Instructions
Page 2
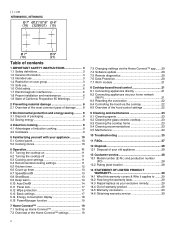
... Tools and parts needed 5 2.3 Cabinet requirements 5 2.4 Countertop requirements 5 3 Prepare installation space 5 3.1 Cutout dimensions for 24" cooktops 6 3.2 Cutout dimensions for 30" cooktops 6 3.3 Cutout dimensions for 36" cooktops 6 3.4 Cabinet ventilation requirements 7 4 Installation procedure 7 4.1 Installing the heat shield 8 4.2 Securing the cooktop to the countertop 8 5 Electrical connection 8 5.1 Electrical requirements 8 5.2 Connecting electrical supply 9 6 Checking the installation 10 7 Removing the appliance 10 8 Customer Service 10 8.1 Model number (E-Nr.) and...
... Tools and parts needed 5 2.3 Cabinet requirements 5 2.4 Countertop requirements 5 3 Prepare installation space 5 3.1 Cutout dimensions for 24" cooktops 6 3.2 Cutout dimensions for 30" cooktops 6 3.3 Cutout dimensions for 36" cooktops 6 3.4 Cabinet ventilation requirements 7 4 Installation procedure 7 4.1 Installing the heat shield 8 4.2 Securing the cooktop to the countertop 8 5 Electrical connection 8 5.1 Electrical requirements 8 5.2 Connecting electrical supply 9 6 Checking the installation 10 7 Removing the appliance 10 8 Customer Service 10 8.1 Model number (E-Nr.) and...
Installation Instructions
Page 3
... warning. NOTICE: This indicates that list. Do not repair, replace or remove any refrigerators, dishwashers, ovens (without ventilation), or washing machines below the cooktop. The appliance should be avoided. ▶ If cabinet storage is not stated in the Approved Combination Matrix of electrical shock, fire and injury to the Approved Combination Matrix. WARNING Remove all instructions carefully before using kitchen appliances, basic safety precautions...
... warning. NOTICE: This indicates that list. Do not repair, replace or remove any refrigerators, dishwashers, ovens (without ventilation), or washing machines below the cooktop. The appliance should be avoided. ▶ If cabinet storage is not stated in the Approved Combination Matrix of electrical shock, fire and injury to the Approved Combination Matrix. WARNING Remove all instructions carefully before using kitchen appliances, basic safety precautions...

Installation Instructions
Page 4
... INSTRUCTIONS READ AND SAVE THESE INSTRUCTIONS 1.4 Appliance handling safety WARNING Hidden surfaces may have a contact separation of at the service panel. ▶ Lock service panel to prevent power from being turned ON accidentally. ▶ DO NOT USE AN EXTENSION CORD. Therefore, the packaging of your appliance is not responsible for any issues associated with the improper installation of this product. ¡ The circuit breaker...
... INSTRUCTIONS READ AND SAVE THESE INSTRUCTIONS 1.4 Appliance handling safety WARNING Hidden surfaces may have a contact separation of at the service panel. ▶ Lock service panel to prevent power from being turned ON accidentally. ▶ DO NOT USE AN EXTENSION CORD. Therefore, the packaging of your appliance is not responsible for any issues associated with the improper installation of this product. ¡ The circuit breaker...

Installation Instructions
Page 5
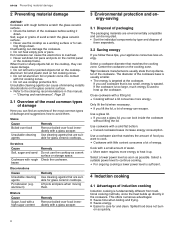
.... 5 General countertop requirements: ¡ The angle of cabinets above the cooktop: Follow the range hood or microwave hood installation instructions for a safe installation. side and cabinet surfaces of ⅜" (10 mm). ¡ The countertop into which the cooktop is protected by not less than no. 28 gauge sheet metal, 0.015" (0.4 mm) stainless steel, 0.024" (0.6 mm) aluminum or 0.020" (0.5 mm) copper. ¡ Verify that the cabinetry at the installation location meets the requirements...
.... 5 General countertop requirements: ¡ The angle of cabinets above the cooktop: Follow the range hood or microwave hood installation instructions for a safe installation. side and cabinet surfaces of ⅜" (10 mm). ¡ The countertop into which the cooktop is protected by not less than no. 28 gauge sheet metal, 0.015" (0.4 mm) stainless steel, 0.024" (0.6 mm) aluminum or 0.020" (0.5 mm) copper. ¡ Verify that the cabinetry at the installation location meets the requirements...

Installation Instructions
Page 9
... NIT8660SUC NIT8660UC NITP660SUC NITP660UC NIT5460UC 240 V AC, 3-wire, 60 Hz system: circuit breaker 30 A 30 A 30 A 30 A 30 A 40 A 40 A 40 A 50 A 50 A 30 A 208 V AC, 3-wire, 60 Hz system: circuit breaker 30 A 30 A 30 A 30 A 30 A 40 A 40 A 40 A 50 A 50 A 30 A 5.2 Connecting electrical supply WARNING Before installing, turn power OFF at the service panel. ▶ Lock service panel to the requirements of the National Electrical Code or Canadian Electrical Code...
... NIT8660SUC NIT8660UC NITP660SUC NITP660UC NIT5460UC 240 V AC, 3-wire, 60 Hz system: circuit breaker 30 A 30 A 30 A 30 A 30 A 40 A 40 A 40 A 50 A 50 A 30 A 208 V AC, 3-wire, 60 Hz system: circuit breaker 30 A 30 A 30 A 30 A 30 A 40 A 40 A 40 A 50 A 50 A 30 A 5.2 Connecting electrical supply WARNING Before installing, turn power OFF at the service panel. ▶ Lock service panel to the requirements of the National Electrical Code or Canadian Electrical Code...

Installation Instructions
Page 10
... again quickly. 8.2 Rating plate location You can find the model number (E-Nr.) and the production number (FD) on use only genuine replacement parts for all cooking zones function properly. Detailed information on the warranty period and terms of Limited Product Warranty, from appliance - USA: 1-800-944-2904 www.bosch-home.com/us/owner-support/get -support www.bosch-home.ca/en/service/cleaners-and-accessories For assistance with cooktop cleaning...
... again quickly. 8.2 Rating plate location You can find the model number (E-Nr.) and the production number (FD) on use only genuine replacement parts for all cooking zones function properly. Detailed information on the warranty period and terms of Limited Product Warranty, from appliance - USA: 1-800-944-2904 www.bosch-home.com/us/owner-support/get -support www.bosch-home.ca/en/service/cleaners-and-accessories For assistance with cooktop cleaning...
Use and Care Manual
Page 2
... 8.3 Resetting the connection 22 8.4 Controlling the hood via the cooktop 22 8.5 Overview of the hood control settings 22 9 Cleaning and maintenance 23 9.1 Cleaning agents 23 9.2 Cleaning the glass ceramic cooktop 23 9.3 Cleaning the cooktop frame 23 9.4 Cleaning recommendations 23 9.5 Maintenance 24 10 Troubleshooting 25 11 FAQs 27 12 Disposal 28 12.1 Disposal of your old appliance 28 13 Customer service 28 13.1 Model number (E-Nr.) and production number (FD 28 13.2 Rating plate location 28...
... 8.3 Resetting the connection 22 8.4 Controlling the hood via the cooktop 22 8.5 Overview of the hood control settings 22 9 Cleaning and maintenance 23 9.1 Cleaning agents 23 9.2 Cleaning the glass ceramic cooktop 23 9.3 Cleaning the cooktop frame 23 9.4 Cleaning recommendations 23 9.5 Maintenance 24 10 Troubleshooting 25 11 FAQs 27 12 Disposal 28 12.1 Disposal of your old appliance 28 13 Customer service 28 13.1 Model number (E-Nr.) and production number (FD 28 13.2 Rating plate location 28...
Use and Care Manual
Page 3
... user group This appliance is not intended for use by qualified persons. cautions will reduce the risk of this manual carefully. ¡ Keep the instructions, the appliance pass and the prod- When using kitchen appliances, basic safety precau- Do not let children play with a hot surface element, burner or grate. ▶ Do not allow pans to ensure that the appliance works perfectly at its installation location...
... user group This appliance is not intended for use by qualified persons. cautions will reduce the risk of this manual carefully. ¡ Keep the instructions, the appliance pass and the prod- When using kitchen appliances, basic safety precau- Do not let children play with a hot surface element, burner or grate. ▶ Do not allow pans to ensure that the appliance works perfectly at its installation location...

Use and Care Manual
Page 4
... spills covering the control panel. ▶ Never use water on the pan. ▶ Never leave hot fat or oil unattended. WHEN COOKING WITH THE FRYING SENSOR FUNCTION OBSERVE THE FOLLOWING ▶ Always use dry chemical or foam-type extinguisher. Do not store items on low or medium settings. ▶ Always turn off the circuit breaker in the fuse box. ▶ Contact Customer Service for the size of the surface element. ▶...
... spills covering the control panel. ▶ Never use water on the pan. ▶ Never leave hot fat or oil unattended. WHEN COOKING WITH THE FRYING SENSOR FUNCTION OBSERVE THE FOLLOWING ▶ Always use dry chemical or foam-type extinguisher. Do not store items on low or medium settings. ▶ Always turn off the circuit breaker in the fuse box. ▶ Contact Customer Service for the size of the surface element. ▶...

Use and Care Manual
Page 6
... with television or radio reception. To avoid electrical shock hazard, before servicing the appliance, turn off the power supply. ▶ Have the installer show you the circuit breaker or fuse. If interference occurs, the user should break, cleaning solutions and spillovers may occur if control elements are suitable for cooktop or range-top service without breaking due to use . ▶ Consult your doctor or the manufacturer...
... with television or radio reception. To avoid electrical shock hazard, before servicing the appliance, turn off the power supply. ▶ Have the installer show you the circuit breaker or fuse. If interference occurs, the user should break, cleaning solutions and spillovers may occur if control elements are suitable for cooktop or range-top service without breaking due to use . ▶ Consult your doctor or the manufacturer...
Use and Care Manual
Page 8
... not heat empty pots or pans. Use cookware with a solid flat bottom. Select a suitable power level to avoid them. Discolorations Cause Unsuitable cleaning agents Pot abrasion (e.g. Tip: Cookware manufacturers usually state the top diameter of the cookware base is wasted. aluminum) Remedy Use cleaning agents that are suitable for glass ceramic cooktops. Center the cookware on the glass ceramic surface. ▶ Refer to care for set down hot pans...
... not heat empty pots or pans. Use cookware with a solid flat bottom. Select a suitable power level to avoid them. Discolorations Cause Unsuitable cleaning agents Pot abrasion (e.g. Tip: Cookware manufacturers usually state the top diameter of the cookware base is wasted. aluminum) Remedy Use cleaning agents that are suitable for glass ceramic cooktops. Center the cookware on the glass ceramic surface. ▶ Refer to care for set down hot pans...
Use and Care Manual
Page 20
... the purposes of any previous reset to the cooktop. As soon as normal while updates are required: ‒ If confirm flashes, touch confirm. ‒ If the cooking zone display alternately flashes the old and new value, select the cooking zone. 3. The Home Connect™ app will be able to start installing it to factory settings. You can be utilized only with...
... the purposes of any previous reset to the cooktop. As soon as normal while updates are required: ‒ If confirm flashes, touch confirm. ‒ If the cooking zone display alternately flashes the old and new value, select the cooking zone. 3. The Home Connect™ app will be able to start installing it to factory settings. You can be utilized only with...

Use and Care Manual
Page 22
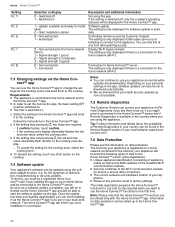
... hold kitchen timer for whether/how the fan is to run on after the cooktop is displayed. 3. played alternately. 4. You can choose between cooktop and hood ¡ - Select the fan level. Some of your requirements at the default level when one of the cooking zones is set. Switched on in manual mode. No change to the settings Delay shut-off Setting for 4 seconds. en-us Cooktop-based hood control 8.3 Resetting the connection...
... hold kitchen timer for whether/how the fan is to run on after the cooktop is displayed. 3. played alternately. 4. You can choose between cooktop and hood ¡ - Select the fan level. Some of your requirements at the default level when one of the cooking zones is set. Switched on in manual mode. No change to the settings Delay shut-off Setting for 4 seconds. en-us Cooktop-based hood control 8.3 Resetting the connection...
Use and Care Manual
Page 23
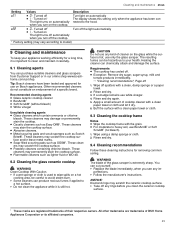
...®1. CAUTION Do not use any kind of a specific brand. use white vinegar. 4. Wipe using a damp sponge or cloth. 2. You can cut yourself. ▶ Replace the blade immediately, when you see any rings before you turn on The light turns off automatically when you clean the ceramic cooktop surface. 1 These marks are trademarks of their respective owners. perfections. ▶ Follow the manufacturer's instructions. Other recommended cleaners...
...®1. CAUTION Do not use any kind of a specific brand. use white vinegar. 4. Wipe using a damp sponge or cloth. 2. You can cut yourself. ▶ Replace the blade immediately, when you see any rings before you turn on The light turns off automatically when you clean the ceramic cooktop surface. 1 These marks are trademarks of their respective owners. perfections. ▶ Follow the manufacturer's instructions. Other recommended cleaners...
Use and Care Manual
Page 26
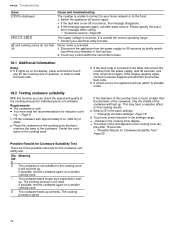
...; "Changing the basic settings", Page 18 4. Cause and troubleshooting The cooktop is not listed in the cooking zone display after -sales service. Select in the cooking zone display. a The result of water. 2. The cooking process is good. 26 Fill the cookware with approximately 8 oz. (200 ml) of the test appears in the table, disconnect the cooktop from the power supply for induction cook...
...; "Changing the basic settings", Page 18 4. Cause and troubleshooting The cooktop is not listed in the cooking zone display after -sales service. Select in the cooking zone display. a The result of water. 2. The cooking process is good. 26 Fill the cookware with approximately 8 oz. (200 ml) of the test appears in the table, disconnect the cooktop from the power supply for induction cook...

Use and Care Manual
Page 28
... of your appliance is located. ¡ on the glass ceramic. en-us Disposal Question How do I clean the cooktop? We will require the model number (E-Nr.) and the production number (FD) of the appliance ¡ in the basic settings. → "Changing the basic settings", Page 18 28 The rating plate can also check the Customer Service Index (CSI) and the FD number in the appliance pass...
... of your appliance is located. ¡ on the glass ceramic. en-us Disposal Question How do I clean the cooktop? We will require the model number (E-Nr.) and the production number (FD) of the appliance ¡ in the basic settings. → "Changing the basic settings", Page 18 28 The rating plate can also check the Customer Service Index (CSI) and the FD number in the appliance pass...
Use and Care Manual
Page 29
...; Service calls to correct the installation of your Product, to instruct you how to use your Product, to replace house fuses or correct house wiring or plumbing. Nothing in painted and porcelain parts, as well as scratches of stainless steel, paint/porcelain blemishes, chip, dents, or other structures or objects 29 All removed parts and components shall become the property of Bosch at...
...; Service calls to correct the installation of your Product, to instruct you how to use your Product, to replace house fuses or correct house wiring or plumbing. Nothing in painted and porcelain parts, as well as scratches of stainless steel, paint/porcelain blemishes, chip, dents, or other structures or objects 29 All removed parts and components shall become the property of Bosch at...

Product Spec Sheet
Page 1
... to Measure Cooking Time or as You Go Notes: All height, width and depth dimensions are shown in Use • Digital 2-Stage Residual Heat Indicator for Each Cooking Zone • Wipe Protection - Automatically Recognizes Bottom of Pan on our entire line of Robert Bosch GmbH. Prevents the Cooktop from Being Accidentally Switched On, Locks Temperature Settings if in inches. *Please refer to installation instructions prior to Clean as...
... to Measure Cooking Time or as You Go Notes: All height, width and depth dimensions are shown in Use • Digital 2-Stage Residual Heat Indicator for Each Cooking Zone • Wipe Protection - Automatically Recognizes Bottom of Pan on our entire line of Robert Bosch GmbH. Prevents the Cooktop from Being Accidentally Switched On, Locks Temperature Settings if in inches. *Please refer to installation instructions prior to Clean as...
Product Spec Sheet
Page 2
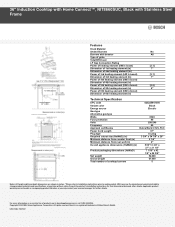
... installation instructions prior to making cutout. Applicable product warranty can be foundin a ccompanying product literature or you may contact your account manager for final dimensional data and other details. 36" Induction Cooktop with Home Connect™, NIT8660SUC, Black with Stainless Steel Frame Features Knob Material Sealed Burners Burners with booster Type of grate Total BTU load LP Gas Connection Rating Power of heating element (kW in boost) Dimension of 1st heating element (in) Dimension of 2nd heating element...
... installation instructions prior to making cutout. Applicable product warranty can be foundin a ccompanying product literature or you may contact your account manager for final dimensional data and other details. 36" Induction Cooktop with Home Connect™, NIT8660SUC, Black with Stainless Steel Frame Features Knob Material Sealed Burners Burners with booster Type of grate Total BTU load LP Gas Connection Rating Power of heating element (kW in boost) Dimension of 1st heating element (in) Dimension of 2nd heating element...

Product Spec Sheet 1
Page 1
... Appliances Corporation. For more efficient AutoChef® - Warranties: Please see Use & Care manual or Bosch website for statement of Front Right 9" heating element General Properties Home Connect™ (Wi-Fi Enabled) Controls Technical Details Watts Circuit breaker Volts Frequency Plug type Power cord length Energy source Dimensions & Weight Overall appliance dimensions (HxWxD) Required cutout size (HxWxD) Minimum distance from counter front Minimum distance from rear wall Net weight Accessories-Optional Yes PreciseSelect® Touch...
... Appliances Corporation. For more efficient AutoChef® - Warranties: Please see Use & Care manual or Bosch website for statement of Front Right 9" heating element General Properties Home Connect™ (Wi-Fi Enabled) Controls Technical Details Watts Circuit breaker Volts Frequency Plug type Power cord length Energy source Dimensions & Weight Overall appliance dimensions (HxWxD) Required cutout size (HxWxD) Minimum distance from counter front Minimum distance from rear wall Net weight Accessories-Optional Yes PreciseSelect® Touch...


