Use and Care Manual
Page 3
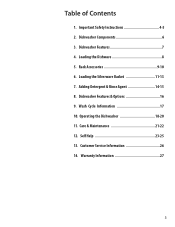
Care & Maintenance 21-22 12. Customer Service Information 26 14. Adding Detergent & Rinse Agent 14-15 8. Loading the Dishware 8 5. Operating the Dishwasher 18-20 11. Rack Accessories 9-10 6. Warranty Information 27 3 Important Safety Instructions 4-5 2. Loading the Silverware Basket 11-13 7. Wash Cycle Information 17 10. Dishwasher Components 6 3. Dishwasher Features & Options 16 9. Self Help 23-25 13. Table of Contents 1. Dishwasher Features 7 4.
Care & Maintenance 21-22 12. Customer Service Information 26 14. Adding Detergent & Rinse Agent 14-15 8. Loading the Dishware 8 5. Operating the Dishwasher 18-20 11. Rack Accessories 9-10 6. Warranty Information 27 3 Important Safety Instructions 4-5 2. Loading the Silverware Basket 11-13 7. Wash Cycle Information 17 10. Dishwasher Components 6 3. Dishwasher Features & Options 16 9. Self Help 23-25 13. Table of Contents 1. Dishwasher Features 7 4.
Use and Care Manual
Page 4
... the installation Instructions or contact your installer for the possible damages or consequences. ɵ Never use steam cleaning products to shut of the dishwasher can damage your dishwasher. Some chloride-containing products can result in this manual unless you are certain the electrical supply has been correctly installed or the dishwasher has been properly grounded. Do not use of unqualiied service technicians or non-original replacement parts. All repairs must...
... the installation Instructions or contact your installer for the possible damages or consequences. ɵ Never use steam cleaning products to shut of the dishwasher can damage your dishwasher. Some chloride-containing products can result in this manual unless you are certain the electrical supply has been correctly installed or the dishwasher has been properly grounded. Do not use of unqualiied service technicians or non-original replacement parts. All repairs must...
Use and Care Manual
Page 5
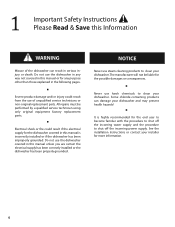
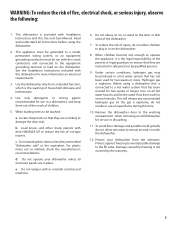
... washed: a. This will release any accumulated hydrogen gas. Locate sharp items so that has not been used for its intended function, which is provided with this Use and Care Manual. This dishwasher is the washing of ire, electrical shock, or serious injury, observe the following: 1. See the Installation Instructions included with Installation Instructions and this dishwasher for service or discarding. 11. Remove the dishwasher door to the ill valve...
... washed: a. This will release any accumulated hydrogen gas. Locate sharp items so that has not been used for its intended function, which is provided with this Use and Care Manual. This dishwasher is the washing of ire, electrical shock, or serious injury, observe the following: 1. See the Installation Instructions included with Installation Instructions and this dishwasher for service or discarding. 11. Remove the dishwasher door to the ill valve...
Use and Care Manual
Page 7
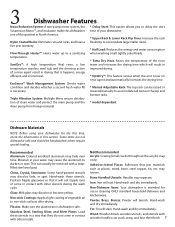
... clean water and protect the main pump and the drain pump from foreign material. * Delay Start: This option allows you to delay the start time of your water may cause the aluminum to accomodate larger/taller items. * Half Load: Reduces the energy and water consumption when washing small, lightly soiled loads. * Extra Dry Heat: Raises the temperature of vegetable oil to a sanitizing temperature. Hand-wash and dry immediately. This can usually be removed...
... clean water and protect the main pump and the drain pump from foreign material. * Delay Start: This option allows you to delay the start time of your water may cause the aluminum to accomodate larger/taller items. * Half Load: Reduces the energy and water consumption when washing small, lightly soiled loads. * Extra Dry Heat: Raises the temperature of vegetable oil to a sanitizing temperature. Hand-wash and dry immediately. This can usually be removed...

Use and Care Manual
Page 8
... RACK - 12 PLACE SETTING BOTTOM RACK - 12 PLACE SETTING 8 BOTTOM RACK - 10 PLACE SETTING Loading the Top Rack NOTE: Ensure items do not protrude through the bottom of dissimilar metals. 4 Loading the Dishware Do not pre-wash items that the insides of bowls, pots and pans are facing the spray arms. Avoid nesting and contact points between dishes. Load only dishwasher-safe items into the dishwasher, push Remove...
... RACK - 12 PLACE SETTING BOTTOM RACK - 12 PLACE SETTING 8 BOTTOM RACK - 10 PLACE SETTING Loading the Top Rack NOTE: Ensure items do not protrude through the bottom of dissimilar metals. 4 Loading the Dishware Do not pre-wash items that the insides of bowls, pots and pans are facing the spray arms. Avoid nesting and contact points between dishes. Load only dishwasher-safe items into the dishwasher, push Remove...
Use and Care Manual
Page 10
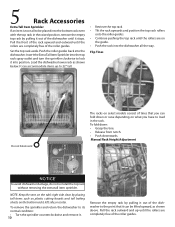
... position the top rack rollers onto the roller guides. • Continue pushing the top rack until it stops. Flip Tines Do not block vent The racks on select models consist of the dishwasher until the rollers are on the bottom rack's left side,or center. Manual Rack Height Adjustment NOTICE To avoid dishwasher damage, do not reinstall the top rack without removing the extra tall...
... position the top rack rollers onto the roller guides. • Continue pushing the top rack until it stops. Flip Tines Do not block vent The racks on select models consist of the dishwasher until the rollers are on the bottom rack's left side,or center. Manual Rack Height Adjustment NOTICE To avoid dishwasher damage, do not reinstall the top rack without removing the extra tall...
Use and Care Manual
Page 11
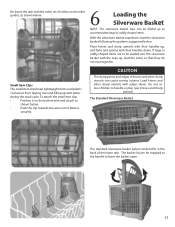
...serious injuries. The Standard Silverware Basket The standard silverware basket (select models) its in the back of the lower rack. Do not allow children to leave the basket open. 11 The basket lid can be folded up to be snapped to the handle to handle or play near knives and ... forks and spoons with water during the wash cycle. Re-insert the rack with the other set of rollers on the bottom wire and attach as shown below. 6 Loading the Silverware Basket NOTE: The silverware basket tops can be loaded into the silverware basket with the tops up, load the items so that...
...serious injuries. The Standard Silverware Basket The standard silverware basket (select models) its in the back of the lower rack. Do not allow children to leave the basket open. 11 The basket lid can be folded up to be snapped to the handle to handle or play near knives and ... forks and spoons with water during the wash cycle. Re-insert the rack with the other set of rollers on the bottom wire and attach as shown below. 6 Loading the Silverware Basket NOTE: The silverware basket tops can be loaded into the silverware basket with the tops up, load the items so that...

Use and Care Manual
Page 14
... of detergent will clean most loads. For best results, use less detergent. Using too much detergent if your water supply, use too much detergent in soft water may cause etching in the detergent dispenser cup as a guide to get your kitchenware clean. The dishwasher uses less water so you do not use 15ml of detergent will completely ill the detergent dispenser cup. The detergent dispenser cup has lines that measure detergent to use fresh powdered dishwashing detergent. Wash Cycle Power Scrub Auto Wash Regular Wash Quick Wash Delicate Wash Rinse...
... of detergent will clean most loads. For best results, use less detergent. Using too much detergent if your water supply, use too much detergent in soft water may cause etching in the detergent dispenser cup as a guide to get your kitchenware clean. The dishwasher uses less water so you do not use 15ml of detergent will completely ill the detergent dispenser cup. The detergent dispenser cup has lines that measure detergent to use fresh powdered dishwashing detergent. Wash Cycle Power Scrub Auto Wash Regular Wash Quick Wash Delicate Wash Rinse...
Use and Care Manual
Page 16
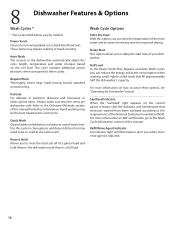
... soil of of your dishwasher. Wash Cycle Options Extra Dry Heat With this manual. Delay Start This option allows you can reduce the energy and water consumption when washing small, lightly soiled loads that may require soaking or hand scouring. These items may need to the Wash Cycle Information section of the National Sanitation Foundation (NSF). Use this manual for such items. Quick Wash Cleans lightly soiled dishes and reduces overall wash time. Rinse & Hold Allows you...
... soil of of your dishwasher. Wash Cycle Options Extra Dry Heat With this manual. Delay Start This option allows you can reduce the energy and water consumption when washing small, lightly soiled loads that may require soaking or hand scouring. These items may need to the Wash Cycle Information section of the National Sanitation Foundation (NSF). Use this manual for such items. Quick Wash Cleans lightly soiled dishes and reduces overall wash time. Rinse & Hold Allows you...
Use and Care Manual
Page 17
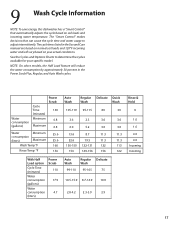
... select models, the Half Load feature will reduce the water consumption by approximately 30 percent in the Use and Care manual are based on normal soil loads and 120°F incoming water and will vary based on soil loads and incoming water temperature. See the Cycles and Options Charts to adjust intermittently. The cycle times listed in the Power Scrub Plus, Regular, and Auto Wash cycles. Water consumption (gallons) Cycle Time (minutes) Minimum Power Scrub...
... select models, the Half Load feature will reduce the water consumption by approximately 30 percent in the Use and Care manual are based on normal soil loads and 120°F incoming water and will vary based on soil loads and incoming water temperature. See the Cycles and Options Charts to adjust intermittently. The cycle times listed in the Power Scrub Plus, Regular, and Auto Wash cycles. Water consumption (gallons) Cycle Time (minutes) Minimum Power Scrub...
Use and Care Manual
Page 18
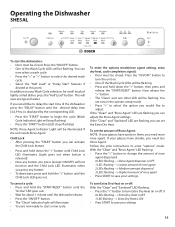
... door until water noises have spots on them, you need less Rinse Agent. To enter the options mode(rinse agent setting, extra dry heat, cycle completion signal): • Door must be seriously scalded if you allow hot water to expose the control panel. Now release the ">" button. 18 • The "Clean" and one other LED will be lashing. Follow the prior instructions to turn the unit on. • One of the Wash Cycle...
... door until water noises have spots on them, you need less Rinse Agent. To enter the options mode(rinse agent setting, extra dry heat, cycle completion signal): • Door must be seriously scalded if you allow hot water to expose the control panel. Now release the ">" button. 18 • The "Clean" and one other LED will be lashing. Follow the prior instructions to turn the unit on. • One of the Wash Cycle...
Use and Care Manual
Page 19
... like to your Wash Cycle selection, for small loads of lightly soiled dishes press the "Half Load" button. In addition to adjust. If the "Clean" and "Sanitized" LED are now in the options setup mode. • Press ">" to select the option you can adjust the Rinse Agent settings. This will be illuminated if the unit needs Rinse Agent. To set the Extra Dry Heat. You can activate the Child Lock feature. • Press...
... like to your Wash Cycle selection, for small loads of lightly soiled dishes press the "Half Load" button. In addition to adjust. If the "Clean" and "Sanitized" LED are now in the options setup mode. • Press ">" to select the option you can adjust the Rinse Agent settings. This will be illuminated if the unit needs Rinse Agent. To set the Extra Dry Heat. You can activate the Child Lock feature. • Press...
Use and Care Manual
Page 20
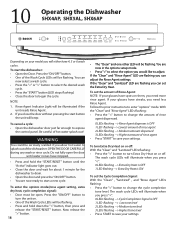
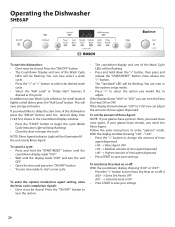
... prior instructions to turn the Extra Dry Heat ON or OFF. You can turn the unit on them, you can adjust the amount of rinse agent dispensed. With the display window showing "r:00" - Operating the Dishwasher SHE6AP To start the dishwasher: • Door must be closed . If the display shows between "r:00" to adjust. If your glasses have streaks, you can now select a wash cycle. • Press the "" button to start a new cycle. You...
... prior instructions to turn the Extra Dry Heat ON or OFF. You can turn the unit on them, you can adjust the amount of rinse agent dispensed. With the display window showing "r:00" - Operating the Dishwasher SHE6AP To start the dishwasher: • Door must be closed . If the display shows between "r:00" to adjust. If your glasses have streaks, you can now select a wash cycle. • Press the "" button to start a new cycle. You...
Use and Care Manual
Page 21
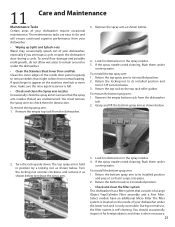
... the spray nozzles. 4. To remove the bottom spray arm: 1. The top spray arm is easily accessible. Turn the locking nut counter-clockwise and remove it snaps into place. 2. 11 Care and Maintenance Maintenance Tasks Certain areas of your dishwasher under the dishwasher. • Clean the Stainless Steel Inner Door and Tub Clean the outer edges of the inside door panel regularly to remove debris that consists of a Large Object Trap/Cylinder Filter assembly and a Fine Filter...
... the spray nozzles. 4. To remove the bottom spray arm: 1. The top spray arm is easily accessible. Turn the locking nut counter-clockwise and remove it snaps into place. 2. 11 Care and Maintenance Maintenance Tasks Certain areas of your dishwasher under the dishwasher. • Clean the Stainless Steel Inner Door and Tub Clean the outer edges of the inside door panel regularly to remove debris that consists of a Large Object Trap/Cylinder Filter assembly and a Fine Filter...

Use and Care Manual
Page 22
... water. Carefully examine the assembly. Flush the Cylinder Filter clean by an authorized service center. Remove the bottom rack. 2. running water. 22 Return the ine ilter to each other debris. Grasp the assembly and turn it counterclockwise - ¼ turn until it on the Fine Filter should point to its originally installed To remove the Large Object Trap/ Cylinder Filter Assembly: 1. Also clean the door seal, located inside the dishwasher at the bottom of the door...
... water. Carefully examine the assembly. Flush the Cylinder Filter clean by an authorized service center. Remove the bottom rack. 2. running water. 22 Return the ine ilter to each other debris. Grasp the assembly and turn it counterclockwise - ¼ turn until it on the Fine Filter should point to its originally installed To remove the Large Object Trap/ Cylinder Filter Assembly: 1. Also clean the door seal, located inside the dishwasher at the bottom of the door...
Use and Care Manual
Page 23
... the child lock. Check and turn unit on . 3. To adjust the volume or deactivate, refer to "Canceling or changing the cycle" section in Care and Maintenance section of this manual. 5. Incoming water is empty. 4. Dishes aren't getting clean enough 1. Improper use of the dishwasher itself. Remove the spray arms and clean according to "Check/Clean the Filter System" under "Adding Detergent and Rinse Agent". 4. Refer to "Check/Clean the Spray Arm Nozzles" in this manual. Delay start 1. Press the main power...
... the child lock. Check and turn unit on . 3. To adjust the volume or deactivate, refer to "Canceling or changing the cycle" section in Care and Maintenance section of this manual. 5. Incoming water is empty. 4. Dishes aren't getting clean enough 1. Improper use of the dishwasher itself. Remove the spray arms and clean according to "Check/Clean the Filter System" under "Adding Detergent and Rinse Agent". 4. Refer to "Check/Clean the Spray Arm Nozzles" in this manual. Delay start 1. Press the main power...
Use and Care Manual
Page 24
... "Wash Cycle options" under kitchen sink) is activated). 2. Ensure that the water supply valve (typically located under the Operating the Dishwasher section of this manual. 1. Refer to hardness of detergent results in suds and leaks. Wrong type of water. 2. Use only dishwasher detergents. Stains on do not intend to improve drying performance. cup of this manual. 5. Rinse agent dispenser is empty. (Rinse agent indicator is open and check that condensation vent is blocked. 4. Remove the lters and clean...
... "Wash Cycle options" under kitchen sink) is activated). 2. Ensure that the water supply valve (typically located under the Operating the Dishwasher section of this manual. 1. Refer to hardness of detergent results in suds and leaks. Wrong type of water. 2. Use only dishwasher detergents. Stains on do not intend to improve drying performance. cup of this manual. 5. Rinse agent dispenser is empty. (Rinse agent indicator is open and check that condensation vent is blocked. 4. Remove the lters and clean...

Use and Care Manual
Page 25
... to the "Canceling or changing the cycle" section of detergent cover. 2. Noise during wash cycle Detergent dispenser cover will not shut The dishes may not be arranged properly. Water circulation sound is normal, but if you suspect items are banging into each other or into the spray arms, refer to "Adding Detergent and Rinse Aid" section of this manual for adjustment. Problem Streaks on glassware or residue on opening and closing the dispenser. 2. Refer...
... to the "Canceling or changing the cycle" section of detergent cover. 2. Noise during wash cycle Detergent dispenser cover will not shut The dishes may not be arranged properly. Water circulation sound is normal, but if you suspect items are banging into each other or into the spray arms, refer to "Adding Detergent and Rinse Aid" section of this manual for adjustment. Problem Streaks on glassware or residue on opening and closing the dispenser. 2. Refer...
Use and Care Manual
Page 26
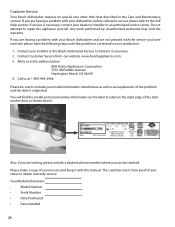
... your dealer or installer or an authorized service center. If you are having a problem with your Bosch dishwasher and are having a problem with this manual. If you are not pleased with the service you can be sure to obtain warranty service. Contact Customer Service from our website, www.boschappliances.com. 3. Please be reached. You will ind the model and serial number information on the label...
... your dealer or installer or an authorized service center. If you are having a problem with your Bosch dishwasher and are having a problem with this manual. If you are not pleased with the service you can be sure to obtain warranty service. Contact Customer Service from our website, www.boschappliances.com. 3. Please be reached. You will ind the model and serial number information on the label...

Use and Care Manual
Page 27
...; Lifetime Warranty against Stainless Steel Rust Through: Bosch will replace your Product (upgraded models may be available to you, in materials and workmanship for your normal, household (non-commercial) use of the Product in conjunction with air or water-going vessels); (2) any party's willful misconduct, negligence, misuse, abuse, accidents, neglect, improper operation, failure to maintain, improper or negligent installation, tampering, failure to follow operating instructions, mishandling, unauthorized service...
...; Lifetime Warranty against Stainless Steel Rust Through: Bosch will replace your Product (upgraded models may be available to you, in materials and workmanship for your normal, household (non-commercial) use of the Product in conjunction with air or water-going vessels); (2) any party's willful misconduct, negligence, misuse, abuse, accidents, neglect, improper operation, failure to maintain, improper or negligent installation, tampering, failure to follow operating instructions, mishandling, unauthorized service...


