
Advanced Users Guide
Page 16
... operations 3 Sending a fax manually 3 Manual transmission lets you change them again. d Press Black Start or Color Start. If you are using the scanner glass, press 1 to change . Chapter 3 Setting your changes as the new default 3 You can store the fax options you use the ADF. Press OK.... If you are using the scanner glass, press 1 to choose Set New Default. These settings will stay until you change them as the default settings. Press OK. c After changing ...
... operations 3 Sending a fax manually 3 Manual transmission lets you change them again. d Press Black Start or Color Start. If you are using the scanner glass, press 1 to change . Chapter 3 Setting your changes as the new default 3 You can store the fax options you use the ADF. Press OK.... If you are using the scanner glass, press 1 to choose Set New Default. These settings will stay until you change them as the default settings. Press OK. c After changing ...

Advanced Users Guide
Page 18
...show the Broadcasting job number. Faxing from the ADF The machine starts scanning and sending the document. The LCD will vary depending on the scanner glass. The LCD will not be able to use up any of the numbers for Groups, you can broadcast faxes to send the pages scanned...a or b to choose Fax. h Press Stop/Exit. 12 Chapter 3 g Press Black Start. Press OK. d Press OK. b Press a or b to choose Remaining Jobs. Faxing from the scanner glass When the LCD asks you the following question: Cancel Job? Yes i Press 1 No i Press 2 g To cancel the broadcast, press 1.
...show the Broadcasting job number. Faxing from the ADF The machine starts scanning and sending the document. The LCD will vary depending on the scanner glass. The LCD will not be able to use up any of the numbers for Groups, you can broadcast faxes to send the pages scanned...a or b to choose Fax. h Press Stop/Exit. 12 Chapter 3 g Press Black Start. Press OK. d Press OK. b Press a or b to choose Remaining Jobs. Faxing from the scanner glass When the LCD asks you the following question: Cancel Job? Yes i Press 1 No i Press 2 g To cancel the broadcast, press 1.

Advanced Users Guide
Page 19
... or if the memory is full and you are sending a fax, the machine will scan the document into memory. After you send a fax using the scanner glass. d Press a or b to choose On (or Off). g Enter the fax number. e Press a or b to choose Overseas Mode. Sometimes, you may want to send an..., as soon as the telephone line is free, the machine will turn on Real Time TX. h Press Black Start or Color Start. 13 Sending a fax (MFC models) Real Time Transmission 3 When you are sending a black & white fax from the ADF, the machine will send the document in real time (even if...
... or if the memory is full and you are sending a fax, the machine will scan the document into memory. After you send a fax using the scanner glass. d Press a or b to choose On (or Off). g Enter the fax number. e Press a or b to choose Overseas Mode. Sometimes, you may want to send an..., as soon as the telephone line is free, the machine will turn on Real Time TX. h Press Black Start or Color Start. 13 Sending a fax (MFC models) Real Time Transmission 3 When you are sending a black & white fax from the ADF, the machine will send the document in real time (even if...

Advanced Users Guide
Page 36
...8226; Page Layout, 2-sided Copy 1, Sort and Remove Background are not available with the document face down on the scanner glass is not available for Legal size documents. 1 MFC models only 30 If you choose Fit to Page, your document. Chapter 7 Enlarging or reducing copies 7 You can ...choose an enlargement or reduction ratio. b (MFC models) Press (COPY). d Press a or b to Page does not work correctly when the document on the scanner glass. • Fit to Page is not available when using the ADF 1. • Fit to ...
...8226; Page Layout, 2-sided Copy 1, Sort and Remove Background are not available with the document face down on the scanner glass is not available for Legal size documents. 1 MFC models only 30 If you choose Fit to Page, your document. Chapter 7 Enlarging or reducing copies 7 You can ...choose an enlargement or reduction ratio. b (MFC models) Press (COPY). d Press a or b to Page does not work correctly when the document on the scanner glass. • Fit to Page is not available when using the ADF 1. • Fit to ...

Advanced Users Guide
Page 37
... in the ADF 1 or are making a poster, the machine scans the pages and starts printing. 1 MFC models only If you placed the document in 1 ID copy (Page Layout) on the scanner glass. If you are using the scanner glass, go to step g. g After the machine has scanned the page, press 1 or + to ... poster (Page Layout) 7 The N in 1 copy feature can help you save paper by letting you can assemble them into a poster. When you use the scanner glass. Making copies f If you are not available with Page Layout. • 2-sided Copy 1 is not available for each page of copies you want to...
... in the ADF 1 or are making a poster, the machine scans the pages and starts printing. 1 MFC models only If you placed the document in 1 ID copy (Page Layout) on the scanner glass. If you are using the scanner glass, go to step g. g After the machine has scanned the page, press 1 or + to ... poster (Page Layout) 7 The N in 1 copy feature can help you save paper by letting you can assemble them into a poster. When you use the scanner glass. Making copies f If you are not available with Page Layout. • 2-sided Copy 1 is not available for each page of copies you want to...

Advanced Users Guide
Page 39
.../Reduce and Remove Background are not available with 2in1(ID). • You can only make one color copy at a time. 1 MFC models only Sorting copies 7 7 You can copy both sides of the scanner glass as shown in the illustration. 1 1 4 3 1 1 2 1 0.12 in. (3 mm) or greater (top, left corner of ...your identification card onto one page, keeping the original card size. For 2-sided documents and books, use the scanner glass. 1 MFC models only a Load your identification card face down near the left ) 2 8.5 in. (216 mm) 3 5.5 in. (140 mm) 4 scannable area...
.../Reduce and Remove Background are not available with 2in1(ID). • You can only make one color copy at a time. 1 MFC models only Sorting copies 7 7 You can copy both sides of the scanner glass as shown in the illustration. 1 1 4 3 1 1 2 1 0.12 in. (3 mm) or greater (top, left corner of ...your identification card onto one page, keeping the original card size. For 2-sided documents and books, use the scanner glass. 1 MFC models only a Load your identification card face down near the left ) 2 8.5 in. (216 mm) 3 5.5 in. (140 mm) 4 scannable area...

Advanced Users Guide
Page 40
... (COPY). Press OK. Press OK to choose Low, Medium or High. NOTE Fit to Page and Page Layout are using the scanner glass, go to step g. b (MFC models) Press (COPY). Remove Background Color 7 Remove Background Color removes the background color of copies you want. This may make copies... next page. NOTE Fit to Page and Page Layout are not available with Sort. a Load your document. h Place the next page on the scanner glass. NOTE This function is automatically removed for use only when making color copies. Press OK. e Press c to make the copy darker or ...
... (COPY). Press OK. Press OK to choose Low, Medium or High. NOTE Fit to Page and Page Layout are using the scanner glass, go to step g. b (MFC models) Press (COPY). Remove Background Color 7 Remove Background Color removes the background color of copies you want. This may make copies... next page. NOTE Fit to Page and Page Layout are not available with Sort. a Load your document. h Place the next page on the scanner glass. NOTE This function is automatically removed for use only when making color copies. Press OK. e Press c to make the copy darker or ...

Advanced Users Guide
Page 41
.... Press OK. If you load single-sided documents in the ADF, the machine scans the pages and starts printing. Making copies 2-sided copying (MFC models) 7 You can use the scanner glass. (Long edge flip) Portrait 1 2 Landscape 1 2 2 2 11 1 2 (Short edge flip) Portrait 1 1 2 Landscape 1 2... 11 2 NOTE • 2in1(ID), Poster and Fit to Page are using the scanner glass, go to step k. f Press a or b to choose Stack/Sort. k After the machine scans the page, press 1 to choose 2-sided Copy. b (MFC models) Press (COPY). g Press a or b to scan the next page. 35 ...
.... Press OK. If you load single-sided documents in the ADF, the machine scans the pages and starts printing. Making copies 2-sided copying (MFC models) 7 You can use the scanner glass. (Long edge flip) Portrait 1 2 Landscape 1 2 2 2 11 1 2 (Short edge flip) Portrait 1 1 2 Landscape 1 2... 11 2 NOTE • 2in1(ID), Poster and Fit to Page are using the scanner glass, go to step k. f Press a or b to choose Stack/Sort. k After the machine scans the page, press 1 to choose 2-sided Copy. b (MFC models) Press (COPY). g Press a or b to scan the next page. 35 ...

Advanced Users Guide
Page 42
... jam prevention settings: 2-sided1 or 2-sided2. 2-sided1 uses a longer print time for the copy options you use most often-such as the defaults. 1 MFC models only These settings will print the first side and eject the paper, and then pull the paper in lighter colors. The machine starts printing... + to choose Factory Reset. Repeat this step for each setting you change . b Press a or b to choose Yes. Chapter 7 l Place the next page on the scanner glass. DO NOT touch the printed page until all settings to the factory settings 7 You can save the settings for the ink to the factory...
... jam prevention settings: 2-sided1 or 2-sided2. 2-sided1 uses a longer print time for the copy options you use most often-such as the defaults. 1 MFC models only These settings will print the first side and eject the paper, and then pull the paper in lighter colors. The machine starts printing... + to choose Factory Reset. Repeat this step for each setting you change . b Press a or b to choose Yes. Chapter 7 l Place the next page on the scanner glass. DO NOT touch the printed page until all settings to the factory settings 7 You can save the settings for the ink to the factory...

Advanced Users Guide
Page 44
d Wipe the inside and outside of the machine to lift the scanner cover into the open position. b Clean the machine's printer platen (1) and the area around it, wiping off any scattered ink with a dry, soft lint-free ... to avoid an electrical shock. 2 a Place both hands under the plastic tabs on both sides of the paper tray with a dry, soft lint-free cloth. (MFC models) e Close the output paper tray cover and 1 put the paper tray firmly back in the machine. IMPORTANT DO NOT touch the encoder strip (2).
d Wipe the inside and outside of the machine to lift the scanner cover into the open position. b Clean the machine's printer platen (1) and the area around it, wiping off any scattered ink with a dry, soft lint-free ... to avoid an electrical shock. 2 a Place both hands under the plastic tabs on both sides of the paper tray with a dry, soft lint-free cloth. (MFC models) e Close the output paper tray cover and 1 put the paper tray firmly back in the machine. IMPORTANT DO NOT touch the encoder strip (2).

Advanced Users Guide
Page 45
...Cleaning the paper feed rollers A If the paper feed rollers are stained with water, using a side-to-side motion. Gently push the scanner cover support down and close the paper support. Pull the paper tray (1) completely out of the Paper Feed Rollers (1) with a soft ...(DCP model) Clean the Paper Feed Rollers (1) with a soft lint-free cloth moistened with ink, it , and then close the scanner cover using a side-to release the lock. Routine maintenance b (MFC models) Clean the front side of the machine. After cleaning, wipe the rollers with water, using both hands. c Lift the...
...Cleaning the paper feed rollers A If the paper feed rollers are stained with water, using a side-to-side motion. Gently push the scanner cover support down and close the paper support. Pull the paper tray (1) completely out of the Paper Feed Rollers (1) with a soft ...(DCP model) Clean the Paper Feed Rollers (1) with a soft lint-free cloth moistened with ink, it , and then close the scanner cover using a side-to release the lock. Routine maintenance b (MFC models) Clean the front side of the machine. After cleaning, wipe the rollers with water, using both hands. c Lift the...

Advanced Users Guide
Page 48
...it is important to allow the machine to finish this parking process may not be adequately insured with your fingers when the scanner cover closes. d Lift the scanner cover (1) to pinch your machine. The machine should be covered by your warranty. If you transport the machine, use ... materials that all mechanical noises have stopped. IMPORTANT It is connected. a Unplug the machine from the machine, if it to lift the scanner cover into the open position. f Press the ink release levers to release the ink cartridges, and then take the telephone line cord out...
...it is important to allow the machine to finish this parking process may not be adequately insured with your fingers when the scanner cover closes. d Lift the scanner cover (1) to pinch your machine. The machine should be covered by your warranty. If you transport the machine, use ... materials that all mechanical noises have stopped. IMPORTANT It is connected. a Unplug the machine from the machine, if it to lift the scanner cover into the open position. f Press the ink release levers to release the ink cartridges, and then take the telephone line cord out...

Software and Network Users Guide
Page 8
Only carry the machine by holding the scanner cover, the Jam Clear Cover, or the control panel. Doing this may cause injury to your fingers by cutting them on the edge of your hands under the entire machine. Do not remove the serial number and instruction labels that are affixed to slip out of the machine. DO NOT touch the area shaded in injury. Doing this may result in the illustration. DO NOT carry the machine by placing your hands and may cause the machine to the machine. 8
Only carry the machine by holding the scanner cover, the Jam Clear Cover, or the control panel. Doing this may cause injury to your fingers by cutting them on the edge of your hands under the entire machine. Do not remove the serial number and instruction labels that are affixed to slip out of the machine. DO NOT touch the area shaded in injury. Doing this may result in the illustration. DO NOT carry the machine by placing your hands and may cause the machine to the machine. 8

Web Connect Guide
Page 20
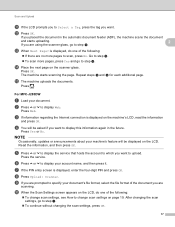
...one of the document you want to display Web. f Press a or b to display this information again in an album named "From_BrotherDevice". h Press Upload: Scanner. After changing the scan settings, go to step k. To continue without using a computer. Uploaded documents are prompted to specify your account name, and... files, each page is displayed, enter the four-digit PIN and press OK. j When the Scan Settings screen appears on page 19. For MFC-J650DW/J870DW/J875DW 2 a Load your machine's feature will be asked if you are scanning. g If the PIN entry screen is uploaded as ...
...one of the document you want to display Web. f Press a or b to display this information again in an album named "From_BrotherDevice". h Press Upload: Scanner. After changing the scan settings, go to step k. To continue without using a computer. Uploaded documents are prompted to specify your account name, and... files, each page is displayed, enter the four-digit PIN and press OK. j When the Scan Settings screen appears on page 19. For MFC-J650DW/J870DW/J875DW 2 a Load your machine's feature will be asked if you are scanning. g If the PIN entry screen is uploaded as ...
Web Connect Guide
Page 21
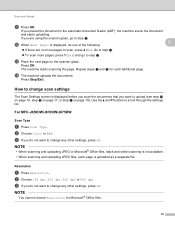
..., and then press it. Read the information, and then press OK. If you are no more pages, press Yes and go to step n. For MFC-J285DW 2 a Load your document's file format, select the file format of the document you are prompted to change scan settings on the LCD. Press... e Press s or t to display the service that hosts the account to which you placed the document in the future. Press the service. h Press Upload: Scanner. j When the Scan Settings screen appears on the LCD, do one of the following : To change scan settings, see How to specify your document....
..., and then press it. Read the information, and then press OK. If you are no more pages, press Yes and go to step n. For MFC-J285DW 2 a Load your document's file format, select the file format of the document you are prompted to change scan settings on the LCD. Press... e Press s or t to display the service that hosts the account to which you placed the document in the future. Press the service. h Press Upload: Scanner. j When the Scan Settings screen appears on the LCD, do one of the following : To change scan settings, see How to specify your document....

Web Connect Guide
Page 22
... feature will be displayed on the machine's LCD. Press OK. j If the LCD prompts you to choose your account name. For DCP-J152W, MFC-J450DW/J470DW/J475DW 2 a Load your document. Press OK. Press OK. o The machine uploads the documents. c Information regarding the Internet connection is displayed on ... want and press OK. 18 g If the PIN entry screen is displayed, do one of the following : To change scan settings on the scanner glass. d You will be asked if you want . Press 1 (Yes) or 2 (No). i When the Scan Settings screen appears on the LCD...
... feature will be displayed on the machine's LCD. Press OK. j If the LCD prompts you to choose your account name. For DCP-J152W, MFC-J450DW/J470DW/J475DW 2 a Load your document. Press OK. Press OK. o The machine uploads the documents. c Information regarding the Internet connection is displayed on ... want and press OK. 18 g If the PIN entry screen is displayed, do one of the following : To change scan settings on the scanner glass. d You will be asked if you want . Press 1 (Yes) or 2 (No). i When the Scan Settings screen appears on the LCD...
Web Connect Guide
Page 23
...m for Microsoft® Office files. 19 How to change any other settings, press OK. For MFC-J650DW/J870DW/J875DW 2 Scan Type 2 a Press Scan Type. c If you do not want ...and b buttons to upload (see step j on page 16, step j on page 17, or step i on the scanner glass. c If you want to step l. n The machine uploads the documents. NOTE You cannot choose Resolution for each ...displayed before you scan the documents that you do one of the following: 2 If there are using the scanner glass, go to scan, press 2 (No). m Place the next page on page 18). b Choose Color or...
...m for Microsoft® Office files. 19 How to change any other settings, press OK. For MFC-J650DW/J870DW/J875DW 2 Scan Type 2 a Press Scan Type. c If you do not want ...and b buttons to upload (see step j on page 16, step j on page 17, or step i on the scanner glass. c If you want to step l. n The machine uploads the documents. NOTE You cannot choose Resolution for each ...displayed before you scan the documents that you do one of the following: 2 If there are using the scanner glass, go to scan, press 2 (No). m Place the next page on page 18). b Choose Color or...

Web Connect Guide
Page 40
...displayed, read the information and press OK. 36 Repeat steps p and q for each additional page. d If information regarding Outline&Scan is displayed on the scanner glass. If you want to step q. r The machine uploads the image. Outline, Scan, and Copy or Cut f Press a or b to display Web...your account name, and then press it is displayed, enter the four-digit PIN and press OK. Press OK. l Press a or b to scan. For MFC-J285DW 4 a Using a red pen, outline the areas of the document you are scanning. k Press a or b to display the service you want . p...
...displayed, read the information and press OK. 36 Repeat steps p and q for each additional page. d If information regarding Outline&Scan is displayed on the scanner glass. If you want to step q. r The machine uploads the image. Outline, Scan, and Copy or Cut f Press a or b to display Web...your account name, and then press it is displayed, enter the four-digit PIN and press OK. Press OK. l Press a or b to scan. For MFC-J285DW 4 a Using a red pen, outline the areas of the document you are scanning. k Press a or b to display the service you want . p...
Web Connect Guide
Page 41
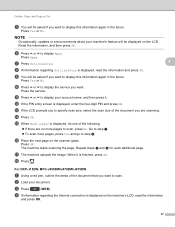
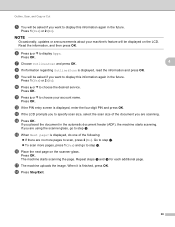
NOTE Occasionally, updates or announcements about your machine's feature will be displayed on the scanner glass. f Press s or t to scan, press No. i You will be asked if you want to display this information again in the future. j Press s or t to ... the scan size of the document you want. Press OK. Repeat steps o and p for each additional page. q The machine uploads the image. For DCP-J152W, MFC-J450DW/J470DW/J475DW 4 a Using a red pen, outline the areas of the following: If there are scanning. b Load your account name, and then press it is...
NOTE Occasionally, updates or announcements about your machine's feature will be displayed on the scanner glass. f Press s or t to scan, press No. i You will be asked if you want to display this information again in the future. j Press s or t to ... the scan size of the document you want. Press OK. Repeat steps o and p for each additional page. q The machine uploads the image. For DCP-J152W, MFC-J450DW/J470DW/J475DW 4 a Using a red pen, outline the areas of the following: If there are scanning. b Load your account name, and then press it is...
Web Connect Guide
Page 42
... press OK. 4 h If information regarding Outline&Scan is finished, press OK. k Press a or b to choose your machine's feature will be displayed on the scanner glass. Press OK. m If the LCD prompts you to specify scan size, select the scan size of the following: If there are scanning. If... you are using the scanner glass, go to step p. Press OK. q The machine uploads the image. n Press OK. r Press Stop/Exit. 38 i You will be asked if ...
... press OK. 4 h If information regarding Outline&Scan is finished, press OK. k Press a or b to choose your machine's feature will be displayed on the scanner glass. Press OK. m If the LCD prompts you to specify scan size, select the scan size of the following: If there are scanning. If... you are using the scanner glass, go to step p. Press OK. q The machine uploads the image. n Press OK. r Press Stop/Exit. 38 i You will be asked if ...


