
Accessory Catalog
Page 4
...). 2. SA161 All Brother home-use sewing machines www.brother.com Loosen the clamp screw at the back of zipper/piping, and presses the fabric with a screwdriver. 5. Its position can be adjusted exactly on the edge of zipper/piping, avoiding the non-flat parts of the presser foot... foot over the long feed dogs on the presser foot and select a straight stitch (left or right. 3. Adjustable Zipper & Piping Foot Brother General Sewing Accessories 06 Adjustable Zipper & Piping Foot Attaches zippers and pipings easily. Use these utility presser feet and accessories to add a professional...
...). 2. SA161 All Brother home-use sewing machines www.brother.com Loosen the clamp screw at the back of zipper/piping, and presses the fabric with a screwdriver. 5. Its position can be adjusted exactly on the edge of zipper/piping, avoiding the non-flat parts of the presser foot... foot over the long feed dogs on the presser foot and select a straight stitch (left or right. 3. Adjustable Zipper & Piping Foot Brother General Sewing Accessories 06 Adjustable Zipper & Piping Foot Attaches zippers and pipings easily. Use these utility presser feet and accessories to add a professional...

Accessory Catalog
Page 6
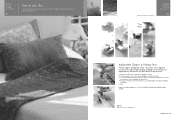
...the presser foot. 4. Select an overlock stitch. 2. Attach the presser foot. 3. Position the edge of the fabric. Non Stick Foot Designed for details.) www.brother.com Sew along the guide. Place the fabric with the wrong side facing up under the presser foot. 3. Hold the fabric from the back and... front and roll it into the curled part of the foot. 6. Select a desired stitch and sew. Continue to sew to the end of the fabric behind the needle and lower the presser...
...the presser foot. 4. Select an overlock stitch. 2. Attach the presser foot. 3. Position the edge of the fabric. Non Stick Foot Designed for details.) www.brother.com Sew along the guide. Place the fabric with the wrong side facing up under the presser foot. 3. Hold the fabric from the back and... front and roll it into the curled part of the foot. 6. Select a desired stitch and sew. Continue to sew to the end of the fabric behind the needle and lower the presser...

Users Manual - Multi
Page 3
... air openings blocked. Do not pull or push fabric while stitching. DANGER - The sewing machine should always be followed, including the following: "Read all moving parts. Do not unplug by or near children. 2. To unplug, grasp the plug, not the cord. 10. Always unplug the sewing machine from the accumulation of...
... air openings blocked. Do not pull or push fabric while stitching. DANGER - The sewing machine should always be followed, including the following: "Read all moving parts. Do not unplug by or near children. 2. To unplug, grasp the plug, not the cord. 10. Always unplug the sewing machine from the accumulation of...

Users Manual - Multi
Page 6
TABLE OF CONTENTS KNOWING YOUR SEWING MACHINE Principal parts 1 Accessories 3 OPERATING YOUR SEWING MACHINE 4 Connecting Plugs 4 Main Power and Sewing Light Switches ....5 Foot Controller 5 Replacing the Needle 6 Checking the Needle 6 Changing the Presser Foot 7 ...
TABLE OF CONTENTS KNOWING YOUR SEWING MACHINE Principal parts 1 Accessories 3 OPERATING YOUR SEWING MACHINE 4 Connecting Plugs 4 Main Power and Sewing Light Switches ....5 Foot Controller 5 Replacing the Needle 6 Checking the Needle 6 Changing the Presser Foot 7 ...

Users Manual - Multi
Page 13
... Needle 1. Para averiguar sila aguja no esta doblada, coloque la pane plan de /a aguja hacia abajo come muestra el dibujo. 3. Introduzca otra aguja, con la parte redonda cara a usted. To check if the needle is bent, place the flat side of the needle down as possible up against the needle stopper...
... Needle 1. Para averiguar sila aguja no esta doblada, coloque la pane plan de /a aguja hacia abajo come muestra el dibujo. 3. Introduzca otra aguja, con la parte redonda cara a usted. To check if the needle is bent, place the flat side of the needle down as possible up against the needle stopper...

Users Manual - Multi
Page 29
... presser foot to their highest positions. 2. Tire unos 15 cm (6") de cada uno de los hilos y paselos entre los salientes delprensatelas, a la derecha, hacia la parte posterior de la maquina. Tire delhilo superior hacia ustedy elhiloinferiorsaldra dela canilla en una baga large. 4. The upper thread should have caught the lower thread...
... presser foot to their highest positions. 2. Tire unos 15 cm (6") de cada uno de los hilos y paselos entre los salientes delprensatelas, a la derecha, hacia la parte posterior de la maquina. Tire delhilo superior hacia ustedy elhiloinferiorsaldra dela canilla en una baga large. 4. The upper thread should have caught the lower thread...

Users Manual - Multi
Page 68
N Needle Replacement Inspection 0 Overedging Page 6 6 37 Patchwork 36 Pattern Selection Dial 8 Performance Checklist 54 Principa Parts 1 R Relative Chart of Sewing Fabrics, Needles and Threads 25 Repacking 59 Reverse Sewing Button 13 S Scallop Stitch 34 Sewing Light Switch 5 Light Bulb Replacement 52 ...
N Needle Replacement Inspection 0 Overedging Page 6 6 37 Patchwork 36 Pattern Selection Dial 8 Performance Checklist 54 Principa Parts 1 R Relative Chart of Sewing Fabrics, Needles and Threads 25 Repacking 59 Reverse Sewing Button 13 S Scallop Stitch 34 Sewing Light Switch 5 Light Bulb Replacement 52 ...

