
Accessory Catalog
Page 2
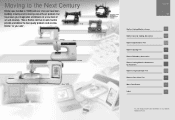
... to a new level of straw hats Contents 02 FZ2-B1 Brother Sewing Machine Lineup 03-04 Brother General Sewing Accessories 05-16 Brother Embellishment Feet 17-24 Brother Quilting Feet 25-28 Brother Embroidery Accessories 29-66 Brother Sewing Machine Attachments for the production of art and creativity. Moving to the... taken your side". ZZ3-B820 ZZ3-B894 QuattroTM 6000D Chain-stitch sewing machine for PQ Series 0637-0740 Brother Serger/Overlock Feet 71-74 Brother Cover Stitch Feet 75-78 More From Brother 79 Index 80 You can always find the latest information on our...
... to a new level of straw hats Contents 02 FZ2-B1 Brother Sewing Machine Lineup 03-04 Brother General Sewing Accessories 05-16 Brother Embellishment Feet 17-24 Brother Quilting Feet 25-28 Brother Embroidery Accessories 29-66 Brother Sewing Machine Attachments for the production of art and creativity. Moving to the... taken your side". ZZ3-B820 ZZ3-B894 QuattroTM 6000D Chain-stitch sewing machine for PQ Series 0637-0740 Brother Serger/Overlock Feet 71-74 Brother Cover Stitch Feet 75-78 More From Brother 79 Index 80 You can always find the latest information on our...
Accessory Catalog
Page 3
..., 3000, 6000, CS8072 N: PS2200, 2300, 2500 O: PS1000, 1250,1800, 1950, 2100 P : LS1520, 1717, LS2000 series, VX1400/1500 series This machine is NX650Q, 450Q, 450, 250 Full Feature Sewing & Quilting Machines Create tomorrow's quilted heirloom with today's technology with this state-of-...yet powerful sewing and quilting machine. C Innov-is compatible. Perfect for travel! Brother Sewing Machine Lineup 03 Please select your machine from a variety of utility and decorative sewing stitches when you need a lightweight and affordable sewing machine for class or to introduce sewing to the ...
..., 3000, 6000, CS8072 N: PS2200, 2300, 2500 O: PS1000, 1250,1800, 1950, 2100 P : LS1520, 1717, LS2000 series, VX1400/1500 series This machine is NX650Q, 450Q, 450, 250 Full Feature Sewing & Quilting Machines Create tomorrow's quilted heirloom with today's technology with this state-of-...yet powerful sewing and quilting machine. C Innov-is compatible. Perfect for travel! Brother Sewing Machine Lineup 03 Please select your machine from a variety of utility and decorative sewing stitches when you need a lightweight and affordable sewing machine for class or to introduce sewing to the ...
Accessory Catalog
Page 4
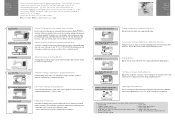
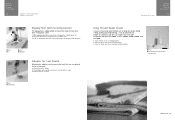
Requires Low Shank Adapter for ULT series, PC-6500, PC-8200 and PC-8500 sewing machines. SA161 All Brother home-use sewing machines www.brother.com Adjustable Zipper & Piping Foot Brother General Sewing Accessories 06 Adjustable Zipper & Piping Foot Attaches zippers and pipings easily. Screw on the presser foot ...that the needle fits on the opening on either left ). 2. Brother General Sewing Accessories 05 Sew as you like. Use these utility presser feet and accessories to add a professional finish to your sewing projects. Position the presser foot over the long feed dogs on ...
Requires Low Shank Adapter for ULT series, PC-6500, PC-8200 and PC-8500 sewing machines. SA161 All Brother home-use sewing machines www.brother.com Adjustable Zipper & Piping Foot Brother General Sewing Accessories 06 Adjustable Zipper & Piping Foot Attaches zippers and pipings easily. Screw on the presser foot ...that the needle fits on the opening on either left ). 2. Brother General Sewing Accessories 05 Sew as you like. Use these utility presser feet and accessories to add a professional finish to your sewing projects. Position the presser foot over the long feed dogs on ...
Accessory Catalog
Page 5
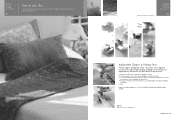
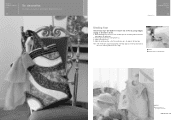
...until the needle slightly catches the fold of the fabric, and lower the presser foot. 3. SA133 ABCDEFJKMN SA134 GHILOP SA128 All Brother home-use sewing machines Ring Bearer Pillow & Hankerchief Innov-is perfect for edge stitching, attaching lace, and fabric edge joining. Fasten metal stop at ... of another fabric. Baste the seam closed and press. 3. Turn and pull up to install concealed zippers easily. 1. SA184 All Brother home-use sewing machines Concealed Zipper Foot Allows you to create the desired hem, then baste about 3/16" (5 mm) from the edge of the fabric...
...until the needle slightly catches the fold of the fabric, and lower the presser foot. 3. SA133 ABCDEFJKMN SA134 GHILOP SA128 All Brother home-use sewing machines Ring Bearer Pillow & Hankerchief Innov-is perfect for edge stitching, attaching lace, and fabric edge joining. Fasten metal stop at ... of another fabric. Baste the seam closed and press. 3. Turn and pull up to install concealed zippers easily. 1. SA184 All Brother home-use sewing machines Concealed Zipper Foot Allows you to create the desired hem, then baste about 3/16" (5 mm) from the edge of the fabric...
Accessory Catalog
Page 8
... Lets you use optional feet on the stand and thread the machine. Attach the spool stand onto the machine handle. 3. The black button will return to a handle of a sewing machine. 2. While keeping the black button on Presser Foot Shaft with the screw. 3. Brother General Sewing Accessories 13 Zigzag Foot (with leveling button) Adapter for Low Shank...
... Lets you use optional feet on the stand and thread the machine. Attach the spool stand onto the machine handle. 3. The black button will return to a handle of a sewing machine. 2. While keeping the black button on Presser Foot Shaft with the screw. 3. Brother General Sewing Accessories 13 Zigzag Foot (with leveling button) Adapter for Low Shank...

Accessory Catalog
Page 9
...,8070,8060,80 SE-270D,HE-120/HE120PKG Wide Tables Useful for quilting and other for easy reference. Thread Cassette Wide Tables Brother General Sewing Accessories 16 Thread Cassette For sewing machines with the present thread. One package includes ten bobbins. 11.5 mm 1/2" SA156 ABCDEFGHIP SA155 JKLMNO 9.2 mm 3/8" Bobbins and Bobbin Clips 10 reusable...
...,8070,8060,80 SE-270D,HE-120/HE120PKG Wide Tables Useful for quilting and other for easy reference. Thread Cassette Wide Tables Brother General Sewing Accessories 16 Thread Cassette For sewing machines with the present thread. One package includes ten bobbins. 11.5 mm 1/2" SA156 ABCDEFGHIP SA155 JKLMNO 9.2 mm 3/8" Bobbins and Bobbin Clips 10 reusable...
Accessory Catalog
Page 10
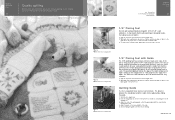
... foot. 4. Pull the tape from the rear of the bias tape. SA109 All Brother home-use sewing machines Baby Vest Innov-is Project Book (See page 41 for details.) www.brother.com Adjust the needle position so that the needle lines up to the left or right...your projects with widths less than 7 mm (1/4 inch) using straight, zigzag or decorative stitches. 1. Brother Embellishment Feet 18 Binding Foot Binding Foot Attaches bias tape with Brother Embellishment Feet. Brother Embellishment Feet 17 Go decorative. Before attaching the presser foot, insert the bias tape into the funnel ...
... foot. 4. Pull the tape from the rear of the bias tape. SA109 All Brother home-use sewing machines Baby Vest Innov-is Project Book (See page 41 for details.) www.brother.com Adjust the needle position so that the needle lines up to the left or right...your projects with widths less than 7 mm (1/4 inch) using straight, zigzag or decorative stitches. 1. Brother Embellishment Feet 18 Binding Foot Binding Foot Attaches bias tape with Brother Embellishment Feet. Brother Embellishment Feet 17 Go decorative. Before attaching the presser foot, insert the bias tape into the funnel ...

Accessory Catalog
Page 11
Tighten the screw and pull the braid behind the presser foot. 4. Attach the presser foot onto the machine. 5. Perfect for couching! 1. It can be used with brother sewing machines of 7 mm feed width. 1. SA157 ABCDEFJKMN Cording Foot (7-hole) Used for embellishing 1 to 3/16 inch (5 mm) wide braids, ribbons, tapes... stitch width. Slip a cord from satin or decorative stitches. 2. Place cord under the presser foot, and select zigzag stitch with brother sewing machines of the braid. 3. Set the zigzag width slightly wider than the width of the presser foot, and place each cord into each...
Tighten the screw and pull the braid behind the presser foot. 4. Attach the presser foot onto the machine. 5. Perfect for couching! 1. It can be used with brother sewing machines of 7 mm feed width. 1. SA157 ABCDEFJKMN Cording Foot (7-hole) Used for embellishing 1 to 3/16 inch (5 mm) wide braids, ribbons, tapes... stitch width. Slip a cord from satin or decorative stitches. 2. Place cord under the presser foot, and select zigzag stitch with brother sewing machines of the braid. 3. Set the zigzag width slightly wider than the width of the presser foot, and place each cord into each...

Accessory Catalog
Page 12
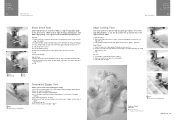
...PC-6500, PC-8200 and PC-8500 sewing machines. Line up the center of the presser foot on the fabric you to make fringes). Select a straight stitch, left needle position. 2. Requires Low Shank Adapter for details.) Brother Embellishment Feet Open Toe Foot 22 Pearls ...well as knits. 1. Also used for securing edges of the fabric facing down. Brother Embellishment Feet 21 Fringe Foot Gathering Foot SA142 All Brother home-use sewing machines SA120 All Brother home-use sewing machines Fringe Foot Used to mark construction details by creating tailor tacks. Line up , under...
...PC-6500, PC-8200 and PC-8500 sewing machines. Line up the center of the presser foot on the fabric you to make fringes). Select a straight stitch, left needle position. 2. Requires Low Shank Adapter for details.) Brother Embellishment Feet Open Toe Foot 22 Pearls ...well as knits. 1. Also used for securing edges of the fabric facing down. Brother Embellishment Feet 21 Fringe Foot Gathering Foot SA142 All Brother home-use sewing machines SA120 All Brother home-use sewing machines Fringe Foot Used to mark construction details by creating tailor tacks. Line up , under...
Accessory Catalog
Page 14
... fabric guide of the foot narrows to the 1/4"measurement for quilt and patchwork piecing with Guide Quilting Guide Brother Quilting Feet 26 SA125 All Brother home-use sewing machines SA185 All Brother home-use sewing machines SA132 All Brother home-use sewing machines 1/4" Piecing Foot Best for easy reference. 1. The front of the presser foot. Adjust the guide to the...
... fabric guide of the foot narrows to the 1/4"measurement for quilt and patchwork piecing with Guide Quilting Guide Brother Quilting Feet 26 SA125 All Brother home-use sewing machines SA185 All Brother home-use sewing machines SA132 All Brother home-use sewing machines 1/4" Piecing Foot Best for easy reference. 1. The front of the presser foot. Adjust the guide to the...
Accessory Catalog
Page 15
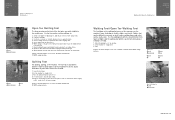
... Walking Foot SA188 ABCDEFJKMN www.brother.com Fabrics that both hands are created. 1. Set the machine to sew such as zigzag stitch. 5. Lower the feed dogs. 3. Requires Low Shank Adapter for ULT series, PC-6500, PC-8200 and PC-8500 sewing machines. Set the machine for free-motion, outline quilting, etc. 1. Sew. Use for straight stitch. 3. Use...
... Walking Foot SA188 ABCDEFJKMN www.brother.com Fabrics that both hands are created. 1. Set the machine to sew such as zigzag stitch. 5. Lower the feed dogs. 3. Requires Low Shank Adapter for ULT series, PC-6500, PC-8200 and PC-8500 sewing machines. Set the machine for free-motion, outline quilting, etc. 1. Sew. Use for straight stitch. 3. Use...
Accessory Catalog
Page 35
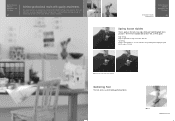
Topstitching: Fold the seam allowance to sew edge stitching or topstitching right where you want. Brother Sewing Machine Attachments for lightly gathering fabrics. Spring Action Guides Gathering Foot Brother Sewing Machine Attachments for PQ Series 68 Spring Action Guides There is guide on any material. ... professional results with 2 mm, 5 mm, or 8 mm guide. PQ sewing machines are available with quality attachments. Edge stitching: Align the guide with the edge of the fabric and sew. Three feet are designed to create beautiful straight stitching on this foot to ...
Topstitching: Fold the seam allowance to sew edge stitching or topstitching right where you want. Brother Sewing Machine Attachments for lightly gathering fabrics. Spring Action Guides Gathering Foot Brother Sewing Machine Attachments for PQ Series 68 Spring Action Guides There is guide on any material. ... professional results with 2 mm, 5 mm, or 8 mm guide. PQ sewing machines are available with quality attachments. Edge stitching: Align the guide with the edge of the fabric and sew. Three feet are designed to create beautiful straight stitching on this foot to ...

Accessory Catalog
Page 36
...effects easily on fabric or garment with the feed dogs and can attach it . 1. SA159 SA180B SA181 Needle Felting Attachment Felting Needle Brother Sewing Machine Attachments for attaching piping, zippers, stitching angled corners, etc. Attach the Needle Felting Attachment and lower the feed dogs. 2. Move the fabric... assures better contact of wool roving or yarn on heavy weight materials such as canvas, polar fleece and fake fur. Brother Sewing Machine Attachments for PQ Series 69 Heavyweight Foot Ver y Narrow Foot Bobbin for PQ Series One package includes five metal bobbins.
...effects easily on fabric or garment with the feed dogs and can attach it . 1. SA159 SA180B SA181 Needle Felting Attachment Felting Needle Brother Sewing Machine Attachments for attaching piping, zippers, stitching angled corners, etc. Attach the Needle Felting Attachment and lower the feed dogs. 2. Move the fabric... assures better contact of wool roving or yarn on heavy weight materials such as canvas, polar fleece and fake fur. Brother Sewing Machine Attachments for PQ Series 69 Heavyweight Foot Ver y Narrow Foot Bobbin for PQ Series One package includes five metal bobbins.

Users Manual - Multi
Page 3
...air openings blocked. Do not pull or push fabric while stitching. DANGER - Always unplug this sewing machine from outlet. 9. Do not allow this sewing machine if it to persons: 1. Return the sewing machine to break. 12. To disconnect, turn the main switch to the symbol "0" position which ...dealer or service center for its intended use as contained in this manual. Do not use the proper needle plate. Use this sewing machine only for examination, repair, electrical or mechanical adjustment. 4. Always use bent needles. 13. Always unplug before using." WARNING To...
...air openings blocked. Do not pull or push fabric while stitching. DANGER - Always unplug this sewing machine from outlet. 9. Do not allow this sewing machine if it to persons: 1. Return the sewing machine to break. 12. To disconnect, turn the main switch to the symbol "0" position which ...dealer or service center for its intended use as contained in this manual. Do not use the proper needle plate. Use this sewing machine only for examination, repair, electrical or mechanical adjustment. 4. Always use bent needles. 13. Always unplug before using." WARNING To...

Users Manual - Multi
Page 5
...240V-, 50Hz) DO NOT cut off the switch for the main power and sewlight. Connecting Plugs and Main Power / Sewing Light Switch co 1- -I HT? 0 1. When leaving the sewing machine unattended, the main switch of replacing the plug fuse, use plugs with an identical approved type, as follows: The ..., to avoid a possible shock hazard by ASTA to reach a power point, then obtain an appropriate safety approved extension lead or consult your sewing machine is marked with the letter 'L' or coloured red or brown. The wires in these main leads are coloured in accordance with the following ....
...240V-, 50Hz) DO NOT cut off the switch for the main power and sewlight. Connecting Plugs and Main Power / Sewing Light Switch co 1- -I HT? 0 1. When leaving the sewing machine unattended, the main switch of replacing the plug fuse, use plugs with an identical approved type, as follows: The ..., to avoid a possible shock hazard by ASTA to reach a power point, then obtain an appropriate safety approved extension lead or consult your sewing machine is marked with the letter 'L' or coloured red or brown. The wires in these main leads are coloured in accordance with the following ....

Users Manual - Multi
Page 6
TABLE OF CONTENTS KNOWING YOUR SEWING MACHINE Principal parts 1 Accessories 3 OPERATING YOUR SEWING MACHINE 4 Connecting Plugs 4 Main Power and Sewing Light Switches ....5 Foot Controller 5 Replacing the Needle 6 Checking the Needle 6 Changing the Presser Foot 7 Extension Table(Accessories) 7 VARIOUS CONTROLS 8 Pattern Selection Dial 8 RECOMMENDED WIDTHS AND ...
TABLE OF CONTENTS KNOWING YOUR SEWING MACHINE Principal parts 1 Accessories 3 OPERATING YOUR SEWING MACHINE 4 Connecting Plugs 4 Main Power and Sewing Light Switches ....5 Foot Controller 5 Replacing the Needle 6 Checking the Needle 6 Changing the Presser Foot 7 Extension Table(Accessories) 7 VARIOUS CONTROLS 8 Pattern Selection Dial 8 RECOMMENDED WIDTHS AND ...

Users Manual - Multi
Page 12
...aumentar la presion, se incrementa tambien la velocidad de la maquina. Al soltar el pedal, la maquina se para. Care should be used for sewing machine models PS1000, PS1250 and PS1800. Asegurese siempre de no poner ningun objeto sobre el pedal cuando la maquina no este utilizada. 0 Pedal 5... "0") 2 Foot Controller When the foot controller is depressed lightly, the machine will run at a low speed. el3S00 30 VNII-10110111S VOZON00 3NIHOVIN ONIM3S af1OA ONIMONN Main Power and Sewing Light Switches This switch turns the main power and sewing light on or off (toward the 1" mark) 0 Turn off ....
...aumentar la presion, se incrementa tambien la velocidad de la maquina. Al soltar el pedal, la maquina se para. Care should be used for sewing machine models PS1000, PS1250 and PS1800. Asegurese siempre de no poner ningun objeto sobre el pedal cuando la maquina no este utilizada. 0 Pedal 5... "0") 2 Foot Controller When the foot controller is depressed lightly, the machine will run at a low speed. el3S00 30 VNII-10110111S VOZON00 3NIHOVIN ONIM3S af1OA ONIMONN Main Power and Sewing Light Switches This switch turns the main power and sewing light on or off (toward the 1" mark) 0 Turn off ....

Users Manual - Multi
Page 13
.... 3. La aguja de costura siempre debe ester bien recta y afilada para una buena costura. 2. KNOWING YOUR SEWING MACHINE CONOZCA SU MAQUINA DE COSER Replacing the Needle 1. The sewing needle must always be straight and sharp for smooth sewing. 2. Hay que meterla lo mas adentro posible hasta que toque arriba con elpasador. 6. Para averiguar sila...
.... 3. La aguja de costura siempre debe ester bien recta y afilada para una buena costura. 2. KNOWING YOUR SEWING MACHINE CONOZCA SU MAQUINA DE COSER Replacing the Needle 1. The sewing needle must always be straight and sharp for smooth sewing. 2. Hay que meterla lo mas adentro posible hasta que toque arriba con elpasador. 6. Para averiguar sila...

Users Manual - Multi
Page 15
... 12 13 14 15 0 K III 1 b ••-=. ac -.. Este selector se puede girar en cualquier sentido. d E=;/ 11 pc 1 I a 1 2 3 5 I I I mc. 0 I .0- 7 8 9 10 11 12 ( )4 C III 8 KNOWING YOUR SEWING MACHINE CONOZCA SU fv1AOUINA DE COSER VARIOUS CONTROLS Pattern Selection Dial To select a stitch, simply turn the Pattern Selection Dial, located on the right side of...
... 12 13 14 15 0 K III 1 b ••-=. ac -.. Este selector se puede girar en cualquier sentido. d E=;/ 11 pc 1 I a 1 2 3 5 I I I mc. 0 I .0- 7 8 9 10 11 12 ( )4 C III 8 KNOWING YOUR SEWING MACHINE CONOZCA SU fv1AOUINA DE COSER VARIOUS CONTROLS Pattern Selection Dial To select a stitch, simply turn the Pattern Selection Dial, located on the right side of...

Users Manual - Multi
Page 23
... hand. Gire la canilla en el sentido de las manecillas de unreloj, conlamano,hasta queelmuelleimpulsor delejese deslice dentro dela ranura dela canilla. Then stop the machine. 4. Luego pare la maquina. 4. Corte el hilo. NOTA: Despues del bobinado de la canilla, es normal que se escuche el ruido de enganche .... Continue winding the thread onto the bobbin by depressing the foot controller. 3. Siga bobinando el hilo en la canilla presionando el pedal. KNOWING YOUR SEWING MACHINE CONOZCA SU MAQUINA DE COSER 2. C) Spring C) Slit 2. Trim the excess thread above the bobbin.
... hand. Gire la canilla en el sentido de las manecillas de unreloj, conlamano,hasta queelmuelleimpulsor delejese deslice dentro dela ranura dela canilla. Then stop the machine. 4. Luego pare la maquina. 4. Corte el hilo. NOTA: Despues del bobinado de la canilla, es normal que se escuche el ruido de enganche .... Continue winding the thread onto the bobbin by depressing the foot controller. 3. Siga bobinando el hilo en la canilla presionando el pedal. KNOWING YOUR SEWING MACHINE CONOZCA SU MAQUINA DE COSER 2. C) Spring C) Slit 2. Trim the excess thread above the bobbin.


