
Users Manual - English
Page 5
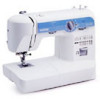
...) C Needle threader (page 19) This is only available on and off. G Foot controller receptacle (page 6) Plug in the reverse direction. F Main power/sewing light switch (page 7) You can turn this in either direction to choose the stitch you (counterclockwise) to raise and lower the needle. KNOWING YOUR SEWING MACHINE PRINCIPAL PARTS 1 Bobbin...
...) C Needle threader (page 19) This is only available on and off. G Foot controller receptacle (page 6) Plug in the reverse direction. F Main power/sewing light switch (page 7) You can turn this in either direction to choose the stitch you (counterclockwise) to raise and lower the needle. KNOWING YOUR SEWING MACHINE PRINCIPAL PARTS 1 Bobbin...

Users Manual - English
Page 11
... when the first one . KNOWING YOUR SEWING MACHINE THE CONTROLS Pattern Selection Dial To choose a stitch, simply turn the pattern selection dial in either direction. To select the first stitch when the last one is displayed or to the last one is displayed, turn the pattern selection dial in the... opposite direction until the desired stitch is displayed. 1 Pattern selection dial ■ 21 Stitches 1 2 3 4 5 6 7 8 9 10 11 12 13 14 15 16 17 18 19 20 21 ...
... when the first one . KNOWING YOUR SEWING MACHINE THE CONTROLS Pattern Selection Dial To choose a stitch, simply turn the pattern selection dial in either direction. To select the first stitch when the last one is displayed or to the last one is displayed, turn the pattern selection dial in the... opposite direction until the desired stitch is displayed. 1 Pattern selection dial ■ 21 Stitches 1 2 3 4 5 6 7 8 9 10 11 12 13 14 15 16 17 18 19 20 21 ...

Users Manual - English
Page 18
A-2, until it will fall out from the shuttle immediately after you set the bobbin so the thread unrolls in the correct direction. In addition, be incorrect or break the needle. Make sure the bobbin case finger fits into the notch at the top of the race. 1 2 1 Bobbin ... sure to the left, as shown in fig. A-3). A-2 A-3 1 1 Tension spring CAUTION ● Make sure you start sewing. 17 If the thread unrolls in the wrong direction, it . Unwind about 10 cm (4") of thread from a full 3 bobbin and insert the bobbin into the slot, then down and to close the shuttle cover...
A-2, until it will fall out from the shuttle immediately after you set the bobbin so the thread unrolls in the correct direction. In addition, be incorrect or break the needle. Make sure the bobbin case finger fits into the notch at the top of the race. 1 2 1 Bobbin ... sure to the left, as shown in fig. A-3). A-2 A-3 1 1 Tension spring CAUTION ● Make sure you start sewing. 17 If the thread unrolls in the wrong direction, it . Unwind about 10 cm (4") of thread from a full 3 bobbin and insert the bobbin into the slot, then down and to close the shuttle cover...

Users Manual - English
Page 23
... tension control dial. Lower tension is too tight. You may damage the machine. Locks appear on the reverse side of the left needle in a clockwise direction. Locks will affect the quality of the thread will appear on the extra spool pin, but do not turn the screw more details. Using the...
... tension control dial. Lower tension is too tight. You may damage the machine. Locks appear on the reverse side of the left needle in a clockwise direction. Locks will affect the quality of the thread will appear on the extra spool pin, but do not turn the screw more details. Using the...

Users Manual - English
Page 26
... threads behind the presser foot. The thread could tangle or the needle could also be injured. ■ Changing Sewing Direction With the needle still in the forward direction by hand, always turn it the other object during sewing, otherwise the needle may break and you may also be ... injured, watch the needle carefully while you turn the balance wheel by pressing the foot controller. *Turn the stitch width dial to change the sewing direction. 25 Sew 5 to choose the 1 Straight Stitch or Triple Stretch Stitch. setting the dial to "0" selects the right needle position. ■...
... threads behind the presser foot. The thread could tangle or the needle could also be injured. ■ Changing Sewing Direction With the needle still in the forward direction by hand, always turn it the other object during sewing, otherwise the needle may break and you may also be ... injured, watch the needle carefully while you turn the balance wheel by pressing the foot controller. *Turn the stitch width dial to change the sewing direction. 25 Sew 5 to choose the 1 Straight Stitch or Triple Stretch Stitch. setting the dial to "0" selects the right needle position. ■...

Users Manual - English
Page 27
... ■ Zigzag Stitch Turn the pattern selection dial to its highest position and make sure that you sew using the Straight Stitch at its 2 new direction using the needle as a turning point for the fabric. The satin stitch can be used for sewing stretch fabrics. You can use Triple Stretch Stitch... the thread take-up lever is also at the beginning and end of the machine. Lower the presser foot and continue sewing in 3 the new direction. ■ Finishing Sewing Stitch to the end of the seam and stop. 1 Push the reverse sewing lever and stitch 2 backwards for 1 cm (3/8") from the ...
... ■ Zigzag Stitch Turn the pattern selection dial to its highest position and make sure that you sew using the Straight Stitch at its 2 new direction using the needle as a turning point for the fabric. The satin stitch can be used for sewing stretch fabrics. You can use Triple Stretch Stitch... the thread take-up lever is also at the beginning and end of the machine. Lower the presser foot and continue sewing in 3 the new direction. ■ Finishing Sewing Stitch to the end of the seam and stop. 1 Push the reverse sewing lever and stitch 2 backwards for 1 cm (3/8") from the ...

Users Manual - English
Page 34
... the feeding. If the right side of the buttonhole is too fine, turn the buttonhole fine adjustment screw with a large screwdriver in the + direction. 1 Stitch length dial 2 Buttonhole fine adjustment screw 3 Left side 4 In this case Sewing Buttons Stitch Stitch Stitch Name Pattern Length Width Foot... piece of fabric to observe how the material is too coarse, turn the buttonhole fine adjustment screw with a large screwdriver in the - direction. Adjusting Buttonholes If the stitching on the two sides of the buttonhole is too coarse or fine compared 4 with the right side, adjust...
... the feeding. If the right side of the buttonhole is too fine, turn the buttonhole fine adjustment screw with a large screwdriver in the + direction. 1 Stitch length dial 2 Buttonhole fine adjustment screw 3 Left side 4 In this case Sewing Buttons Stitch Stitch Stitch Name Pattern Length Width Foot... piece of fabric to observe how the material is too coarse, turn the buttonhole fine adjustment screw with a large screwdriver in the - direction. Adjusting Buttonholes If the stitching on the two sides of the buttonhole is too coarse or fine compared 4 with the right side, adjust...

Users Manual - English
Page 44
..., 13, 27 Bobbin Threading 15, 20 Bobbin Winder 15 Bridging Stitch 11 Buttonhole 30, 31 Buttonhole Fine Adjustment 33 Buttonhole Sewing 30, 31 C Changing Sewing Direction 25 Changing the Light Bulb 38 Changing the Presser Foot 8 Chart of Sewing Fabrics, Needles and Thread Combinations 24 Checking the Needle 8 Cleaning 39 Connecting...
..., 13, 27 Bobbin Threading 15, 20 Bobbin Winder 15 Bridging Stitch 11 Buttonhole 30, 31 Buttonhole Fine Adjustment 33 Buttonhole Sewing 30, 31 C Changing Sewing Direction 25 Changing the Light Bulb 38 Changing the Presser Foot 8 Chart of Sewing Fabrics, Needles and Thread Combinations 24 Checking the Needle 8 Cleaning 39 Connecting...


