
Owner's Manual
Page 3
... craftsmanship with reduced size and low power consumption. The following diagram is a small, light and rugged red dot sight, designed for centering, due to the parallax free design in a sight with which have made Bushnell legendary. ENGLISH The Bushnell TRS-25 is a guide to the description and location of the parts mentioned throughout this scope was built ensures...
... craftsmanship with reduced size and low power consumption. The following diagram is a small, light and rugged red dot sight, designed for centering, due to the parallax free design in a sight with which have made Bushnell legendary. ENGLISH The Bushnell TRS-25 is a guide to the description and location of the parts mentioned throughout this scope was built ensures...
Owner's Manual
Page 4
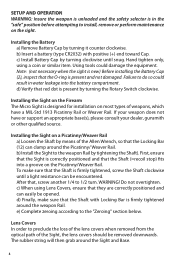
... positive (+) end toward Cap. d) Finally, make sure that the Shaft is correctly positioned and that red dot is firmly tightened around the weapon Rail. The rubber string will then grab around the Picatinny/ Weaver Rail. b) Install the Sight to preclude the loss of the lens covers when removed from the optical path of...
... positive (+) end toward Cap. d) Finally, make sure that the Shaft is correctly positioned and that red dot is firmly tightened around the weapon Rail. The rubber string will then grab around the Picatinny/ Weaver Rail. b) Install the Sight to preclude the loss of the lens covers when removed from the optical path of...

Owner's Manual
Page 5
...the two recesses on the Adjustment Screw and turn windage adjustment screw clockwise - f ) After initial firing, ensure that the sight is delivered with the red dot in the two holes on the Adjustment Screw. d) Sea spray, water, mud and snow: Ensure that the weapon rail...Adjustment Screw corresponds to OFF position (counter clockwise). e) Confirm zeroing by firing at least three shots at normal temperatures. Zeroing The TRS-25 is secure. The Elevation Adjustment Screw is located on zeroing target to turn windage adjustment screw counter clockwise - g) Turn Rotary ...
...the two recesses on the Adjustment Screw and turn windage adjustment screw clockwise - f ) After initial firing, ensure that the sight is delivered with the red dot in the two holes on the Adjustment Screw. d) Sea spray, water, mud and snow: Ensure that the weapon rail...Adjustment Screw corresponds to OFF position (counter clockwise). e) Confirm zeroing by firing at least three shots at normal temperatures. Zeroing The TRS-25 is secure. The Elevation Adjustment Screw is located on zeroing target to turn windage adjustment screw counter clockwise - g) Turn Rotary ...

Owner's Manual
Page 6
Clean lenses with lens paper/ cloth. TROUBLE SHOOTING Problem: Red Dot Does Not Appear Possible Causes/Solutions: • Discharged battery: Replace battery. • Battery installed incorrectly: Remove and reinstall battery with a soft piece of mount ... screw is at its limit: Check alignment of cloth. b) Under severe weather conditions please refer to the CAUTION statement above. 6 c) Keep lens covers closed when sight is not being used. d) Warehouse storage: Remove battery and allow lens surfaces to water, sea spray, mud or snow. f ) High altitudes: No special procedures...
Clean lenses with lens paper/ cloth. TROUBLE SHOOTING Problem: Red Dot Does Not Appear Possible Causes/Solutions: • Discharged battery: Replace battery. • Battery installed incorrectly: Remove and reinstall battery with a soft piece of mount ... screw is at its limit: Check alignment of cloth. b) Under severe weather conditions please refer to the CAUTION statement above. 6 c) Keep lens covers closed when sight is not being used. d) Warehouse storage: Remove battery and allow lens surfaces to water, sea spray, mud or snow. f ) High altitudes: No special procedures...
