

Instruction Manual
Page 2
The camera is faulty and the images cannot be recorded or downloaded to a computer, Canon cannot be aware that certain public performances, exhibitions, etc., may prohibit the use of your recorded images of people and certain subjects for ...anything but private enjoyment. To avoid botched pictures and accidents, first read the "Safety Warnings" (p.259, 260) and "Handling Precautions" (p.14, 15). If the camera or memory...
The camera is faulty and the images cannot be recorded or downloaded to a computer, Canon cannot be aware that certain public performances, exhibitions, etc., may prohibit the use of your recorded images of people and certain subjects for ...anything but private enjoyment. To avoid botched pictures and accidents, first read the "Safety Warnings" (p.259, 260) and "Handling Precautions" (p.14, 15). If the camera or memory...

Instruction Manual
Page 3
... LP-E10 (with protective cover) Battery Charger LC-E10/LC-E10E* Wide Strap EW-200D Interface Cable Camera Instruction Manual (CD-ROM) EOS DIGITAL Solution Disk (Software CD-ROM) Software Instruction Manual (CD-ROM) Camera Basic Instruction Manual * Battery Charger LC-E10 or LC-E10E is provided. (The LC-E10E comes with... any of the above items. Software Instruction Manual The software Instruction Manuals are included in the Software Instruction Manual. 3 If anything is missing, contact your camera. Be careful not to look up manuals in the CD-ROM as PDF files.
... LP-E10 (with protective cover) Battery Charger LC-E10/LC-E10E* Wide Strap EW-200D Interface Cable Camera Instruction Manual (CD-ROM) EOS DIGITAL Solution Disk (Software CD-ROM) Software Instruction Manual (CD-ROM) Camera Basic Instruction Manual * Battery Charger LC-E10 or LC-E10E is provided. (The LC-E10E comes with... any of the above items. Software Instruction Manual The software Instruction Manuals are included in the Software Instruction Manual. 3 If anything is missing, contact your camera. Be careful not to look up manuals in the CD-ROM as PDF files.

Instruction Manual
Page 4
... the setting. respectively after you let go of the button. * In this manual, the icons and markings indicating the camera's buttons, dials, and settings correspond to the icons and markings on the camera and on the upper right of the page, it indicates that the function is assumed that all the menu... All operations explained in this manual assume that the power switch has already been set to the default. For explanatory purposes, the instructions show the camera attached with an EF-S18-55mm f/3.5-5.6 IS II lens. 4
... the setting. respectively after you let go of the button. * In this manual, the icons and markings indicating the camera's buttons, dials, and settings correspond to the icons and markings on the camera and on the upper right of the page, it indicates that the function is assumed that all the menu... All operations explained in this manual assume that the power switch has already been set to the default. For explanatory purposes, the instructions show the camera attached with an EF-S18-55mm f/3.5-5.6 IS II lens. 4

Instruction Manual
Page 5
Introduction 2 1 Getting Started 25 2 Basic Shooting and Image Playback 49 3 Creative Shooting 71 4 Advanced Shooting 91 5 Shooting with the LCD Monitor (Live View Shooting) 121 6 Shooting Movies 139 7 Handy Features 153 8 Image Playback 175 9 Printing Images 201 10 Customizing the Camera 215 11 Reference 225 12 Software Start Guide 269 13 Quick Reference Guide and Instruction Manual Index 273 5 Chapters For first-time DSLR users, Chapters 1 and 2 explain the camera's basic operations and shooting procedures.
Introduction 2 1 Getting Started 25 2 Basic Shooting and Image Playback 49 3 Creative Shooting 71 4 Advanced Shooting 91 5 Shooting with the LCD Monitor (Live View Shooting) 121 6 Shooting Movies 139 7 Handy Features 153 8 Image Playback 175 9 Printing Images 201 10 Customizing the Camera 215 11 Reference 225 12 Software Start Guide 269 13 Quick Reference Guide and Instruction Manual Index 273 5 Chapters For first-time DSLR users, Chapters 1 and 2 explain the camera's basic operations and shooting procedures.
Instruction Manual
Page 7
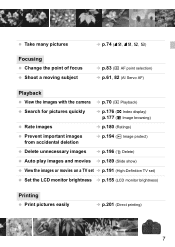
... focus Shoot a moving subject Î p.74 (7a, 8a, b, c) Î p.83 (S AF point selection) Î p.61, 82 (AI Servo AF) Playback View the images with the camera Î p.70 (x Playback) Search for pictures quickly Î p.176 (H Index display) p.177 (I Image browsing) Rate images Î p.180 (Ratings) Prevent important images from accidental deletion...
... focus Shoot a moving subject Î p.74 (7a, 8a, b, c) Î p.83 (S AF point selection) Î p.61, 82 (AI Servo AF) Playback View the images with the camera Î p.70 (x Playback) Search for pictures quickly Î p.176 (H Index display) p.177 (I Image browsing) Rate images Î p.180 (Ratings) Prevent important images from accidental deletion...

Instruction Manual
Page 12
... Monitor Brightness 155 Creating and Selecting a Folder 156 File Numbering Methods 158 Setting Copyright Information 160 Auto Rotation of Vertical Images 162 B Checking Camera Settings 163 Reverting the Camera to the Default Settings 164 Turning the LCD monitor Off/On 166 Changing the Shooting Settings Screen Color 166 Setting the Flash 167...
... Monitor Brightness 155 Creating and Selecting a Folder 156 File Numbering Methods 158 Setting Copyright Information 160 Auto Rotation of Vertical Images 162 B Checking Camera Settings 163 Reverting the Camera to the Default Settings 164 Turning the LCD monitor Off/On 166 Changing the Shooting Settings Screen Color 166 Setting the Flash 167...

Instruction Manual
Page 13
... 201 Preparing to Print 202 wPrinting...204 Trimming the Image 209 W Digital Print Order Format (DPOF 211 W Direct Printing with DPOF 214 10 Customizing the Camera 215 Setting Custom Functions 216 Custom Function Settings 218 Registering My Menu 224 11 Reference 225 External Speedlites 226 Using a Household Power Outlet 228 F Using...
... 201 Preparing to Print 202 wPrinting...204 Trimming the Image 209 W Digital Print Order Format (DPOF 211 W Direct Printing with DPOF 214 10 Customizing the Camera 215 Setting Custom Functions 216 Custom Function Settings 218 Registering My Menu 224 11 Reference 225 External Speedlites 226 Using a Household Power Outlet 228 F Using...

Instruction Manual
Page 14
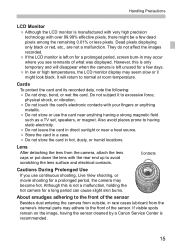
... be used for an extended period, test all its functions before using the camera. If the camera has not been used underwater. Do not leave the camera in from the cold into water, promptly consult your nearest Canon Service Center. Use a blower to the warmer temperature before using it is... or if there is still working properly. 14 If you have the camera checked by your fingers. Wipe off any water droplets with your Canon dealer or check the camera yourself and make sure it . Never leave the camera near anything having a strong magnetic field such as a darkroom or chemical...
... be used for an extended period, test all its functions before using the camera. If the camera has not been used underwater. Do not leave the camera in from the cold into water, promptly consult your nearest Canon Service Center. Use a blower to the warmer temperature before using it is... or if there is still working properly. 14 If you have the camera checked by your fingers. Wipe off any water droplets with your Canon dealer or check the camera yourself and make sure it . Never leave the camera near anything having a strong magnetic field such as a darkroom or chemical...
Instruction Manual
Page 15
... is manufactured with very high precision technology with your fingers or anything having the sensor cleaned by a Canon Service Center is recommended. 15 Do not leave the card in rare cases lubricant from the camera, attach the lens caps or put down the lens with the rear end up to having static... electricity. Lens After detaching the lens from the camera's internal parts may occur where you use the card near a heat source. Cards To protect the card and its recorded data, note the following: Do ...
... is manufactured with very high precision technology with your fingers or anything having the sensor cleaned by a Canon Service Center is recommended. 15 Do not leave the card in rare cases lubricant from the camera, attach the lens caps or put down the lens with the rear end up to having static... electricity. Lens After detaching the lens from the camera's internal parts may occur where you use the card near a heat source. Cards To protect the card and its recorded data, note the following: Do ...

Instruction Manual
Page 16
Quick Start Guide 1 Insert the battery. (p.28) To charge the battery, see page 26. 2 Insert the card. (p.28) With the card's label facing toward the camera back, insert it into the slot. 3 White index Red index Attach the lens. (p.35) Align the lens' white or red index with the camera's index in the matching color. 4 Set the lens focus mode switch to . (p.35) 5 16 Set the power switch to . (p.31) When the LCD monitor displays the Date/Time setting screen, see page 33.
Quick Start Guide 1 Insert the battery. (p.28) To charge the battery, see page 26. 2 Insert the card. (p.28) With the card's label facing toward the camera back, insert it into the slot. 3 White index Red index Attach the lens. (p.35) Align the lens' white or red index with the camera's index in the matching color. 4 Set the lens focus mode switch to . (p.35) 5 16 Set the power switch to . (p.31) When the LCD monitor displays the Date/Time setting screen, see page 33.

Instruction Manual
Page 17
...7 Focus the subject. (p.39) Look through the viewfinder and aim the viewfinder center over the subject. Press the shutter button halfway, and the camera will be displayed for approx. 2 sec. To display the image again, press the button (p.70). If necessary, the built-in flash will ...pop-up automatically. 8 Take the picture. (p.39) Press the shutter button completely to (Full Auto). (p.50) All the necessary camera settings will focus the subject. on the LCD monitor. To view the images captured so far, see "Erasing Images" (p.196). 17 To shoot ...
...7 Focus the subject. (p.39) Look through the viewfinder and aim the viewfinder center over the subject. Press the shutter button halfway, and the camera will be displayed for approx. 2 sec. To display the image again, press the button (p.70). If necessary, the built-in flash will ...pop-up automatically. 8 Take the picture. (p.39) Press the shutter button completely to (Full Auto). (p.50) All the necessary camera settings will focus the subject. on the LCD monitor. To view the images captured so far, see "Erasing Images" (p.196). 17 To shoot ...

Instruction Manual
Page 22
The camera sets everything to suit the subject. 1: Full Auto (p.50) 7: Flash Off (p.54) C: Creative Auto (p.55) Image Zone 2 : Portrait (p.58) 3: Landscape (p.59) 4 : Close-up (p.60) 5: Sports (p....
The camera sets everything to suit the subject. 1: Full Auto (p.50) 7: Flash Off (p.54) C: Creative Auto (p.55) Image Zone 2 : Portrait (p.58) 3: Landscape (p.59) 4 : Close-up (p.60) 5: Sports (p....
Instruction Manual
Page 25
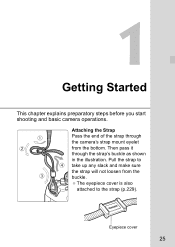
Then pass it through the camera's strap mount eyelet from the buckle. Getting Started This chapter explains preparatory steps before you start shooting and basic camera operations. The eyepiece cover is also attached to take up any slack and make sure the strap will not loosen from the bottom. Pull the strap to the strap (p.229). Attaching the Strap Pass the end of the strap through the strap's buckle as shown in the illustration. Eyepiece cover 25
Then pass it through the camera's strap mount eyelet from the buckle. Getting Started This chapter explains preparatory steps before you start shooting and basic camera operations. The eyepiece cover is also attached to take up any slack and make sure the strap will not loosen from the bottom. Pull the strap to the strap (p.229). Attaching the Strap Pass the end of the strap through the strap's buckle as shown in the illustration. Eyepiece cover 25

Instruction Manual
Page 27
... during storage, a charged battery will gradually drain and lose its service life. Store the battery with a 100 V AC to be used in the camera for a prolonged period, a small amount of its power. After disconnecting the charger's power plug, do not touch the prongs for the respective country ... charger is to 240 V AC 50/ 60 Hz power source. Charging the Battery Tips for which Canon cannot be held liable. 27 Recharge the battery on the day before using the camera, remove the battery. The Battery Pack LP-E10 is fully charged can lower the battery's performance. ...
... during storage, a charged battery will gradually drain and lose its service life. Store the battery with a 100 V AC to be used in the camera for a prolonged period, a small amount of its power. After disconnecting the charger's power plug, do not touch the prongs for the respective country ... charger is to 240 V AC 50/ 60 Hz power source. Charging the Battery Tips for which Canon cannot be held liable. 27 Recharge the battery on the day before using the camera, remove the battery. The Battery Pack LP-E10 is fully charged can lower the battery's performance. ...

Instruction Manual
Page 28
...will be an SD, SDHC, or SDXC memory card. Installing and Removing the Battery and Card Load a fully-charged Battery Pack LP-E10 into the camera. Installing the Battery/Card 1 Open the cover. Slide the lever as shown by the arrows and open the cover. Make sure the card's write-...protect switch is set the power switch to enable writing/erasing. Insert the card straight in the illustration, face the card's label side toward the camera back. Insert the battery until it locks in place. 3 Insert the card. As shown in all the way. 4 Close the cover. The captured images...
...will be an SD, SDHC, or SDXC memory card. Installing and Removing the Battery and Card Load a fully-charged Battery Pack LP-E10 into the camera. Installing the Battery/Card 1 Open the cover. Slide the lever as shown by the arrows and open the cover. Make sure the card's write-...protect switch is set the power switch to enable writing/erasing. Insert the card straight in the illustration, face the card's label side toward the camera back. Insert the battery until it locks in place. 3 Insert the card. As shown in all the way. 4 Close the cover. The captured images...

Instruction Manual
Page 30
... computer, transfer all the images on the LCD monitor, remove and reinsert the card. Otherwise, the image data may be destroyed or the card or camera may then return to or read by the card, being erased, or data is being written to normal. 30 If the error persists, use a... different card. The card may be damaged. • Removing the card. • Removing the battery. • Shaking or banging the camera around. Installing and Removing the Battery and Card When the access lamp is lit or blinking, it indicates that images are being transferred. Do not...
... computer, transfer all the images on the LCD monitor, remove and reinsert the card. Otherwise, the image data may be destroyed or the card or camera may then return to or read by the card, being erased, or data is being written to normal. 30 If the error persists, use a... different card. The card may be damaged. • Removing the card. • Removing the battery. • Shaking or banging the camera around. Installing and Removing the Battery and Card When the access lamp is lit or blinking, it indicates that images are being transferred. Do not...

Instruction Manual
Page 31
Set to this position when not using the camera. 3 About Auto Power Off To save battery power, the camera turns off automatically after the card finishes recording the image. 31 You can change the auto power-off time with [5 Auto power off] (p.155). If ...you turn on the power switch, see page 33 to the card, [Recording ...] will be displayed and the power will turn on the camera again, just press the shutter button halfway (p.39). To turn off after about 30 seconds of non-operation. Turning on the Power If the date...
Set to this position when not using the camera. 3 About Auto Power Off To save battery power, the camera turns off automatically after the card finishes recording the image. 31 You can change the auto power-off time with [5 Auto power off] (p.155). If ...you turn on the power switch, see page 33 to the card, [Recording ...] will be displayed and the power will turn on the camera again, just press the shutter button halfway (p.39). To turn off after about 30 seconds of non-operation. Turning on the Power If the date...

Instruction Manual
Page 32
... possible shots may be recharged. Depending on a fully-charged Battery Pack LP-E10, no Live View shooting, and CIPA (Camera & Imaging Products Association) testing standards. x : Battery level is powered by the camera's battery. The lens operation is less than half full. Battery Life Temperature No Flash 50% Flash Use At 23°...
... possible shots may be recharged. Depending on a fully-charged Battery Pack LP-E10, no Live View shooting, and CIPA (Camera & Imaging Products Association) testing standards. x : Battery level is powered by the camera's battery. The lens operation is less than half full. Battery Life Temperature No Flash 50% Flash Use At 23°...

Instruction Manual
Page 33
... . (Returns to select [OK], then press . Follow steps 3 and 4 to select the [6] tab. Press so is displayed. The date/time set . If you store the camera without the battery or if the camera's battery becomes exhausted, the date/time might be set will appear.
... . (Returns to select [OK], then press . Follow steps 3 and 4 to select the [6] tab. Press so is displayed. The date/time set . If you store the camera without the battery or if the camera's battery becomes exhausted, the date/time might be set will appear.

Instruction Manual
Page 35
... lens' red or white index with minimal dust. If it snaps in a place with the camera's index matching the same color. When storing the camera without a lens attached, be sure to attach the body cap to the camera. Attaching and Detaching a Lens Attaching a Lens 1 Remove the caps. White index 2 Attach the lens. Remove...
... lens' red or white index with minimal dust. If it snaps in a place with the camera's index matching the same color. When storing the camera without a lens attached, be sure to attach the body cap to the camera. Attaching and Detaching a Lens Attaching a Lens 1 Remove the caps. White index 2 Attach the lens. Remove...


