Owners Manual
Page 3
...13 Operating Range 13 Remote Control Battery Installation 14 Installation 15 Positioning the Projector 15 Adjustable Feet 15 Connecting the AC Power Cord 16 Connecting to a Computer 17 Connecting to Video Equipment 18 Connecting to Component Video Equipment 19 ...Cover 48 Cleaning the Projection Lens 49 Cleaning the Projector Cabinet 49 Lamp Replacement 50 Lamp Replace Counter 51 Appendix 52 Troubleshooting 52 Indicators and Projector Condition 54 Menu Tree 55 Compatible Computer Specifications 57 Technical Specifications 58 Configurations of Terminals 60...
...13 Operating Range 13 Remote Control Battery Installation 14 Installation 15 Positioning the Projector 15 Adjustable Feet 15 Connecting the AC Power Cord 16 Connecting to a Computer 17 Connecting to Video Equipment 18 Connecting to Component Video Equipment 19 ...Cover 48 Cleaning the Projection Lens 49 Cleaning the Projector Cabinet 49 Lamp Replacement 50 Lamp Replace Counter 51 Appendix 52 Troubleshooting 52 Indicators and Projector Condition 54 Menu Tree 55 Compatible Computer Specifications 57 Technical Specifications 58 Configurations of Terminals 60...

Owners Manual
Page 4
... WITH THIS UNIT. Do not stare directly into the lens as defined in the Standard for an extended time, unplug the projector from the power outlet. Heat build- READ AND KEEP THIS OWNER'S MANUAL FOR LATER USE. THIS SYMBOL INDICATES THAT DANGEROUS ... PARTS INSIDE EXCEPT LAMP REPLACEMENT. This projector provides many convenient features and functions. To the Owner Before operating this projector, read this manual again, check operations and cable connections and try the solutions in the "Troubleshooting" section in a computer room as possible. Safety Precaution WARNING ...
... WITH THIS UNIT. Do not stare directly into the lens as defined in the Standard for an extended time, unplug the projector from the power outlet. Heat build- READ AND KEEP THIS OWNER'S MANUAL FOR LATER USE. THIS SYMBOL INDICATES THAT DANGEROUS ... PARTS INSIDE EXCEPT LAMP REPLACEMENT. This projector provides many convenient features and functions. To the Owner Before operating this projector, read this manual again, check operations and cable connections and try the solutions in the "Troubleshooting" section in a computer room as possible. Safety Precaution WARNING ...
Owners Manual
Page 27
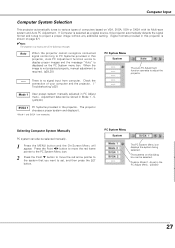
... not projected properly, manual adjustment is displayed on VGA, SVGA, XGA or SXGA with its Multi-scan system and Auto PC Adjustment. Computer Input Computer System Selection This projector automatically tunes to various types of your computer and the projector. ( " Troubleshooting" p52 ) Mode 1 User preset system manually adjusted in PC Adjust menu. Check the connection of...
... not projected properly, manual adjustment is displayed on VGA, SVGA, XGA or SXGA with its Multi-scan system and Auto PC Adjustment. Computer Input Computer System Selection This projector automatically tunes to various types of your computer and the projector. ( " Troubleshooting" p52 ) Mode 1 User preset system manually adjusted in PC Adjust menu. Check the connection of...
Owners Manual
Page 52
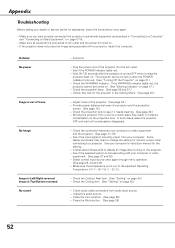
.... - See if the selected system is correctly output from audio input source. - Appendix Troubleshooting Before calling your dealer or service center for the setting. - Check the WARNING indicator. Provide proper distance between your computer or video equipment and the projector. (See page 17-19) - Check the projection lens to Video Equipment" on page...
.... - See if the selected system is correctly output from audio input source. - Appendix Troubleshooting Before calling your dealer or service center for the setting. - Check the WARNING indicator. Provide proper distance between your computer or video equipment and the projector. (See page 17-19) - Check the projection lens to Video Equipment" on page...