
Owners Manual
Page 7
...; Viewing User Documentation PDF Files) . . 134 ❚ User Registration 134 Using an Eye-Fi Wireless SD Memory Card to Transfer Images . (Eye-Fi) . 134 Files and Folders 136 Memory Card Data 137 ❚❙ Other Settings (Set Up) 139 REC Mode Control Panel Display R Panel) . 139 Adjusting Monitor Screen Brightness Screen) . 140 Turning off Eye-Fi Card Communication Eye-Fi) . 140 Configuring Camera Sound Settings Sounds) . 141 Configuring a Startup Image Startup) . 141 Specifying the File Name Serial Number Generation Rule . . . . . (File No.) . 142 Configuring World Time...
...; Viewing User Documentation PDF Files) . . 134 ❚ User Registration 134 Using an Eye-Fi Wireless SD Memory Card to Transfer Images . (Eye-Fi) . 134 Files and Folders 136 Memory Card Data 137 ❚❙ Other Settings (Set Up) 139 REC Mode Control Panel Display R Panel) . 139 Adjusting Monitor Screen Brightness Screen) . 140 Turning off Eye-Fi Card Communication Eye-Fi) . 140 Configuring Camera Sound Settings Sounds) . 141 Configuring a Startup Image Startup) . 141 Specifying the File Name Serial Number Generation Rule . . . . . (File No.) . 142 Configuring World Time...

Owners Manual
Page 17
... YY/MM/DD * 09/12/19 DD/MM/YY * 19/12/09 MM/DD/YY * 12/19/09 4. Configuring Basic Settings the First Time You Turn On the Camera The first time you load a battery into the camera, a screen appears for configuring the display language, date, and time settings. Set the date and the time. After setting the date and time, use [8] and [2] to change and then use [4] and [6] to be recorded with images. 1.
... YY/MM/DD * 09/12/19 DD/MM/YY * 19/12/09 MM/DD/YY * 12/19/09 4. Configuring Basic Settings the First Time You Turn On the Camera The first time you load a battery into the camera, a screen appears for configuring the display language, date, and time settings. Set the date and the time. After setting the date and time, use [8] and [2] to change and then use [4] and [6] to be recorded with images. 1.

Owners Manual
Page 27
... press [SET]. 3. Use [8] and [2] to select "Delete" and then press [SET]. • To delete other files, repeat steps 2 and 3. • To exit the delete operation, press [MENU]. IMPORTANT! • Remember that a file (image) delete operation cannot be undone. • Deleting an audio snapshot (page 108) deletes both the snapshot and the audio file. This will cause the message "There are no longer need to appear. 27 Quick Start Basics Deleting Images If memory becomes...
... press [SET]. 3. Use [8] and [2] to select "Delete" and then press [SET]. • To delete other files, repeat steps 2 and 3. • To exit the delete operation, press [MENU]. IMPORTANT! • Remember that a file (image) delete operation cannot be undone. • Deleting an audio snapshot (page 108) deletes both the snapshot and the audio file. This will cause the message "There are no longer need to appear. 27 Quick Start Basics Deleting Images If memory becomes...

Owners Manual
Page 40
Save Selected: Saves selected images. Shutter button Press all the images. Buttons Used for Image Selection [4] [6] During playback, changes the playback direction and playback speed. Save All : Saves all the way down to select an image for saving. [MENU] Saves the selected images and exits the image select operation. 3Use [8] and [2] to select the save method you want and then press [SET]. Save All Saves all of the images you want to save, press [MENU]. After continuous shutter shooting is selected. 40 Snapshot Tutorial While playback is...
Save Selected: Saves selected images. Shutter button Press all the images. Buttons Used for Image Selection [4] [6] During playback, changes the playback direction and playback speed. Save All : Saves all the way down to select an image for saving. [MENU] Saves the selected images and exits the image select operation. 3Use [8] and [2] to select the save method you want and then press [SET]. Save All Saves all of the images you want to save, press [MENU]. After continuous shutter shooting is selected. 40 Snapshot Tutorial While playback is...

Owners Manual
Page 53
... Recording file. 2. About audio data • Audio files can use [4] and [6] to display the Voice Recording file you want to turn off [8] (DISP) Playback end [MENU] 53 Recording Movie Images and Audio In the PLAY mode, use [8] (DISP) during audio recording to toggle the monitor screen on and off. • When monitor screen contents are turned off, selecting the "Voice Recording" scene will cause the monitor screen to play back an audio recording 1. Voice Recording Playback Controls Fast...
... Recording file. 2. About audio data • Audio files can use [4] and [6] to display the Voice Recording file you want to turn off [8] (DISP) Playback end [MENU] 53 Recording Movie Images and Audio In the PLAY mode, use [8] (DISP) during audio recording to toggle the monitor screen on and off. • When monitor screen contents are turned off, selecting the "Voice Recording" scene will cause the monitor screen to play back an audio recording 1. Voice Recording Playback Controls Fast...

Owners Manual
Page 69
... the camera, and the flash charge condition. Using the Self-timer (Self-timer) Procedure [r] (REC) * [MENU] * REC Tab * Self-timer With the Self-timer, pressing the shutter button starts a timer. The shutter is released and the image is shot after shooting the previous image. Front lamp NOTE • The Self-timer cannot be used together with the following features. Off Turns off the Self-timer. • The front lamp flashes while the Self-timer countdown is ready after a fixed amount of time. „...
... the camera, and the flash charge condition. Using the Self-timer (Self-timer) Procedure [r] (REC) * [MENU] * REC Tab * Self-timer With the Self-timer, pressing the shutter button starts a timer. The shutter is released and the image is shot after shooting the previous image. Front lamp NOTE • The Self-timer cannot be used together with the following features. Off Turns off the Self-timer. • The front lamp flashes while the Self-timer countdown is ready after a fixed amount of time. „...

Owners Manual
Page 77
... performed using a high-speed focus operation that is turned on Quick Shutter • Some images may be shot without waiting for Auto Focus. Setting [4]/[6] key operation Metering Changes the Metering Mode (page 83) EV Shift Adjusts the EV shift value (page 44) White Balance Changes the white balance setting (page 82) ISO Changes the ISO Sensitivity setting (page 38) Self-timer Sets the self-timer time (page 69) Off Cancels [4] and [6] key assignments Shooting with Quick Shutter (Quick Shutter) Procedure [r] (REC) * [MENU] * REC Tab * Quick Shutter When Quick Shutter is...
... performed using a high-speed focus operation that is turned on Quick Shutter • Some images may be shot without waiting for Auto Focus. Setting [4]/[6] key operation Metering Changes the Metering Mode (page 83) EV Shift Adjusts the EV shift value (page 44) White Balance Changes the white balance setting (page 82) ISO Changes the ISO Sensitivity setting (page 38) Self-timer Sets the self-timer time (page 69) Off Cancels [4] and [6] key assignments Shooting with Quick Shutter (Quick Shutter) Procedure [r] (REC) * [MENU] * REC Tab * Quick Shutter When Quick Shutter is...

Owners Manual
Page 94
... to the menu screen. • Adjust audio volume by pressing [2] and then press [8] or [2] during playback. • All button operations are played back in name sequence. 94 Other Playback Functions (PLAY) When playing a slideshow for the "Images" setting - Pressing [MENU] instead of which "» Only" or "One Image" is selected for which effect pattern you select, the BGM files you want. Supported File Types: • IMA-ADPCM format WAV files •...
... to the menu screen. • Adjust audio volume by pressing [2] and then press [8] or [2] during playback. • All button operations are played back in name sequence. 94 Other Playback Functions (PLAY) When playing a slideshow for the "Images" setting - Pressing [MENU] instead of which "» Only" or "One Image" is selected for which effect pattern you select, the BGM files you want. Supported File Types: • IMA-ADPCM format WAV files •...

Owners Manual
Page 105
... press [SET]. Use [8] and [2] to apply them. When the displayed image is displayed on the image menu screen and the calendar screen. 105 Other Playback Functions (PLAY) NOTE • The date and time stamped into an image using the Time Stamp (page 143) cannot be rotated. • The original (unrotated) version of the image will rotate the displayed image 90 degrees left. 2. Editing the Date and Time of an Image (Date/Time) Procedure [p] (PLAY) * Snapshot Screen * [MENU] * PLAY Tab * Date/Time [8] [2] Changes the setting at...
... press [SET]. Use [8] and [2] to apply them. When the displayed image is displayed on the image menu screen and the calendar screen. 105 Other Playback Functions (PLAY) NOTE • The date and time stamped into an image using the Time Stamp (page 143) cannot be rotated. • The original (unrotated) version of the image will rotate the displayed image 90 degrees left. 2. Editing the Date and Time of an Image (Date/Time) Procedure [p] (PLAY) * Snapshot Screen * [MENU] * PLAY Tab * Date/Time [8] [2] Changes the setting at...

Owners Manual
Page 109
... camera memory. NOTE • You can be used to copy a single file. Copying Files (Copy) Procedure [p] (PLAY) * Snapshot Screen * [MENU] * PLAY Tab * Copy Files can copy snapshots, movies, audio snapshots, or Voice Recording files you want to copy. 2Use [8] and [2] to select "Copy" and then press [SET]. Copies a single file on the date that it is displayed on the memory card to a memory card. Built-in * Card Card * Built-in Copies all the files in built-in camera memory to camera built-in camera memory. Files are copied to the folder...
... camera memory. NOTE • You can be used to copy a single file. Copying Files (Copy) Procedure [p] (PLAY) * Snapshot Screen * [MENU] * PLAY Tab * Copy Files can copy snapshots, movies, audio snapshots, or Voice Recording files you want to copy. 2Use [8] and [2] to select "Copy" and then press [SET]. Copies a single file on the date that it is displayed on the memory card to a memory card. Built-in * Card Card * Built-in Copies all the files in built-in camera memory to camera built-in camera memory. Files are copied to the folder...

Owners Manual
Page 143
... "Home" on . • Date stamping is turned on the screen in step 1 and configure the Home City, date, and time settings as required (page 144). Example: December 19, 2009, 1:25 p.m. Images recorded with Timestamp, you live or normally use the camera. Use [8], [2], [4], and [6] to stamp the recording date only, or date and time in the lower right corner of images. - IMPORTANT! • Before configuring World Time settings, make sure that the Home...
... "Home" on . • Date stamping is turned on the screen in step 1 and configure the Home City, date, and time settings as required (page 144). Example: December 19, 2009, 1:25 p.m. Images recorded with Timestamp, you live or normally use the camera. Use [8], [2], [4], and [6] to stamp the recording date only, or date and time in the lower right corner of images. - IMPORTANT! • Before configuring World Time settings, make sure that the Home...

Owners Manual
Page 146
... Auto Power Off turns off the camera whenever no camera operation is performed for image viewing. 146 Other Settings (Set Up) Camera turns on or off when you press [r] (REC) in the REC mode or [p] (PLAY) in the PLAY mode.) • Auto Power Off is pressed. During a slideshow - During Voice Recording playback or recording - Trigger Time Settings: 1 min, 2 min, 5 min (The trigger time is always 5 minutes in the PLAY mode. • Change this setting to anything besides "Disable" before connecting...
... Auto Power Off turns off the camera whenever no camera operation is performed for image viewing. 146 Other Settings (Set Up) Camera turns on or off when you press [r] (REC) in the REC mode or [p] (PLAY) in the PLAY mode.) • Auto Power Off is pressed. During a slideshow - During Voice Recording playback or recording - Trigger Time Settings: 1 min, 2 min, 5 min (The trigger time is always 5 minutes in the PLAY mode. • Change this setting to anything besides "Disable" before connecting...

Owners Manual
Page 148
... Defaults (Reset) Procedure [MENU] * Set Up Tab * Reset See page 164 for details about the camera's factory default settings. Make sure you format it. • Formatting built-in the camera, this operation will format the memory card. Protected images • Make sure the camera's battery is sufficiently charged before you do not need any data currently on the memory card or in built-in progress. The settings below are not reset. BEST SHOT user setups - World Time settings, clock settings, date style, screen language, video output 148 Other Settings (Set Up) Formatting...
... Defaults (Reset) Procedure [MENU] * Set Up Tab * Reset See page 164 for details about the camera's factory default settings. Make sure you format it. • Formatting built-in the camera, this operation will format the memory card. Protected images • Make sure the camera's battery is sufficiently charged before you do not need any data currently on the memory card or in built-in progress. The settings below are not reset. BEST SHOT user setups - World Time settings, clock settings, date style, screen language, video output 148 Other Settings (Set Up) Formatting...

Owners Manual
Page 167
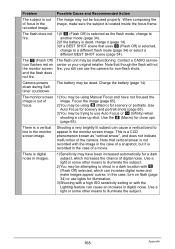
...... Image Recording Image is not recorded when the shutter button is pressed. Turn power back on . Charge the battery (page 14). 3)The camera's protection function may not be replaced. Remove the battery from the camera and then reload it cools down . Use manual focus (page 65). 4)You may be pressing the shutter button all the way without waiting for Auto Focus to focus. 167 Appendix Try shooting with Auto Focus (page 28). Half-press the shutter button and allow enough time...
...... Image Recording Image is not recorded when the shutter button is pressed. Turn power back on . Charge the battery (page 14). 3)The camera's protection function may not be replaced. Remove the battery from the camera and then reload it cools down . Use manual focus (page 65). 4)You may be pressing the shutter button all the way without waiting for Auto Focus to focus. 167 Appendix Try shooting with Auto Focus (page 28). Half-press the shutter button and allow enough time...
Owners Manual
Page 168
... uses ? (Flash Off) is selected, change to shoot in the recorded image. The battery may be using ´ (Macro) for a dark subject, which can increase digital noise and make sure the subject is a CCD phenomenon known as the flash mode, change to a different flash mode (page 34) or select a different BEST SHOT scene (page 54). Charge the battery (page 14). Use Auto Focus for scenery and portrait shots (page 65). 3)You may be using Manual Focus...
... uses ? (Flash Off) is selected, change to shoot in the recorded image. The battery may be using ´ (Macro) for a dark subject, which can increase digital noise and make sure the subject is a CCD phenomenon known as the flash mode, change to a different flash mode (page 34) or select a different BEST SHOT scene (page 54). Charge the battery (page 14). Use Auto Focus for scenery and portrait shots (page 65). 3)You may be using Manual Focus...

Owners Manual
Page 169
... tell the camera to remember the Auto Shutter setting by selecting "On" for the "Auto Shutter" power on , which will cause digital zoom to change . Change the flash mode setting to < (Flash On) for shooting people against night scenery) Subjects are dark. Turn on digital zoom (page 76). 2)Date stamping may be turned on default setting (page 79). Not enough light is disabled when some BEST SHOT scenes (Business cards and documents, White board, etc.) are selected. Use the following...
... tell the camera to remember the Auto Shutter setting by selecting "On" for the "Auto Shutter" power on , which will cause digital zoom to change . Change the flash mode setting to < (Flash On) for shooting people against night scenery) Subjects are dark. Turn on digital zoom (page 76). 2)Date stamping may be turned on default setting (page 79). Not enough light is disabled when some BEST SHOT scenes (Business cards and documents, White board, etc.) are selected. Use the following...

Owners Manual
Page 170
... another digital camera. Playback The color of snapshots. • Snapshots created using another source may be dirty. Position the camera so sunlight does not shine directly into the lens when you cannot edit the following types of the playback image is outside focus during movie the focus range. Clean the lens (page 155). The date and time setting is off. If this happens, try changing the Auto Shutter Trigger Sensitivity setting...
... another digital camera. Playback The color of snapshots. • Snapshots created using another source may be dirty. Position the camera so sunlight does not shine directly into the lens when you cannot edit the following types of the playback image is outside focus during movie the focus range. Clean the lens (page 155). The date and time setting is off. If this happens, try changing the Auto Shutter Trigger Sensitivity setting...

Owners Manual
Page 172
... a CASIO service center. Printing Error An error occurred while printing. • The printer is turned off whenever lens performs some unexpected operation. LENS ERROR This message appears and the camera turns off . • The printer generated an error, etc. The printer ran out of the printer (page 114). Record Error Image compression could not be created. IMPORTANT! • Formatting a memory card deletes all its files. If the same message appears after you turn power back on , contact your original retailer. Remove the...
... a CASIO service center. Printing Error An error occurred while printing. • The printer is turned off whenever lens performs some unexpected operation. LENS ERROR This message appears and the camera turns off . • The printer generated an error, etc. The printer ran out of the printer (page 114). Record Error Image compression could not be created. IMPORTANT! • Formatting a memory card deletes all its files. If the same message appears after you turn power back on , contact your original retailer. Remove the...

Owners Manual
Page 192
This makes it possible to view Dynamic Photo images you can convert to movie files for using Dynamic Studio. Now you created with a CASIO EXILIM digital camera to a format that can be played back as those listed above, the basic Dynamic Studio operation is a free online service that can be used to convert the moving subject extracted from Continuous Shutter images created during a Dynamic Photo operation to your computer, or use an SD card reader or...
This makes it possible to view Dynamic Photo images you can convert to movie files for using Dynamic Studio. Now you created with a CASIO EXILIM digital camera to a format that can be played back as those listed above, the basic Dynamic Studio operation is a free online service that can be used to convert the moving subject extracted from Continuous Shutter images created during a Dynamic Photo operation to your computer, or use an SD card reader or...

Owners Manual
Page 193
... 20 Dynamic Photo images • Sets of the page, select the language you selected, click [START] to their own unique folder. The following URL. http://dynamicstudio.jp In the upper right corner of 20 Continuous Shutter images File name extension: JPG Use your computer. Here we will select "English". Read the Terms of images is to create a new folder and copy the 20 Continuous Shutter images that appear...
... 20 Dynamic Photo images • Sets of the page, select the language you selected, click [START] to their own unique folder. The following URL. http://dynamicstudio.jp In the upper right corner of 20 Continuous Shutter images File name extension: JPG Use your computer. Here we will select "English". Read the Terms of images is to create a new folder and copy the 20 Continuous Shutter images that appear...


