
Owners Manual
Page 1
E Digital Camera EX-Z70 User's Guide Thank you for purchasing this CASIO product. • Before using it, be sure to read the precautions contained in this User's Guide. • Keep the User's Guide in a safe place for future reference. • For the most up-to-date information about this product, visit the official EXILIM Website at http://www.exilim.com/. K817PCM2DKX
E Digital Camera EX-Z70 User's Guide Thank you for purchasing this CASIO product. • Before using it, be sure to read the precautions contained in this User's Guide. • Keep the User's Guide in a safe place for future reference. • For the most up-to-date information about this product, visit the official EXILIM Website at http://www.exilim.com/. K817PCM2DKX

Owners Manual
Page 2
INTRODUCTION INTRODUCTION Unpacking Check to make sure that all of the AC power cord plug varies according to country or geographic area. Strap CD-ROM USB Cable AV Cable 2 Basic Reference If something is missing, contact your camera. Camera Rechargeable Lithium Ion Battery (NP-20) Lithium Ion Battery Charger (BC-11L) AC Power Cord * * The shape of the items shown below are included with your dealer as soon as possible.
INTRODUCTION INTRODUCTION Unpacking Check to make sure that all of the AC power cord plug varies according to country or geographic area. Strap CD-ROM USB Cable AV Cable 2 Basic Reference If something is missing, contact your camera. Camera Rechargeable Lithium Ion Battery (NP-20) Lithium Ion Battery Charger (BC-11L) AC Power Cord * * The shape of the items shown below are included with your dealer as soon as possible.

Owners Manual
Page 3
...record an image 19 To view a recorded image 20 To delete an image 20 21 GETTING READY About This Manual 21 General Guide 22 Camera 22 Lithium Ion Battery Charger 24 Monitor Screen Contents 25 REC Mode 25 PLAY Mode 27 Changing the Contents of the Monitor Screen 29 ...To charge the battery 31 To load the battery 34 Low Battery Indicator 36 To replace the battery 37 Power Supply Precautions 38 Turning the Camera On and Off 41 Configuring Power Saving Settings 42 Using the On-screen Menus 44 Configuring Display Language and Clock Settings ... 46 To configure...
...record an image 19 To view a recorded image 20 To delete an image 20 21 GETTING READY About This Manual 21 General Guide 22 Camera 22 Lithium Ion Battery Charger 24 Monitor Screen Contents 25 REC Mode 25 PLAY Mode 27 Changing the Contents of the Monitor Screen 29 ...To charge the battery 31 To load the battery 34 Low Battery Indicator 36 To replace the battery 37 Power Supply Precautions 38 Turning the Camera On and Off 41 Configuring Power Saving Settings 42 Using the On-screen Menus 44 Configuring Display Language and Clock Settings ... 46 To configure...

Owners Manual
Page 4
INTRODUCTION 50 BASIC IMAGE RECORDING Recording an Image 50 Aiming the Camera 50 Recording an Image 51 Using the easy Mode 55 Recording Precautions 57 Using Zoom 59 Optical Zoom 59 Digital Zoom 61 Using the Flash ...
INTRODUCTION 50 BASIC IMAGE RECORDING Recording an Image 50 Aiming the Camera 50 Recording an Image 51 Using the easy Mode 55 Recording Precautions 57 Using Zoom 59 Optical Zoom 59 Digital Zoom 61 Using the Flash ...

Owners Manual
Page 5
... the Filter Function 120 Specifying Outline Sharpness 120 Specifying Color Saturation 121 Specifying Contrast 121 Date Stamping Snapshots 122 Resetting the Camera 123 Zooming the Display Image 126 Resizing an Image 127 Cropping an Image 128 Keystone Correction 130 Using Color Restoration to ... the Display Image 144 Adding Audio to a Snapshot 145 To re-record audio 146 Playing Back a Voice Recording File 147 Displaying Camera Images on a TV Screen 148 Selecting the Video Output System 150 124 PLAYBACK Basic Playback Operation 124 Playing an Audio Snapshot 125 ...
... the Filter Function 120 Specifying Outline Sharpness 120 Specifying Color Saturation 121 Specifying Contrast 121 Date Stamping Snapshots 122 Resetting the Camera 123 Zooming the Display Image 126 Resizing an Image 127 Cropping an Image 128 Keystone Correction 130 Using Color Restoration to ... the Display Image 144 Adding Audio to a Snapshot 145 To re-record audio 146 Playing Back a Voice Recording File 147 Displaying Camera Images on a TV Screen 148 Selecting the Video Output System 150 124 PLAYBACK Basic Playback Operation 124 Playing an Audio Snapshot 125 ...

Owners Manual
Page 6
... [ ] (PLAY) Power On/Off Functions 169 Formatting Built-in Memory 170 171 USING A MEMORY CARD Using a Memory Card 172 To insert a memory card into the camera 172 To replace the memory card 173 Formatting a Memory Card 174 Copying Files 175 To copy all the files in built-in memory to a memory...
... [ ] (PLAY) Power On/Off Functions 169 Formatting Built-in Memory 170 171 USING A MEMORY CARD Using a Memory Card 172 To insert a memory card into the camera 172 To replace the memory card 173 Formatting a Memory Card 174 Copying Files 175 To copy all the files in built-in memory to a memory...

Owners Manual
Page 7
... 200 Memory Data 201 DCF Protocol 201 Memory Folder Structure 202 Image Files Supported by the Camera 203 205 USING THE CAMERA WITH A COMPUTER Using the Camera with a Windows Computer ......... 205 Selecting the Software You Need 205 Computer System Requirements 207 Managing...Snapshot 211 Playing a Movie 213 Viewing User Documentation (PDF Files) 214 User Registration 214 Exiting the Menu Application 214 Using the Camera with a Macintosh Computer ....... 215 Selecting the Software You Need 215 Computer System Requirements 216 Managing Images on a Macintosh 217 ...
... 200 Memory Data 201 DCF Protocol 201 Memory Folder Structure 202 Image Files Supported by the Camera 203 205 USING THE CAMERA WITH A COMPUTER Using the Camera with a Windows Computer ......... 205 Selecting the Software You Need 205 Computer System Requirements 207 Managing...Snapshot 211 Playing a Movie 213 Viewing User Documentation (PDF Files) 214 User Registration 214 Exiting the Menu Application 214 Using the Camera with a Macintosh Computer ....... 215 Selecting the Software You Need 215 Computer System Requirements 216 Managing Images on a Macintosh 217 ...

Owners Manual
Page 8
... or claims by third parties which may also be held liable for any damages or losses suffered by the screens and configuration of the actual camera. • The SD logo is a registered trademark. • Windows, Internet Explorer, Windows Media, and DirectX are registered trademarks of Microsoft ... Incorporated in this User's Guide may differ somewhat by you or any damage or loss resulting from the use or malfunction of the EX-Z70. • CASIO COMPUTER CO., LTD. Except as a result of malfunction, repairs, or battery replacement. shall not be trademarks or service marks of others...
... or claims by third parties which may also be held liable for any damages or losses suffered by the screens and configuration of the actual camera. • The SD logo is a registered trademark. • Windows, Internet Explorer, Windows Media, and DirectX are registered trademarks of Microsoft ... Incorporated in this User's Guide may differ somewhat by you or any damage or loss resulting from the use or malfunction of the EX-Z70. • CASIO COMPUTER CO., LTD. Except as a result of malfunction, repairs, or battery replacement. shall not be trademarks or service marks of others...

Owners Manual
Page 9
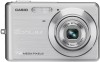
... TFT color LCD monitor screen • 8.3MB built-in memory Images can be set up (page 41) Press [ ] (REC) or [ ] (PLAY) to turn on the camera and enter the mode you want to use. • easy mode (page 55) This feature eliminates troublesome setups. • 12X zoom (page 59) 3X optical...
... TFT color LCD monitor screen • 8.3MB built-in memory Images can be set up (page 41) Press [ ] (REC) or [ ] (PLAY) to turn on the camera and enter the mode you want to use. • easy mode (page 55) This feature eliminates troublesome setups. • 12X zoom (page 59) 3X optical...

Owners Manual
Page 10
... Old Photograph (page 99) You can use the procedure in this section to restore an old, faded photograph with the color provided by modern digital camera technology. • Movie recording with audio (page 102) VGA size, 30 fps, Motion JPEG format • Audio Snapshot mode (page 106) Use this mode... easier than the Auto Focus range. • Quick Shutter (page 76) When you press the shutter button all the way down without pausing, the camera immediately records the image without waiting for Auto Focus to set up for the scene you selected. New BEST SHOT sample scenes include setups for...
... Old Photograph (page 99) You can use the procedure in this section to restore an old, faded photograph with the color provided by modern digital camera technology. • Movie recording with audio (page 102) VGA size, 30 fps, Motion JPEG format • Audio Snapshot mode (page 106) Use this mode... easier than the Auto Focus range. • Quick Shutter (page 76) When you press the shutter button all the way down without pausing, the camera immediately records the image without waiting for Auto Focus to set up for the scene you selected. New BEST SHOT sample scenes include setups for...

Owners Manual
Page 11
... through a computer. • PRINT Image Matching III Compatible (page 188) Images include PRINT Image Matching III data (mode setting and other camera setup information). You can select from a movie and create still images that date, which helps to make searching for a particular file quicker ...file recorded for that are suitable for printing. • Calendar screen (page 140) A simple operation displays a full-month calendar on the camera's monitor screen. Each day of the full-month calendar shows a thumbnail of an old photograph to a PictBridge or USB DIRECT-PRINT compatible...
... through a computer. • PRINT Image Matching III Compatible (page 188) Images include PRINT Image Matching III data (mode setting and other camera setup information). You can select from a movie and create still images that date, which helps to make searching for a particular file quicker ...file recorded for that are suitable for printing. • Calendar screen (page 140) A simple operation displays a full-month calendar on the camera's monitor screen. Each day of the full-month calendar shows a thumbnail of an old photograph to a PictBridge or USB DIRECT-PRINT compatible...

Owners Manual
Page 12
... of the reach of this manual to "camera" refer to the CASIO EX-Z70 Digital Camera. • Never try to open the case of accident. 12 High-voltage internal components create the risk of a person operating a motor vehicle. Always ... accident. • Never try to a CASIO authorized service center. • Keep the small parts and accessories of small children. Doing so can interfere with Photohands, and application that automatically loads images from your camera to observe the following important precautions whenever using the EX-Z70. Precautions I General Precautions Be sure ...
... of the reach of this manual to "camera" refer to the CASIO EX-Z70 Digital Camera. • Never try to open the case of accident. 12 High-voltage internal components create the risk of a person operating a motor vehicle. Always ... accident. • Never try to a CASIO authorized service center. • Keep the small parts and accessories of small children. Doing so can interfere with Photohands, and application that automatically loads images from your camera to observe the following important precautions whenever using the EX-Z70. Precautions I General Precautions Be sure ...

Owners Manual
Page 13
...; Never open the battery cover while an image is prohibited. Intense light from the power outlet, and contact your nearest CASIO authorized service center for repair. Next, remove the camera's battery and/or unplug the AC power cord from the flash can cause the data stored in the rain or snow.... • At least once a year, unplug the AC power cord from the power outlet, and contact your dealer or nearest CASIO authorized service center. Next, remove the camera's battery and/or unplug the AC power cord from the power outlet and clean the area around the prongs can also corrupt...
...; Never open the battery cover while an image is prohibited. Intense light from the power outlet, and contact your nearest CASIO authorized service center for repair. Next, remove the camera's battery and/or unplug the AC power cord from the flash can cause the data stored in the rain or snow.... • At least once a year, unplug the AC power cord from the power outlet, and contact your dealer or nearest CASIO authorized service center. Next, remove the camera's battery and/or unplug the AC power cord from the power outlet and clean the area around the prongs can also corrupt...

Owners Manual
Page 14
...green after you first record a number of test images and check the results to record important images, make sure you turn off the camera - Follow the instructions provided by the message to appear on the monitor screen (page 232). Disconnecting the USB cable while a data ... error message to eliminate the cause of data in file memory. - Removing the battery or memory card while the camera is being performed - INTRODUCTION I Data Error Precautions • Your digital camera is manufactured using precision digital components. I Test for proper operation before using the...
...green after you first record a number of test images and check the results to record important images, make sure you turn off the camera - Follow the instructions provided by the message to appear on the monitor screen (page 232). Disconnecting the USB cable while a data ... error message to eliminate the cause of data in file memory. - Removing the battery or memory card while the camera is being performed - INTRODUCTION I Data Error Precautions • Your digital camera is manufactured using precision digital components. I Test for proper operation before using the...

Owners Manual
Page 15
.... Be sure to reconfigure these settings after power is interrupted (page 163). • Never remove the battery from forming, place the camera into a location that is much force when cleaning the surface of battery is the possibility that should avoid exposing it into a plastic ... • You may sometimes notice some distortion in certain types of a closed vehicle, especially one parked in lines that condensation can damage the camera. I Lens • Never apply too much warmer or colder than your current location. Near air conditioners, heaters, or other type of the...
.... Be sure to reconfigure these settings after power is interrupted (page 163). • Never remove the battery from forming, place the camera into a location that is much force when cleaning the surface of battery is the possibility that should avoid exposing it into a plastic ... • You may sometimes notice some distortion in certain types of a closed vehicle, especially one parked in lines that condensation can damage the camera. I Lens • Never apply too much warmer or colder than your current location. Near air conditioners, heaters, or other type of the...

Owners Manual
Page 16
...see all of the detail of the actual image. INTRODUCTION I Caring for on-the-spot checks of important images. I Other • The camera may become slightly warm during image playback are smaller than normal, and so you can use . Never touch the lens with proper operation of ...a lens blower to enlarge the monitor screen image. Avoid touching the flash. You can interfere with a soft, dry cloth. You can interfere with your camera • Fingerprints, dust, or any other soiling of the lens with a soft lens cloth. • Fingerprints, dirt, and other foreign matter on ...
...see all of the detail of the actual image. INTRODUCTION I Caring for on-the-spot checks of important images. I Other • The camera may become slightly warm during image playback are smaller than normal, and so you can use . Never touch the lens with proper operation of ...a lens blower to enlarge the monitor screen image. Avoid touching the flash. You can interfere with a soft, dry cloth. You can interfere with your camera • Fingerprints, dust, or any other soiling of the lens with a soft lens cloth. • Fingerprints, dirt, and other foreign matter on ...

Owners Manual
Page 17
Load the battery into the camera. (page 34). 1 2 [CHARGE] lamp lights red during charging. [CHARGE] lamp goes out when charging is complete. -T+ 2 Stopper 3 17 Charge the rechargeable litium ion battery (NP-20) that comes 1 with the camera (page 31). • It takes about 90 minutes to achieve a full charge. 2. QUICK START GUIDE QUICK START GUIDE First, charge the battery! 1.
Load the battery into the camera. (page 34). 1 2 [CHARGE] lamp lights red during charging. [CHARGE] lamp goes out when charging is complete. -T+ 2 Stopper 3 17 Charge the rechargeable litium ion battery (NP-20) that comes 1 with the camera (page 31). • It takes about 90 minutes to achieve a full charge. 2. QUICK START GUIDE QUICK START GUIDE First, charge the battery! 1.

Owners Manual
Page 18
... time. 9. QUICK START GUIDE To configure display language and clock settings • Be sure to configure the following procedure, you will need to use the camera's menu to select the date format setting you want . 3. Use [̆] and [̄] to select the language you want , and then press [SET]. ... 9 7. See page 47 for details. • If you make a mistake when setting the language or clock with the following settings before using the camera to register the clock settings and exit the setting screen. 18 Use and [̈] to select the city you want, and then press [SET]. ...
... time. 9. QUICK START GUIDE To configure display language and clock settings • Be sure to configure the following procedure, you will need to use the camera's menu to select the date format setting you want . 3. Use [̆] and [̄] to select the language you want , and then press [SET]. ... 9 7. See page 47 for details. • If you make a mistake when setting the language or clock with the following settings before using the camera to register the clock settings and exit the setting screen. 18 Use and [̈] to select the city you want, and then press [SET]. ...

Owners Manual
Page 19
... first format it using a commercially available memory card, be sure to compose the image, and then press the shutter button half way. • When the camera finishes its Auto Focus operation, the focus frame will turn green and the operation lamp lights green. 3. Before using the... camera's formatting procedure. For details about formatting a memory card, see page 174. 19 Press [ ] (REC). • This enters the REC (recording) mode. 2. QUICK START GUIDE To ...
... first format it using a commercially available memory card, be sure to compose the image, and then press the shutter button half way. • When the camera finishes its Auto Focus operation, the focus frame will turn green and the operation lamp lights green. 3. Before using the... camera's formatting procedure. For details about formatting a memory card, see page 174. 19 Press [ ] (REC). • This enters the REC (recording) mode. 2. QUICK START GUIDE To ...

Owners Manual
Page 21
... brackets ([ ]). I On-screen Text On-screen text is useful when operating the camera. 21 I Supplementary Information • IMPORTANT! This term as used in this manual: "camera" "file memory" "battery" "digital noise" Means this: The CASIO EX-Z70 Digital Camera The location where the camera is currently storing images you record (page 51) The NP-20 Rechargeable...
... brackets ([ ]). I On-screen Text On-screen text is useful when operating the camera. 21 I Supplementary Information • IMPORTANT! This term as used in this manual: "camera" "file memory" "battery" "digital noise" Means this: The CASIO EX-Z70 Digital Camera The location where the camera is currently storing images you record (page 51) The NP-20 Rechargeable...


