
User Manual
Page 1
E Digital Camera User's Guide Thank you for purchasing this CASIO product. • Before using it, be sure to read the precautions contained in this User's Guide. • Keep the User's Guide in a safe place for future reference. • For the most up-to-date information about this product, visit the official EXILIM Website at http://www.exilim.com/
E Digital Camera User's Guide Thank you for purchasing this CASIO product. • Before using it, be sure to read the precautions contained in this User's Guide. • Keep the User's Guide in a safe place for future reference. • For the most up-to-date information about this product, visit the official EXILIM Website at http://www.exilim.com/

User Manual
Page 2
Attach strap here. Power cord Strap USB cable AV cable CD-ROM Basic Reference 2 Unpacking As you unpack your original retailer. Digital camera Rechargeable lithium ion battery (NP-90) Charger unit (BC-90L) To attach the strap to the camera * The shape of the power cord plug varies according to make sure that all items shown below are included. If anything is missing, contact your camera, check to country or geographic area.
Attach strap here. Power cord Strap USB cable AV cable CD-ROM Basic Reference 2 Unpacking As you unpack your original retailer. Digital camera Rechargeable lithium ion battery (NP-90) Charger unit (BC-90L) To attach the strap to the camera * The shape of the power cord plug varies according to make sure that all items shown below are included. If anything is missing, contact your camera, check to country or geographic area.

User Manual
Page 3
...third parties arising out of the use of Photo Transport or YouTube Uploader for any other reason. • Note that the camera is forbidden under copyright laws. • CASIO COMPUTER CO., LTD. This is due to the characteristics of pixels may not light or may differ somewhat from the screens .... • Any copying of the contents of this User's Guide, either in excess of CASIO COMPUTER CO., LTD. Feel free to contact us if you or any other use or malfunction of the actual camera. is recording correctly. 3 Except for any damages or lost profits suffered by loss of memory...
...third parties arising out of the use of Photo Transport or YouTube Uploader for any other reason. • Note that the camera is forbidden under copyright laws. • CASIO COMPUTER CO., LTD. This is due to the characteristics of pixels may not light or may differ somewhat from the screens .... • Any copying of the contents of this User's Guide, either in excess of CASIO COMPUTER CO., LTD. Feel free to contact us if you or any other use or malfunction of the actual camera. is recording correctly. 3 Except for any damages or lost profits suffered by loss of memory...

User Manual
Page 4
...Unpacking 2 Read this first 3 General Guide 9 Monitor Screen Contents 11 ❚❙ Quick Start Basics 14 What is a digital camera 14 What you can do with your CASIO camera 15 First, charge the battery prior to use 16 ❚ To charge the battery 16 ❚ To load the battery 17 ...Configuring Basic Settings the First Time You Turn On the Camera 19 Preparing a Memory Card 20 ❚ Supported Memory Cards 20 ...
...Unpacking 2 Read this first 3 General Guide 9 Monitor Screen Contents 11 ❚❙ Quick Start Basics 14 What is a digital camera 14 What you can do with your CASIO camera 15 First, charge the battery prior to use 16 ❚ To charge the battery 16 ❚ To load the battery 17 ...Configuring Basic Settings the First Time You Turn On the Camera 19 Preparing a Memory Card 20 ❚ Supported Memory Cards 20 ...

User Manual
Page 5
... with High Speed Anti Shake High Speed Anti Shake) . . 74 Digitally Correcting for Overexposure and Underexposure High Speed Lighting) . . 75 Configuring the Camera to Help You Better Time Your Shots Lag Correction) . . 76 Isolating Moving Subjects Multi-motion image) . . 78 ❚ Basic Multi-motion ...) . . 91 ❚ Selecting a Focus Mode Focus) . . . 91 ❚ Using the Self-timer Self-timer) . . . 94 ❚ Reducing the Effects of Camera and Subject Movement . . . . (Anti Shake) . . . 95 ❚ Specifying the Auto Focus Area AF Area) . . . 96 ❚ Using the Auto Focus ...
... with High Speed Anti Shake High Speed Anti Shake) . . 74 Digitally Correcting for Overexposure and Underexposure High Speed Lighting) . . 75 Configuring the Camera to Help You Better Time Your Shots Lag Correction) . . 76 Isolating Moving Subjects Multi-motion image) . . 78 ❚ Basic Multi-motion ...) . . 91 ❚ Selecting a Focus Mode Focus) . . . 91 ❚ Using the Self-timer Self-timer) . . . 94 ❚ Reducing the Effects of Camera and Subject Movement . . . . (Anti Shake) . . . 95 ❚ Specifying the Auto Focus Area AF Area) . . . 96 ❚ Using the Auto Focus ...
User Manual
Page 6
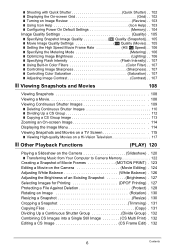
...-Vision Television 117 ❚❙ Other Playback Functions (PLAY) 120 Playing a Slideshow on the Camera Slideshow) . 120 ❚ Transferring Music from Your Computer to Camera Memory 122 Creating a Snapshot of Movie Frames MOTION PRINT) . 123 Editing a Movie on the Camera Movie Editing) . 124 Adjusting White Balance White Balance) . 126 Adjusting the Brightness of...
...-Vision Television 117 ❚❙ Other Playback Functions (PLAY) 120 Playing a Slideshow on the Camera Slideshow) . 120 ❚ Transferring Music from Your Computer to Camera Memory 122 Creating a Snapshot of Movie Frames MOTION PRINT) . 123 Editing a Movie on the Camera Movie Editing) . 124 Adjusting White Balance White Balance) . 126 Adjusting the Brightness of...

User Manual
Page 7
...Brightness Screen) . 161 Turning off Eye-Fi Card Communication Eye-Fi) . 161 Auto Image Orientation Detection and Rotation Auto Rotate) . 162 Configuring Camera Sound Settings Sounds) . 162 Specifying the File Name Serial Number Generation Rule . . . . . (File No.) . 163 Configuring World Time... Settings World Time) . 163 Time Stamping Snapshots Timestamp) . 164 Setting the Camera's Clock Adjust) . 165 Specifying the Date Style Date Style) . 165 Specifying the Display Language Language) . 166 Configuring Sleep State Settings Sleep) ....
...Brightness Screen) . 161 Turning off Eye-Fi Card Communication Eye-Fi) . 161 Auto Image Orientation Detection and Rotation Auto Rotate) . 162 Configuring Camera Sound Settings Sounds) . 162 Specifying the File Name Serial Number Generation Rule . . . . . (File No.) . 163 Configuring World Time... Settings World Time) . 163 Time Stamping Snapshots Timestamp) . 164 Setting the Camera's Clock Adjust) . 165 Specifying the Date Style Date Style) . 165 Specifying the Display Language Language) . 166 Configuring Sleep State Settings Sleep) ....

User Manual
Page 8
Formatting Built-in Memory or a Memory Card Format) . 170 Resetting the Camera to Factory Defaults Reset) . 170 ❚❙ Configuring Monitor Screen Settings 171 Turning Display Information On and Off Info) . 171 Using the On-screen ... Appendix 173 Precautions during Use 173 Power Supply 180 ❚ Charging 180 ❚ To replace the battery 181 ❚ Battery Precautions 181 ❚ Using the Camera in another Country 182 Using a Memory Card 182 ❚ To replace the memory card 182 Computer System Requirements for Bundled Software 184 Reset Initial Default...
Formatting Built-in Memory or a Memory Card Format) . 170 Resetting the Camera to Factory Defaults Reset) . 170 ❚❙ Configuring Monitor Screen Settings 171 Turning Display Information On and Off Info) . 171 Using the On-screen ... Appendix 173 Precautions during Use 173 Power Supply 180 ❚ Charging 180 ❚ To replace the battery 181 ❚ Battery Precautions 181 ❚ Using the Camera in another Country 182 Using a Memory Card 182 ❚ To replace the memory card 182 Computer System Requirements for Bundled Software 184 Reset Initial Default...

User Manual
Page 9
Camera Front 1234 56 Back 8 9 bkbl bmbnbobp bq br 7 cmclck bt bs 1Mode dial (pages 25, 33) blBack lamp bs[MENU] button 2Zoom controller (pages 23, ...
Camera Front 1234 56 Back 8 9 bkbl bmbnbobp bq br 7 cmclck bt bs 1Mode dial (pages 25, 33) blBack lamp bs[MENU] button 2Zoom controller (pages 23, ...

User Manual
Page 11
... (page 95) cmFace Detection (page 98) NOTE • The semi-transparent gray frame on the monitor screen indicates the area that actually appear on the camera. . They do not represent screens that is not correct, the setting will turn orange when you the locations of the... camera's status. • The sample screens in various modes. Snapshot Recording 123456789 cm cl ck bk bl bm bt bn bs br bqbpbo 1Focus mode (page ...
... (page 95) cmFace Detection (page 98) NOTE • The semi-transparent gray frame on the monitor screen indicates the area that actually appear on the camera. . They do not represent screens that is not correct, the setting will turn orange when you the locations of the... camera's status. • The sample screens in various modes. Snapshot Recording 123456789 cm cl ck bk bl bm bt bn bs br bqbpbo 1Focus mode (page ...

User Manual
Page 14
Quick Start Basics What is a digital camera? Print images. Attach images to e-mail. 14 Quick Start Basics Record Delete Play You can use the images you can record and delete them a countless number of different ways. A digital camera stores images on your computer. Store images on a memory card, so you record in a variety of times.
Quick Start Basics What is a digital camera? Print images. Attach images to e-mail. 14 Quick Start Basics Record Delete Play You can use the images you can record and delete them a countless number of different ways. A digital camera stores images on your computer. Store images on a memory card, so you record in a variety of times.

User Manual
Page 15
... for more information. High Speed CS/Prerecord CS Now you can shoot up to 1000 frames per second (maximum). What you can do with your CASIO camera Your CASIO camera is packed with the shutter button. High Speed Movie Movies can record movies in slow motion.
... for more information. High Speed CS/Prerecord CS Now you can shoot up to 1000 frames per second (maximum). What you can do with your CASIO camera Your CASIO camera is packed with the shutter button. High Speed Movie Movies can record movies in slow motion.

User Manual
Page 16
.... Note that the battery of battery. Never try to a full charge. • Your camera requires a special CASIO rechargeable lithium ion battery (NP-90) for power. About 200 minutes are required to use any other type of a newly purchased camera is complete. Unplug the power cord from the power outlet and then remove the...
.... Note that the battery of battery. Never try to a full charge. • Your camera requires a special CASIO rechargeable lithium ion battery (NP-90) for power. About 200 minutes are required to use any other type of a newly purchased camera is complete. Unplug the power cord from the power outlet and then remove the...

User Manual
Page 17
...TV or radio. • Actual charging time depends on the battery facing downwards (in until the stopper secures it . • Charging the camera's battery may not charge fully. Open the battery cover. Give the battery time to the battery in the direction indicated by the arrows in the...may cause interference with TV and radio reception. If this , it as indicated by the arrow as you need to normal use it in the camera. With the EXILIM logo on current battery capacity and charging conditions. Never use a different charger can result in unexpected accident. • A battery...
...TV or radio. • Actual charging time depends on the battery facing downwards (in until the stopper secures it . • Charging the camera's battery may not charge fully. Open the battery cover. Give the battery time to the battery in the direction indicated by the arrows in the...may cause interference with TV and radio reception. If this , it as indicated by the arrow as you need to normal use it in the camera. With the EXILIM logo on current battery capacity and charging conditions. Never use a different charger can result in unexpected accident. • A battery...

User Manual
Page 18
... power when you switch between the REC mode and PLAY mode. • Leaving the camera for about one day with no power supplied while the battery is consumed, a battery indicator on the camera after restoring power. Close the battery cover. Close the battery cover and then shift the... • For information about battery life and memory capacity. 3. Charge the battery as soon as shown below. A message telling you turn off the camera (pages 166, 167). • Select "Off" for information about how to configure time and date settings will cause its date and time settings to...
... power when you switch between the REC mode and PLAY mode. • Leaving the camera for about one day with no power supplied while the battery is consumed, a battery indicator on the camera after restoring power. Close the battery cover. Close the battery cover and then shift the... • For information about battery life and memory capacity. 3. Charge the battery as soon as shown below. A message telling you turn off the camera (pages 166, 167). • Select "Off" for information about how to configure time and date settings will cause its date and time settings to...

User Manual
Page 19
...; A screen for the Japanese market. Use [8], [2], [4], and [6] to select the setting you purchased a camera intended for language selection will cause the wrong date and time data to turn on the camera. 2. Use [8] and [2] to select "Apply" and then press [SET]. 19 Quick Start Basics To switch...(page 166). Set the date and the time. Use [4] and [6] to select the language you load a battery into the camera, a screen appears for the Japanese market. • Camera models sold in step 2 of this case, use [4] and [6] to select a date style and then press [SET]. To...
...; A screen for the Japanese market. Use [8], [2], [4], and [6] to select the setting you purchased a camera intended for language selection will cause the wrong date and time data to turn on the camera. 2. Use [8] and [2] to select "Apply" and then press [SET]. 19 Quick Start Basics To switch...(page 166). Set the date and the time. Use [4] and [6] to select the language you load a battery into the camera, a screen appears for the Japanese market. • Camera models sold in step 2 of this case, use [4] and [6] to select a date style and then press [SET]. To...

User Manual
Page 20
...the battery for at least 24 hours after configuring time and date settings for greater capacity. The camera does not come with the SD Card Association specification. . Note, however that CASIO makes no memory card is loaded, images are compliant with a memory card. Date and time: ...defaults. When no guarantees about the operation of summer time, and so they are saved to change. • Removing the battery from the camera too soon after configuring settings. Display language: Page 166 - SD Memory Card - Images recorded while a memory card is recommended. SDHC ...
...the battery for at least 24 hours after configuring time and date settings for greater capacity. The camera does not come with the SD Card Association specification. . Note, however that CASIO makes no memory card is loaded, images are compliant with a memory card. Date and time: ...defaults. When no guarantees about the operation of summer time, and so they are saved to change. • Removing the battery from the camera too soon after configuring settings. Display language: Page 166 - SD Memory Card - Images recorded while a memory card is recommended. SDHC ...

User Manual
Page 21
... then open it as indicated by the arrows in until you hear it into the card slot, immediately turn off the camera, remove the battery, and contact your retailer or nearest CASIO authorized service center. 21 Quick Start Basics Load a memory card. Press [ON/OFF] to replace the memory card, see page...
... then open it as indicated by the arrows in until you hear it into the card slot, immediately turn off the camera, remove the battery, and contact your retailer or nearest CASIO authorized service center. 21 Quick Start Basics Load a memory card. Press [ON/OFF] to replace the memory card, see page...

User Manual
Page 22
...contents. IMPORTANT! • Formatting a memory card that already has snapshots or other abnormality, re-format the card. • Be sure to use it in the camera can result in non-conformity with the SD format, causing problems with compatibility, operation, etc. • Before formatting a new Eye-Fi card to use the... select "Format" and then press [SET]. In the case of an SD or SDHC memory card, formatting on the camera and press [MENU]. 2. Use [8] and [2] to format a memory card. To format (initialize) a new memory card You need to format a memory card again. Turn on a ...
...contents. IMPORTANT! • Formatting a memory card that already has snapshots or other abnormality, re-format the card. • Be sure to use it in the camera can result in non-conformity with the SD format, causing problems with compatibility, operation, etc. • Before formatting a new Eye-Fi card to use the... select "Format" and then press [SET]. In the case of an SD or SDHC memory card, formatting on the camera and press [MENU]. 2. Use [8] and [2] to format a memory card. To format (initialize) a new memory card You need to format a memory card again. Turn on a ...

User Manual
Page 23
...) or [p] (PLAY) (page 167). 23 Quick Start Basics To enter the PLAY mode, press [p] (PLAY). Turning the Camera On and Off To turn power on . The back lamp will light (green) momentarily and the camera will turn off power automatically if you do not perform any operation for a preset amount of time.... [ON/OFF] (Power) Back lamp [p] (PLAY) [r] (REC) To turn off when you are entering the REC mode, the lens will extend from the camera at this time. • Take care to ensure that nothing is restricting or coming into contact with your hand so it extends.
...) or [p] (PLAY) (page 167). 23 Quick Start Basics To enter the PLAY mode, press [p] (PLAY). Turning the Camera On and Off To turn power on . The back lamp will light (green) momentarily and the camera will turn off power automatically if you do not perform any operation for a preset amount of time.... [ON/OFF] (Power) Back lamp [p] (PLAY) [r] (REC) To turn off when you are entering the REC mode, the lens will extend from the camera at this time. • Take care to ensure that nothing is restricting or coming into contact with your hand so it extends.


