Owners Manual
Page 1
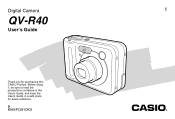
Before using it, be sure to read the precautions contained in this User's Guide, and keep the User's Guide in a safe place for purchasing this CASIO Product. B K864PCM1DKX Digital Camera E QV-R40 User's Guide Thank you for future reference.
Before using it, be sure to read the precautions contained in this User's Guide, and keep the User's Guide in a safe place for purchasing this CASIO Product. B K864PCM1DKX Digital Camera E QV-R40 User's Guide Thank you for future reference.
Owners Manual
Page 3
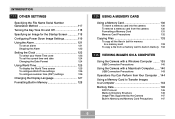
... Precautions 11 Data Error Precautions 18 Operating conditions 18 Condensation 19 Lens 19 Other 20 21 QUICK START GUIDE First, charge the batteries 21 To configure display language and clock settings ..... 22 To record an image 23 To view a recorded image 23 To delete an image 24 25 GETTING READY About This Manual 25 General Guide 26 Monitor Screen Contents 28 REC mode 28 PLAY mode 30 Changing the Contents of the Monitor Screen 31 Indicator Lamps 31...
... Precautions 11 Data Error Precautions 18 Operating conditions 18 Condensation 19 Lens 19 Other 20 21 QUICK START GUIDE First, charge the batteries 21 To configure display language and clock settings ..... 22 To record an image 23 To view a recorded image 23 To delete an image 24 25 GETTING READY About This Manual 25 General Guide 26 Monitor Screen Contents 28 REC mode 28 PLAY mode 30 Changing the Contents of the Monitor Screen 31 Indicator Lamps 31...
Owners Manual
Page 4
... Using Zoom 55 Optical Zoom 55 Digital Zoom 56 Using the Flash 58 Flash Unit Status 59 Changing the Flash Intensity Setting 60 Flash Precautions 60 Using the Self-timer 61 Specifying Image Size and Quality 63 To specify the image size 63 To specify image quality 64 65 OTHER RECORDING FUNCTIONS Selecting the Focus Mode 65 Using Auto Focus 65 Using the Macro Mode 67 Using the Infinity Mode 67 Using Manual Focus 68 Using Focus Lock 69 Exposure Compensation (EV Shift 70 Adjusting White Balance 71 Adjusting White Balance Manually 72 Using the Best Shot Mode...
... Using Zoom 55 Optical Zoom 55 Digital Zoom 56 Using the Flash 58 Flash Unit Status 59 Changing the Flash Intensity Setting 60 Flash Precautions 60 Using the Self-timer 61 Specifying Image Size and Quality 63 To specify the image size 63 To specify image quality 64 65 OTHER RECORDING FUNCTIONS Selecting the Focus Mode 65 Using Auto Focus 65 Using the Macro Mode 67 Using the Infinity Mode 67 Using Manual Focus 68 Using Focus Lock 69 Exposure Compensation (EV Shift 70 Adjusting White Balance 71 Adjusting White Balance Manually 72 Using the Best Shot Mode...
Owners Manual
Page 5
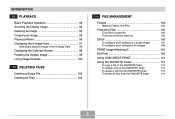
...Basic Playback Operation 92 Zooming the Display Image 93 Resizing an Image 94 Cropping an Image 95 Playing a Movie 96 Displaying the 9-image View 97 Selecting a Specific Image in the 9-image View 98 Displaying the Calendar Screen 98 Rotating the Display Image 99 Using Image Roulette 100 102 DELETING FILES Deleting a Single File 102 Deleting All Files 103 104 FILE MANAGEMENT Folders 104 Memory Folders and Files 104 Protecting Files 105 To protect a single file 105 To protect all files in memory 106 DPOF 106 To configure print settings for a single image 107...
...Basic Playback Operation 92 Zooming the Display Image 93 Resizing an Image 94 Cropping an Image 95 Playing a Movie 96 Displaying the 9-image View 97 Selecting a Specific Image in the 9-image View 98 Displaying the Calendar Screen 98 Rotating the Display Image 99 Using Image Roulette 100 102 DELETING FILES Deleting a Single File 102 Deleting All Files 103 104 FILE MANAGEMENT Folders 104 Memory Folders and Files 104 Protecting Files 105 To protect a single file 105 To protect all files in memory 106 DPOF 106 To configure print settings for a single image 107...
Owners Manual
Page 6
... summer time (DST) settings 126 Changing the Display Language 127 Formatting Built-in Memory 128 129 USING A MEMORY CARD Using a Memory Card 130 To insert a memory card into the camera 130 To remove a memory card from the camera 130 Formatting a Memory Card 131 Memory Card Precautions 132 Copying Files 133 To copy all the files in built-in memory to a memory card 133 To copy a file from a memory card to built-in memory 134 135 VIEWING IMAGES ON A COMPUTER Using the Camera with a Windows Computer ........ 135 USB Connection Precautions 140 Using the Camera with...
... summer time (DST) settings 126 Changing the Display Language 127 Formatting Built-in Memory 128 129 USING A MEMORY CARD Using a Memory Card 130 To insert a memory card into the camera 130 To remove a memory card from the camera 130 Formatting a Memory Card 131 Memory Card Precautions 132 Copying Files 133 To copy all the files in built-in memory to a memory card 133 To copy a file from a memory card to built-in memory 134 135 VIEWING IMAGES ON A COMPUTER Using the Camera with a Windows Computer ........ 135 USB Connection Precautions 140 Using the Camera with...
Owners Manual
Page 7
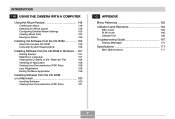
... in Windows ... 157 Getting Started 157 Selecting a Language 157 Viewing the Contents of the "Read me" File 158 Installing an Application 158 Viewing User Documentation (PDF Files) 159 User Registration 159 Exiting the Menu Application 159 Installing Software from the CD-ROM on a Macintosh 160 Installing Software 160 Viewing User Documentation (PDF Files) 161 162 APPENDIX Menu Reference 162 Indicator Lamp Reference 164 REC mode 165 PLAY mode 166 Charger Unit 166 Troubleshooting Guide 167 Display Messages 170 Specifications 171 Main Specifications...
... in Windows ... 157 Getting Started 157 Selecting a Language 157 Viewing the Contents of the "Read me" File 158 Installing an Application 158 Viewing User Documentation (PDF Files) 159 User Registration 159 Exiting the Menu Application 159 Installing Software from the CD-ROM on a Macintosh 160 Installing Software 160 Viewing User Documentation (PDF Files) 161 162 APPENDIX Menu Reference 162 Indicator Lamp Reference 164 REC mode 165 PLAY mode 166 Charger Unit 166 Troubleshooting Guide 167 Display Messages 170 Specifications 171 Main Specifications...
Owners Manual
Page 8
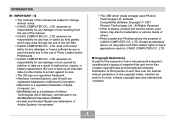
... licensed to third parties of snapshot files and movie files violates copyright laws and international contracts. INTRODUCTION IMPORTANT! • The contents of this manual. • CASIO COMPUTER CO., LTD. shall not be trademarks or service marks of others. • Photo Loader and Photohands are trademarks of Photo Loader and/or Photohands. • CASIO COMPUTER CO., LTD. Compatibility Software Copyright C 1997 Phoenix Technologies Ltd...
... licensed to third parties of snapshot files and movie files violates copyright laws and international contracts. INTRODUCTION IMPORTANT! • The contents of this manual. • CASIO COMPUTER CO., LTD. shall not be trademarks or service marks of others. • Photo Loader and Photohands are trademarks of Photo Loader and/or Photohands. • CASIO COMPUTER CO., LTD. Compatibility Software Copyright C 1997 Phoenix Technologies Ltd...
Owners Manual
Page 9
... type of image you view the effect on the display until one of them remains. • Triple Self-timer mode The self-timer can be recorded without using a memory card. • Support for SD memory cards and MMC (MultiMedia Cards) for memory expansion • Easy Image Transfer Transfer images to a computer simply by selecting the applicable sample images in 32 time zones. 9 You can use Coupling Shot and Pre-shot by connecting the camera with a USB cable. • Best Shot Simply select...
... type of image you view the effect on the display until one of them remains. • Triple Self-timer mode The self-timer can be recorded without using a memory card. • Support for SD memory cards and MMC (MultiMedia Cards) for memory expansion • Easy Image Transfer Transfer images to a computer simply by selecting the applicable sample images in 32 time zones. 9 You can use Coupling Shot and Pre-shot by connecting the camera with a USB cable. • Best Shot Simply select...
Owners Manual
Page 10
... image inter-compatibility between the digital camera and printers. • Digital Print Order Format (DPOF) Images can be used when specifying images and quantities for important events, and even can select images to print and start the print operation directly from your camera to your images come out just the way you intended when you recorded them. • USB DIRECT-PRINT support Your camera supports USB DIRECT-PRINT, which helps to create an album of the first image recorded for that makes image retouching quick and easy...
... image inter-compatibility between the digital camera and printers. • Digital Print Order Format (DPOF) Images can be used when specifying images and quantities for important events, and even can select images to print and start the print operation directly from your camera to your images come out just the way you intended when you recorded them. • USB DIRECT-PRINT support Your camera supports USB DIRECT-PRINT, which helps to create an album of the first image recorded for that makes image retouching quick and easy...
Owners Manual
Page 11
... impact. I Display Panel • Do not apply strong pressure to the LCD panel surface or subject it to record or play back images while operating an automobile or other bright light through the camera's viewfinder. I Avoid Use While In Motion • Never use the flash unit in this manual to "this camera" and "the camera" refer to observe the following important precautions whenever using the QV-R40. Looking...
... impact. I Display Panel • Do not apply strong pressure to the LCD panel surface or subject it to record or play back images while operating an automobile or other bright light through the camera's viewfinder. I Avoid Use While In Motion • Never use the flash unit in this manual to "this camera" and "the camera" refer to observe the following important precautions whenever using the QV-R40. Looking...
Owners Manual
Page 12
...) getting inside of an aircraft or anywhere else where operation of such devices is required when using the camera where it from the camera. 3. Contact your dealer or nearest CASIO authorized service center. Turn off the camera. 2. Particular care is restricted. If you are using battery power, remove the batteries from the wall outlet. INTRODUCTION I Connections • Never plug any of the above symptoms...
...) getting inside of an aircraft or anywhere else where operation of such devices is required when using the camera where it from the camera. 3. Contact your dealer or nearest CASIO authorized service center. Turn off the camera. 2. Particular care is restricted. If you are using battery power, remove the batteries from the wall outlet. INTRODUCTION I Connections • Never plug any of the above symptoms...
Owners Manual
Page 13
... - I Memory Protection • Whenever replacing batteries, be deleted in the case of fire and electric shock. Note that comes with the camera. If you are present. 1. Doing so creates the risk of personal injury. Near heaters, on a high shelf, etc. I Backing Up Important Data • Always keep backup copies of fire and electric shock. Contact your dealer or nearest CASIO...
... - I Memory Protection • Whenever replacing batteries, be deleted in the case of fire and electric shock. Note that comes with the camera. If you are present. 1. Doing so creates the risk of personal injury. Near heaters, on a high shelf, etc. I Backing Up Important Data • Always keep backup copies of fire and electric shock. Contact your dealer or nearest CASIO...
Owners Manual
Page 14
... nickel-metal hydride batteries. • The term "charger unit" in this camera. - Do not charge non-rechargeable batteries. - I Rechargeable Batteries • Should you do not plan to use the camera for this manual refers to clean alkaline battery fluid from open flame. • The term "battery" in the following precautions when using , charging, or storing batteries, immediately remove them from the camera or the battery charger unit and keep...
... nickel-metal hydride batteries. • The term "charger unit" in this camera. - Do not charge non-rechargeable batteries. - I Rechargeable Batteries • Should you do not plan to use the camera for this manual refers to clean alkaline battery fluid from open flame. • The term "battery" in the following precautions when using , charging, or storing batteries, immediately remove them from the camera or the battery charger unit and keep...

Owners Manual
Page 15
... expose it off with battery fluid can conduct electricity (necklaces, pencil lead, etc.). - Continued charging creates the risk of overheating, fire, and explosion. • Battery fluid can damage your eyes. Do not immerse batteries in a microwave oven, throw it into the camera or attach them to the charger unit. - Never use or leave batteries near open flame. - Make sure batteries are to observe...
... expose it off with battery fluid can conduct electricity (necklaces, pencil lead, etc.). - Continued charging creates the risk of overheating, fire, and explosion. • Battery fluid can damage your eyes. Do not immerse batteries in a microwave oven, throw it into the camera or attach them to the charger unit. - Never use or leave batteries near open flame. - Make sure batteries are to observe...

Owners Manual
Page 17
... adaptor while your hands are not using the AC adaptor. - Never pull on use of batteries of alkaline batteries will be very short. IMPORTANT! Actual battery life is recommended. 17 Leaving low or dead batteries in the User's Guide are no other heating device. - Never locate the power cord near a stove or other types of batteries available, note that the life of...
... adaptor while your hands are not using the AC adaptor. - Never pull on use of batteries of alkaline batteries will be very short. IMPORTANT! Actual battery life is recommended. 17 Leaving low or dead batteries in the User's Guide are no other heating device. - Never locate the power cord near a stove or other types of batteries available, note that the life of...
Owners Manual
Page 18
... cause of the error. Charge the batteries or replace the batteries with new ones as soon as possible after you turn off the camera - In areas subject to malfunction of the above conditions can lead to direct sunlight - In areas subject to the camera while the operation lamp is performing a record or memory access operation - Removing the batteries or memory card from the camera, or connecting the USB cable to high...
... cause of the error. Charge the batteries or replace the batteries with new ones as soon as possible after you turn off the camera - In areas subject to malfunction of the above conditions can lead to direct sunlight - In areas subject to the camera while the operation lamp is performing a record or memory access operation - Removing the batteries or memory card from the camera, or connecting the USB cable to high...
Owners Manual
Page 19
... remove dust particles from the camera and leave the battery compartment cover open for a few hours. If condensation does form, remove the batteries from the lens surface by using a lens blower to blow them off. Condensation can cause malfunction of the camera, so you bring the camera indoors on interior components. Next, wipe the surface of the lens can interfere with proper image recording...
... remove dust particles from the camera and leave the battery compartment cover open for a few hours. If condensation does form, remove the batteries from the lens surface by using a lens blower to blow them off. Condensation can cause malfunction of the camera, so you bring the camera indoors on interior components. Next, wipe the surface of the lens can interfere with proper image recording...

Owners Manual
Page 22
... language setting. 4. Press [SET] to register the clock settings and exit the setting screen. 10. Use [̆] and [̄] to turn on the camera. 2. Press the power button to select the summer time (DST) setting you want . 3. Set the date and the time. 9. Press the power button to record images. (See page 47 for details.) 1, 10 2, 3, 4, 5, 6, 7, 8, 9 1. QUICK START GUIDE To configure display language and clock settings • Be sure to configure the following settings before using the camera to turn...
... language setting. 4. Press [SET] to register the clock settings and exit the setting screen. 10. Use [̆] and [̄] to turn on the camera. 2. Press the power button to select the summer time (DST) setting you want . 3. Set the date and the time. 9. Press the power button to record images. (See page 47 for details.) 1, 10 2, 3, 4, 5, 6, 7, 8, 9 1. QUICK START GUIDE To configure display language and clock settings • Be sure to configure the following settings before using the camera to turn...

Owners Manual
Page 23
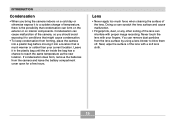
Point the camera at the subject, use the monitor screen or viewfinder to scroll through the images. 23 Holding the camera still, gently press the shutter release button. 2 1. Press [ ] (PLAY). 2. Press [ ] (REC). 2. Use [̇] and [̈] to compose the image, and then press the shutter release button half way. • When proper focus is achieved, the focus frame turns green and the green operation lamp lights. 3. QUICK START GUIDE To record an image Green operation lamp 1 3 (See...
Point the camera at the subject, use the monitor screen or viewfinder to scroll through the images. 23 Holding the camera still, gently press the shutter release button. 2 1. Press [ ] (PLAY). 2. Press [ ] (REC). 2. Use [̇] and [̈] to compose the image, and then press the shutter release button half way. • When proper focus is achieved, the focus frame turns green and the green operation lamp lights. 3. QUICK START GUIDE To record an image Green operation lamp 1 3 (See...
Owners Manual
Page 24
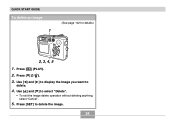
Press [̄] ( ). 3. Use [̆] and [̄] to delete. 4. Use [̇] and [̈] to display the image you want to select "Delete". • To exit the image delete operation without deleting anything, select "Cancel". 5. Press [ ] (PLAY). 2. QUICK START GUIDE To delete an image 1 (See page 102 for details.) 2, 3, 4, 5 1. Press [SET] to delete the image. 24
Press [̄] ( ). 3. Use [̆] and [̄] to delete. 4. Use [̇] and [̈] to display the image you want to select "Delete". • To exit the image delete operation without deleting anything, select "Cancel". 5. Press [ ] (PLAY). 2. QUICK START GUIDE To delete an image 1 (See page 102 for details.) 2, 3, 4, 5 1. Press [SET] to delete the image. 24


