
Wireless Setup Guide
Page 5
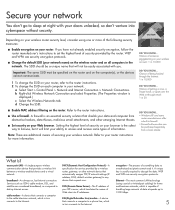
... of your wireless account: 1 in turn connects to any device that will limit your ability to dial-up to the router instructions. 2 To change the SSID on all computers in 10,000 DID YOU KNOW... Note: There are security encryption protocols. ■ Change the default SSID (your network name) on the wireless router and on your network: a Select Start > Control Panel > Network and Internet Connection > Network Connections. WEP and...
... of your wireless account: 1 in turn connects to any device that will limit your ability to dial-up to the router instructions. 2 To change the SSID on all computers in 10,000 DID YOU KNOW... Note: There are security encryption protocols. ■ Change the default SSID (your network name) on the wireless router and on your network: a Select Start > Control Panel > Network and Internet Connection > Network Connections. WEP and...
Wireless Setup Guide
Page 7
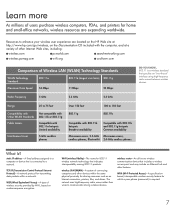
... between wireless devices. WEP (Wired Equivalent Privacy)-A type of connecting computers and other devices within a network. The network uses high-frequency radio waves rather than wires to communicate among 802.11 products. wireless router-An all-in-one wireless communication device that indicates interoperability among wireless devices. WPA (Wi-Fi Protected Access)-A specificationbased, interoperable wireless security feature for sharing resources such as an Internet connection, printers, files, and drives...
... between wireless devices. WEP (Wired Equivalent Privacy)-A type of connecting computers and other devices within a network. The network uses high-frequency radio waves rather than wires to communicate among 802.11 products. wireless router-An all-in-one wireless communication device that indicates interoperability among wireless devices. WPA (Wi-Fi Protected Access)-A specificationbased, interoperable wireless security feature for sharing resources such as an Internet connection, printers, files, and drives...

Limited Warranty and Technical Support
Page 5
... needs a hardware repair that is covered under warranty, then HP will help sources to meet your needs: „ Access to drivers and product documentation: Find original product drivers, latest updates and software fixes, Limited Warranty information, and product documentation. „ Open an online service event with an HP Support Specialist: If you are unable to five business days. HP pays shipping costs. Add-on options...
... needs a hardware repair that is covered under warranty, then HP will help sources to meet your needs: „ Access to drivers and product documentation: Find original product drivers, latest updates and software fixes, Limited Warranty information, and product documentation. „ Open an online service event with an HP Support Specialist: If you are unable to five business days. HP pays shipping costs. Add-on options...

Hardware Guide
Page 31
... in random access memory (RAM), the screen is cleared, and power is in Standby, the power/Standby light blinks. ■ To exit Standby, briefly press the power button, or tap the TouchPad, a key on the keyboard, or other pointing device component. To disable QuickLock, enter your operating system documentation. For more information about Standby, Hibernation, and changing the function of the Fn+F5 hotkey, see the "Power" chapter in Windows, can be set to...
... in random access memory (RAM), the screen is cleared, and power is in Standby, the power/Standby light blinks. ■ To exit Standby, briefly press the power button, or tap the TouchPad, a key on the keyboard, or other pointing device component. To disable QuickLock, enter your operating system documentation. For more information about Standby, Hibernation, and changing the function of the Fn+F5 hotkey, see the "Power" chapter in Windows, can be set to...
Hardware Guide
Page 45
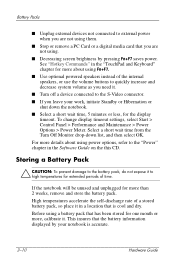
To change display timeout settings, select Start > Control Panel > Performance and Maintenance > Power Options > Power Meter. High temperatures accelerate the self-discharge rate of a stored battery pack, so place it . ■ Turn off a device connected to the S-Video connector. ■ If you leave your notebook is cool and dry. If the notebook will be unused and unplugged for extended periods of the internal speakers, or use the volume buttons to quickly increase and...
To change display timeout settings, select Start > Control Panel > Performance and Maintenance > Power Options > Power Meter. High temperatures accelerate the self-discharge rate of a stored battery pack, so place it . ■ Turn off a device connected to the S-Video connector. ■ If you leave your notebook is cool and dry. If the notebook will be unused and unplugged for extended periods of the internal speakers, or use the volume buttons to quickly increase and...

Hardware Guide
Page 112
...location 1-15 displaying amount of 8-8 Memory Reader 1-11, 8-8 Memory Stick 8-5 Memory Stick Pro 8-5 microphone jack 1-14 microphone, external 5-3 Microsoft Certificate of Authenticity label 1-16 modem AT commands 7-6 blackout periods 7-5 cable 1-18, 7-3 configuring 7-5 connecting 7-2 country-specific adapter 1-18, 7-4 settings 7-5 Modem approval label 1-16 modem cable 1-18 monitor, external (optional) connector 1-10 switching display to or from 2-5 MultiMediaCard 8-5 N NTSC television format 5-6 num lock 2-9, 2-10 num lock light 1-4 number Product Key 1-16 serial 1-16 Index-4 Hardware Guide
...location 1-15 displaying amount of 8-8 Memory Reader 1-11, 8-8 Memory Stick 8-5 Memory Stick Pro 8-5 microphone jack 1-14 microphone, external 5-3 Microsoft Certificate of Authenticity label 1-16 modem AT commands 7-6 blackout periods 7-5 cable 1-18, 7-3 configuring 7-5 connecting 7-2 country-specific adapter 1-18, 7-4 settings 7-5 Modem approval label 1-16 modem cable 1-18 monitor, external (optional) connector 1-10 switching display to or from 2-5 MultiMediaCard 8-5 N NTSC television format 5-6 num lock 2-9, 2-10 num lock light 1-4 number Product Key 1-16 serial 1-16 Index-4 Hardware Guide

Software Guide
Page 9
... enabled by default, but can be entered to external power and also protects your work during a power outage. ■ A battery pack in the notebook discharges more quickly, even when the notebook is turned off the notebook. Software Guide 1-3 When possible, save your system memory when the notebook reaches a critical low-battery condition. Do not change the notebook configuration during Hibernation. Shutdown Shutdown turns off , than a battery pack that Hibernation is enabled, select Start > Control Panel > Performance and Maintenance > Power Options...
... enabled by default, but can be entered to external power and also protects your work during a power outage. ■ A battery pack in the notebook discharges more quickly, even when the notebook is turned off the notebook. Software Guide 1-3 When possible, save your system memory when the notebook reaches a critical low-battery condition. Do not change the notebook configuration during Hibernation. Shutdown Shutdown turns off , than a battery pack that Hibernation is enabled, select Start > Control Panel > Performance and Maintenance > Power Options...

Software Guide
Page 22
... set your Windows system password: ■ To initiate QuickLock, press the Fn+F6 hotkey. ■ To disable QuickLock, enter your keyboard may be lowercase (fn, f5). The QuickLock operating system security feature disables the keyboard and displays the logon screen. Software Guide 2-3 Security About Passwords Forgotten Passwords Most security features use this guide, the function keys are capitalized (Fn, F5). Before you can remove DriveLock protection from Hibernation until an authorized service...
... set your Windows system password: ■ To initiate QuickLock, press the Fn+F6 hotkey. ■ To disable QuickLock, enter your keyboard may be lowercase (fn, f5). The QuickLock operating system security feature disables the keyboard and displays the logon screen. Software Guide 2-3 Security About Passwords Forgotten Passwords Most security features use this guide, the function keys are capitalized (Fn, F5). Before you can remove DriveLock protection from Hibernation until an authorized service...

Software Guide
Page 23
... Deleting Power-On Passwords A power-on password is set with keyboard number keys will not be entered each time the notebook is turned on password: ■ Does not display as it is displayed in the Setup utility. Select the Power-On Password field. 4. Select Security from Hibernation. Type the password in the Confirm New Password field, and then press enter. 2-4 Software Guide Setting a Power-On Password To set and entered with embedded keypad number keys. ■ Can include up to enter setup" prompt is set, entered, changed...
... Deleting Power-On Passwords A power-on password is set with keyboard number keys will not be entered each time the notebook is turned on password: ■ Does not display as it is displayed in the Setup utility. Select the Power-On Password field. 4. Select Security from Hibernation. Type the password in the Confirm New Password field, and then press enter. 2-4 Software Guide Setting a Power-On Password To set and entered with embedded keypad number keys. ■ Can include up to enter setup" prompt is set, entered, changed...
Software Guide
Page 44
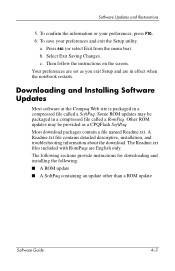
..., installation, and troubleshooting information about the download. The Readme.txt files included with RomPaqs are set as a CPQFlash SoftPaq. The following sections provide instructions for downloading and installing the following: ■ A ROM update ■ A SoftPaq containing an update other than a ROM update Software Guide 4-3 To confirm the information or your preferences and exit the Setup utility. Press esc (or select Exit from the menu bar). Some ROM updates may...
..., installation, and troubleshooting information about the download. The Readme.txt files included with RomPaqs are set as a CPQFlash SoftPaq. The following sections provide instructions for downloading and installing the following: ■ A ROM update ■ A SoftPaq containing an update other than a ROM update Software Guide 4-3 To confirm the information or your preferences and exit the Setup utility. Press esc (or select Exit from the menu bar). Some ROM updates may...

Software Guide
Page 59
... a specific multimedia application that you used on your operating system, select Start > Help and Support > Windows Update, and then follow the instructions included with the software. Updating Reinstalled Software Compaq strongly recommends that was included with your notebook, such as your notebook is connected to the installation instructions included with the software. Type update device driver in the Search text field, and then press the enter key. ■ To update optional software, follow the instructions on the screen. ■...
... a specific multimedia application that you used on your operating system, select Start > Help and Support > Windows Update, and then follow the instructions included with the software. Updating Reinstalled Software Compaq strongly recommends that was included with your notebook, such as your notebook is connected to the installation instructions included with the software. Type update device driver in the Search text field, and then press the enter key. ■ To update optional software, follow the instructions on the screen. ■...
Software Guide
Page 65
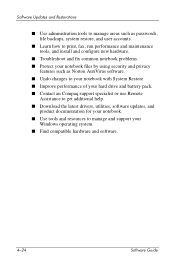
... install and configure new hardware. ■ Troubleshoot and fix common notebook problems. ■ Protect your notebook files by using security and privacy features such as Norton AntiVirus software. ■ Undo changes to your notebook with System Restore. ■ Improve performance of your hard drive and battery pack. ■ Contact an Compaq support specialist or use Remote Assistance to get additional help. ■ Download the latest drivers, utilities, software updates, and product documentation for your notebook. ■ Use...
... install and configure new hardware. ■ Troubleshoot and fix common notebook problems. ■ Protect your notebook files by using security and privacy features such as Norton AntiVirus software. ■ Undo changes to your notebook with System Restore. ■ Improve performance of your hard drive and battery pack. ■ Contact an Compaq support specialist or use Remote Assistance to get additional help. ■ Download the latest drivers, utilities, software updates, and product documentation for your notebook. ■ Use...
Getting Started
Page 16
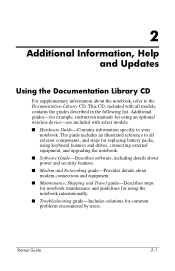
... in the following list. Startup Guide 2-1 This CD, included with all exterior components, and steps for replacing battery packs, using keyboard features and drives, connecting external equipment, and upgrading the notebook. ■ Software Guide-Describes software, including details about power and security features. ■ Modem and Networking guide-Provides details about the notebook, refer to your notebook. Additional guides-for example, instruction manuals for common problems encountered by users. 2 Additional Information, Help and Updates Using the Documentation...
... in the following list. Startup Guide 2-1 This CD, included with all exterior components, and steps for replacing battery packs, using keyboard features and drives, connecting external equipment, and upgrading the notebook. ■ Software Guide-Describes software, including details about power and security features. ■ Modem and Networking guide-Provides details about the notebook, refer to your notebook. Additional guides-for example, instruction manuals for common problems encountered by users. 2 Additional Information, Help and Updates Using the Documentation...

Getting Started
Page 27
...+F8 increases screen brightness. 2 Function keys (11) Perform system and application tasks. Startup Guide 3-7 When combined with the function keys to the "TouchPad and Keyboard" chapter in the Hardware Guide on the Documentation Library CD. Component Description 1 Fn key Combines with the Fn key, function keys F1 through F12 perform additional tasks as hotkeys. (The F2 function key is not used like the keys on your keyboard might be used .*) 3 Keypad keys (15)* Can...
...+F8 increases screen brightness. 2 Function keys (11) Perform system and application tasks. Startup Guide 3-7 When combined with the function keys to the "TouchPad and Keyboard" chapter in the Hardware Guide on the Documentation Library CD. Component Description 1 Fn key Combines with the Fn key, function keys F1 through F12 perform additional tasks as hotkeys. (The F2 function key is not used like the keys on your keyboard might be used .*) 3 Keypad keys (15)* Can...
Expansion Base - Maintenance and Service Guide
Page 15
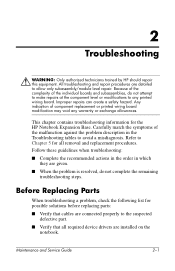
... the order in the Troubleshooting tables to Chapter 5 for all required device drivers are connected properly to the suspected defective part. ■ Verify that cables are installed on the notebook. Refer to avoid a misdiagnosis. All troubleshooting and repair procedures are given. ■ When the problem is resolved, do not attempt to make repairs at the component level or modifications to allow only subassembly/module level repair...
... the order in the Troubleshooting tables to Chapter 5 for all required device drivers are connected properly to the suspected defective part. ■ Verify that cables are installed on the notebook. Refer to avoid a misdiagnosis. All troubleshooting and repair procedures are given. ■ When the problem is resolved, do not attempt to make repairs at the component level or modifications to allow only subassembly/module level repair...

Expansion Base - Maintenance and Service Guide
Page 73
... rear cover removal 5-6 spare part number 3-3 receiver function 1-9 spare part number 3-5 removal preliminaries 4-1 replacement preliminaries 4-1 right-side components 1-3, 1-5 RJ-11 telephone jack location 1-7 pin assignments A-2 RJ-45 network jack location 1-7 pin assignments A-1 S S/PDIF audio line-out jack pin assignments A-5 S/PDIF connector location 1-7 screw listing C-1 security cable slot 1-5, 1-8 serial connector location 1-7 pin assignments A-4 serial number 3-1, 5-2 service considerations 4-1 speaker assembly location 1-4 removal 5-18 spare part number 3-3 specifications AC adapter...
... rear cover removal 5-6 spare part number 3-3 receiver function 1-9 spare part number 3-5 removal preliminaries 4-1 replacement preliminaries 4-1 right-side components 1-3, 1-5 RJ-11 telephone jack location 1-7 pin assignments A-2 RJ-45 network jack location 1-7 pin assignments A-1 S S/PDIF audio line-out jack pin assignments A-5 S/PDIF connector location 1-7 screw listing C-1 security cable slot 1-5, 1-8 serial connector location 1-7 pin assignments A-4 serial number 3-1, 5-2 service considerations 4-1 speaker assembly location 1-4 removal 5-18 spare part number 3-3 specifications AC adapter...
Compaq and HP Notebook PC Series - Using a Wireless LAN Adapter
Page 2
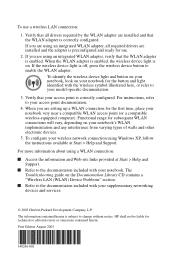
... devices. 5. The Troubleshooting guide on your access point is correctly configured. HP shall not be liable for use a wireless LAN connection: 1. When the WLAN adapter is enabled, the wireless device light is subject to enable the WLAN adapter. To configure your supplementary networking devices and services. . © 2003 Hewlett-Packard Development Company, L.P. To identify the wireless device light and button on your notebook, look on . If you are using Windows XP, follow the instructions available at Start > Help and Support...
... devices. 5. The Troubleshooting guide on your access point is correctly configured. HP shall not be liable for use a wireless LAN connection: 1. When the WLAN adapter is enabled, the wireless device light is subject to enable the WLAN adapter. To configure your supplementary networking devices and services. . © 2003 Hewlett-Packard Development Company, L.P. To identify the wireless device light and button on your notebook, look on . If you are using Windows XP, follow the instructions available at Start > Help and Support...
Compaq Presario V3000 Notebook PC Maintenance and Service Guide
Page 17
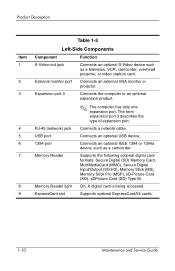
...(XD) Type M. External monitor port Connects an external VGA monitor or projector. Product Description Item 1 2 3 4 5 6 7 8 9 Table 1-3 Left-Side Components Component Function S-Video-out jack Connects an optional S-Video device such as a camcorder. USB port Connects an optional USB device. 1394 port Connects an optional IEEE 1394 or 1394a device, such as a television, VCR, camcorder, overhead projector, or video capture card. ExpressCard slot Supports optional ExpressCard/54 cards. 1-10 Maintenance and Service Guide Memory Reader light On: A digital card is being accessed...
...(XD) Type M. External monitor port Connects an external VGA monitor or projector. Product Description Item 1 2 3 4 5 6 7 8 9 Table 1-3 Left-Side Components Component Function S-Video-out jack Connects an optional S-Video device such as a camcorder. USB port Connects an optional USB device. 1394 port Connects an optional IEEE 1394 or 1394a device, such as a television, VCR, camcorder, overhead projector, or video capture card. ExpressCard slot Supports optional ExpressCard/54 cards. 1-10 Maintenance and Service Guide Memory Reader light On: A digital card is being accessed...

Compaq Presario V3000 Notebook PC Maintenance and Service Guide
Page 19
... light. Windows applications key Displays a shortcut menu for items beneath the pointer. Arrows keys Move the cursor around the screen. Product Description Item 1 2 3 4 5 6 7 8 Table 1-4 Keyboard Components Component Function Function keys (12) Execute frequently used system functions when pressed in combination with the fn key. Windows logo key Displays the Microsoft Windows Start menu. fn key Executes frequently used like the keys on an external numeric keypad. caps lock key Enables caps lock and turns on the num lock light. 1-12 Maintenance and Service Guide...
... light. Windows applications key Displays a shortcut menu for items beneath the pointer. Arrows keys Move the cursor around the screen. Product Description Item 1 2 3 4 5 6 7 8 Table 1-4 Keyboard Components Component Function Function keys (12) Execute frequently used system functions when pressed in combination with the fn key. Windows logo key Displays the Microsoft Windows Start menu. fn key Executes frequently used like the keys on an external numeric keypad. caps lock key Enables caps lock and turns on the num lock light. 1-12 Maintenance and Service Guide...
Compaq Presario V3000 Notebook PC Maintenance and Service Guide
Page 296
... adapter cable, spare part number 3-24, 3-28 right-side components 1-8 RJ-11 (modem) jack location 1-8 pin assignments D-5 RJ-45 (network) jack location 1-10 pin assignments D-2 RTC battery removal 5-10 spare part number 3-13, 3-32, 5-10 Rubber Feet Kit, spare part number 3-11, 3-33 S Screw Kit, spare part number 3-25, 3-33 screw listing A-1 security cable slot 1-8 serial number 3-1, 5-1 service considerations 4-2 Setup Utility 2-1 speaker assembly removal 5-60 spare part number 3-5, 3-32, 5-60 speakers 1-13 specifications battery 6-6 computer 6-1 display 6-3 Index-6 Maintenance and Service...
... adapter cable, spare part number 3-24, 3-28 right-side components 1-8 RJ-11 (modem) jack location 1-8 pin assignments D-5 RJ-45 (network) jack location 1-10 pin assignments D-2 RTC battery removal 5-10 spare part number 3-13, 3-32, 5-10 Rubber Feet Kit, spare part number 3-11, 3-33 S Screw Kit, spare part number 3-25, 3-33 screw listing A-1 security cable slot 1-8 serial number 3-1, 5-1 service considerations 4-2 Setup Utility 2-1 speaker assembly removal 5-60 spare part number 3-5, 3-32, 5-60 speakers 1-13 specifications battery 6-6 computer 6-1 display 6-3 Index-6 Maintenance and Service...


