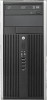
Illustrated Parts & Service Map Pro 6305 Business PC Microtower
Page 1
...-001 636927-001 680020-001 646809-001 665961-001 661841-001 450712-001 586721-001 703597-001 397117-001 HP Compaq Pro 6305, MT 706895-003 page 1 and other countries. Illustrated Parts & Service Map HP Compaq Pro 6305 Business PC Microtower © 2013 Hewlett-Packard Development Company, L.P. Optional discrete graphics solutions from AMD and NVIDIA • External...
Illustrated Parts & Service Map Pro 6305 Business PC Microtower
Page 2
... x16 graphics card, 512 MB (for use only with Windows 8) 697246-001 * HP WLAN 802.11 g/n 1x2 PCIe NIC 538048-001 * Intel PRO/1000, single port, GbE, NIC 728562-001 * Intel Centrino Advanced-N 6205, 802.11a/b/g/n WLAN module 695915-001 * HP USB 3.0 SuperSpeed PCIe... Message Probable Cause Recommended Action 101-Option ROM Error 1. Determine if hard drive is unable to fail. Expansion board option ROM checksum 1. HP Compaq Pro 6305, MT 706895-003 page 2 System unable to isolate faulty DIMM. 4. Clear CMOS memory. 2. Check monitor connection. 4. Enter Computer Setup and run ...
Illustrated Parts & Service Map Pro 6305 Business PC Microtower
Page 3
..." message is restarted. Clearing CMOS 1. Locate the header and jumper. 4. Reconnect the external equipment. 7. This clears the current passwords and disables the password features. 8. HP Compaq Pro 6305, MT 706895-003 page 3 Allows you to boot the system from a USB flash drive. Ignore Changes and Exit - Lists all models. Allows you to save current...
Illustrated Parts & Service Map Pro 6305 Business PC Microtower
Page 4
... DisplayPort connector Hood lock connector USB connectors Network+USB connectors Hood sensor connector PCIe X1 slot PCIe X16 slot PCIe X16 slot PCI slot HP Compaq Pro 6305, MT 706895-003 page 4 Channel A IN/OUT DIMM2 Memory socket - Channel A PAR DIMM3 Memory socket - System Board System Board Connectors and Jumpers (component location may vary...
Hardware Reference Guide
Page 5
... Panel Components 4 Small Form Factor (SFF) Rear Panel Components 5 Media Card Reader Components ...6 Keyboard ...7 Using the Windows Logo Key 8 Serial Number Location ...10 2 Microtower (MT) Hardware Upgrades ...11 Serviceability Features ...11 Warnings and Cautions ...11 Removing the Computer Access Panel 12 Replacing the Computer Access Panel 13 Removing the Front ...
Hardware Reference Guide
Page 10
... up asking if you want to use the connector for a microphone Line-In device or a headphone. You can also be used in a tower orientation. Microtower (MT) Front Panel Components Drive configuration may vary by model. Table 1-1 Front Panel Components 1 5.25-inch Optical Drives 5 3.5-inch Media Card Reader (optional) 2 Hard Drive Activity...
Hardware Reference Guide
Page 12
... video connectors on the graphics card and the integrated graphics on the system board may be functional on the graphics card. 4 Chapter 1 Product Features Microtower (MT) Rear Panel Components Figure 1-4 Rear Panel Components Table 1-3 Rear Panel Components 1 Power Cord Connector 2 Line-In Audio Connector (blue) 6 Line-Out Connector for a line-in...
Hardware Reference Guide
Page 19
2 Microtower (MT) Hardware Upgrades Serviceability Features The computer includes features that make it easy to the system board. Do not plug telecommunications or telephone connectors into an ...
Hardware Reference Guide
Page 20
... power outlet and disconnect any security devices that secure the access panel to install internal parts. Figure 2-1 Removing the Computer Access Panel 12 Chapter 2 Microtower (MT) Hardware Upgrades Disconnect the power cord from the computer. 3. Use the handle located between the thumbscrews to the internal components of the power-on state...
Hardware Reference Guide
Page 22
.... 4. CAUTION: Regardless of the power-on state, voltage is always present on the side of the computer. 5. Figure 2-4 Removing the Front Bezel 14 Chapter 2 Microtower (MT) Hardware Upgrades Remove the computer access panel. 6. Remove/disengage any external devices. Disconnect the power cord from the computer. 3. Lift up the three tabs on...
Hardware Reference Guide
Page 24
... Second Media Card Reader USB Device, such as a Media Card Reader Hood Sensor USB Device, such as a Media Card Reader Expansion Card 16 Chapter 2 Microtower (MT) Hardware Upgrades System Board Connections Refer to the following illustrations and tables to identify the system board connectors for your model.
Hardware Reference Guide
Page 26
... channel. ● In any mode, the maximum operational speed is not equal to prevent corrosion and/or oxidation resulting from the computer. 18 Chapter 2 Microtower (MT) Hardware Upgrades Installing DIMMs CAUTION: You must disconnect the power cord and wait approximately 30 seconds for the power to Channel A.
Hardware Reference Guide
Page 28
... the computer. 3. CAUTION: Regardless of the computer chassis. 7. To remove, replace, or add an expansion card: 1. Figure 2-9 Opening the Expansion Slot Retainer 20 Chapter 2 Microtower (MT) Hardware Upgrades Remove/disengage any security devices that secures the PCI slot covers by lifting the green tab on the computer. Removing or Installing an...
Hardware Reference Guide
Page 30
... from the socket. Be sure not to scrape the card against the other components. Store the removed card in anti-static packaging. 22 Chapter 2 Microtower (MT) Hardware Upgrades Figure 2-11 Removing a Standard PCI Expansion Card c. b. If you are removing a standard PCI card or PCI Express x1 card, hold the card at...
Hardware Reference Guide
Page 32
... configuration on the computer. 16. To verify the type and size of the storage devices installed in the computer, run Computer Setup. 24 Chapter 2 Microtower (MT) Hardware Upgrades
Hardware Reference Guide
Page 34
... damage to Electrostatic Discharge on or in a bubble-pack mailer or other protective packaging and label the package "Fragile: Handle With Care." 26 Chapter 2 Microtower (MT) Hardware Upgrades Handle a drive carefully; If a drive must remove the four silver and blue 6-32 isolation mounting guide screws from the old hard drive and...
Hardware Reference Guide
Page 36
Figure 2-18 Disconnecting the Media Card Reader USB Cable 7. Lift the release tab on the latch drive bracket (1) for the drive you are removing a media card reader, disconnect the USB cable from its drive bay (2). b. A latch drive bracket with release tabs secures the drives in the drive bay. If you want to remove, then slide the drive from the system board. Figure 2-19 Removing the Drives 28 Chapter 2 Microtower (MT) Hardware Upgrades
Hardware Reference Guide
Page 38
... the guide screws with the guide slots, until the drive snaps into the Drive Cage 9. Figure 2-22 Connecting the Optical Drive Cables 30 Chapter 2 Microtower (MT) Hardware Upgrades Figure 2-21 Sliding the Drives into place. 8.
Hardware Reference Guide
Page 40
... an active AC outlet. Disconnect the power cord from the back of the hard drive. Figure 2-24 Disconnecting the Hard Drive Cables 32 Chapter 2 Microtower (MT) Hardware Upgrades CAUTION: Regardless of the computer. 5. Disconnect the power cable (1) and data cable (2) from the power outlet and disconnect any external devices.
Hardware Reference Guide
Page 42
... bays. Figure 2-26 Installing Isolation Mounting Guide Screws in a 3.5-inch Drive ● If you must install the drive in the Adapter Bracket 34 Chapter 2 Microtower (MT) Hardware Upgrades Refer to the new one. ● If you are installing a 2.5-inch hard drive: ◦ Slide the drive into the bay adapter bracket, ensuring...