User Guide
Page 3
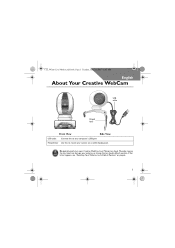
Motion lens head. CLI_WCam Live! Motion_QS.book Page 1 Tuesday, June 28, 2005 11:43 AM English About Your Creative WebCam USB cable Hinged lever Front View Side View USB cable Connect this to your camera on page 6. 1 Manually moving the lens head may damage your Creative WebCam Live! Do not physically turn your webcam or change the lens head's default position. Hinged lever Use this to mount your computer's USB port. If the latter happens, see "Resetting Your Webcam to its Default Position" on an LCD display panel.
Motion lens head. CLI_WCam Live! Motion_QS.book Page 1 Tuesday, June 28, 2005 11:43 AM English About Your Creative WebCam USB cable Hinged lever Front View Side View USB cable Connect this to your camera on page 6. 1 Manually moving the lens head may damage your Creative WebCam Live! Do not physically turn your webcam or change the lens head's default position. Hinged lever Use this to mount your computer's USB port. If the latter happens, see "Resetting Your Webcam to its Default Position" on an LCD display panel.
User Guide
Page 4
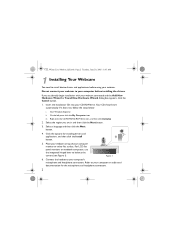
... Next button. 3. Place your webcam on top of your computer before using your computer or audio card documentation for installing drivers and applications, and then click the Install button. 5. Start Windows Explorer. iii. If it does not, follow the steps below: i. On the left pane, click the My Computer icon. Select the region you accidentally begin installation with your webcam connected and the Add New Hardware Wizard or...
... Next button. 3. Place your webcam on top of your computer before using your computer or audio card documentation for installing drivers and applications, and then click the Install button. 5. Start Windows Explorer. iii. If it does not, follow the steps below: i. On the left pane, click the My Computer icon. Select the region you accidentally begin installation with your webcam connected and the Add New Hardware Wizard or...
User Guide
Page 5
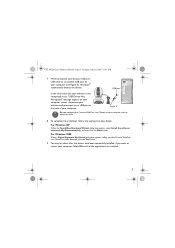
... Creative WebCam Live! CLI_WCam Live! When prompted, connect your webcam's USB cable to an available USB port on your computer screen, disconnect your webcam and reconnect it to a USB port at the back of your computer. To complete the installation, follow the appropriate steps below: For Windows XP When the Found New Hardware Wizard dialog box appears, select Install the software automatically (Recommended), and then click the Next button. Motion...
... Creative WebCam Live! CLI_WCam Live! When prompted, connect your webcam's USB cable to an available USB port on your computer screen, disconnect your webcam and reconnect it to a USB port at the back of your computer. To complete the installation, follow the appropriate steps below: For Windows XP When the Found New Hardware Wizard dialog box appears, select Install the software automatically (Recommended), and then click the Next button. Motion...
User Guide
Page 6
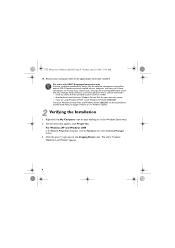
... • download and install the latest Windows Service Pack for optimal USB 2.0 performance are installed on your computer after all the applications have been installed. CLI_WCam Live! If you if these components are using Windows XP SP1, install Windows XP Hotfix KB822603 The latest Windows Service Packs and Windows Hotfix KB822603 can be obtained from the Microsoft Help and Support website or via Windows Update. 2 Verifying the Installation 1. The entry "Creative WebCam Live!
... • download and install the latest Windows Service Pack for optimal USB 2.0 performance are installed on your computer after all the applications have been installed. CLI_WCam Live! If you if these components are using Windows XP SP1, install Windows XP Hotfix KB822603 The latest Windows Service Packs and Windows Hotfix KB822603 can be obtained from the Microsoft Help and Support website or via Windows Update. 2 Verifying the Installation 1. The entry "Creative WebCam Live!
User Guide
Page 7
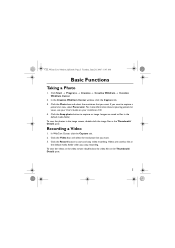
Click Start → Programs → Creative → Creative WebCam → Creative WebCam Center. 2. If you stop video recording. Click the Record button to capture an image. In the Creative WebCam Center window, click the Capture tab. 3. Images are saved as files in the default media folder when you want . In WebCam Center, click the Capture tab. 2. Videos are saved as files in the default media folder. Click the Photo box and select the resolution that you...
Click Start → Programs → Creative → Creative WebCam → Creative WebCam Center. 2. If you stop video recording. Click the Record button to capture an image. In the Creative WebCam Center window, click the Capture tab. 3. Images are saved as files in the default media folder when you want . In WebCam Center, click the Capture tab. 2. Videos are saved as files in the default media folder. Click the Photo box and select the resolution that you...

User Guide
Page 8
... or Camera button. 6 Motion icon. Your camera view moves toward the center of horizontal, vertical and diagonal panning in eight different directions. Click Start → Settings → Control Panel → Scanners and Cameras, and click the Creative WebCam Live! ii. Using the Pan and Tilt feature With the Pan and Tilt feature, you want to start controlling your webcam's positioning directly from your face during video instant messaging sessions, or when recording video...
... or Camera button. 6 Motion icon. Your camera view moves toward the center of horizontal, vertical and diagonal panning in eight different directions. Click Start → Settings → Control Panel → Scanners and Cameras, and click the Creative WebCam Live! ii. Using the Pan and Tilt feature With the Pan and Tilt feature, you want to start controlling your webcam's positioning directly from your face during video instant messaging sessions, or when recording video...

User Guide
Page 9
... you receive the most appropriate service and product support available. Go to change without prior notice. in the United States and/or other information in ) Product Registration Registering your product's many features. All specifications are subject to d:\manual\\manual.chm (replace d:\ with the drive letter of Microsoft Corporation. CLI_WCam Live! Please note that your User's Guide is a registered trademark of the...
... you receive the most appropriate service and product support available. Go to change without prior notice. in the United States and/or other information in ) Product Registration Registering your product's many features. All specifications are subject to d:\manual\\manual.chm (replace d:\ with the drive letter of Microsoft Corporation. CLI_WCam Live! Please note that your User's Guide is a registered trademark of the...


