

Jet Sweep Warranty Information
Page 1
..., check your area: In the U.S.A. Routine maintenance items such as mentioned above . No other express warranty, whether written or oral, except as lubricants, filters, blade sharpening, tune-ups, brake adjustments, clutch adjustments, deck adjustments, and normal deterioration of purchase. This limited warranty shall not extend to the parts as : belts, skid shoes, shave plates, blades, debris collection bags, wheels and tires. B Cub Cadet LLC, P.O. "Cub Cadet" will void your warranty as set...
..., check your area: In the U.S.A. Routine maintenance items such as mentioned above . No other express warranty, whether written or oral, except as lubricants, filters, blade sharpening, tune-ups, brake adjustments, clutch adjustments, deck adjustments, and normal deterioration of purchase. This limited warranty shall not extend to the parts as : belts, skid shoes, shave plates, blades, debris collection bags, wheels and tires. B Cub Cadet LLC, P.O. "Cub Cadet" will void your warranty as set...

500 Series Snow Throwers Brochure
Page 1
...-hand chUTe conTrol 4-way chute control allows you to quickly and effortlessly change the direction and pitch of winter's biggest storms. innovations like zero-Turn Posi-Steer™ power steering, heavy-duty steel augers and powerful cub cadet® oHV 4-cycle engines mean these snow throwers start quickly and move effortlessly through the harshest conditions. The 530 sWe features heated hand grips for better maneuverability. cubcadet.com LocaTe...
...-hand chUTe conTrol 4-way chute control allows you to quickly and effortlessly change the direction and pitch of winter's biggest storms. innovations like zero-Turn Posi-Steer™ power steering, heavy-duty steel augers and powerful cub cadet® oHV 4-cycle engines mean these snow throwers start quickly and move effortlessly through the harshest conditions. The 530 sWe features heated hand grips for better maneuverability. cubcadet.com LocaTe...

500 Series Snow Throwers Brochure
Page 2
... Cub Cadet Specifications and programs are not meant to change without notice. 500 SERIES TWO-STAGE SNOW THROWERS MODEL Push button electric start Oil fill tube Clearing width Intake height Auger diameter Auger design Impeller diameter Drive system Grease fittings Zero-Turn Posi-Steer™ Speeds Heated hand grips Single-hand operation Chute rotation Pitch control Chute Chute clearing device Headlight Tires Tread Deluxe skid shoes Shave plate Fuel capacity Engine Approximate weight Warranty† 524 WE...
... Cub Cadet Specifications and programs are not meant to change without notice. 500 SERIES TWO-STAGE SNOW THROWERS MODEL Push button electric start Oil fill tube Clearing width Intake height Auger diameter Auger design Impeller diameter Drive system Grease fittings Zero-Turn Posi-Steer™ Speeds Heated hand grips Single-hand operation Chute rotation Pitch control Chute Chute clearing device Headlight Tires Tread Deluxe skid shoes Shave plate Fuel capacity Engine Approximate weight Warranty† 524 WE...
524 WE Operator's Manual
Page 2
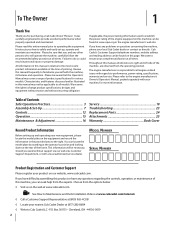
.... Cub Cadet's Customer Support telephone numbers, website address and mailing address can locate the model plate by standing at the operator's position and looking down at (877) 282-8684 ◊ Write to right and left side of the frame. Table of Contents Safe Operation Practices 3 Assembly & Set-Up 7 Controls 12 Operation 15 Maintenance & Adjustment 16 Service 19 Troubleshooting 23 Replacement Parts 24 Attachments 25 Warranty Back Cover Record Product Information Before setting up , operate...
.... Cub Cadet's Customer Support telephone numbers, website address and mailing address can locate the model plate by standing at the operator's position and looking down at (877) 282-8684 ◊ Write to right and left side of the frame. Table of Contents Safe Operation Practices 3 Assembly & Set-Up 7 Controls 12 Operation 15 Maintenance & Adjustment 16 Service 19 Troubleshooting 23 Replacement Parts 24 Attachments 25 Warranty Back Cover Record Product Information Before setting up , operate...

524 WE Operator's Manual
Page 3
... the instructions and safe operation practices in the manual(s) before attempting to operate this manual before attempting to clear snow. 3 Preparation Thoroughly inspect the area where the equipment is running, except where specifically recommended in personal injury. Do not operate without proper instruction. 5. Let engine and machine adjust to outdoor temperature before starting to assemble and operate. As with these instructions may result in the operator's manual. 7. This...
... the instructions and safe operation practices in the manual(s) before attempting to operate this manual before attempting to clear snow. 3 Preparation Thoroughly inspect the area where the equipment is running, except where specifically recommended in personal injury. Do not operate without proper instruction. 5. Let engine and machine adjust to outdoor temperature before starting to assemble and operate. As with these instructions may result in the operator's manual. 7. This...

524 WE Operator's Manual
Page 4
... or property damage use extreme care in both directions 21. Never over fill fuel tank. snow at all times until all safety devices in a poorly ventilated area. Rapid retraction of starter cord (kickback) will pull hand and arm toward engine faster than ½ allow anyone in this machine without good visibility or light. The control levers must operate easily in handling gasoline. Keep...
... or property damage use extreme care in both directions 21. Never over fill fuel tank. snow at all times until all safety devices in a poorly ventilated area. Rapid retraction of starter cord (kickback) will pull hand and arm toward engine faster than ½ allow anyone in this machine without good visibility or light. The control levers must operate easily in handling gasoline. Keep...

524 WE Operator's Manual
Page 5
... control systems: Engine Modification (EM), Oxidizing Catalyst (OC), Secondary Air Injection (SAI) and Three Way Catalyst (TWC) if so equipped. Check their proper operation regularly. "Use of auger/impeller. 10. This machine is an open flame, spark or pilot light such as necessary. 8. Do not change the engine governor setting or over-speed the engine. Check fuel line, tank, cap, and fittings frequently for gas, oil, etc. Do not crank engine...
... control systems: Engine Modification (EM), Oxidizing Catalyst (OC), Secondary Air Injection (SAI) and Three Way Catalyst (TWC) if so equipped. Check their proper operation regularly. "Use of auger/impeller. 10. This machine is an open flame, spark or pilot light such as necessary. 8. Do not change the engine governor setting or over-speed the engine. Check fuel line, tank, cap, and fittings frequently for gas, oil, etc. Do not crank engine...

524 WE Operator's Manual
Page 7
... Replacement Auger Shear Pins • One Chute Assembly • One Product Registration Card • One Engine Operator's Manual Assembly Remove all loose parts before pivoting the handle upward. Pivot the handle upward. See Figure 3-3. Figure 3-1 NOTE: Make certain the cables are for packaging purposes only. They are seated properly in the Forward-6 position 2. Remove hairpin clip, wing nut and hex screw from chute control head and clevis pin and bow-tie cotter pin from chute support...
... Replacement Auger Shear Pins • One Chute Assembly • One Product Registration Card • One Engine Operator's Manual Assembly Remove all loose parts before pivoting the handle upward. Pivot the handle upward. See Figure 3-3. Figure 3-1 NOTE: Make certain the cables are for packaging purposes only. They are seated properly in the Forward-6 position 2. Remove hairpin clip, wing nut and hex screw from chute control head and clevis pin and bow-tie cotter pin from chute support...

524 WE Operator's Manual
Page 9
... adjustments. 6. Finish securing chute control head to the chute control head and insert the hairpin clip removed earlier. See Figure 3-3. NOTE: Models with 2-Way Chute Control have only one hand while inserting the rod with wing nut, clevis pin, and bow-tie cotter pin arrow on top of the hex rod. Figure 3-8 7. Push the chute control rod toward the control panel until needed. Figure 3-10 Set-Up Shear Pins A pair of replacement auger shear pins...
... adjustments. 6. Finish securing chute control head to the chute control head and insert the hairpin clip removed earlier. See Figure 3-3. NOTE: Models with 2-Way Chute Control have only one hand while inserting the rod with wing nut, clevis pin, and bow-tie cotter pin arrow on top of the hex rod. Figure 3-8 7. Push the chute control rod toward the control panel until needed. Figure 3-10 Set-Up Shear Pins A pair of replacement auger shear pins...

524 WE Operator's Manual
Page 10
... on the skid shoes. 3. Check the tire pressure before operating the snow thrower. Adjust them downward, if desired, prior to desired position. Figure 3-12 Tire Pressure WARNING: Under any circumstance do not exceed manufacturer's recommended psi. Refer to the tire side wall for recommended pressure. Chute Clean-Out Tool The chute clean-out tool is fastened to the top of the auger housing with force sufficient to...
... on the skid shoes. 3. Check the tire pressure before operating the snow thrower. Adjust them downward, if desired, prior to desired position. Figure 3-12 Tire Pressure WARNING: Under any circumstance do not exceed manufacturer's recommended psi. Refer to the tire side wall for recommended pressure. Chute Clean-Out Tool The chute clean-out tool is fastened to the top of the auger housing with force sufficient to...

524 WE Operator's Manual
Page 11
...: 1. Refer to the Engine Operator's manual. Refer to the Engine Operator's Manual. Assembly & Set-Up 11 Confirm that the auger has completely stopped rotating and shows NO signs of the auger control as follows: 1. See Figure 3-14. Perform all instructions below. In a well-ventilated area, start engine. Position the bracket upward to provide more slack (or downward to verify your snow thrower is operating safely and properly. Repeat...
...: 1. Refer to the Engine Operator's manual. Refer to the Engine Operator's Manual. Assembly & Set-Up 11 Confirm that the auger has completely stopped rotating and shows NO signs of the auger control as follows: 1. See Figure 3-14. Perform all instructions below. In a well-ventilated area, start engine. Position the bracket upward to provide more slack (or downward to verify your snow thrower is operating safely and properly. Repeat...

524 WE Operator's Manual
Page 12
... of the handle panel and is the fastest. Augers Forward There are two reverse (R) speeds. Controls and Features Drive Control Chute Assembly Clean Out Tool Headlight † 4 Shift Lever Chute Directional Control Auger Control Heated Grips † Steering Trigger Control † Augers Skid Shoe † If Equipped Figure 4-1 Snow thrower controls and features are described below and illustrated in the right side of travel. Shift Lever The shift lever is located in Figure 4-1. Adjust upward...
... of the handle panel and is the fastest. Augers Forward There are two reverse (R) speeds. Controls and Features Drive Control Chute Assembly Clean Out Tool Headlight † 4 Shift Lever Chute Directional Control Auger Control Heated Grips † Steering Trigger Control † Augers Skid Shoe † If Equipped Figure 4-1 Snow thrower controls and features are described below and illustrated in the right side of travel. Shift Lever The shift lever is located in Figure 4-1. Adjust upward...

524 WE Operator's Manual
Page 15
... shaft with your snow thrower's warranty. Any damage to the auger gearbox or other than OEM Part No.738-04124A replacement shear pins. Operation 5 Starting and Stopping the Engine Refer to the Engine Operator's Manual packed with shear pins and cotter pins. To Steer (If so Equipped) With the drive control engaged, squeeze the right steering trigger control to turn , check to do so will not turn right. If the augers will NOT be covered by your snow thrower...
... shaft with your snow thrower's warranty. Any damage to the auger gearbox or other than OEM Part No.738-04124A replacement shear pins. Operation 5 Starting and Stopping the Engine Refer to the Engine Operator's Manual packed with shear pins and cotter pins. To Steer (If so Equipped) With the drive control engaged, squeeze the right steering trigger control to turn , check to do so will not turn right. If the augers will NOT be covered by your snow thrower...

524 WE Operator's Manual
Page 16
...: 1. Refer to the Engine Operator's Manual. Figure 6-1 To remove shave plate: 1. Tire Pressure Refer to the snow thrower housing. 2. When one side wears out, they can be checked periodically and replaced when necessary. Spray lubricant inside of housing. Auger Shaft At least once a season, remove the shear pins from the auger shaft. Reassemble new shave plate, making sure heads of the shaft. Tighten securely. 16 Figure 6-2 See Figure 6-2. Clean and coat the...
...: 1. Refer to the Engine Operator's Manual. Figure 6-1 To remove shave plate: 1. Tire Pressure Refer to the snow thrower housing. 2. When one side wears out, they can be checked periodically and replaced when necessary. Spray lubricant inside of housing. Auger Shaft At least once a season, remove the shear pins from the auger shaft. Reassemble new shave plate, making sure heads of the shaft. Tighten securely. 16 Figure 6-2 See Figure 6-2. Clean and coat the...

524 WE Operator's Manual
Page 17
... for instructions on the auger housing. 3. Adjustments Shift Cable If the full range of fuel. 2. shaft. Doing so will hinder the snow thrower's drive Auger Control Refer to the Assembly & Set-up and forward so that it . Remove the frame cover from the underside of engine oil (or 3-in-1 oil) to take up section for instructions on the shift cable index bracket. Apply a light coating of the snow thrower by removing the self-tapping screws...
... for instructions on the auger housing. 3. Adjustments Shift Cable If the full range of fuel. 2. shaft. Doing so will hinder the snow thrower's drive Auger Control Refer to the Assembly & Set-up and forward so that it . Remove the frame cover from the underside of engine oil (or 3-in-1 oil) to take up section for instructions on the shift cable index bracket. Apply a light coating of the snow thrower by removing the self-tapping screws...

524 WE Operator's Manual
Page 20
... the auger belt off engine pulley. 4. After replacing the auger belt, perform the Auger Control test on the auger housing. 5. Refer to pour fuel from tank by removing the self-tapping screws which secure it stops. Service See Figure 7-5. Remove the plastic belt cover on the front of the snow thrower by running engine until it . Figure 7-6 b. Remove the frame cover from around the auger pulley, and slip the Drive Belt belt between the support bracket and the auger pulley. Remove the belt from the...
... the auger belt off engine pulley. 4. After replacing the auger belt, perform the Auger Control test on the auger housing. 5. Refer to pour fuel from tank by removing the self-tapping screws which secure it stops. Service See Figure 7-5. Remove the plastic belt cover on the front of the snow thrower by running engine until it . Figure 7-6 b. Remove the frame cover from around the auger pulley, and slip the Drive Belt belt between the support bracket and the auger pulley. Remove the belt from the...

524 WE Operator's Manual
Page 21
... frame cover from the engine. 2. See Figure 7-7. 8. Remove and replace belt in third Forward (F3) position. 3. Friction Wheel Inspection (524 SWE, 526 SWE, 528 SWE & 530 SWE) If the snow thrower fails to drive with the drive control engaged, and performing the drive control cable adjustment fails to correct the problem, the friction wheel may need to have the friction wheel rubber replaced or phone Customer Support as follows: 1. Do not attempt to re-install the stop bolt to run...
... frame cover from the engine. 2. See Figure 7-7. 8. Remove and replace belt in third Forward (F3) position. 3. Friction Wheel Inspection (524 SWE, 526 SWE, 528 SWE & 530 SWE) If the snow thrower fails to drive with the drive control engaged, and performing the drive control cable adjustment fails to correct the problem, the friction wheel may need to have the friction wheel rubber replaced or phone Customer Support as follows: 1. Do not attempt to re-install the stop bolt to run...

524 WE Operator's Manual
Page 23
...position. 2. Stop engine immediately and disconnect spark plug wire. Replace with clean, fresh gasoline. 4. Fill tank with new shear pin(s). 1. Contact an authorized Service Center. 1. Connect and tighten spark plug wire. 2. Replace friction wheel. Auger belt loose or damaged. 5. Refer to Maintenance & Adjustments section. 5. Engine not primed. 5. Contact an authorized Service Center. 1. Shear pin(s) sheared. 1. Fuel tank empty or stale fuel. 4. Tighten all bolts and nuts. Carburetor out of the extension cord to the electric starter...
...position. 2. Stop engine immediately and disconnect spark plug wire. Replace with clean, fresh gasoline. 4. Fill tank with new shear pin(s). 1. Contact an authorized Service Center. 1. Connect and tighten spark plug wire. 2. Replace friction wheel. Auger belt loose or damaged. 5. Refer to Maintenance & Adjustments section. 5. Engine not primed. 5. Contact an authorized Service Center. 1. Shear pin(s) sheared. 1. Fuel tank empty or stale fuel. 4. Tighten all bolts and nuts. Carburetor out of the extension cord to the electric starter...

524 WE Operator's Manual
Page 24
Parts Manual downloads are also available free of charge at www.cubcadet.com. 24 Replacement Parts Component 9 Part Number and Description 954-04050 954-04260 954-04195 954-04201A Auger Drive Belt (524 WE & 524 SWE) Wheel Drive Belt (524 WE & 524 SWE) Auger Drive Belt (526 SWE, 528 SWE & 530 SWE) Wheel Drive Belt (526 SWE, 528 SWE & 530 SWE) 684-04159 684-04153 935-04054 925-1629 Friction Wheel Assembly (524 SWE, 526 SWE, 528 SWE, 530 SWE) Friction Wheel Assembly (524 WE) Friction Wheel Rubber (all models) Lamp, 12V 738-04124A 714...
Parts Manual downloads are also available free of charge at www.cubcadet.com. 24 Replacement Parts Component 9 Part Number and Description 954-04050 954-04260 954-04195 954-04201A Auger Drive Belt (524 WE & 524 SWE) Wheel Drive Belt (524 WE & 524 SWE) Auger Drive Belt (526 SWE, 528 SWE & 530 SWE) Wheel Drive Belt (526 SWE, 528 SWE & 530 SWE) 684-04159 684-04153 935-04054 925-1629 Friction Wheel Assembly (524 SWE, 526 SWE, 528 SWE, 530 SWE) Friction Wheel Assembly (524 WE) Friction Wheel Rubber (all models) Lamp, 12V 738-04124A 714...

524 WE Operator's Manual
Page 28
... for substitute or replacement lawn care services or for use or exposure. Routine maintenance items such as to any kind be free from defects in material and workmanship for a period of Purchase to items such as identified. Cub Cadet does not extend any warranty for loss, damage, or injury to you and your warranty as lubricants, filters, blade sharpening, tune-ups, brake adjustments, clutch adjustments, deck adjustments, and normal...
... for substitute or replacement lawn care services or for use or exposure. Routine maintenance items such as to any kind be free from defects in material and workmanship for a period of Purchase to items such as identified. Cub Cadet does not extend any warranty for loss, damage, or injury to you and your warranty as lubricants, filters, blade sharpening, tune-ups, brake adjustments, clutch adjustments, deck adjustments, and normal...


