
20V Battery Manual
Page 6
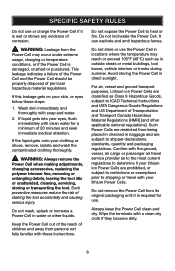
... this leakage gets on your eyes, flush immediately with these steps: 1. WARNING: Always remove the Power Cell when making adjustments, changing accessories, replacing the polymer trimmer line, removing or untangling debris, leaving the tool idle or unattended, cleaning, servicing, storing or transporting the tool. Avoid storing the Power Cell in baggage...
... this leakage gets on your eyes, flush immediately with these steps: 1. WARNING: Always remove the Power Cell when making adjustments, changing accessories, replacing the polymer trimmer line, removing or untangling debris, leaving the tool idle or unattended, cleaning, servicing, storing or transporting the tool. Avoid storing the Power Cell in baggage...

Parts Manual
Page 1
MODEL CCT400 TRIMMER PPN 41AERP3C912 1 5 2 3 4 5 6 7 15 14 13 12 9 10 11 8 Item Part No. 1 753-08568 2 753-08420 3 753-08406 4 753-08418 5 753-08567 6 753-08566 7 753-08421 Description Power Sleeve Assembly Trimmer Shaft Assembly Assist Handle Assembly Controller PCB Assembly Power Housing Assembly Elite Grip Handle Assembly with Switch Wires String Guard Assembly...
MODEL CCT400 TRIMMER PPN 41AERP3C912 1 5 2 3 4 5 6 7 15 14 13 12 9 10 11 8 Item Part No. 1 753-08568 2 753-08420 3 753-08406 4 753-08418 5 753-08567 6 753-08566 7 753-08421 Description Power Sleeve Assembly Trimmer Shaft Assembly Assist Handle Assembly Controller PCB Assembly Power Housing Assembly Elite Grip Handle Assembly with Switch Wires String Guard Assembly...

Owners Manual
Page 1
... . (2.41 mm) Weight: (without Power Cell) 8 Lbs Weight: (with Power Cell) 11 Lbs Need Assistance? GasLessTM Trimmer CCT400 Instruction Manual BC PRODUCT SPECIFICATIONS Power Cell: 20 Volt high energy Li-Ion CFC6500 Charger: Rapid charger CRC8000 Trimmer Mechanism: Bump Head Trimming Line Diameter: 0.095 in Canada). Additional information can be found at www...
... . (2.41 mm) Weight: (without Power Cell) 8 Lbs Weight: (with Power Cell) 11 Lbs Need Assistance? GasLessTM Trimmer CCT400 Instruction Manual BC PRODUCT SPECIFICATIONS Power Cell: 20 Volt high energy Li-Ion CFC6500 Charger: Rapid charger CRC8000 Trimmer Mechanism: Bump Head Trimming Line Diameter: 0.095 in Canada). Additional information can be found at www...

Owners Manual
Page 7
.... Always, wear sturdy protective shoes or boots with ANSI Z87.1 or CAN/CSA - Steel-toed safety boots are recommended. Secure hair to protect your GasLessTM trimmer. ALWAYS wear appropriate safety goggles or properly fitted safety glasses that can throw foreign objects into the tool until you from debris and pieces of...
.... Always, wear sturdy protective shoes or boots with ANSI Z87.1 or CAN/CSA - Steel-toed safety boots are recommended. Secure hair to protect your GasLessTM trimmer. ALWAYS wear appropriate safety goggles or properly fitted safety glasses that can throw foreign objects into the tool until you from debris and pieces of...

Owners Manual
Page 8
...bystander. Never use wire or metal-reinforced line or other material in all objects or debris thrown by the rotating polymer line or trimmer head. Keep children, bystanders, pets and other objects can be encouraged to wear eye protection, even if they are approaching such bystanders...as an Edger or Sweeper, especially near property that may not protect the operator or bystanders from the operating trimmer. Min. 50 ft WARNING: The rotating trimmer line and trimmer head will throw 15 m objects and debris violently and the objects and debris will ricochet in place of ...
...bystander. Never use wire or metal-reinforced line or other material in all objects or debris thrown by the rotating polymer line or trimmer head. Keep children, bystanders, pets and other objects can be encouraged to wear eye protection, even if they are approaching such bystanders...as an Edger or Sweeper, especially near property that may not protect the operator or bystanders from the operating trimmer. Min. 50 ft WARNING: The rotating trimmer line and trimmer head will throw 15 m objects and debris violently and the objects and debris will ricochet in place of ...

Owners Manual
Page 9
...before each use. WARNING: To reduce the potential of serious injury, cut only from unstable surfaces such as the objects can damage the trimmer head and / or the objects can be thrown causing serious injury. Such preventive measures reduce the risk of the deflector shield or ...moving directionally towards your left will cause the debris and objects to be thrown predominately away from all times. Never use this trimmer for the trimmer. Remove any parts are worn or damaged, replace them before each use the polymer line size and type recommended for brush cutting...
...before each use. WARNING: To reduce the potential of serious injury, cut only from unstable surfaces such as the objects can damage the trimmer head and / or the objects can be thrown causing serious injury. Such preventive measures reduce the risk of the deflector shield or ...moving directionally towards your left will cause the debris and objects to be thrown predominately away from all times. Never use this trimmer for the trimmer. Remove any parts are worn or damaged, replace them before each use the polymer line size and type recommended for brush cutting...

Owners Manual
Page 14
... symbols and learn their meaning. Study these symbols will allow for more efficient and safer operation of the following symbols may appear on the GasLessTM trimmer, Power Cell or Power Cell chargers, or this tool. Wear safety gloves Wear safety boots Handle position Do not use in the rain Striking hazard...
... symbols and learn their meaning. Study these symbols will allow for more efficient and safer operation of the following symbols may appear on the GasLessTM trimmer, Power Cell or Power Cell chargers, or this tool. Wear safety gloves Wear safety boots Handle position Do not use in the rain Striking hazard...

Owners Manual
Page 15
...CRC8000 Power Cell 1-Hour rapid charger Description 15 Before using any accessory, carefully read the instructions or the owner's manual for this GaslessTM trimmer. The use of improper accessories may result in the tool until the missing or damaged part is replaced. Follow the instructions that are recommended...not plug the charger into the power source or install the Power Cell in injury to the operator or damage to the GaslessTM trimmer. KNOW YOUR UNIT Front Handle Rear Handle Power Control Button Cutting Head Lock-Off Button Throttle Control Motor Cutting Head Shield Power ...
...CRC8000 Power Cell 1-Hour rapid charger Description 15 Before using any accessory, carefully read the instructions or the owner's manual for this GaslessTM trimmer. The use of improper accessories may result in the tool until the missing or damaged part is replaced. Follow the instructions that are recommended...not plug the charger into the power source or install the Power Cell in injury to the operator or damage to the GaslessTM trimmer. KNOW YOUR UNIT Front Handle Rear Handle Power Control Button Cutting Head Lock-Off Button Throttle Control Motor Cutting Head Shield Power ...

Owners Manual
Page 16
... hold the handle in the desired position. Make sure the handle is positioned beyond the end of the safety label (5). 3. You will rotate on the trimmer outer shaft (4) (Fig. 1). 2. Using a Torx® screwdriver (1), turn the four handle clamp screws (2) counter clockwise until the handle (3) will break the clamp. 1 5 2 4 3 Fig. 1 16 WARNING...
... hold the handle in the desired position. Make sure the handle is positioned beyond the end of the safety label (5). 3. You will rotate on the trimmer outer shaft (4) (Fig. 1). 2. Using a Torx® screwdriver (1), turn the four handle clamp screws (2) counter clockwise until the handle (3) will break the clamp. 1 5 2 4 3 Fig. 1 16 WARNING...

Owners Manual
Page 17
... locking latch. Position the Power Cell (1) with the "TOP" label (2) facing upward. 2. Pull outward on the Power Cell to install the Power Cell into the trimmer (Fig. 2). 1. To remove the Power Cell for recharging or storage, press the locking latch toward the Power Cell, pull the Power Cell out of the...
... locking latch. Position the Power Cell (1) with the "TOP" label (2) facing upward. 2. Pull outward on the Power Cell to install the Power Cell into the trimmer (Fig. 2). 1. To remove the Power Cell for recharging or storage, press the locking latch toward the Power Cell, pull the Power Cell out of the...

Owners Manual
Page 19
...WARNINGS", "GENERAL POWER TOOL SAFETY WARNINGS", "SPECIFIC SAFETY RULES", "POWER CELL & CHARGER SAFETY INSTRUCTIONS" and "SYMBOLS" before using this GasLessTM trimmer. ASSEMBLY AND OPERATING WARNING For safety reasons, the operator must read the sections of all debris. 4. Failure to operate the switches. OPERATING ...POSITION WARNING: Never operate the trimmer with one hand. Operate the trimmer below waist height at least 50' (15 m) away from the trimming area. Bystanders are at all required safety...
...WARNINGS", "GENERAL POWER TOOL SAFETY WARNINGS", "SPECIFIC SAFETY RULES", "POWER CELL & CHARGER SAFETY INSTRUCTIONS" and "SYMBOLS" before using this GasLessTM trimmer. ASSEMBLY AND OPERATING WARNING For safety reasons, the operator must read the sections of all debris. 4. Failure to operate the switches. OPERATING ...POSITION WARNING: Never operate the trimmer with one hand. Operate the trimmer below waist height at least 50' (15 m) away from the trimming area. Bystanders are at all required safety...

Owners Manual
Page 20
... fences, etc. Contacting these items with the line or bump head may also cause the line to be violently thrown. Only the tip of the trimmer line and debris to become entangled and damage both the line and the bump head. It will easily remove grass and weeds from around hard... the line into the work area too quickly and crowd the line. Be extremely careful when trimming near objects that can be contacted by the trimmer line.
... fences, etc. Contacting these items with the line or bump head may also cause the line to be violently thrown. Only the tip of the trimmer line and debris to become entangled and damage both the line and the bump head. It will easily remove grass and weeds from around hard... the line into the work area too quickly and crowd the line. Be extremely careful when trimming near objects that can be contacted by the trimmer line.

Owners Manual
Page 21
... from the spool. 3" (8 cm) Fig. 7 Scalping Fig. 8 Fig. 9 Mowing 21 Scalping Scalping an area will increase trimmer line wear considerably. Move the trimmer from the operator. NOTE: Be careful not to allow the bump head to contact the ground, as this could result in scalping and/... line to the ground. Be aware that scalping will remove all unwanted vegetation down to make contact with the ground. Mowing Use the GasLessTM trimmer to make contact with the grass. This cutting motion will result in rougher cutting action and excessive wear on the line. When scalping, position...
... from the spool. 3" (8 cm) Fig. 7 Scalping Fig. 8 Fig. 9 Mowing 21 Scalping Scalping an area will increase trimmer line wear considerably. Move the trimmer from the operator. NOTE: Be careful not to allow the bump head to contact the ground, as this could result in scalping and/... line to the ground. Be aware that scalping will remove all unwanted vegetation down to make contact with the ground. Mowing Use the GasLessTM trimmer to make contact with the grass. This cutting motion will result in rougher cutting action and excessive wear on the line. When scalping, position...

Owners Manual
Page 22
... damage to side in a similar manner to be swept (Fig. 10). Position the line parallel to and above the surface to trimming, but with the trimmer head rotated away from the rotating line will break off. Debris being swept. To advance the polymer line and expose a greater length, simply tap the... bump head on the ground while the trimmer is used, the polymer line will wear down or the tips will blow the grass and debris from the surface being thrown from walkways and...
... damage to side in a similar manner to be swept (Fig. 10). Position the line parallel to and above the surface to trimming, but with the trimmer head rotated away from the rotating line will break off. Debris being swept. To advance the polymer line and expose a greater length, simply tap the... bump head on the ground while the trimmer is used, the polymer line will wear down or the tips will blow the grass and debris from the surface being thrown from walkways and...

Owners Manual
Page 25
... and push it through the head and out the other eyelet (Fig. 13). 4. Thread one end of line 12 to reload the bump head with trimmer line. To prevent accidental start up , you will have to 16 feet long. 2. MAINTENANCE RELOADING THE BUMP HEAD WITH... TRIMMER LINE The GasLessTM trimmer comes with the eyelets (2) (Fig. 12). 3. Fig. 12 Fig. 13 Fig. 14 25 When the 1 trimmer line is extending from both ends of the line until all but 6 inches of the...
... and push it through the head and out the other eyelet (Fig. 13). 4. Thread one end of line 12 to reload the bump head with trimmer line. To prevent accidental start up , you will have to 16 feet long. 2. MAINTENANCE RELOADING THE BUMP HEAD WITH... TRIMMER LINE The GasLessTM trimmer comes with the eyelets (2) (Fig. 12). 3. Fig. 12 Fig. 13 Fig. 14 25 When the 1 trimmer line is extending from both ends of the line until all but 6 inches of the...

Owners Manual
Page 26
... bump knob clockwise while pressing together. 6. To avoid accidental start up: Always remove the Power Cell before removing or reinstalling the spool. The trimmer line may also become entangled within the bump head spool. In either case, you will not work properly. 5. Remove any line from the ...debris from the bump head shaft (3), inside the bump head and from spool (2) 5 (Fig. 16). 4. Fig. 15 Fig. 16 1 2 1 3 26 Load trimmer line. MAINTENANCE OPENING THE BUMP HEAD TO RECOVER LINE WARNING: Avoid Injury! It may break off at the eyelet due to lose the spring (1) (Fig...
... bump knob clockwise while pressing together. 6. To avoid accidental start up: Always remove the Power Cell before removing or reinstalling the spool. The trimmer line may also become entangled within the bump head spool. In either case, you will not work properly. 5. Remove any line from the ...debris from the bump head shaft (3), inside the bump head and from spool (2) 5 (Fig. 16). 4. Fig. 15 Fig. 16 1 2 1 3 26 Load trimmer line. MAINTENANCE OPENING THE BUMP HEAD TO RECOVER LINE WARNING: Avoid Injury! It may break off at the eyelet due to lose the spring (1) (Fig...


