
Planning Guides
Page 1
... installation instructions for additional details. 7.2 www.Dacor.com Phone: (800) 793-0093 Specifications are subject to increase the length of the duct run , subtract the equivalent length of the hood. See installation instructions for more details. grounded..., dedicated 3-wire circuit (hot, neutral, ground) * At zero inches static pressure General Specifications Model DHI361 DHI421 DHI482 DHI542 DHI602 Blowers 1 1 2 2 2 Lights 4 4 4 6 ...
... installation instructions for additional details. 7.2 www.Dacor.com Phone: (800) 793-0093 Specifications are subject to increase the length of the duct run , subtract the equivalent length of the hood. See installation instructions for more details. grounded..., dedicated 3-wire circuit (hot, neutral, ground) * At zero inches static pressure General Specifications Model DHI361 DHI421 DHI482 DHI542 DHI602 Blowers 1 1 2 2 2 Lights 4 4 4 6 ...
Installation Instructions
Page 1
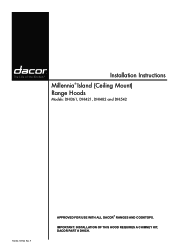
F Approved for use with all dacor® ranges and cooktops. IMPORTANT: INSTALLATION OF THIS HOOD REQUIRES a CHIMNEY KIT, DACOR PART # DHICH. Installation Instructions Millennia® Island (Ceiling Mount) Range Hoods Models: DHI361, DHI421, DHI482 and DHI542 Part No. 101744 Rev.
F Approved for use with all dacor® ranges and cooktops. IMPORTANT: INSTALLATION OF THIS HOOD REQUIRES a CHIMNEY KIT, DACOR PART # DHICH. Installation Instructions Millennia® Island (Ceiling Mount) Range Hoods Models: DHI361, DHI421, DHI482 and DHI542 Part No. 101744 Rev.
Installation Instructions
Page 2
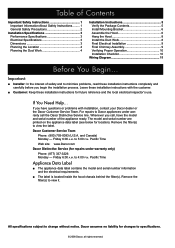
... the Location 4 Planning the Duct Work 4 Installation Instructions 5 Verify the Package Contents 5 Install Mounting Bracket 6 Assemble the Hood 6 Hang the Hood 8 Install the Duct Work 8 Final Electrical Installation 9 Final Chimney Assembly 9 Verifying Proper Operation 10 Installation Checklist 10 Wiring Diagram...9632;■ The label is located inside the hood chassis behind the filter(s). All specifications subject to 4:00 p.m. If You Need Help... Whenever you call the Dacor Distinctive Service line. Friday 6:00 a.m. Dacor Customer Service Team Phone: (800) 793-0093...
... the Location 4 Planning the Duct Work 4 Installation Instructions 5 Verify the Package Contents 5 Install Mounting Bracket 6 Assemble the Hood 6 Hang the Hood 8 Install the Duct Work 8 Final Electrical Installation 9 Final Chimney Assembly 9 Verifying Proper Operation 10 Installation Checklist 10 Wiring Diagram...9632;■ The label is located inside the hood chassis behind the filter(s). All specifications subject to 4:00 p.m. If You Need Help... Whenever you call the Dacor Distinctive Service line. Friday 6:00 a.m. Dacor Customer Service Team Phone: (800) 793-0093...
Installation Instructions
Page 3
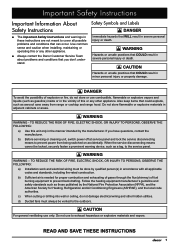
... injury or death. Use common sense and caution when installing, maintaining or operating this or any other appliance. ■■ Always contact the Dacor Customer Service Team about problems and conditions that could explode, such as a tag, to prevent power from range or cooktop and range... hood. warning Hazards or unsafe practices that COULD result in minor personal injury or property damage. If you don't understand. Follow the heating equipment ...
... injury or death. Use common sense and caution when installing, maintaining or operating this or any other appliance. ■■ Always contact the Dacor Customer Service Team about problems and conditions that could explode, such as a tag, to prevent power from range or cooktop and range... hood. warning Hazards or unsafe practices that COULD result in minor personal injury or property damage. If you don't understand. Follow the heating equipment ...
Installation Instructions
Page 4
...literature accompanying it started. • The fire department is damaged when received, immediately contact the dealer or builder. • This range hood must be installed and grounded by the manufacturer of the cooktop or range. Use only the cleaners specified. • Clean the filter...installation, adjustment, alteration, service or maintenance can fight the fire with the controls. • If the range or cooktop and range hood are in use and care manual. Clean the appliance only as cigarettes or napkins, to these installation instructions and the requirements specified by ...
...literature accompanying it started. • The fire department is damaged when received, immediately contact the dealer or builder. • This range hood must be installed and grounded by the manufacturer of the cooktop or range. Use only the cleaners specified. • Clean the filter...installation, adjustment, alteration, service or maintenance can fight the fire with the controls. • If the range or cooktop and range hood are in use and care manual. Clean the appliance only as cigarettes or napkins, to these installation instructions and the requirements specified by ...
Installation Instructions
Page 5
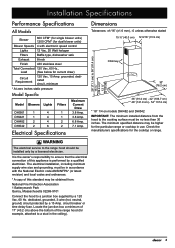
...local codes and ordinances. * A copy of this appliance is the owner's responsibility to ensure that the electrical connection of the range hood (for the particular range or cooktop in use. dedicated, grounded, 3-wire (hot, neutral, ground) circuit protected by a licensed... inches static pressure Model Specific Model Blowers Lights DHI361 1 4 DHI421 1 4 DHI482 2 4 DHI542 2 6 Filters 1 1 2 2 Maximum Current Draw 3.8 Amp. 3.8 Amp. 6.8 Amp. 7.1 Amp. The minimum specified distance may be obtained from the hood to the range hood should be no less than 30 inches. The...
...local codes and ordinances. * A copy of this appliance is the owner's responsibility to ensure that the electrical connection of the range hood (for the particular range or cooktop in use. dedicated, grounded, 3-wire (hot, neutral, ground) circuit protected by a licensed... inches static pressure Model Specific Model Blowers Lights DHI361 1 4 DHI421 1 4 DHI482 2 4 DHI542 2 6 Filters 1 1 2 2 Maximum Current Draw 3.8 Amp. 3.8 Amp. 6.8 Amp. 7.1 Amp. The minimum specified distance may be obtained from the hood to the range hood should be no less than 30 inches. The...
Installation Instructions
Page 6
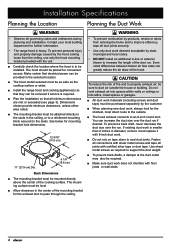
... must be sure to seal duct joints. warning • To prevent combustion by-products, smoke or odors from the ceiling, use only the hood mounting bracket provided with 8-inch duct work is required. ■■ Plan the installation so that all joints with floor joists or wall studs... metal screws and tape all minimum dimensions are met or exceeded (see page 3). To prevent personal injury and property damage caused by the hood coming loose from entering the home and to improve efficiency, tape all governing codes and ordinances during planning and installation. To prevent a back...
... must be sure to seal duct joints. warning • To prevent combustion by-products, smoke or odors from the ceiling, use only the hood mounting bracket provided with 8-inch duct work is required. ■■ Plan the installation so that all joints with floor joists or wall studs... metal screws and tape all minimum dimensions are met or exceeded (see page 3). To prevent personal injury and property damage caused by the hood coming loose from entering the home and to improve efficiency, tape all governing codes and ordinances during planning and installation. To prevent a back...

Installation Instructions
Page 7
... short section of 24 inches straight duct between bends as possible. Do not install a damaged or incomplete appliance. ■A■ Hood assembly with model and configuration. To determine the actual maximum duct run, subtract the equivalent length of each elbow, transition and cap from ... 45° elbow 3¼" X 10" to back" use round duct instead of the chimney kit (DHICH), which is required for the hood is 50 feet. Installation Instructions Verify the Package Contents Unpack the parts boxes and verify that is missing or damaged, please contact the dealer immediately...
... short section of 24 inches straight duct between bends as possible. Do not install a damaged or incomplete appliance. ■A■ Hood assembly with model and configuration. To determine the actual maximum duct run, subtract the equivalent length of each elbow, transition and cap from ... 45° elbow 3¼" X 10" to back" use round duct instead of the chimney kit (DHICH), which is required for the hood is 50 feet. Installation Instructions Verify the Package Contents Unpack the parts boxes and verify that is missing or damaged, please contact the dealer immediately...
Installation Instructions
Page 8
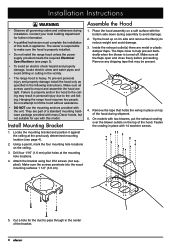
...required Electrical Specifications (see page 4). 2. Inside the exhaust outlet(s) there are part of a standard mounting hardware package provided with many Dacor hoods, but not suitable for further information. • A qualified technician must complete the installation of the bracket. 6 Remove any shipping... 1 1/2" (3.8 cm). 5. Locate the mounting bracket and position it 's side and remove the filter(s) to make sure the hood is turned off. The flaps close freely before proceeding. Contact your local building department for use the mounting anchors provided with 14 ...
...required Electrical Specifications (see page 4). 2. Inside the exhaust outlet(s) there are part of a standard mounting hardware package provided with many Dacor hoods, but not suitable for further information. • A qualified technician must complete the installation of the bracket. 6 Remove any shipping... 1 1/2" (3.8 cm). 5. Locate the mounting bracket and position it 's side and remove the filter(s) to make sure the hood is turned off. The flaps close freely before proceeding. Contact your local building department for use the mounting anchors provided with 14 ...

Installation Instructions
Page 9
...slots on only one way. Position the bottom framework piece on the bottom of the two pieces together must be mounted (30" minimum) and the hood thickness (12 1/2") from the ceiling to fit on the sides. The total height of the framework piece. Carefully slide both pieces of the chimney ...assembly. Make sure the Dacor logo faces the same side as the control panel. 16. Use four machine screws to fasten the top piece to scratch the surfaces. Put ...
...slots on only one way. Position the bottom framework piece on the bottom of the two pieces together must be mounted (30" minimum) and the hood thickness (12 1/2") from the ceiling to fit on the sides. The total height of the framework piece. Carefully slide both pieces of the chimney ...assembly. Make sure the Dacor logo faces the same side as the control panel. 16. Use four machine screws to fasten the top piece to scratch the surfaces. Put ...

Installation Instructions
Page 10
...of the framework. 3. Use duct tape only. Lift the chimney up until all the remaining duct system joints. Attach the duct to access the hood exhaust. Use sheet metal screws (not provided) and duct tape on all four mounting springs protrude out of the mounting slots on the top of... so that the control panel faces the same direction as described below. 1. Do not use screws to attach the duct work system according to the hood exhaust outlet. Screws may prevent the damper flaps on pages 4 and 5. Push up and reach inside framework Mounting springs 8 Install the duct work to...
...of the framework. 3. Use duct tape only. Lift the chimney up until all the remaining duct system joints. Attach the duct to access the hood exhaust. Use sheet metal screws (not provided) and duct tape on all four mounting springs protrude out of the mounting slots on the top of... so that the control panel faces the same direction as described below. 1. Do not use screws to attach the duct work system according to the hood exhaust outlet. Screws may prevent the damper flaps on pages 4 and 5. Push up and reach inside framework Mounting springs 8 Install the duct work to...

Installation Instructions
Page 11
... Electrical Installation Final Chimney Assembly warning • To avoid electric shock or fire hazard, prior to connecting the electrical wiring to the hood, make sure that power to the hood power supply line is capable of handling the total connected load. Move the chimney up the holes on the side of the... chimney, above the vents, with the holes on the side of the hood electrical wiring may create an electric shock or fire hazard and may result in damage to the bracket using two machine screws, one on the...
... Electrical Installation Final Chimney Assembly warning • To avoid electric shock or fire hazard, prior to connecting the electrical wiring to the hood, make sure that power to the hood power supply line is capable of handling the total connected load. Move the chimney up the holes on the side of the... chimney, above the vents, with the holes on the side of the hood electrical wiring may create an electric shock or fire hazard and may result in damage to the bracket using two machine screws, one on the...
Installation Instructions
Page 12
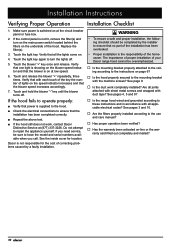
... Has the warranty been activated on at (877) 337-3226. See the inside cover for the cost of the hood. The importance of proper installation of your Dacor range hood cannot be overemphasized. □□ Is the mounting bracket properly attached to the ceiling according to the instructions on ...page 6? □□ Is the hood properly secured to turn on the main power switch located behind the...
... Has the warranty been activated on at (877) 337-3226. See the inside cover for the cost of the hood. The importance of proper installation of your Dacor range hood cannot be overemphasized. □□ Is the mounting bracket properly attached to the ceiling according to the instructions on ...page 6? □□ Is the hood properly secured to turn on the main power switch located behind the...

Use & Care Manuals
Page 1
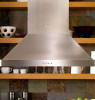
Ta b l e o f C o n t e n t s Important Safety Instructions 1 Part of the Range Hood 3 Operating Instructions 4 Care and Cleaning 5 Before You Call for Service 7 Warranty and Service 8 Warranty Card Back Cover Part No. 101741 Rev. G Model DHI482 shown. Use and Care Manual Millennia® Island/Wall Hoods Models: DHI361, DHI421, DHI482, DHI542, DHW301, DHW361, DHW421 and DHW482 Style varies.
Ta b l e o f C o n t e n t s Important Safety Instructions 1 Part of the Range Hood 3 Operating Instructions 4 Care and Cleaning 5 Before You Call for Service 7 Warranty and Service 8 Warranty Card Back Cover Part No. 101741 Rev. G Model DHI482 shown. Use and Care Manual Millennia® Island/Wall Hoods Models: DHI361, DHI421, DHI482, DHI542, DHW301, DHW361, DHW421 and DHW482 Style varies.
Use & Care Manuals
Page 3
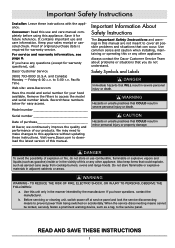
...result in the manner intended by the manufacturer. If you have any other appliance. READ AND SAVE THESE INSTRUCTIONS 1 Keep your hood available. Record these numbers below for your sales receipt or canceled check. Use common sense and caution when installing, maintaining or ... materials in this or any questions (except for future reference. b. to access the model and serial number labels. Always contact the Dacor Customer Service Team about problems or situations that can occur. When the service disconnecting means cannot be locked, securely fasten a prominent warning...
...result in the manner intended by the manufacturer. If you have any other appliance. READ AND SAVE THESE INSTRUCTIONS 1 Keep your hood available. Record these numbers below for your sales receipt or canceled check. Use common sense and caution when installing, maintaining or ... materials in this or any questions (except for future reference. b. to access the model and serial number labels. Always contact the Dacor Customer Service Team about problems or situations that can occur. When the service disconnecting means cannot be locked, securely fasten a prominent warning...
Use & Care Manuals
Page 4
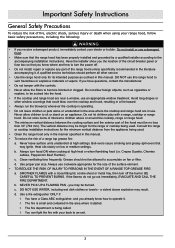
...Heat oils slowly on fan or filter. Do not let children play with a close-fitting lid, cookie sheet or metal tray, then turn hood ON when cooking at high settings. a violent steam explosion may ignite. A qualified service technician should not be burned. SMOTHER FLAMES with a.... Important Safety Instructions General Safety Precautions To reduce the risk of fire, electric shock, serious injury or death when using your range hood, follow basic safety precautions, including the following: WARNING • If you have a Class ABC extinguisher, and you already know where...
...Heat oils slowly on fan or filter. Do not let children play with a close-fitting lid, cookie sheet or metal tray, then turn hood ON when cooking at high settings. a violent steam explosion may ignite. A qualified service technician should not be burned. SMOTHER FLAMES with a.... Important Safety Instructions General Safety Precautions To reduce the risk of fire, electric shock, serious injury or death when using your range hood, follow basic safety precautions, including the following: WARNING • If you have a Class ABC extinguisher, and you already know where...
Use & Care Manuals
Page 5
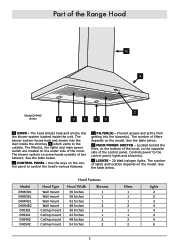
...Located behind the filter, on the bottom of the hood, on the under side of two blowers. The blower system forces heat and smoke into the blower(s). C CONTROL PANEL - Model DHW301 DHW361 DHW421 DHW482 DHI361 DHI421 DHI482 DHI542 Hood Type Wall mount Wall mount Wall mount Wall mount ...Ceiling mount Ceiling mount Ceiling mount Ceiling mount Hood Features Hood Width 30 Inches 36 Inches 42 Inches 48 Inches 36 Inches 42 Inches...
...Located behind the filter, on the bottom of the hood, on the under side of two blowers. The blower system forces heat and smoke into the blower(s). C CONTROL PANEL - Model DHW301 DHW361 DHW421 DHW482 DHI361 DHI421 DHI482 DHI542 Hood Type Wall mount Wall mount Wall mount Wall mount ...Ceiling mount Ceiling mount Ceiling mount Ceiling mount Hood Features Hood Width 30 Inches 36 Inches 42 Inches 48 Inches 36 Inches 42 Inches...

Use & Care Manuals
Page 6
... to cook to establish an airflow pattern in air from outside the house, increasing heating and cooling costs. • Keep the filter system and hood surfaces free of safety, heat oils and fats slowly. Important Operating Tips • Always use lids on cookware to retain heat and moisture. •... the fan speed according to the volume and weight of the proper size, material and construction for the location. Also, do not operate the hood with grimy or grease-laden filters. Personal injury, fire or damage to remove heat and smoke. Energy Saving Tips • Do not operate the...
... to cook to establish an airflow pattern in air from outside the house, increasing heating and cooling costs. • Keep the filter system and hood surfaces free of safety, heat oils and fats slowly. Important Operating Tips • Always use lids on cookware to retain heat and moisture. •... the fan speed according to the volume and weight of the proper size, material and construction for the location. Also, do not operate the hood with grimy or grease-laden filters. Personal injury, fire or damage to remove heat and smoke. Energy Saving Tips • Do not operate the...
Use & Care Manuals
Page 7
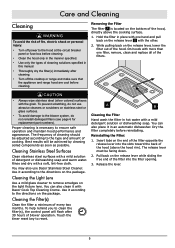
... or range and make sure that the appliance and range hood are cool before reinstalling. Use it in an automatic dishwasher. You can also place it according to the blower system, do not use Dacor Stainless Steel Cleaner. Dry the filter completely before cleaning. Removing... the Filter The filter A is necessary to ensure safe operation and maintain hood performance and appearance. Proper cleaning is located on the release lever...
... or range and make sure that the appliance and range hood are cool before reinstalling. Use it in an automatic dishwasher. You can also place it according to the blower system, do not use Dacor Stainless Steel Cleaner. Dry the filter completely before cleaning. Removing... the Filter The filter A is necessary to ensure safe operation and maintain hood performance and appearance. Proper cleaning is located on the release lever...

Use & Care Manuals
Page 8
...Pry out only the the lens retaining ring B , which is considered to the light fixture. Replacement Parts Dacor Part Number Description 106660 Halogen light bulb 101952 Filter A302 Stainless steel cleaner A300 Cooktop cleaning creme For replacement...replacing a light bulb. • To avoid personal injury, make sure power is working. The oils from your Dacor dealer or visit www.everythingdacor.com. 6 It is difficult to make sure it is on the lens retaining ring ... bulbs, check to make sure the cooktop or range, the hood and the light are sensitive to prevent scratching.
...Pry out only the the lens retaining ring B , which is considered to the light fixture. Replacement Parts Dacor Part Number Description 106660 Halogen light bulb 101952 Filter A302 Stainless steel cleaner A300 Cooktop cleaning creme For replacement...replacing a light bulb. • To avoid personal injury, make sure power is working. The oils from your Dacor dealer or visit www.everythingdacor.com. 6 It is difficult to make sure it is on the lens retaining ring ... bulbs, check to make sure the cooktop or range, the hood and the light are sensitive to prevent scratching.


