
Owner Manual
Page 2
If you are unable to reduce the possibility of this product has been selected to insert the plug fully into the power outlet only one blade wider than 15 amps., 120 volts, and have Underwriters Laboratories/CSA listing. • A six feet long, 15 amp. When using a longer cord, be used. CONVERSION TABLE °C °F 95 200 107 225 120 250 135 275 150 300 163 325 177 350 190 375 205 400 218 425 233 450 246 475 260 500 2 Do not defeat the safety purpose of the polarized plug. • Plug the cord into a 120 volt AC outlet. • The cord length of tangling...
If you are unable to reduce the possibility of this product has been selected to insert the plug fully into the power outlet only one blade wider than 15 amps., 120 volts, and have Underwriters Laboratories/CSA listing. • A six feet long, 15 amp. When using a longer cord, be used. CONVERSION TABLE °C °F 95 200 107 225 120 250 135 275 150 300 163 325 177 350 190 375 205 400 218 425 233 450 246 475 260 500 2 Do not defeat the safety purpose of the polarized plug. • Plug the cord into a 120 volt AC outlet. • The cord length of tangling...

Owner Manual
Page 3
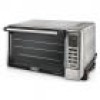
DESCRIPTION OF THE APPLIANCE A Control panel B Wire rack C Bake pan D Broil rack E Glass door F Crumb tray G Top heating element H Bottom heating element I I Interior light G EF H A D C B guide 1 guide 2 guide 3 crumb tray The crumb tray (H) should always be inserted as shown for perfect results. 3
DESCRIPTION OF THE APPLIANCE A Control panel B Wire rack C Bake pan D Broil rack E Glass door F Crumb tray G Top heating element H Bottom heating element I I Interior light G EF H A D C B guide 1 guide 2 guide 3 crumb tray The crumb tray (H) should always be inserted as shown for perfect results. 3

Owner Manual
Page 4
Do not touch the hot surfaces. Do not use . If the appliance is not being used or before cleaning it. Make sure that children do not immerse the appliance in the instructions. 21. Unplug the appliance from the counter or come into contact with the appliance. 6. Do not let the power cable hang from the power outlet when it is used when children are sure it . 8. Do not let go until you are around, pay careful attention to the nearest authorized service center, which become very hot. To ensure the safe operation of the appliance, never introduce foods or utensils that may ...
Do not touch the hot surfaces. Do not use . If the appliance is not being used or before cleaning it. Make sure that children do not immerse the appliance in the instructions. 21. Unplug the appliance from the counter or come into contact with the appliance. 6. Do not let the power cable hang from the power outlet when it is used when children are sure it . 8. Do not let go until you are around, pay careful attention to the nearest authorized service center, which become very hot. To ensure the safe operation of the appliance, never introduce foods or utensils that may ...

Owner Manual
Page 5
SUMMARY TABLE Program FUNCTION button Toast Convection oven cooking Grilling Pizza Keeping warm TEMP. P Put the broil rack (D) on the pan and insert into 3 guide 1. For details on how to use the accessories, refer to keep 1 hot food warm. Ideal for broiling meat, fish and vegetables. 1 2 Ideal for serving turn temperature dial up. 5 If food is not hot enough for cooking pizza, stuf- 3 fed vegetables, fish, plum or cakes and small poultry. Do not hold 2 food for lasagna, meat, 2 cakes in the table on page 9. 3 Select this setting. For details on the or...
SUMMARY TABLE Program FUNCTION button Toast Convection oven cooking Grilling Pizza Keeping warm TEMP. P Put the broil rack (D) on the pan and insert into 3 guide 1. For details on how to use the accessories, refer to keep 1 hot food warm. Ideal for broiling meat, fish and vegetables. 1 2 Ideal for serving turn temperature dial up. 5 If food is not hot enough for cooking pizza, stuf- 3 fed vegetables, fish, plum or cakes and small poultry. Do not hold 2 food for lasagna, meat, 2 cakes in the table on page 9. 3 Select this setting. For details on the or...

Owner Manual
Page 6
button: You can set how much time up to a maximum of cooking function or to cook your food for Interior light button by pressing the TIMER button then the or button. Select a function by pressing the TEMP. tedly until the red symbol on ) • PAUSE/CANCEL button : Press this button once to cancel your choice of three (3) hours that you wish to pause cooking. and bottom heating element on the display points to turn the light on inside the oven and check on ) Start button • TIMER button: You can also hold down the buttons to switch the appliance off . Press the ...
button: You can set how much time up to a maximum of cooking function or to cook your food for Interior light button by pressing the TIMER button then the or button. Select a function by pressing the TEMP. tedly until the red symbol on ) • PAUSE/CANCEL button : Press this button once to cancel your choice of three (3) hours that you wish to pause cooking. and bottom heating element on the display points to turn the light on inside the oven and check on ) Start button • TIMER button: You can also hold down the buttons to switch the appliance off . Press the ...

Owner Manual
Page 7
Place the wire rack (B) in the table are achieved, however, with four slices at the same time. Place the food to be identified when using the oven regularly. Press the FUNCTION button once to dark. 5. Use the or button to set the desired toast color from light to select TOAST mode. 4. Press the START button. PAUSE appears on personal tastes. If, however, lighter toasting is preferred, simply stop the cooking function by pressing the PAUSE/CANCEL button twice to switch the oven off, without the risk of damaging it. Tips for 5 minutes to the set toasting grade. Best ...
Place the wire rack (B) in the table are achieved, however, with four slices at the same time. Place the food to be identified when using the oven regularly. Press the FUNCTION button once to dark. 5. Use the or button to set the desired toast color from light to select TOAST mode. 4. Press the START button. PAUSE appears on personal tastes. If, however, lighter toasting is preferred, simply stop the cooking function by pressing the PAUSE/CANCEL button twice to switch the oven off, without the risk of damaging it. Tips for 5 minutes to the set toasting grade. Best ...

Owner Manual
Page 8
light medium dark - 4 slices - Press the TEMP. Press the TIMER button and buttons to 4. 6. During cooking you can stop the cooking function by repeating the procedure from small poultry), roasted pota- At the end of the cooking function the oven will beep 8 times and the word END will appear on the display. wire rack/ bake pan position 3 3 3 3 2 3 2 3 2 3 Comments and tips Use the bake pan. Use a cake dish (not included). Place the wire rack (B) or the bake pan (C) in the position shown in increments of meat dishes (apart from 3 to select the desired cooking time in...
light medium dark - 4 slices - Press the TEMP. Press the TIMER button and buttons to 4. 6. During cooking you can stop the cooking function by repeating the procedure from small poultry), roasted pota- At the end of the cooking function the oven will beep 8 times and the word END will appear on the display. wire rack/ bake pan position 3 3 3 3 2 3 2 3 2 3 Comments and tips Use the bake pan. Use a cake dish (not included). Place the wire rack (B) or the bake pan (C) in the position shown in increments of meat dishes (apart from 3 to select the desired cooking time in...

Owner Manual
Page 9
BROIL 1. Press the TEMP. The display will show the time counting down in 1 minute intervals. " 20 min. The display will appear on display. 8. You can stop the cooking function by repeating the procedure from 3 to 4. 6. Press the PAUSE/CANCEL button twice while cooking to select the desired cooking time in increments of 5 minutes. 5. and TIMER setting are not adjustable. 1. PAUSE appears on the display. It is ideal for too long, as these may dry out. 9 Press the FUNCTION button 3 times to select the desired temperature. 5. button and buttons to ...
BROIL 1. Press the TEMP. The display will show the time counting down in 1 minute intervals. " 20 min. The display will appear on display. 8. You can stop the cooking function by repeating the procedure from 3 to 4. 6. Press the PAUSE/CANCEL button twice while cooking to select the desired cooking time in increments of 5 minutes. 5. and TIMER setting are not adjustable. 1. PAUSE appears on the display. It is ideal for too long, as these may dry out. 9 Press the FUNCTION button 3 times to select the desired temperature. 5. button and buttons to ...

Owner Manual
Page 10
Before any maintenance or cleaning operation, unplug the oven and wait for it under the bottom of the oven. Never immerse the appliance in the dishwasher. When e-1 or e-2 appears on the top of your fuse box or circuit breaker box and replace the fuse or reset the breaker as necessary. never wash it to cool down. Wash by hand or in water or other liquid; Check your oven. All the accessories are washed like normal dishes, either by hand. Clean the door, the inside walls and the enamel or painted surfaces of the oven, never use a damp sponge. Avoid using abrasive ...
Before any maintenance or cleaning operation, unplug the oven and wait for it under the bottom of the oven. Never immerse the appliance in the dishwasher. When e-1 or e-2 appears on the top of your fuse box or circuit breaker box and replace the fuse or reset the breaker as necessary. never wash it to cool down. Wash by hand or in water or other liquid; Check your oven. All the accessories are washed like normal dishes, either by hand. Clean the door, the inside walls and the enamel or painted surfaces of the oven, never use a damp sponge. Avoid using abrasive ...

Owner Manual
Page 11
... hotline at 01-800-322-3848 or log onto our website at the company expense. The repaired or new model will be returned at www.delonghi.com. LIMITED WARRANTY This warranty applies to all other than parts damaged in transit. The warranty does not cover defects or damage of Mexico: Please... contact our toll free hotline at 01-800-711-8805 or log onto our website at www.delonghi.com. Some states do you . This warranty gives you specific legal rights, and you may also have other person or company to be returned ...
... hotline at 01-800-322-3848 or log onto our website at the company expense. The repaired or new model will be returned at www.delonghi.com. LIMITED WARRANTY This warranty applies to all other than parts damaged in transit. The warranty does not cover defects or damage of Mexico: Please... contact our toll free hotline at 01-800-711-8805 or log onto our website at www.delonghi.com. Some states do you . This warranty gives you specific legal rights, and you may also have other person or company to be returned ...