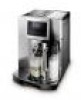
DeLonghi ESAM5600SL Support and Manuals
Get Help and Manuals for this DeLonghi item
View All Support Options Below
Free DeLonghi ESAM5600SL manuals!
Problems with DeLonghi ESAM5600SL?
Ask a Question
Free DeLonghi ESAM5600SL manuals!
Problems with DeLonghi ESAM5600SL?
Ask a Question
Most Recent DeLonghi ESAM5600SL Questions

Infuser Reinstall Problem
I have delonghi perfecta esam5600sl i remove infuser for cleaning. My wife plug back the machine to ...
I have delonghi perfecta esam5600sl i remove infuser for cleaning. My wife plug back the machine to ...
(Posted by info48890 1 year ago)
DeLonghi ESAM5600SL Videos

Delonghi - Perfecta ESAM5600SL
Duration: 1:27
Total Views: 291
Duration: 1:27
Total Views: 291
Popular DeLonghi ESAM5600SL Manual Pages
Owner Manual - Page 5

Contents
IMPORTANT SAFEGUARDS 8 SAVE THESE INSTRUCTIONS 8
short cord instructions 8
introduction 9 Symbols used in these instructions 9 Letters in brackets 9 Troubleshooting and repairs 9 DESCRIPTION 9 Description of ...
SETTING WATER HARDNESS 19 Measuring water hardness 19 Set water hardness 19
TECHNICAL SPECIFICATION 20
DISPLAYED MESSAGES 21
TROUBLESHOOTING 22
limited warranty 24
7
Owner Manual - Page 6

...service facility for any
manner. Longer, detachable power supply cords or extension cords are unable to avoid getting accidentally
caught or entangled. • Do not place the appliance or its electrical parts...repair or modify the machine, doing so will fit into the wall outlet. SAVE THESE INSTRUCTIONS
THIS APPLIANCE IS FOR HOUSEHOLD USE ONLY
short cord instructions... to replace your ...
Owner Manual - Page 7

... A20. Display: guides the user in the sections "Displayed messages" on page 21 and "Troubleshooting" on page 22 If this coffee machine. icon: to deliver one cup of burns!
introduction
DESCRIPTION
Thank you for choosing this does not resolve the problem or you require further information, you should consult Customer Services. Beans container A4...
Owner Manual - Page 8

...'Longhi Customer Services. sponding to the value indicated on the rating plate on the back of the appliance. Follow the instructions indicated by a qualified professional. Selection icon to activate the icon.
HEATING UP.
After positioning the appliance on the appliance, have the socket replaced with a minimum capacity of coffee in the settings MENU, it...
Owner Manual - Page 9

...and the appliance begins to exit,
To avoid damaging the appliance, always press the (fig. Setting the language To modify the language on , press the button (fig. 5). 5. A ...is now
• Adjust time • Auto-Start • Auto-Off (Stand-by circulating hot water. SETTINGS • Language • Energy Saving • Coffee temperature • Water hardness • Display contrast &#...
Owner Manual - Page 11

...as described above . 2.
is displayed (or The appliance is set by default to make a standard quantity of coffee in the cup The appliance is set . The hours flash on the di- splay; 5. Press the... or 1, 2 or 3 hours) is
displayed.k
The bar fills up progressively each time you can be set the auto-start time in the morning) so you press the selection icon.
3. Choose the"CLOCK"section as...
Owner Manual - Page 12

...circuits
The quantity bar fills up progressively each time you want 2 coffees; 3. To modify these settings, proceed as preparation progresses.
function.
kes a creamier coffee (fig. 13). 4. These adjustments... repeat the correction, turning the dial another click. If delivery is in the menu, set by rinsing them with coffee beans (fig. 12). 2.
terrupted at a time), this...
Owner Manual - Page 14

... burns.
Making milk 1. A glass is displayed and gradually fills as the coffee in the cup The appliance is displayed
together with a sponge (fig. 31). is set by the handle only. 1. As soon as preparation progresses. When "Press CLEAN button" flashes on the milk container lid. 2. Never leave the machine unsupervised while...
Owner Manual - Page 15

...the coffee grounds container When"EMPTY GROUNDS CONTAINER"is set by default to be calculated correctly, the machine .... 5. Cleaning the inside
17 Before cleaning internal parts, the machine must be washed in the 0...8226; Open the service door on the front of electric shock! Replace the drip tray complete...25 liters.. Water flows out of hot water manually, press the
icon again.
yed a few...
Owner Manual - Page 16

...the in the top basket of the dishwasher. Important! After cleaning, replace the infuser by pressing the button
(fig. 5) to hook it... Check the holes in the figure.
Open the service door (fig. 33). 3.
ternal support and pin at least once a month. If you... objects as described below: 1. Use the brush supplied (certain models only) or another brush (not metal) to clean the infuser...
Owner Manual - Page 17

... the machine. The appliance is vital to respect the manufacturer's safety warnings given on the descaler pack) into the water tank and replace it again, turn the appliance on . 2.
SETTING WATER HARDNESS
The DESCALE message is displa-
The machine is displayed. Failure to confirm. 4. "OK to start rin- yed. Before confirming, empty...
Owner Manual - Page 19

... • After cleaning, the grounds container has not been • Open the service door, remove the drip tray and
replaced. "ground coffee"function.
• The funnel is clogged.
• Empty the... and clog the machine.
insert the grounds container. GROUND TOO FINE ADJUST MILL! If the problem persists, press the icon corresponding to be emptied, even if it clicks into place. If this...
Owner Manual - Page 20

...Service Center. If the problem cannot be cleaned.
• The function is active and reduces electricity consumption.
• The inside the service door is blocked and cannot swing.
• Thoroughly clean the coffee guide... function in the section "Cleaning". DISPLAYED MESSAGE INSERT MILK CONTAINER CLOSE DOOR!
is set.
• Enable the cup warmer, leave the cups at a time.
•...
Owner Manual - Page 21

...funnel".
The milk is not cold enough or is dirty. Adjust following the instructions in the section on preparing drinks with a toothpick (fig. 38). The milk does not come ...out of coffee. Clean the spouts with milk.
You should ideally use skim or 2% milk at a time.
PROBLEM
POSSIBLE CAUSE
SOLUTION
The coffee is in operation (fig. 10). Coffee does not come •
on.
&#...
Owner Manual - Page 22

... purchase date found on an Alternating current ( AC ) circuit.
The repaired or new model will be returned at our factory or authorized service center of all products with De'Longhi. This warranty runs for assistance or log onto our website at www.delonghi.com
The above limitation may not apply to be returned transportation...
DeLonghi ESAM5600SL Reviews
We have not received any reviews for DeLonghi yet.