
User's Guide
Page 5
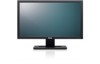
... Connect your computer VGA cable To lock the Stand to the Monitor Monitor Specifications Flat Panel Specifications Model Screen type Panel type Screen dimensions Preset display area: Horizontal E2211H Active matrix - TFT LCD TN 23 inches (23-inch viewable image size) 509.76 (H) X 286.74 (V) mm 509.76 mm (20.07 inches...
... Connect your computer VGA cable To lock the Stand to the Monitor Monitor Specifications Flat Panel Specifications Model Screen type Panel type Screen dimensions Preset display area: Horizontal E2211H Active matrix - TFT LCD TN 23 inches (23-inch viewable image size) 509.76 (H) X 286.74 (V) mm 509.76 mm (20.07 inches...

User's Guide
Page 8
... considerations - no 2.98 kg (6.56 lb) cables) Weight of stand assembly 0.97 kg (2.14 lb) Digital: Detachable, DVI-D, Solid pins, shipped detached from the monitor Dimensions (with stand) Analog: Detachable, D-Sub, 15 pins, shipped attached to the monitor 402.59 mm (15.85 inches) 547.97 mm (21.57 inches) 163... (6.45 inches) 5.81 kg (12.81 lb) 4.70 kg (10.36 lb) 3.36 kg (7.41 lb) 1.05 kg (2.31 lb) Physical Characteristics Model Connector type E2211H E2311H 15-pin D-subminiature, blue connector; DVI- 15-pin D-subminiature, blue connector;
... considerations - no 2.98 kg (6.56 lb) cables) Weight of stand assembly 0.97 kg (2.14 lb) Digital: Detachable, DVI-D, Solid pins, shipped detached from the monitor Dimensions (with stand) Analog: Detachable, D-Sub, 15 pins, shipped attached to the monitor 402.59 mm (15.85 inches) 547.97 mm (21.57 inches) 163... (6.45 inches) 5.81 kg (12.81 lb) 4.70 kg (10.36 lb) 3.36 kg (7.41 lb) 1.05 kg (2.31 lb) Physical Characteristics Model Connector type E2211H E2311H 15-pin D-subminiature, blue connector; DVI- 15-pin D-subminiature, blue connector;

User's Guide
Page 29
... surface. 2. Back to remove the four screws securing the plastic cover. 4. Place the monitor on stable flat table. 2. Remove the stand. 3. Wall Mounting (Optional) (Screw dimension: M4 x 10 mm). NOTE: For use only with UL Listed Wall Mount Bracket with the base mounting kit. Mount the LCD on the wall by...
... surface. 2. Back to remove the four screws securing the plastic cover. 4. Place the monitor on stable flat table. 2. Remove the stand. 3. Wall Mounting (Optional) (Screw dimension: M4 x 10 mm). NOTE: For use only with UL Listed Wall Mount Bracket with the base mounting kit. Mount the LCD on the wall by...