
Handling swollen Lithium-ion batteries
Page 1
... Dell product support for options to replace a swollen battery under the terms of the applicable warranty or service contract, including options for assistance and further instructions. ● Using a non-Dell or incompatible battery may be trademarks of swelling, do not try to free it as puncturing, bending, or crushing a battery can be dangerous. ● Do not attempt to reassemble a damaged or swollen battery into a notebook...
... Dell product support for options to replace a swollen battery under the terms of the applicable warranty or service contract, including options for assistance and further instructions. ● Using a non-Dell or incompatible battery may be trademarks of swelling, do not try to free it as puncturing, bending, or crushing a battery can be dangerous. ● Do not attempt to reassemble a damaged or swollen battery into a notebook...

Inspiron 15 3000 Service Manual
Page 4
Replacing the keyboard 25 Procedure 25 Post-requisites 25 Removing the base cover 26 Prerequisites 26 Procedure 26 Replacing the base cover 31 Procedure 31 Post-requisites 33 Removing the optical-drive interposer 34 Prerequisites 34 Procedure 34 Replacing the optical-drive interposer 36 Procedure 36 Post-requisites 36 Removing the hard drive 37 Prerequisites 37 Procedure 37 Replacing the hard drive 40 Procedure 40 Post-requisites 41 Removing the memory modules 42 Prerequisites 42 Procedure 42 4
Replacing the keyboard 25 Procedure 25 Post-requisites 25 Removing the base cover 26 Prerequisites 26 Procedure 26 Replacing the base cover 31 Procedure 31 Post-requisites 33 Removing the optical-drive interposer 34 Prerequisites 34 Procedure 34 Replacing the optical-drive interposer 36 Procedure 36 Post-requisites 36 Removing the hard drive 37 Prerequisites 37 Procedure 37 Replacing the hard drive 40 Procedure 40 Post-requisites 41 Removing the memory modules 42 Prerequisites 42 Procedure 42 4
Inspiron 15 3000 Service Manual
Page 10
... of your operating system for shut-down instructions. 3 Disconnect your computer and all attached devices from their electrical outlets. 4 Disconnect all open files and exit all attached network devices and peripherals, such as keyboard, mouse, and monitor from your computer. 5 Remove any media card and optical disc from your computer. Click Start → Power → Shut down your computer, if applicable. 6 Close the display and turn the...
... of your operating system for shut-down instructions. 3 Disconnect your computer and all attached devices from their electrical outlets. 4 Disconnect all open files and exit all attached network devices and peripherals, such as keyboard, mouse, and monitor from your computer. 5 Remove any media card and optical disc from your computer. Click Start → Power → Shut down your computer, if applicable. 6 Close the display and turn the...
Inspiron 15 3000 Service Manual
Page 11
... any installed card from the media-card reader. 11 See the safety instructions that shipped with locking tabs or thumb-screws that is not authorized by Dell is flat and clean. When disconnecting cables, keep them by the Dell technical assistance team. CAUTION: To avoid damaging the computer, ensure that the ports and connectors are correctly oriented and aligned. When connecting cables, ensure...
... any installed card from the media-card reader. 11 See the safety instructions that shipped with locking tabs or thumb-screws that is not authorized by Dell is flat and clean. When disconnecting cables, keep them by the Dell technical assistance team. CAUTION: To avoid damaging the computer, ensure that the ports and connectors are correctly oriented and aligned. When connecting cables, ensure...
Inspiron 15 3000 Service Manual
Page 14
Identifier GUID-06588814-2678-4667-9FF9-C009F4BCE185 Status Released After working inside your computer CAUTION: Leaving stray or loose screws inside your computer may severely damage your computer. 1 Replace all screws and ensure that no stray screws remain inside your computer. 2 Connect any external devices, peripherals, or cables you removed before working on your computer. 3 Replace any media cards, discs, or any other parts that you removed before working on your computer. 4 Connect your computer and all attached devices to their electrical outlets. 5 Turn on your computer. 14
Identifier GUID-06588814-2678-4667-9FF9-C009F4BCE185 Status Released After working inside your computer CAUTION: Leaving stray or loose screws inside your computer may severely damage your computer. 1 Replace all screws and ensure that no stray screws remain inside your computer. 2 Connect any external devices, peripherals, or cables you removed before working on your computer. 3 Replace any media cards, discs, or any other parts that you removed before working on your computer. 4 Connect your computer and all attached devices to their electrical outlets. 5 Turn on your computer. 14
Inspiron 15 3000 Service Manual
Page 42
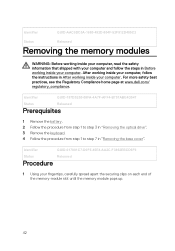
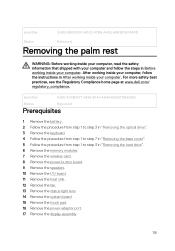
... at www.dell.com/ regulatory_compliance. Identifier GUID-187D5E55-08FA-4A7F-AFF4-B757ABE4D947 Status Released Prerequisites 1 Remove the battery. 2 Follow the procedure from step 1 to step 3 in "Removing the optical drive". 3 Remove the keyboard. 4 Follow the procedure from step 1 to step 7 in Before working inside your fingertips, carefully spread apart the securing clips on each end of the memory-module slot until the memory module pops...
... at www.dell.com/ regulatory_compliance. Identifier GUID-187D5E55-08FA-4A7F-AFF4-B757ABE4D947 Status Released Prerequisites 1 Remove the battery. 2 Follow the procedure from step 1 to step 3 in "Removing the optical drive". 3 Remove the keyboard. 4 Follow the procedure from step 1 to step 7 in Before working inside your fingertips, carefully spread apart the securing clips on each end of the memory-module slot until the memory module pops...
Inspiron 15 3000 Service Manual
Page 62
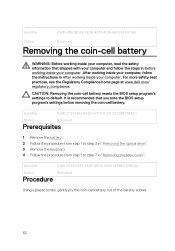
... and follow the instructions in After working inside your computer. For more safety best practices, see the Regulatory Compliance home page at www.dell.com/ regulatory_compliance. CAUTION: Removing the coin-cell battery resets the BIOS setup program's settings to step 7 in "Removing the base cover". Identifier GUID-30EEBC49-DE3E-4C3F-8226-86CE5F32F388 Status Released Removing the coin-cell battery WARNING: Before working inside your computer...
... and follow the instructions in After working inside your computer. For more safety best practices, see the Regulatory Compliance home page at www.dell.com/ regulatory_compliance. CAUTION: Removing the coin-cell battery resets the BIOS setup program's settings to step 7 in "Removing the base cover". Identifier GUID-30EEBC49-DE3E-4C3F-8226-86CE5F32F388 Status Released Removing the coin-cell battery WARNING: Before working inside your computer...
Inspiron 15 3000 Service Manual
Page 75
... and follow the instructions in the system board. Identifier GUID-D003B4D6-D615-492E-A173-3946F05DD05D Status Released Prerequisites 1 Remove the battery. 2 Follow the procedure from step 1 to step 3 in "Removing the base cover". 5 Remove the wireless card. 6 Remove the memory modules. 7 Remove the heat sink. 8 Remove the fan. 75 After working inside your computer, follow the steps in the BIOS setup program after you replace the system board. For more safety...
... and follow the instructions in the system board. Identifier GUID-D003B4D6-D615-492E-A173-3946F05DD05D Status Released Prerequisites 1 Remove the battery. 2 Follow the procedure from step 1 to step 3 in "Removing the base cover". 5 Remove the wireless card. 6 Remove the memory modules. 7 Remove the heat sink. 8 Remove the fan. 75 After working inside your computer, follow the steps in the BIOS setup program after you replace the system board. For more safety...
Inspiron 15 3000 Service Manual
Page 80
... instructions in the system board. NOTE: Replacing the system board removes any changes you replace the system board. You must make the appropriate changes again after you replace the system board. rest assembly. 5 Replace the two screws (M2x3) that secures the power-adapter port cable to the system board. 3 Turn the system board over. 4 Align the screw holes on the palm- Identifier GUID-94C58F5F-515D-4653-A6E6-437DDB6ED01B Status Released Procedure 1 Connect...
... instructions in the system board. NOTE: Replacing the system board removes any changes you replace the system board. You must make the appropriate changes again after you replace the system board. rest assembly. 5 Replace the two screws (M2x3) that secures the power-adapter port cable to the system board. 3 Turn the system board over. 4 Align the screw holes on the palm- Identifier GUID-94C58F5F-515D-4653-A6E6-437DDB6ED01B Status Released Procedure 1 Connect...
Inspiron 15 3000 Service Manual
Page 82
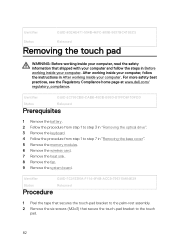
... 1 to the touch pad. 82 After working inside your computer, follow the steps in Before working inside your computer. Identifier GUID-8D2AE471-594B-46FC-808B-9037BC410EC5 Status Released Removing the touch pad WARNING: Before working inside your computer, read the safety information that secure the touch-pad bracket to step 7 in "Removing the base cover". 5 Remove the memory modules. 6 Remove the wireless card. 7 Remove the heat sink. 8 Remove the fan. 9 Remove the system board.
... 1 to the touch pad. 82 After working inside your computer, follow the steps in Before working inside your computer. Identifier GUID-8D2AE471-594B-46FC-808B-9037BC410EC5 Status Released Removing the touch pad WARNING: Before working inside your computer, read the safety information that secure the touch-pad bracket to step 7 in "Removing the base cover". 5 Remove the memory modules. 6 Remove the wireless card. 7 Remove the heat sink. 8 Remove the fan. 9 Remove the system board.
Inspiron 15 3000 Service Manual
Page 87
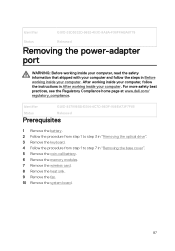
...-F98FFABA8776 Status Released Removing the power-adapter port WARNING: Before working inside your computer, read the safety information that shipped with your computer and follow the instructions in After working inside your computer. After working inside your computer, follow the steps in "Removing the base cover". 5 Remove the coin-cell battery. 6 Remove the memory modules. 7 Remove the wireless card. 8 Remove the heat sink. 9 Remove the fan. 10 Remove the system board. 87 For...
...-F98FFABA8776 Status Released Removing the power-adapter port WARNING: Before working inside your computer, read the safety information that shipped with your computer and follow the instructions in After working inside your computer. After working inside your computer, follow the steps in "Removing the base cover". 5 Remove the coin-cell battery. 6 Remove the memory modules. 7 Remove the wireless card. 8 Remove the heat sink. 9 Remove the fan. 10 Remove the system board. 87 For...
Inspiron 15 3000 Service Manual
Page 97
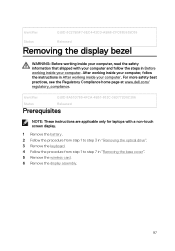
Identifier GUID-5C27B5F7-0EC4-42CD-AB68-CFC88E655D56 Status Released Removing the display bezel WARNING: Before working inside your computer, read the safety information that shipped with a non-touch screen display. 1 Remove the battery. 2 Follow the procedure from step 1 to step 3 in "Removing the optical drive". 3 Remove the keyboard. 4 Follow the procedure from step 1 to step 7 in "Removing the base cover". 5 Remove the wireless card. 6 Remove the display assembly. 97 For more...
Identifier GUID-5C27B5F7-0EC4-42CD-AB68-CFC88E655D56 Status Released Removing the display bezel WARNING: Before working inside your computer, read the safety information that shipped with a non-touch screen display. 1 Remove the battery. 2 Follow the procedure from step 1 to step 3 in "Removing the optical drive". 3 Remove the keyboard. 4 Follow the procedure from step 1 to step 7 in "Removing the base cover". 5 Remove the wireless card. 6 Remove the display assembly. 97 For more...
Inspiron 15 3000 Service Manual
Page 100
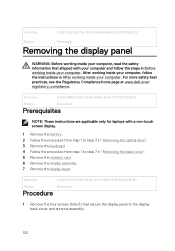
...: Before working inside your computer, read the safety information that secure the display panel to step 7 in "Removing the base cover". 5 Remove the wireless card. 6 Remove the display assembly. 7 Remove the display bezel. Identifier GUID-DFAC3E03-E62A-4C07-8D09-F862E8A29F4D Status Released Procedure 1 Remove the four screws (M2x3) that shipped with a non-touch screen display. 1 Remove the battery. 2 Follow the procedure from step 1 to step 3 in "Removing the optical drive". 3 Remove the keyboard...
...: Before working inside your computer, read the safety information that secure the display panel to step 7 in "Removing the base cover". 5 Remove the wireless card. 6 Remove the display assembly. 7 Remove the display bezel. Identifier GUID-DFAC3E03-E62A-4C07-8D09-F862E8A29F4D Status Released Procedure 1 Remove the four screws (M2x3) that shipped with a non-touch screen display. 1 Remove the battery. 2 Follow the procedure from step 1 to step 3 in "Removing the optical drive". 3 Remove the keyboard...
Inspiron 15 3000 Service Manual
Page 115
..., read the safety information that shipped with your computer and follow the instructions in "Removing the hard drive". 6 Remove the memory modules. 7 Remove the wireless card. 8 Remove the power-button board. 9 Remove the speakers. 10 Remove the I/O board. 11 Remove the heat sink. 12 Remove the fan. 13 Remove the status-light lens. 14 Remove the system board. 15 Remove the touch pad. 16 Remove the power-adapter port. 17 Remove the display assembly. 115 For more safety best practices, see the Regulatory Compliance...
..., read the safety information that shipped with your computer and follow the instructions in "Removing the hard drive". 6 Remove the memory modules. 7 Remove the wireless card. 8 Remove the power-button board. 9 Remove the speakers. 10 Remove the I/O board. 11 Remove the heat sink. 12 Remove the fan. 13 Remove the status-light lens. 14 Remove the system board. 15 Remove the touch pad. 16 Remove the power-adapter port. 17 Remove the display assembly. 115 For more safety best practices, see the Regulatory Compliance...
Inspiron 15 3000 Service Manual
Page 119
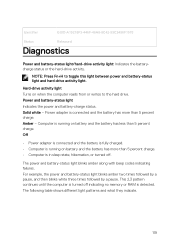
... followed by a pause. NOTE: Press Fn+H to the hard drive. Hard-drive activity light Turns on battery and the battery has more than 5 percent charge. • Computer is in sleep state, hibernation, or turned off indicating no memory or RAM is running on when the computer reads from or writes to toggle this light between power and battery-status light and hard-drive activity light. The power and battery-status light blinks amber along with beep codes indicating failures.
... followed by a pause. NOTE: Press Fn+H to the hard drive. Hard-drive activity light Turns on battery and the battery has more than 5 percent charge. • Computer is in sleep state, hibernation, or turned off indicating no memory or RAM is running on when the computer reads from or writes to toggle this light between power and battery-status light and hard-drive activity light. The power and battery-status light blinks amber along with beep codes indicating failures.
Inspiron 15 3000 Service Manual
Page 120
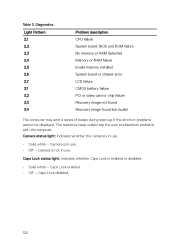
...: Indicates whether Caps Lock is not in use . • Solid white - Camera is enabled or disabled. • Solid white - Table 3. The repetitive beep codes help the user troubleshoot problems with the computer. Caps Lock disabled. 120 Caps Lock enabled. • Off - Diagnostics Light Pattern 2,1 2,2 2,3 2,4 2,5 2,6 2,7 3,1 3,2 3,3 3,4 Problem description CPU failure System board: BIOS and ROM failure No memory or RAM detected Memory or RAM failure Invalid memory installed System board or chipset error LCD failure CMOS battery failure PCI or video card or chip failure Recovery...
...: Indicates whether Caps Lock is not in use . • Solid white - Camera is enabled or disabled. • Solid white - Table 3. The repetitive beep codes help the user troubleshoot problems with the computer. Caps Lock disabled. 120 Caps Lock enabled. • Off - Diagnostics Light Pattern 2,1 2,2 2,3 2,4 2,5 2,6 2,7 3,1 3,2 3,3 3,4 Problem description CPU failure System board: BIOS and ROM failure No memory or RAM detected Memory or RAM failure Invalid memory installed System board or chipset error LCD failure CMOS battery failure PCI or video card or chip failure Recovery...
Inspiron 15 3000 Setup and Specifications
Page 8
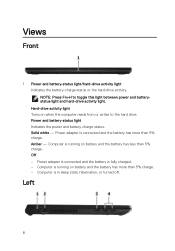
... light between power and batterystatus light and hard-drive activity light. Computer is fully charged. - Hard-drive activity light Turns on battery and the battery has more than 5% charge. - Power and battery-status light Indicates the power and battery-charge status. Left 8 Solid white - Power adapter is connected and the battery is in sleep state, hibernation, or turned off. Views Front 1 Power and battery-status light/hard-drive activity light Indicates the battery-charge status or the hard-drive activity. Computer is connected and the battery has more than 5% charge...
... light between power and batterystatus light and hard-drive activity light. Computer is fully charged. - Hard-drive activity light Turns on battery and the battery has more than 5% charge. - Power and battery-status light Indicates the power and battery-charge status. Left 8 Solid white - Power adapter is connected and the battery is in sleep state, hibernation, or turned off. Views Front 1 Power and battery-status light/hard-drive activity light Indicates the battery-charge status or the hard-drive activity. Computer is connected and the battery has more than 5% charge...

Inspiron 15 3000 Setup and Specifications
Page 13
System information Computer model Processor Chipset Memory Table 4. Memory specifications Slots Type Speed Configurations supported Per memory module slot Inspiron 15-3565 AMD E2/A6/A9 Processor Integrated in ) 2.30 kg (5.07 lb) NOTE: The weight of your computer varies depending on the configuration ordered and the manufacturing variability. Dimensions and weight Height Width Depth Weight (approximate) 23.65 mm (0.93 in) 380 mm (14.96 in...
System information Computer model Processor Chipset Memory Table 4. Memory specifications Slots Type Speed Configurations supported Per memory module slot Inspiron 15-3565 AMD E2/A6/A9 Processor Integrated in ) 2.30 kg (5.07 lb) NOTE: The weight of your computer varies depending on the configuration ordered and the manufacturing variability. Dimensions and weight Height Width Depth Weight (approximate) 23.65 mm (0.93 in) 380 mm (14.96 in...
Inspiron 15 3000 Setup and Specifications
Page 16
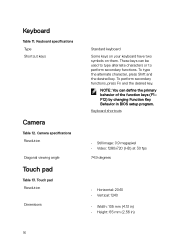
...: 2040 • Vertical: 1240 • Width: 105 mm (4.13 in) • Height: 65 mm (2.56 in BIOS setup program. Touch pad Resolution Dimensions Standard keyboard Some keys on your keyboard have two symbols on them. Keyboard Table 11. Camera specifications Resolution Diagonal viewing angle Touch pad Table 13. To type the alternate character, press Shift and the desired key. F12) by changing Function Key Behavior in ) 16
...: 2040 • Vertical: 1240 • Width: 105 mm (4.13 in) • Height: 65 mm (2.56 in BIOS setup program. Touch pad Resolution Dimensions Standard keyboard Some keys on your keyboard have two symbols on them. Keyboard Table 11. Camera specifications Resolution Diagonal viewing angle Touch pad Table 13. To type the alternate character, press Shift and the desired key. F12) by changing Function Key Behavior in ) 16

Inspiron 15 3000 Setup and Specifications
Page 20
List of keyboard shortcuts Keys Description Mute audio Decrease volume Increase volume Play previous track/chapter Play/Pause Play next track/chapter Switch to external display Search Decrease brightness Increase brightness Turn off/on wireless Sleep Toggle between power and batterystatus light/hard-drive activity light Toggle Fn-key lock Page up 20 Keyboard shortcuts Table 19.
List of keyboard shortcuts Keys Description Mute audio Decrease volume Increase volume Play previous track/chapter Play/Pause Play next track/chapter Switch to external display Search Decrease brightness Increase brightness Turn off/on wireless Sleep Toggle between power and batterystatus light/hard-drive activity light Toggle Fn-key lock Page up 20 Keyboard shortcuts Table 19.


