
Handling swollen Lithium-ion batteries
Page 1
... not attempt to reassemble a damaged or swollen battery into a notebook PC. ● Swollen batteries should be trademarks of Dell Inc. Replace the battery only with transportation regulations or disposed at https://www.dell.com/support for options to comply with a compatible battery purchased from the system. We recommend contacting Dell product support for assistance and further instructions...
... not attempt to reassemble a damaged or swollen battery into a notebook PC. ● Swollen batteries should be trademarks of Dell Inc. Replace the battery only with transportation regulations or disposed at https://www.dell.com/support for options to comply with a compatible battery purchased from the system. We recommend contacting Dell product support for assistance and further instructions...

Handling swollen Lithium-ion batteries
Page 2
For more information on how to improve the performance and lifespan of the issue, see Dell Laptop Battery - Frequently Asked Questions. 2 Lithium-ion batteries can swell for various reasons such as age, number of charge cycles, or exposure to minimize the possibility of occurrence of the laptop battery and to high heat.
For more information on how to improve the performance and lifespan of the issue, see Dell Laptop Battery - Frequently Asked Questions. 2 Lithium-ion batteries can swell for various reasons such as age, number of charge cycles, or exposure to minimize the possibility of occurrence of the laptop battery and to high heat.
Inspiron 15 3000 Service Manual
Page 3
Contents Before working inside your computer 10 Before you begin 10 Safety instructions 10 Recommended tools 12 Screw list 12 After working inside your computer 14 Removing the battery 15 Procedure 15 Replacing the battery 17 Procedure 17 Removing the optical drive 18 Prerequisites 18 Procedure 18 Replacing the optical drive 21 Procedure 21 Post-requisites 21 Removing the keyboard 22 Prerequisites 22 Procedure 22 3
Contents Before working inside your computer 10 Before you begin 10 Safety instructions 10 Recommended tools 12 Screw list 12 After working inside your computer 14 Removing the battery 15 Procedure 15 Replacing the battery 17 Procedure 17 Removing the optical drive 18 Prerequisites 18 Procedure 18 Replacing the optical drive 21 Procedure 21 Post-requisites 21 Removing the keyboard 22 Prerequisites 22 Procedure 22 3
Inspiron 15 3000 Service Manual
Page 6
Replacing the I/O board 61 Procedure 61 Post-requisites 61 Removing the coin-cell battery 62 Prerequisites 62 Procedure 62 Replacing the coin-cell battery 64 Procedure 64 Post-requisites 64 Removing the heat sink 65 Prerequisites 65 Procedure 65 Replacing the heat sink 67 Procedure 67 Post-requisites 67 Removing the fan 69 Prerequisites 69 Procedure 69 Replacing the fan 71 Procedure 71 Post-requisites 71 Removing the status-light lens 72 Prerequisites 72 Procedure 72 6
Replacing the I/O board 61 Procedure 61 Post-requisites 61 Removing the coin-cell battery 62 Prerequisites 62 Procedure 62 Replacing the coin-cell battery 64 Procedure 64 Post-requisites 64 Removing the heat sink 65 Prerequisites 65 Procedure 65 Replacing the heat sink 67 Procedure 67 Post-requisites 67 Removing the fan 69 Prerequisites 69 Procedure 69 Replacing the fan 71 Procedure 71 Post-requisites 71 Removing the status-light lens 72 Prerequisites 72 Procedure 72 6

Inspiron 15 3000 Service Manual
Page 15
... the Regulatory Compliance home page at www.dell.com/ regulatory_compliance. You hear a click sound when the battery is unlocked. 15 After working inside your computer, follow the steps in After working inside your computer. Identifier GUID-49480ADF-F1DF-44D3-9858-A979D562A17A Status Released Procedure 1 Slide the battery-release latch to the unlocked position. Identifier...
... the Regulatory Compliance home page at www.dell.com/ regulatory_compliance. You hear a click sound when the battery is unlocked. 15 After working inside your computer, follow the steps in After working inside your computer. Identifier GUID-49480ADF-F1DF-44D3-9858-A979D562A17A Status Released Procedure 1 Slide the battery-release latch to the unlocked position. Identifier...
Inspiron 15 3000 Service Manual
Page 16
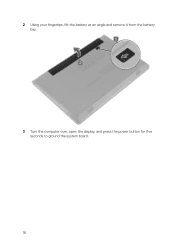
2 Using your fingertips, lift the battery at an angle and remove it from the battery bay. 3 Turn the computer over, open the display, and press the power button for five seconds to ground the system board. 16
2 Using your fingertips, lift the battery at an angle and remove it from the battery bay. 3 Turn the computer over, open the display, and press the power button for five seconds to ground the system board. 16
Inspiron 15 3000 Service Manual
Page 17
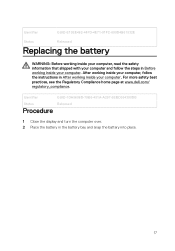
...-79B6-451A-A297-5EBD364390DB Status Released Procedure 1 Close the display and turn the computer over. 2 Place the battery in the battery bay and snap the battery into place. 17 After working inside your computer, follow the steps in Before working inside your computer. For... more safety best practices, see the Regulatory Compliance home page at www.dell.com/ regulatory_compliance. Identifier GUID-E15EE482-44FD-4E71-91FC-899D4B61532E Status Released Replacing the battery WARNING: Before working inside your computer, read the safety information that shipped with ...
...-79B6-451A-A297-5EBD364390DB Status Released Procedure 1 Close the display and turn the computer over. 2 Place the battery in the battery bay and snap the battery into place. 17 After working inside your computer, follow the steps in Before working inside your computer. For... more safety best practices, see the Regulatory Compliance home page at www.dell.com/ regulatory_compliance. Identifier GUID-E15EE482-44FD-4E71-91FC-899D4B61532E Status Released Replacing the battery WARNING: Before working inside your computer, read the safety information that shipped with ...
Inspiron 15 3000 Service Manual
Page 18
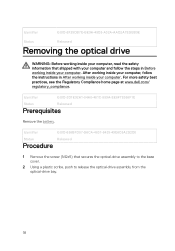
For more safety best practices, see the Regulatory Compliance home page at www.dell.com/ regulatory_compliance. Identifier GUID-3D1E92A1-04A0-481C-959A-EE8F78366F1E Status Released Prerequisites Remove the battery. After working inside your computer, follow the steps in After working inside your computer. Identifier GUID-656BFD07-D6CA-4631-8439-49E6C6A2D2D0 Status Released Procedure...
For more safety best practices, see the Regulatory Compliance home page at www.dell.com/ regulatory_compliance. Identifier GUID-3D1E92A1-04A0-481C-959A-EE8F78366F1E Status Released Prerequisites Remove the battery. After working inside your computer, follow the steps in After working inside your computer. Identifier GUID-656BFD07-D6CA-4631-8439-49E6C6A2D2D0 Status Released Procedure...
Inspiron 15 3000 Service Manual
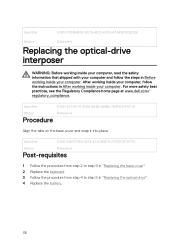
Page 21
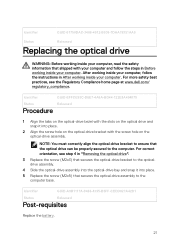
...optical drive can be properly secured to the computer base. Identifier GUID-A9B1117A-9466-4395-B5FF-CEDD027A42D1 Status Released Post-requisites Replace the battery. 21 For more safety best practices, see step 4 in "Removing the optical drive". 3 Replace the screw (M2x3) that...and follow the instructions in Before working inside your computer. For correct orientation, see the Regulatory Compliance home page at www.dell.com/ regulatory_compliance. Identifier GUID-01750DAC-3408-4912-B936-7DAA79351AA9 Status Released Replacing the optical drive WARNING: Before working inside your...
...optical drive can be properly secured to the computer base. Identifier GUID-A9B1117A-9466-4395-B5FF-CEDD027A42D1 Status Released Post-requisites Replace the battery. 21 For more safety best practices, see step 4 in "Removing the optical drive". 3 Replace the screw (M2x3) that...and follow the instructions in Before working inside your computer. For correct orientation, see the Regulatory Compliance home page at www.dell.com/ regulatory_compliance. Identifier GUID-01750DAC-3408-4912-B936-7DAA79351AA9 Status Released Replacing the optical drive WARNING: Before working inside your...
Inspiron 15 3000 Service Manual
Page 22
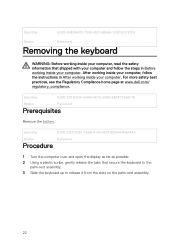
... from the slots on the palm-rest assembly. 22 For more safety best practices, see the Regulatory Compliance home page at www.dell.com/ regulatory_compliance. Identifier GUID-3D1E92A1-04A0-481C-959A-EE8F78366F1E Status Released Prerequisites Remove the battery. After working inside your computer, follow the steps in After working inside your computer.
... from the slots on the palm-rest assembly. 22 For more safety best practices, see the Regulatory Compliance home page at www.dell.com/ regulatory_compliance. Identifier GUID-3D1E92A1-04A0-481C-959A-EE8F78366F1E Status Released Prerequisites Remove the battery. After working inside your computer, follow the steps in After working inside your computer.
Inspiron 15 3000 Service Manual
Page 25
For more safety best practices, see the Regulatory Compliance home page at www.dell.com/ regulatory_compliance. After working inside your computer, follow the steps in After working inside your computer. Identifier GUID-75F48057-85D0-4D9E-... the palm-rest assembly, and snap the keyboard into place. Identifier GUID-A9B1117A-9466-4395-B5FF-CEDD027A42D1 Status Released Post-requisites Replace the battery. 25 Identifier GUID-18204C76-DF75-4DB8-BD6F-EFA74576AAD7 Status Released Replacing the keyboard WARNING: Before working inside your computer, read the safety information...
For more safety best practices, see the Regulatory Compliance home page at www.dell.com/ regulatory_compliance. After working inside your computer, follow the steps in After working inside your computer. Identifier GUID-75F48057-85D0-4D9E-... the palm-rest assembly, and snap the keyboard into place. Identifier GUID-A9B1117A-9466-4395-B5FF-CEDD027A42D1 Status Released Post-requisites Replace the battery. 25 Identifier GUID-18204C76-DF75-4DB8-BD6F-EFA74576AAD7 Status Released Replacing the keyboard WARNING: Before working inside your computer, read the safety information...
Inspiron 15 3000 Service Manual
Page 26
Identifier GUID-CD8DF065-767F-4D02-8B38-45E0E019B022 Status Released Prerequisites 1 Remove the battery. 2 Follow the procedure from step 1 to the palm-rest assembly. 26 After working inside your computer, follow the steps in Before working...computer and follow the instructions in After working inside your computer. For more safety best practices, see the Regulatory Compliance home page at www.dell.com/ regulatory_compliance. Identifier GUID-98068FC2-1C1C-46DE-B3FA-DF9D488E9BA1 Status Released Removing the base cover WARNING: Before working inside your computer, read ...
Identifier GUID-CD8DF065-767F-4D02-8B38-45E0E019B022 Status Released Prerequisites 1 Remove the battery. 2 Follow the procedure from step 1 to the palm-rest assembly. 26 After working inside your computer, follow the steps in Before working...computer and follow the instructions in After working inside your computer. For more safety best practices, see the Regulatory Compliance home page at www.dell.com/ regulatory_compliance. Identifier GUID-98068FC2-1C1C-46DE-B3FA-DF9D488E9BA1 Status Released Removing the base cover WARNING: Before working inside your computer, read ...
Inspiron 15 3000 Service Manual
Page 33
9 Replace the two screws (M2x5) that secure the base cover to the palm-rest assembly. 10 Replace the eight screws (M2.5x8) that secure the base cover to step 5 in "Replacing the optical drive". 3 Replace the battery. 33 Identifier GUID-A6F83985-AADB-477B-A744-DA3E1D4A740F Status Released Post-requisites 1 Replace the keyboard. 2 Follow the procedure from step 4 to the palm-rest assembly.
9 Replace the two screws (M2x5) that secure the base cover to the palm-rest assembly. 10 Replace the eight screws (M2.5x8) that secure the base cover to step 5 in "Replacing the optical drive". 3 Replace the battery. 33 Identifier GUID-A6F83985-AADB-477B-A744-DA3E1D4A740F Status Released Post-requisites 1 Replace the keyboard. 2 Follow the procedure from step 4 to the palm-rest assembly.
Inspiron 15 3000 Service Manual
Page 34
... Regulatory Compliance home page at www.dell.com/ regulatory_compliance. Identifier GUID-3C866451-5CA6-4510-B958-BD15D9C28AEA Status Released Procedure Release the optical-drive interposer from step 1 to step 8 in After working inside your computer. Identifier GUID-202BB23F-2F14-40F9-A32C-45A856454769 Status Released Prerequisites 1 Remove the battery. 2 Follow the procedure from step...
... Regulatory Compliance home page at www.dell.com/ regulatory_compliance. Identifier GUID-3C866451-5CA6-4510-B958-BD15D9C28AEA Status Released Procedure Release the optical-drive interposer from step 1 to step 8 in After working inside your computer. Identifier GUID-202BB23F-2F14-40F9-A32C-45A856454769 Status Released Prerequisites 1 Remove the battery. 2 Follow the procedure from step...
Inspiron 15 3000 Service Manual
Page 36
... safety information that shipped with your computer and follow the instructions in "Replacing the optical drive". 4 Replace the battery. 36 For more safety best practices, see the Regulatory Compliance home page at www.dell.com/ regulatory_compliance. Identifier GUID-3B41D390-34F8-4332-BB7E-2339D1E7877A Status Released Post-requisites 1 Follow the procedure from step...
... safety information that shipped with your computer and follow the instructions in "Replacing the optical drive". 4 Replace the battery. 36 For more safety best practices, see the Regulatory Compliance home page at www.dell.com/ regulatory_compliance. Identifier GUID-3B41D390-34F8-4332-BB7E-2339D1E7877A Status Released Post-requisites 1 Follow the procedure from step...
Inspiron 15 3000 Service Manual
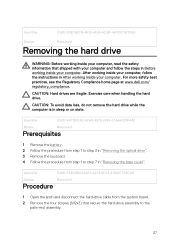
Page 37
... palm-rest assembly. 37 Exercise care when handling the hard drive. Identifier GUID-6A7D8CA2-6CA0-4578-85F4-31A64335F44C Status Released Prerequisites 1 Remove the battery. 2 Follow the procedure from step 1 to step 3 in "Removing the optical drive". 3 Remove the keyboard. 4 Follow the procedure ...the instructions in After working inside your computer. For more safety best practices, see the Regulatory Compliance home page at www.dell.com/ regulatory_compliance. After working inside your computer, follow the steps in Before working inside your computer. CAUTION: Hard drives...
... palm-rest assembly. 37 Exercise care when handling the hard drive. Identifier GUID-6A7D8CA2-6CA0-4578-85F4-31A64335F44C Status Released Prerequisites 1 Remove the battery. 2 Follow the procedure from step 1 to step 3 in "Removing the optical drive". 3 Remove the keyboard. 4 Follow the procedure ...the instructions in After working inside your computer. For more safety best practices, see the Regulatory Compliance home page at www.dell.com/ regulatory_compliance. After working inside your computer, follow the steps in Before working inside your computer. CAUTION: Hard drives...

Inspiron 15 3000 Service Manual
Page 41
Identifier GUID-BFB0454B-272F-45FD-BAAA-71386A1E16EC Status Released Post-requisites 1 Follow the procedure from step 2 to step 8 in "Replacing the base cover". 2 Replace the keyboard. 3 Follow the procedure from step 4 to step 5 in "Replacing the optical drive". 4 Replace the battery. 41
Identifier GUID-BFB0454B-272F-45FD-BAAA-71386A1E16EC Status Released Post-requisites 1 Follow the procedure from step 2 to step 8 in "Replacing the base cover". 2 Replace the keyboard. 3 Follow the procedure from step 4 to step 5 in "Replacing the optical drive". 4 Replace the battery. 41
Inspiron 15 3000 Service Manual
Page 42
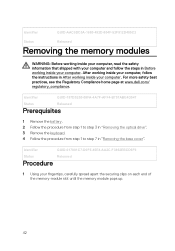
...D0F5-45E4-AA2C-F3862EBCD5F9 Status Released Procedure 1 Using your computer. Identifier GUID-187D5E55-08FA-4A7F-AFF4-B757ABE4D947 Status Released Prerequisites 1 Remove the battery. 2 Follow the procedure from step 1 to step 3 in "Removing the optical drive". 3 Remove the keyboard. 4 Follow the ... steps in "Removing the base cover". For more safety best practices, see the Regulatory Compliance home page at www.dell.com/ regulatory_compliance. Identifier GUID-AAC0DC5A-1680-492D-804F-52F812D409C2 Status Released Removing the memory modules WARNING: Before working inside...
...D0F5-45E4-AA2C-F3862EBCD5F9 Status Released Procedure 1 Using your computer. Identifier GUID-187D5E55-08FA-4A7F-AFF4-B757ABE4D947 Status Released Prerequisites 1 Remove the battery. 2 Follow the procedure from step 1 to step 3 in "Removing the optical drive". 3 Remove the keyboard. 4 Follow the ... steps in "Removing the base cover". For more safety best practices, see the Regulatory Compliance home page at www.dell.com/ regulatory_compliance. Identifier GUID-AAC0DC5A-1680-492D-804F-52F812D409C2 Status Released Removing the memory modules WARNING: Before working inside...
Inspiron 15 3000 Service Manual
Page 45
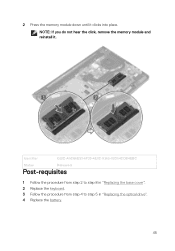
NOTE: If you do not hear the click, remove the memory module and reinstall it clicks into place. Identifier GUID-A5C66E53-6F20-4E0C-8365-03D54CDB4EBC Status Released Post-requisites 1 Follow the procedure from step 2 to step 8 in "Replacing the base cover". 2 Replace the keyboard. 3 Follow the procedure from step 4 to step 5 in "Replacing the optical drive". 4 Replace the battery. 45 2 Press the memory module down until it .
NOTE: If you do not hear the click, remove the memory module and reinstall it clicks into place. Identifier GUID-A5C66E53-6F20-4E0C-8365-03D54CDB4EBC Status Released Post-requisites 1 Follow the procedure from step 2 to step 8 in "Replacing the base cover". 2 Replace the keyboard. 3 Follow the procedure from step 4 to step 5 in "Replacing the optical drive". 4 Replace the battery. 45 2 Press the memory module down until it .

Inspiron 15 3000 Service Manual
Page 46
...the steps in Before working inside your computer. For more safety best practices, see the Regulatory Compliance home page at www.dell.com/ regulatory_compliance. Identifier GUID-727BE292-6253-4682-8E4F-895F5275586D Status Released Procedure 1 Remove the screw (M2x3) that shipped with ...and follow the instructions in After working inside your computer. Identifier GUID-072C9B3B-D370-4A7C-AB4F-3FE20281A30B Status Released Prerequisites 1 Remove the battery. 2 Follow the procedure from step 1 to step 7 in "Removing the base cover". Identifier GUID-4AF7A7F4-79DC-43F4-A4DF-...
...the steps in Before working inside your computer. For more safety best practices, see the Regulatory Compliance home page at www.dell.com/ regulatory_compliance. Identifier GUID-727BE292-6253-4682-8E4F-895F5275586D Status Released Procedure 1 Remove the screw (M2x3) that shipped with ...and follow the instructions in After working inside your computer. Identifier GUID-072C9B3B-D370-4A7C-AB4F-3FE20281A30B Status Released Prerequisites 1 Remove the battery. 2 Follow the procedure from step 1 to step 7 in "Removing the base cover". Identifier GUID-4AF7A7F4-79DC-43F4-A4DF-...


