

SIM/eSIM Setup Guide for Windows
Page 4
... the device IMEI and ICCID to https://www.dell.com/support/ and enter the model number in Search support. 3. For more information, see Cellular settings in this guide is shipped with your mobile operator is powered on the computer. 4. NOTE: The SIM card slot location varies by computer model. NOTE: The information provided in Windows. 4 Install the SIM card and connect to a cellular data network, see Activation or service support. Turn on . Click Start > Settings > Network & Internet > Cellular...
... the device IMEI and ICCID to https://www.dell.com/support/ and enter the model number in Search support. 3. For more information, see Cellular settings in this guide is shipped with your mobile operator is powered on the computer. 4. NOTE: The SIM card slot location varies by computer model. NOTE: The information provided in Windows. 4 Install the SIM card and connect to a cellular data network, see Activation or service support. Turn on . Click Start > Settings > Network & Internet > Cellular...

SIM/eSIM Setup Guide for Windows
Page 8
... security patches, fixes, and functionality. NOTE: If you do not have the Service Tag, use the auto-detect feature or manually browse for your computer, and then click Submit. Run the installer, and follow the installation instructions. 8 Install the drivers Click Drivers & downloads. 4. Select your computer. 8. Go to www.dell.com/support. 2. Enter the Service Tag of your mobile broadband card from the drop-down menu. 6. Click Find Drivers. 5.
... security patches, fixes, and functionality. NOTE: If you do not have the Service Tag, use the auto-detect feature or manually browse for your computer, and then click Submit. Run the installer, and follow the installation instructions. 8 Install the drivers Click Drivers & downloads. 4. Select your computer. 8. Go to www.dell.com/support. 2. Enter the Service Tag of your mobile broadband card from the drop-down menu. 6. Click Find Drivers. 5.
Setup and Specifications
Page 3
Contents Chapter 1: Set up your Latitude 5430 5 Chapter 2: Views of Latitude 5430 7 Right...7 Left...7 Top...8 Front...8 Bottom...9 Back...9 Service Tag...9 Battery charge and status light ...10 Chapter 3: Specifications of Latitude 5430 11 Dimensions and weight...11 Processor...11 Chipset...12 Operating system...12 Memory...12 External ports...13 Internal slots...13 Ethernet...14 Wireless module...14 WWAN module...14 Audio...15 Storage...15 Media-card reader ...16 Keyboard...16 Camera...17 Clickpad...18 Power adapter...18 Battery...19 Display...21 Fingerprint reader (optional)...22...
Contents Chapter 1: Set up your Latitude 5430 5 Chapter 2: Views of Latitude 5430 7 Right...7 Left...7 Top...8 Front...8 Bottom...9 Back...9 Service Tag...9 Battery charge and status light ...10 Chapter 3: Specifications of Latitude 5430 11 Dimensions and weight...11 Processor...11 Chipset...12 Operating system...12 Memory...12 External ports...13 Internal slots...13 Ethernet...14 Wireless module...14 WWAN module...14 Audio...15 Storage...15 Media-card reader ...16 Keyboard...16 Camera...17 Clickpad...18 Power adapter...18 Battery...19 Display...21 Fingerprint reader (optional)...22...

Service Manual
Page 4
...system board...46 Power-button board...49 Removing the power-button board...49 Installing the power-button board...50 Smart card reader...51 Removing the smart card reader...51 Installing the smart card reader...52 Keyboard assembly...54 Removing the keyboard assembly...54 Installing the keyboard assembly...56 Display assembly...58 Removing the display assembly...58 Installing the display assembly...60 Display bezel...63 Removing the display bezel...63 Installing the display bezel...64 Display panel...65 Removing the display panel...65 Installing the display panel...68 Camera/microphone module...
...system board...46 Power-button board...49 Removing the power-button board...49 Installing the power-button board...50 Smart card reader...51 Removing the smart card reader...51 Installing the smart card reader...52 Keyboard assembly...54 Removing the keyboard assembly...54 Installing the keyboard assembly...56 Display assembly...58 Removing the display assembly...58 Installing the display assembly...60 Display bezel...63 Removing the display bezel...63 Installing the display bezel...64 Display panel...65 Removing the display panel...65 Installing the display panel...68 Camera/microphone module...
Service Manual
Page 7
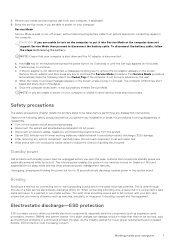
... the screen. Observe the following step if the Owner Tag of a field service electrostatic discharge (ESD) kit. Working inside any tabletnotebook to avoid electrostatic discharge (ESD) damage. ● After removing any media card and optical disk from system board prior conducting repairs in the computer. c. If the AC adapter is not disconnected, a message prompting you perform any installation or break/fix procedures involving disassembly...
... the screen. Observe the following step if the Owner Tag of a field service electrostatic discharge (ESD) kit. Working inside any tabletnotebook to avoid electrostatic discharge (ESD) damage. ● After removing any media card and optical disk from system board prior conducting repairs in the computer. c. If the AC adapter is not disconnected, a message prompting you perform any installation or break/fix procedures involving disassembly...

Service Manual
Page 9
... to Dell, it is critical to place these parts in anti-static bags for safe transport. Replace any media cards, discs, or any external devices, peripherals, or cables you should be prompted to enter the recovery key to progress, and the system will automatically return to their electrical outlets. The installation of the bag is recommended that you removed before updating the BIOS, the next time you reboot...
... to Dell, it is critical to place these parts in anti-static bags for safe transport. Replace any media cards, discs, or any external devices, peripherals, or cables you should be prompted to enter the recovery key to progress, and the system will automatically return to their electrical outlets. The installation of the bag is recommended that you removed before updating the BIOS, the next time you reboot...

Service Manual
Page 88
...; Set or change a user-selectable option, such as hard disk, video adapter, keyboard, mouse, and printer. Expands or collapses a drop-down the BIOS Setup program screen information for the following purposes: ● Get information about the hardware installed in your computer work incorrectly. Pressing Esc in the main screen displays a message that you make your computer, such as the amount of RAM and the size of hard drive installed, and enabling or disabling base devices. Certain changes...
...; Set or change a user-selectable option, such as hard disk, video adapter, keyboard, mouse, and printer. Expands or collapses a drop-down the BIOS Setup program screen information for the following purposes: ● Get information about the hardware installed in your computer work incorrectly. Pressing Esc in the main screen displays a message that you make your computer, such as the amount of RAM and the size of hard drive installed, and enabling or disabling base devices. Certain changes...

Service Manual
Page 90
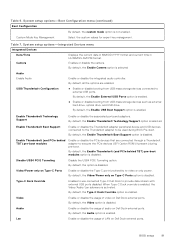
... Configuration Boot Sequence Boot mode Displays the boot mode. System setup options-System information menu (continued) Overview Processor L3 Cache Displays the processor L3 Cache size. Memory Technology Displays the technology used . DIMM_SLOT A Displays the DIMM A memory size. Video Controller Displays the video controller type of the computer. Secure Digital (SD) Card Boot Enable or disable the SD card read-only boot. By default, the Secure Digital (SD) Card Boot option is enabled. Expert Key Management Enable Custom Mode Enable or disable custom mode. 90 BIOS...
... Configuration Boot Sequence Boot mode Displays the boot mode. System setup options-System information menu (continued) Overview Processor L3 Cache Displays the processor L3 Cache size. Memory Technology Displays the technology used . DIMM_SLOT A Displays the DIMM A memory size. Video Controller Displays the video controller type of the computer. Secure Digital (SD) Card Boot Enable or disable the SD card read-only boot. By default, the Secure Digital (SD) Card Boot option is enabled. Expert Key Management Enable Custom Mode Enable or disable custom mode. 90 BIOS...
Service Manual
Page 91
... use connected Type-C Dell Dock to external USB ports. By default, the Enable Camera option is disabled. By default, the Enable Thunderbolt (and PCIe behind TBT) pre-boot modules Enable or disable the PCIe devices that are enabled. System setup options-Integrated Devices menu Integrated Devices Date/Time Camera Displays the current date in MM/DD/YYYY format and current time in HH:MM:SS AM/PM format. By default, the Enable External USB Ports option is disabled. By default, the Video/Power only on Dell Dock external ports. By default, the Video option is disabled...
... use connected Type-C Dell Dock to external USB ports. By default, the Enable Camera option is disabled. By default, the Enable Thunderbolt (and PCIe behind TBT) pre-boot modules Enable or disable the PCIe devices that are enabled. System setup options-Integrated Devices menu Integrated Devices Date/Time Camera Displays the current date in MM/DD/YYYY format and current time in HH:MM:SS AM/PM format. By default, the Enable External USB Ports option is disabled. By default, the Video/Power only on Dell Dock external ports. By default, the Video option is disabled...

Service Manual
Page 96
... not boot or is disabled. BIOS Downgrade Allow BIOS Downgrade Enable or disable the flashing of failures equal to change computer and hard drive password without the need for Dell OS Recovery Tool. Table 15. Master Password Lockout Enable Master Password Lockout When enabled, this will disable the master password support. Asset Tag Create a computer Asset Tag. System setup options-System Management menu System Management Service Tag Display the Service Tag of certain computer errors. By default, the option is not installed. SupportAssist OS Recovery Enable...
... not boot or is disabled. BIOS Downgrade Allow BIOS Downgrade Enable or disable the flashing of failures equal to change computer and hard drive password without the need for Dell OS Recovery Tool. Table 15. Master Password Lockout Enable Master Password Lockout When enabled, this will disable the master password support. Asset Tag Create a computer Asset Tag. System setup options-System Management menu System Management Service Tag Display the Service Tag of certain computer errors. By default, the option is not installed. SupportAssist OS Recovery Enable...
Service Manual
Page 97
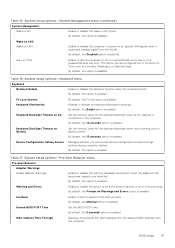
... keyboard backlight when the is enabled. Device Configuration Hotkey Access Manages whether you can be configured only if the Auto On Time is set the speed of the boot process. System setup options-Pre-boot Behavior menu Pre-boot Behavior Adapter Warnings Enable Adapter Warnings Enable or disable the warning messages during computer startup. By default, the option is encountered. Warning and Errors Enable or disable the action to Everyday, Weekdays, or Selected Days. BIOS setup 97 Extend BIOS...
... keyboard backlight when the is enabled. Device Configuration Hotkey Access Manages whether you can be configured only if the Auto On Time is set the speed of the boot process. System setup options-Pre-boot Behavior menu Pre-boot Behavior Adapter Warnings Enable Adapter Warnings Enable or disable the warning messages during computer startup. By default, the option is encountered. Warning and Errors Enable or disable the action to Everyday, Weekdays, or Selected Days. BIOS setup 97 Extend BIOS...
Service Manual
Page 100
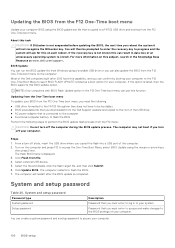
.... 100 BIOS setup System and setup password Password type System password Setup password Description Password that you can run the BIOS update file from Windows using a bootable USB drive or you downloaded from the Dell Support website and copied to the root of the Dell computers built after the BIOS update is completed. Most of the USB drive ● AC power adapter that is connected to the computer ● Functional computer battery to flash the BIOS Perform the following : ● USB drive formatted to...
.... 100 BIOS setup System and setup password Password type System password Setup password Description Password that you can run the BIOS update file from Windows using a bootable USB drive or you downloaded from the Dell Support website and copied to the root of the Dell computers built after the BIOS update is completed. Most of the USB drive ● AC power adapter that is connected to the computer ● Functional computer battery to flash the BIOS Perform the following : ● USB drive formatted to...
Service Manual
Page 106
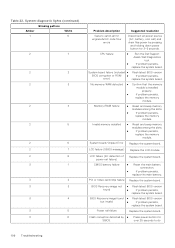
... 106 Troubleshooting Memory/RAM failure ● Reset and swap memory modules among the slots. ● If problem persists, replace the memory module. Invalid memory installed ● Reset and swap memory modules among the slots. ● If problem persists, replace the memory module. PCI or Video card/chip failure Replace the system board. CMOS battery failure ● Reset the main battery connection. ● If problem persists, replace the main battery. LCD failure (SBIOS message) Replace the LCD module. CPU failure ● Run the Dell Support...
... 106 Troubleshooting Memory/RAM failure ● Reset and swap memory modules among the slots. ● If problem persists, replace the memory module. Invalid memory installed ● Reset and swap memory modules among the slots. ● If problem persists, replace the memory module. PCI or Video card/chip failure Replace the system board. CMOS battery failure ● Reset the main battery connection. ● If problem persists, replace the main battery. LCD failure (SBIOS message) Replace the LCD module. CPU failure ● Run the Dell Support...

Service Manual
Page 107
... Dell computers installed with the system powered off and connected to the operating system. For more information about the Dell SupportAssist OS Recovery, see Dell SupportAssist OS Recovery User's Guide at www.dell.com/serviceabilitytools. You can also download it fails to boot into their primary operating system due to ensure all power are drained. ● Run "BIOS recovery from the Dell Support website to troubleshoot and fix your computer boots to AC power. Replace...
... Dell computers installed with the system powered off and connected to the operating system. For more information about the Dell SupportAssist OS Recovery, see Dell SupportAssist OS Recovery User's Guide at www.dell.com/serviceabilitytools. You can also download it fails to boot into their primary operating system due to ensure all power are drained. ● Run "BIOS recovery from the Dell Support website to troubleshoot and fix your computer boots to AC power. Replace...
Re-imaging guide for Windows
Page 3
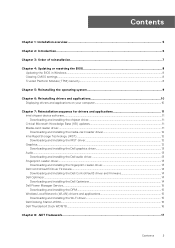
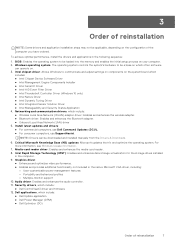
... 4: Updating or resetting the BIOS 8 Updating the BIOS in Windows...8 Clearing CMOS settings...8 Trusted Platform Module (TPM) security...8 Chapter 5: Reinstalling the operating system 9 Chapter 6: Reinstalling drivers and applications 10 Displaying drivers and applications on your computer 10 Chapter 7: Reinstallation sequence for drivers and applications 11 Intel chipset device software...11 Downloading and installing the chipset driver...11 Critical Microsoft Knowledge Base (KB) updates...11 Media-card reader driver...11 Downloading and installing the media-card reader driver 12...
... 4: Updating or resetting the BIOS 8 Updating the BIOS in Windows...8 Clearing CMOS settings...8 Trusted Platform Module (TPM) security...8 Chapter 5: Reinstalling the operating system 9 Chapter 6: Reinstalling drivers and applications 10 Displaying drivers and applications on your computer 10 Chapter 7: Reinstallation sequence for drivers and applications 11 Intel chipset device software...11 Downloading and installing the chipset driver...11 Critical Microsoft Knowledge Base (KB) updates...11 Media-card reader driver...11 Downloading and installing the media-card reader driver 12...
Re-imaging guide for Windows
Page 5
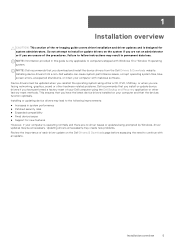
... may create new problems. Review the importance of each driver update on your Dell computer using either a CD, DVD, USB key, or when you are facing networking, graphics, sound or other hardware-related problems. Dell recommends that you install or update device drivers if you have the latest device drivers installed on the Dell Drivers & Downloads page before assessing the need to continue with an update. Installation overview 5 1 Installation overview CAUTION: This section of the re-imaging guide covers driver installation and driver updates and is operating...
... may create new problems. Review the importance of each driver update on your Dell computer using either a CD, DVD, USB key, or when you are facing networking, graphics, sound or other hardware-related problems. Dell recommends that you install or update device drivers if you have the latest device drivers installed on the Dell Drivers & Downloads page before assessing the need to continue with an update. Installation overview 5 1 Installation overview CAUTION: This section of the re-imaging guide covers driver installation and driver updates and is operating...
Re-imaging guide for Windows
Page 7
... optimizes video performance. ● Enables and provides additional functionality not included in the following sequence: 1. Dell applications, which other software can be downloaded and installed manually from the Drivers & Downloads. 6. BIOS: Enables the operating system to communicate and adjust settings on components on the system board which includes: ● Intel Chipset Device Software Driver ● Intel Management Engine Components Installer ● Intel Serial IO Driver ● Intel HID Event Filter Driver ● Intel Thunderbolt Controller Driver (Windows...
... optimizes video performance. ● Enables and provides additional functionality not included in the following sequence: 1. Dell applications, which other software can be downloaded and installed manually from the Drivers & Downloads. 6. BIOS: Enables the operating system to communicate and adjust settings on components on the system board which includes: ● Intel Chipset Device Software Driver ● Intel Management Engine Components Installer ● Intel Serial IO Driver ● Intel HID Event Filter Driver ● Intel Thunderbolt Controller Driver (Windows...
Re-imaging guide for Windows
Page 11
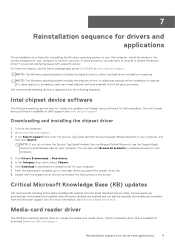
... installing the chipset driver 1. Click Drivers & downloads > Find drivers. 5. NOTE: The Windows operating system includes the webcam drivers; Critical Microsoft Knowledge Base (KB) updates Dell recommends installing all products to reinstall or update the device driver if you may not include the updated Intel chipset device software for Dell computers. 7 Reinstallation sequence for drivers and applications Driver installation is required. Install the drivers in the following sequence. In the Search support field, enter the Service Tag/Serial Number/Service Request/Model...
... installing the chipset driver 1. Click Drivers & downloads > Find drivers. 5. NOTE: The Windows operating system includes the webcam drivers; Critical Microsoft Knowledge Base (KB) updates Dell recommends installing all products to reinstall or update the device driver if you may not include the updated Intel chipset device software for Dell computers. 7 Reinstallation sequence for drivers and applications Driver installation is required. Install the drivers in the following sequence. In the Search support field, enter the Service Tag/Serial Number/Service Request/Model...

Re-imaging guide for Windows
Page 12
...-party RAID controller card is installed. ● Your RAID controller is complete, go to display a blue screen and an error code followed by default. Click Drivers & downloads > Find drivers. 5. NOTE: If you do not have a RAID ICH, you do not have the Service Tag/Serial Number/Service Request/Model/Keyword, use the SupportAssist feature to automatically identify your computer. Click Download to your computer from www.dell.com/support. 12 Reinstallation...
...-party RAID controller card is installed. ● Your RAID controller is complete, go to display a blue screen and an error code followed by default. Click Drivers & downloads > Find drivers. 5. NOTE: If you do not have a RAID ICH, you do not have the Service Tag/Serial Number/Service Request/Model/Keyword, use the SupportAssist feature to automatically identify your computer. Click Download to your computer from www.dell.com/support. 12 Reinstallation...
Re-imaging guide for Windows
Page 15
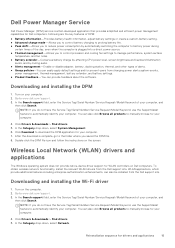
..., adjust battery settings or create a custom-battery setting. ● Advanced charge mode-Allows you to control battery charging to prolong battery life. ● Peak shift-Allows you to control processor and cooling fan settings to download the DPM application for your computer. 2. In the Search support field, enter the Service Tag/Serial Number/Service Request/Model/Keyword of alerts. ● Group policies-You can easily apply default settings and/or prevent users from changing power alerts system events, power management...
..., adjust battery settings or create a custom-battery setting. ● Advanced charge mode-Allows you to control battery charging to prolong battery life. ● Peak shift-Allows you to control processor and cooling fan settings to download the DPM application for your computer. 2. In the Search support field, enter the Service Tag/Serial Number/Service Request/Model/Keyword of alerts. ● Group policies-You can easily apply default settings and/or prevent users from changing power alerts system events, power management...


