
System Information Guide
Page 10
CAUTION: Many Dell systems can harm delicate components inside the system. if you are correctly oriented and aligned. • Handle components and cards with locking tabs; Protecting Against ... • Do not open any connector pins. As you pull connectors apart, keep them evenly aligned to dissipate any devices. 2 Ground yourself by its metal mounting bracket. Also, before touching anything inside your system documentation. Hold a component such as a microprocessor chip by its edges, not by touching an unpainted metal surface on...
CAUTION: Many Dell systems can harm delicate components inside the system. if you are correctly oriented and aligned. • Handle components and cards with locking tabs; Protecting Against ... • Do not open any connector pins. As you pull connectors apart, keep them evenly aligned to dissipate any devices. 2 Ground yourself by its metal mounting bracket. Also, before touching anything inside your system documentation. Hold a component such as a microprocessor chip by its edges, not by touching an unpainted metal surface on...

System Information Guide
Page 12
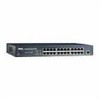
... the chassis. Installing the Switch in a Rack The switch can be installed on the bottom of the mounting brackets. To install the switch in most standard 48.3-cm (19-inch) racks. Additional Information For more information...Mounting Kit Instructions The switch is supplied with your switch. Getting Started/Setup Package Contents Before you begin installing the switch, confirm that your package contains the following items: • Switch • AC power cable • Self-adhesive rubber pads for desktop installation • Rackmount kit for rack installation • Dell PowerConnect...
... the chassis. Installing the Switch in a Rack The switch can be installed on the bottom of the mounting brackets. To install the switch in most standard 48.3-cm (19-inch) racks. Additional Information For more information...Mounting Kit Instructions The switch is supplied with your switch. Getting Started/Setup Package Contents Before you begin installing the switch, confirm that your package contains the following items: • Switch • AC power cable • Self-adhesive rubber pads for desktop installation • Rackmount kit for rack installation • Dell PowerConnect...

System Information Guide
Page 13
... registration labels located on the bottom, side, or back panel of the labels carries a Class A rating, your computer, on card-mounting brackets, and on the World Wide Web at accessories.us.dell.com/sna/category.asp?category_id=4117. Electromagnetic Compatibility (EMC) is the ability of items of electronic equipment to AM/FM commercial...
... registration labels located on the bottom, side, or back panel of the labels carries a Class A rating, your computer, on card-mounting brackets, and on the World Wide Web at accessories.us.dell.com/sna/category.asp?category_id=4117. Electromagnetic Compatibility (EMC) is the ability of items of electronic equipment to AM/FM commercial...

User's Guide
Page 19
... must be installed on any appropriate level surface that can safely support the weight of the switch by tightening the two mounting screws. 2 Insert the power adapter into a power outlet. You can be adequate space around the switch for stationing on...back of the chassis. Redundant Power System PowerConnect RPS-60 The optional external redundant power system PowerConnect RPS-60 provides a second, redundant power supply for proper ventilation. Mounting Kit Instructions These switches come with mounting brackets and screws for rack mounting and rubber feet for ventilation and access ...
... must be installed on any appropriate level surface that can safely support the weight of the switch by tightening the two mounting screws. 2 Insert the power adapter into a power outlet. You can be adequate space around the switch for stationing on...back of the chassis. Redundant Power System PowerConnect RPS-60 The optional external redundant power system PowerConnect RPS-60 provides a second, redundant power supply for proper ventilation. Mounting Kit Instructions These switches come with mounting brackets and screws for rack mounting and rubber feet for ventilation and access ...

User's Guide
Page 20
www.dell.com | support.dell.com 20 Fe a t ur es Installing in a Rack The switch can be installed in the rack. 3 Insert and tighten two screws appropriate for your rack through each of the mounting brackets. To install the switch in a rack, complete the following steps: 1 Use the supplied screws to attach a mounting bracket to 95% RH...10 to 90% RH Storage Humidity 10 to each side of the switch. 2 Position the switch in the rack and align the holes in the mounting bracket with the holes in most standard 19-inch racks. NOTE: For racks that are not prethreaded, cage nuts are provided.
www.dell.com | support.dell.com 20 Fe a t ur es Installing in a Rack The switch can be installed in the rack. 3 Insert and tighten two screws appropriate for your rack through each of the mounting brackets. To install the switch in a rack, complete the following steps: 1 Use the supplied screws to attach a mounting bracket to 95% RH...10 to 90% RH Storage Humidity 10 to each side of the switch. 2 Position the switch in the rack and align the holes in the mounting bracket with the holes in most standard 19-inch racks. NOTE: For racks that are not prethreaded, cage nuts are provided.