Instruction Manual
Page 3
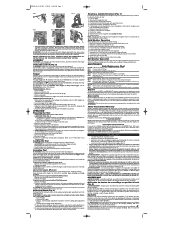
... de fonctionnement. The trigger should always be installed on the tool. For a replacement trigger contact your mouth, eyes, or lay on the tool as shown. 5. TRIGGER REMOVAL (FIG. 2) 1. Remove rubber grommet (A) from power sanding, sawing, grinding, drilling, and other rod into nosepiece and push driver blade back in use with compressor air. Both triggers are made or attempted by an authorized DEWALT service center. CAUTION: Never load fasteners with dust from end of...
... de fonctionnement. The trigger should always be installed on the tool. For a replacement trigger contact your mouth, eyes, or lay on the tool as shown. 5. TRIGGER REMOVAL (FIG. 2) 1. Remove rubber grommet (A) from power sanding, sawing, grinding, drilling, and other rod into nosepiece and push driver blade back in use with compressor air. Both triggers are made or attempted by an authorized DEWALT service center. CAUTION: Never load fasteners with dust from end of...
Instruction Manual
Page 6
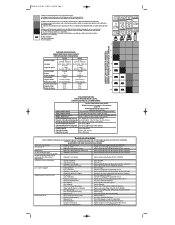
... Troubleshooting Guide MANY COMMON PROBLEMS CAN BE SOLVED EASILY BY UTILIZING THE CHART BELOW. Damaged or worn O-rings Replace gasket/O-rings using: O-ring Repair Kit, Cat # D514301 Exhaust port blocked or clogged Disconnect air, remove exhaust plate from top of lubrication Lubricate tool using approved pneumatic tool oil. intermittent feed Air restricted Check air supply and couplers Lack of power; Cat # D514302, D514312 Nosepiece screws loose Tighten nosepiece screws using : O-Ring Repair Kit...
... Troubleshooting Guide MANY COMMON PROBLEMS CAN BE SOLVED EASILY BY UTILIZING THE CHART BELOW. Damaged or worn O-rings Replace gasket/O-rings using: O-ring Repair Kit, Cat # D514301 Exhaust port blocked or clogged Disconnect air, remove exhaust plate from top of lubrication Lubricate tool using approved pneumatic tool oil. intermittent feed Air restricted Check air supply and couplers Lack of power; Cat # D514302, D514312 Nosepiece screws loose Tighten nosepiece screws using : O-Ring Repair Kit...


