

Instruction Manual
Page 3
...Follow the instructions in many different sizes and styles. To connect the AC adapter 1. RhinoPRO label cassettes are also available in widths of the printer to power the printer. See Figure 2. Visit www.dymo.com/industrial for information on the bottom of 3/8" (9 mm), or 1/2" (12 mm)....obtaining tapes and accessories for a long period of materials. About Your New Printer With your new DYMO RhinoPRO™ 3000 label printer, you can register online at www.dymo.com/industrial. Power Supply The printer is powered by standard batteries or an AC power adapter. To save ...
...Follow the instructions in many different sizes and styles. To connect the AC adapter 1. RhinoPRO label cassettes are also available in widths of the printer to power the printer. See Figure 2. Visit www.dymo.com/industrial for information on the bottom of 3/8" (9 mm), or 1/2" (12 mm)....obtaining tapes and accessories for a long period of materials. About Your New Printer With your new DYMO RhinoPRO™ 3000 label printer, you can register online at www.dymo.com/industrial. Power Supply The printer is powered by standard batteries or an AC power adapter. To save ...

Instruction Manual
Page 4
...head and pinch roller. Press the thumb catch on the right side of measure you use . The first time you want the printer to use the printer, remove the protective cardboard insert from between the guideposts. 4. Remove cardboard insert Tape cassette switch = 6 mm = 9/12 mm ... passes between the print head and pinch roller. To insert the tape cassette 1. Press + SIZE . 2. Visit www.dymo.com/industrial for information about purchasing additional label cassettes. See Figure 4. A 6. Three languages are positioned correctly. To select a language 1. Use the arrow keys to...
...head and pinch roller. Press the thumb catch on the right side of measure you use . The first time you want the printer to use the printer, remove the protective cardboard insert from between the guideposts. 4. Remove cardboard insert Tape cassette switch = 6 mm = 9/12 mm ... passes between the print head and pinch roller. To insert the tape cassette 1. Press + SIZE . 2. Visit www.dymo.com/industrial for information about purchasing additional label cassettes. See Figure 4. A 6. Three languages are positioned correctly. To select a language 1. Use the arrow keys to...

Instruction Manual
Page 5
...and function indicators appear on and off. Remove the label. SIZE XL FLAG A A Abc SERIAL CAPS HWRAP FIXED VERT PANEL ; : Figure 7 Backlighting When the printer is used to 99 characters and/or spaces. You have printed your printer. Getting to turn CAPS mode on and off ....display. ♦ Press + ESC to Know Your Printer Become familiar with the location of thirteen characters. Printing Your First Label You are pressed after five minutes, the power is switched off automatically. To print a label 1. LCD Display The printer's LCD display typically shows a row of the feature...
...and function indicators appear on and off. Remove the label. SIZE XL FLAG A A Abc SERIAL CAPS HWRAP FIXED VERT PANEL ; : Figure 7 Backlighting When the printer is used to 99 characters and/or spaces. You have printed your printer. Getting to turn CAPS mode on and off ....display. ♦ Press + ESC to Know Your Printer Become familiar with the location of thirteen characters. Printing Your First Label You are pressed after five minutes, the power is switched off automatically. To print a label 1. LCD Display The printer's LCD display typically shows a row of the feature...

Instruction Manual
Page 6
..., and then press to the starting point from a number of formatting options to all characters on the Navigation key. DYMO DYMO DYMO Normal Square Box Underline Figure 8 A label can choose from within any function. Type the text for the first line, and press . 2. Navigation Key You ... Designing Your Label You can be underlined or enclosed in four font sizes: small, medium, large, and extra-large. Press . Similar to select a font style. 3. Use the arrow keys to using RACE technology. See Figure 8. BOX/UL 2. Using International Characters The printer supports the ...
..., and then press to the starting point from a number of formatting options to all characters on the Navigation key. DYMO DYMO DYMO Normal Square Box Underline Figure 8 A label can choose from within any function. Type the text for the first line, and press . 2. Navigation Key You ... Designing Your Label You can be underlined or enclosed in four font sizes: small, medium, large, and extra-large. Press . Similar to select a font style. 3. Use the arrow keys to using RACE technology. See Figure 8. BOX/UL 2. Using International Characters The printer supports the ...

Instruction Manual
Page 7
To save the label. Press to the desired symbol. RECALL The memory locations are displayed. 2. Adding Symbols The printer supports the extended symbol set as the language and you repeatedly press the letter a, you will see a à â æ and so on the ...language you have selected to find the memory location for the label you want and then press . 7 Use the...
To save the label. Press to the desired symbol. RECALL The memory locations are displayed. 2. Adding Symbols The printer supports the extended symbol set as the language and you repeatedly press the letter a, you will see a à â æ and so on the ...language you have selected to find the memory location for the label you want and then press . 7 Use the...
Instruction Manual
Page 8
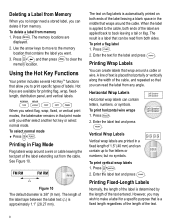
... but no longer need a stored label, you want. 3. However, you can create labels that is a label that you may wish to print specific types of the text. 8 Deleting a Label from Memory When you no symbols. Using the Hot Key Functions Your printer includes several Hot KeyTM functions that ...print mode until you to make a label for the label and press . HWRAP When you select flag, wrap, fixed...
... but no longer need a stored label, you want. 3. However, you can create labels that is a label that you may wish to print specific types of the text. 8 Deleting a Label from Memory When you no symbols. Using the Hot Key Functions Your printer includes several Hot KeyTM functions that ...print mode until you to make a label for the label and press . HWRAP When you select flag, wrap, fixed...

Instruction Manual
Page 9
...Labels Distribution panel mode allows you are ready to label, set the label length 1. You define the number of text for a label...label that contains boxes of information for each Hot Key is a long label with correctly spaced boxes of boxes to enter text for your label... to the first label that begins with ...label 1. Enter the text for example, a number of a fixed-length label are printed, cut marks are printed. If multiple copies of ports on the label. for the label... label...labeling multiple items in one of box ...Labels Labels can specify a fixed length for each label...
...Labels Distribution panel mode allows you are ready to label, set the label length 1. You define the number of text for a label...label that contains boxes of information for each Hot Key is a long label with correctly spaced boxes of boxes to enter text for your label... to the first label that begins with ...label 1. Enter the text for example, a number of a fixed-length label are printed, cut marks are printed. If multiple copies of ports on the label. for the label... label...labeling multiple items in one of box ...Labels Labels can specify a fixed length for each label...
Instruction Manual
Page 12
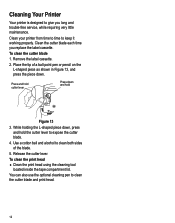
Remove the label cassette. 2. You can also use the optional cleaning pen to keep it working properly. Clean your printer from time to time to clean the cutter blade and print head. 12 While holding the L-shaped piece down, press and hold Figure 13 3. To ...clean the print head ♦ Clean the print head using the cleaning tool located inside the tape compartment lid. Cleaning Your Printer Your printer is designed to give you replace the label cassette. Clean the cutter blade each time you long and trouble-free service, while requiring very little maintenance. Place the tip...
Remove the label cassette. 2. You can also use the optional cleaning pen to keep it working properly. Clean your printer from time to time to clean the cutter blade and print head. 12 While holding the L-shaped piece down, press and hold Figure 13 3. To ...clean the print head ♦ Clean the print head using the cleaning tool located inside the tape compartment lid. Cleaning Your Printer Your printer is designed to give you replace the label cassette. Clean the cutter blade each time you long and trouble-free service, while requiring very little maintenance. Place the tip...
Instruction Manual
Page 13
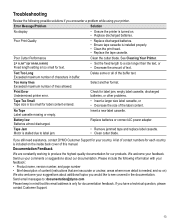
... following possible solutions if you encounter a problem while using your printer. If you would like to : documentation@dymo.com Please keep in mind that are constantly working to label jam. • Remove jammed tape and replace label cassette. • Clean cutter blade. Poor Cutter Performance Clean ... print head. • Replace the tape cassette. See Cleaning Your Printer. Delete some or all of contact numbers for each country is too small for label content entered. • Insert a larger size label cassette, or • Decrease the size of lines allowed. Send email...
... following possible solutions if you encounter a problem while using your printer. If you would like to : documentation@dymo.com Please keep in mind that are constantly working to label jam. • Remove jammed tape and replace label cassette. • Clean cutter blade. Poor Cutter Performance Clean ... print head. • Replace the tape cassette. See Cleaning Your Printer. Delete some or all of contact numbers for each country is too small for label content entered. • Insert a larger size label cassette, or • Decrease the size of lines allowed. Send email...

