User Guide
Page 2
Contents About Your New Label Maker 5 Product Registration 5 Getting Started 5 Connecting the Power 5 Inserting the Batteries 5 Connecting the Optional Power Adapter 6 Inserting the Tape Cassette 6 Using the Label Maker for the First Time 7 Getting to Know the Label Maker 7 Power ...7 LCD Display ...8 Format ...8 Insert ...8 Settings ...8 CAPS Mode ...8 Num Lock ...9 ...
Contents About Your New Label Maker 5 Product Registration 5 Getting Started 5 Connecting the Power 5 Inserting the Batteries 5 Connecting the Optional Power Adapter 6 Inserting the Tape Cassette 6 Using the Label Maker for the First Time 7 Getting to Know the Label Maker 7 Power ...7 LCD Display ...8 Format ...8 Insert ...8 Settings ...8 CAPS Mode ...8 Num Lock ...9 ...

User Guide
Page 4
17 18 19 20 21 22 23 1 16 2 15 3 14 4 5 6 7 c 13 8 12 11 10 9 Figure 1 DYMO® LabelManager® 210D Electronic Label Maker 1 Tape cutter 2 Print 3 Save 4 OK 5 Number lock 6 Backspace 7 Currency 8 Return 9 Accented character 10 Punctuation 11 Space bar 12 Insert 13 Caps 14 Format 15 Settings 16 On/Off 17 AC power connector 18 Clear 19 Open 20 Navigation 21 LCD display 22 Cancel 23 Preview 4
17 18 19 20 21 22 23 1 16 2 15 3 14 4 5 6 7 c 13 8 12 11 10 9 Figure 1 DYMO® LabelManager® 210D Electronic Label Maker 1 Tape cutter 2 Print 3 Save 4 OK 5 Number lock 6 Backspace 7 Currency 8 Return 9 Accented character 10 Punctuation 11 Space bar 12 Insert 13 Caps 14 Format 15 Settings 16 On/Off 17 AC power connector 18 Clear 19 Open 20 Navigation 21 LCD display 22 Cancel 23 Preview 4
User Guide
Page 5
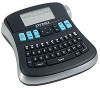
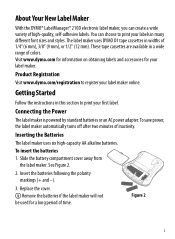
... in a wide range of colors. Product Registration Visit www.dymo.com/registration to print your first label. Slide the battery compartment cover away from the label maker. Figure 2 5 These tape cassettes are available in widths of time. Inserting the Batteries The label maker uses six ...inactivity. Getting Started Follow the instructions in many different font sizes and styles. About Your New Label Maker With the DYMO® LabelManager® 210D electronic label maker, you can choose to print your labels in this section to register your label maker online. Visit www...
... in a wide range of colors. Product Registration Visit www.dymo.com/registration to print your first label. Slide the battery compartment cover away from the label maker. Figure 2 5 These tape cassettes are available in widths of time. Inserting the Batteries The label maker uses six ...inactivity. Getting Started Follow the instructions in many different font sizes and styles. About Your New Label Maker With the DYMO® LabelManager® 210D electronic label maker, you can choose to print your labels in this section to register your label maker online. Visit www...

User Guide
Page 6
...into a power outlet. Ç Make sure the label maker power is turned off before you disconnect the power adapter from the tape exit slot. Visit www.dymo.com for the first time, remove the protective cardboard insert from the main power source. Click! Ç Before using the ...label maker for information about purchasing additional tape cassettes. Plug the power adapter into place. Lift the tape cassette cover to the label maker ...
...into a power outlet. Ç Make sure the label maker power is turned off before you disconnect the power adapter from the tape exit slot. Visit www.dymo.com for the first time, remove the protective cardboard insert from the main power source. Click! Ç Before using the ...label maker for information about purchasing additional tape cassettes. Plug the power adapter into place. Lift the tape cassette cover to the label maker ...
User Guide
Page 7
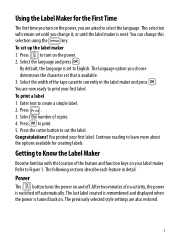
.... 2. Press . 3. Select the number of the feature and function keys on and off automatically. Continue reading to create a simple label. 2. After two minutes of the tape cassette currently in detail. Enter text to learn more about the options available for the First Time The first time you turn on . To print...
.... 2. Press . 3. Select the number of the feature and function keys on and off automatically. Continue reading to create a simple label. 2. After two minutes of the tape cassette currently in detail. Enter text to learn more about the options available for the First Time The first time you turn on . To print...

User Guide
Page 16
... of the blade. See Figure 6. 16 The text is displayed. 3. Clean the cutter blade each time you want to select the text you replace the tape cassette. Use a cotton ball and alcohol to keep it working properly. Remove the cleaning tool from time to time to clean both sides of the... Maker Your label maker is designed to give you want to expose the cutter blade. Press and hold To clean the print head 1. Remove the tape cassette. 2. Remove the tape cassette. 2. To insert saved text 1.
... of the blade. See Figure 6. 16 The text is displayed. 3. Clean the cutter blade each time you want to select the text you replace the tape cassette. Use a cotton ball and alcohol to keep it working properly. Remove the cleaning tool from time to time to clean both sides of the... Maker Your label maker is designed to give you want to expose the cutter blade. Press and hold To clean the print head 1. Remove the tape cassette. 2. Remove the tape cassette. 2. To insert saved text 1.
User Guide
Page 17
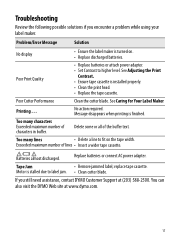
... a line to higher level. Troubleshooting Review the following possible solutions if you still need assistance, contact DYMO Customer Support at www.dymo.com. 17 Problem/Error Message Solution No display • Ensure the label maker is installed properly. ...• Clean the print head. • Replace the tape cassette. See Caring for Your Label Maker. Motor is finished. See Adjusting the Print Contrast. • Ensure tape cassette is turned on the tape...
... a line to higher level. Troubleshooting Review the following possible solutions if you still need assistance, contact DYMO Customer Support at www.dymo.com. 17 Problem/Error Message Solution No display • Ensure the label maker is installed properly. ...• Clean the print head. • Replace the tape cassette. See Caring for Your Label Maker. Motor is finished. See Adjusting the Print Contrast. • Ensure tape cassette is turned on the tape...


