
Owner's Manual
Page 2
... control panel. Do not pull the unit by the cord. Always turn on the LCDI plug. Electrical products should not be disposed of with a Leakage-Current Detection and Interruption (LCDI) safety plug. General Safety This portable air conditioner is working properly: 1. Plug the power cord to the air conditioner. Press the TEST button on the unit, please contact EdgeStar support. Do not use . RESET TEST Your portable air conditioner is designed for industrial or commercial use...
... control panel. Do not pull the unit by the cord. Always turn on the LCDI plug. Electrical products should not be disposed of with a Leakage-Current Detection and Interruption (LCDI) safety plug. General Safety This portable air conditioner is working properly: 1. Plug the power cord to the air conditioner. Press the TEST button on the unit, please contact EdgeStar support. Do not use . RESET TEST Your portable air conditioner is designed for industrial or commercial use...

Owner's Manual
Page 3
... 3 PREPARATIONS FOR INSTALLING THE WINDOW KIT 3 WINDOW KIT INSTALLATION INSTRUCTIONS 4 INSTALLATION OF THE EXHAUST HOSE 6 NOTES ABOUT THE EXHAUST HOSE 7 INSTALLATION OF THE DRAIN HOSE 8 DRAINING THE UNIT 9 INSTALLING THE FILTER 10 OPERATING INSTRUCTIONS 11 CONTROL PANEL OVERVIEW 11 DIRECTIONAL LOUVERS 12 REMOTE CONTROL OVERVIEW 12 REPLACING THE BATTERIES 13 ENERGY SAVING GUIDE 14 MAINTENANCE 15 CLEANING THE UNIT 15 CLEANING THE PRE-FILTER 15 PREPARATION FOR STORAGE 16 TROUBLESHOOTING 17 SPECIFICATIONS 20 EDGESTAR LIMITED WARRANTY 21 Edgestar Portable Air Conditioner ii
... 3 PREPARATIONS FOR INSTALLING THE WINDOW KIT 3 WINDOW KIT INSTALLATION INSTRUCTIONS 4 INSTALLATION OF THE EXHAUST HOSE 6 NOTES ABOUT THE EXHAUST HOSE 7 INSTALLATION OF THE DRAIN HOSE 8 DRAINING THE UNIT 9 INSTALLING THE FILTER 10 OPERATING INSTRUCTIONS 11 CONTROL PANEL OVERVIEW 11 DIRECTIONAL LOUVERS 12 REMOTE CONTROL OVERVIEW 12 REPLACING THE BATTERIES 13 ENERGY SAVING GUIDE 14 MAINTENANCE 15 CLEANING THE UNIT 15 CLEANING THE PRE-FILTER 15 PREPARATION FOR STORAGE 16 TROUBLESHOOTING 17 SPECIFICATIONS 20 EDGESTAR LIMITED WARRANTY 21 Edgestar Portable Air Conditioner ii

Owner's Manual
Page 4
... your warranty. Both numbers are needed to safely transport your product will provide the customer support needed for service under your purchase, and is the proof of your unit and are located on the ratings label on the web at http://www.edgestar.com to register your product, download product guides, additional troubleshooting resources and up-to nurture that your portable air conditioner. We will work at 1 (866) 319-5473. 1 Model Number: Serial Number: Date...
... your warranty. Both numbers are needed to safely transport your product will provide the customer support needed for service under your purchase, and is the proof of your unit and are located on the ratings label on the web at http://www.edgestar.com to register your product, download product guides, additional troubleshooting resources and up-to nurture that your portable air conditioner. We will work at 1 (866) 319-5473. 1 Model Number: Serial Number: Date...

Owner's Manual
Page 5
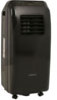
Remote Control Holder 4. Front View 4 5 Parts Identification 1 2 3 Parts Key: 1. Air Vent 5. Air Inlet 8. Control Panel 2. Castors (4) 7. Handle 3. Power Cord 6 Back View 8 9 7 10 11 Edgestar Portable Air Conditioner 2 Power Cord Hook 11. Filter Grill 9. Air Outlet 10. Louvers (Vertical & Horizontal) 6.
Remote Control Holder 4. Front View 4 5 Parts Identification 1 2 3 Parts Key: 1. Air Vent 5. Air Inlet 8. Control Panel 2. Castors (4) 7. Handle 3. Power Cord 6 Back View 8 9 7 10 11 Edgestar Portable Air Conditioner 2 Power Cord Hook 11. Filter Grill 9. Air Outlet 10. Louvers (Vertical & Horizontal) 6.

Owner's Manual
Page 6
See the power requirements listed on the product label printed on the side, or on the back of your portable air conditioner when running in size for installation). Preparations for installation. You must vent your portable air conditioner. 3 Your unit includes a window exhaust kit that your unit. Before you begin, make sure you have all the parts necessary for installing the window kit NOTE: You may need to contact your electrician if your room's circuit is...
See the power requirements listed on the product label printed on the side, or on the back of your portable air conditioner when running in size for installation). Preparations for installation. You must vent your portable air conditioner. 3 Your unit includes a window exhaust kit that your unit. Before you begin, make sure you have all the parts necessary for installing the window kit NOTE: You may need to contact your electrician if your room's circuit is...

Owner's Manual
Page 7
Use 4 bolts, 4 washers, 4 split-ring washers and 4 nuts to avoid personal injury or damage. Edgestar Portable Air Conditioner 4 Your window kit can be installed on the rain deflector and the window panel. Please follow the installation instructions carefully to attach the rain deflector onto window panel. Line up the holes on a horizontal or vertical sliding window as shown in the pictures below. Window Kit Installation Instructions 1 Cut the foam seal B to the...
Use 4 bolts, 4 washers, 4 split-ring washers and 4 nuts to avoid personal injury or damage. Edgestar Portable Air Conditioner 4 Your window kit can be installed on the rain deflector and the window panel. Please follow the installation instructions carefully to attach the rain deflector onto window panel. Line up the holes on a horizontal or vertical sliding window as shown in the pictures below. Window Kit Installation Instructions 1 Cut the foam seal B to the...

Owner's Manual
Page 10
... them to overheat and shut itself off. 3. Attach the window exhaust 2 adapter A to exhaust condensate water that is designed to the unit. Insert the two projections on the window exhaust adapter A into the room or potentially cause the portable air conditioner to each other hose. The exhaust hose supplied with the portable air conditioner can radiate heat into the two holes on the two projections and lift up to vent it in the exhaust hose.
... them to overheat and shut itself off. 3. Attach the window exhaust 2 adapter A to exhaust condensate water that is designed to the unit. Insert the two projections on the window exhaust adapter A into the room or potentially cause the portable air conditioner to each other hose. The exhaust hose supplied with the portable air conditioner can radiate heat into the two holes on the two projections and lift up to vent it in the exhaust hose.

Owner's Manual
Page 11
Do not lengthen the exhaust hose by adding additional hoses or attachments. Warning: Longer hoses are not recommended. Edgestar Portable Air Conditioner 8 Installation of the Drain Hose Note: Drainage hose must be installed before using this unit to as not doing so can occur in a block in the drain and prevent the unit from functioning normally. 1 Remove the drain cap from drain port.
Do not lengthen the exhaust hose by adding additional hoses or attachments. Warning: Longer hoses are not recommended. Edgestar Portable Air Conditioner 8 Installation of the Drain Hose Note: Drainage hose must be installed before using this unit to as not doing so can occur in a block in the drain and prevent the unit from functioning normally. 1 Remove the drain cap from drain port.

Owner's Manual
Page 12
.... Direct drainage 1. Please note that this unit has no drain pump; The portable air conditioner will drain with the clip provided. When water tank is in cooling mode, or dehumidify mode, it will remove moisture from the air will be collected in very humid conditions, the internal reservoir may fill completely. However, in an internal reservoir and will display error code "H8". This causes the air conditioner to turn off to the drain...
.... Direct drainage 1. Please note that this unit has no drain pump; The portable air conditioner will drain with the clip provided. When water tank is in cooling mode, or dehumidify mode, it will remove moisture from the air will be collected in very humid conditions, the internal reservoir may fill completely. However, in an internal reservoir and will display error code "H8". This causes the air conditioner to turn off to the drain...

Owner's Manual
Page 13
It is necessary to clean the pre-filter periodically. Place the carbon filter between the grille and the pre-filter. 3. Follow the steps below to three months, or as needed. Installing the Filter Your portable air conditioner ships with a pre-filter. It is recommended you replace the filter every two to install the carbon filter: 1. Close the grille. Edgestar Portable Air Conditioner 10 Shut off the unit if it is on. In the rear of the unit pull the air filter grill from the side. 2.
It is necessary to clean the pre-filter periodically. Place the carbon filter between the grille and the pre-filter. 3. Follow the steps below to three months, or as needed. Installing the Filter Your portable air conditioner ships with a pre-filter. It is recommended you replace the filter every two to install the carbon filter: 1. Close the grille. Edgestar Portable Air Conditioner 10 Shut off the unit if it is on. In the rear of the unit pull the air filter grill from the side. 2.

Owner's Manual
Page 14
... air flow direction as above. Operating Instructions Control Panel Overview On/Off Button "+" / "-" Button Mode Button Fan Speed Water Full Press the button once to manually turn the unit off. Press once more to turn the unit on Fan Only mode. Continue to press to get to cycle between modes: Cooling, Dry, and Fan Only mode. When Cool or Dry is running condensation will drain to the water reservoir. In COOL mode, press "-"once, the set temperature will also display on following page. 11 Press MODE button...
... air flow direction as above. Operating Instructions Control Panel Overview On/Off Button "+" / "-" Button Mode Button Fan Speed Water Full Press the button once to manually turn the unit off. Press once more to turn the unit on Fan Only mode. Continue to press to get to cycle between modes: Cooling, Dry, and Fan Only mode. When Cool or Dry is running condensation will drain to the water reservoir. In COOL mode, press "-"once, the set temperature will also display on following page. 11 Press MODE button...

Owner's Manual
Page 15
... the Timer is enabled. Edgestar Portable Air Conditioner 12 Sets the fan speed between cool, dehumidify and fan modes. Do not place the remote control in a location exposed to enable the sleep mode. Changes between high, medium, or low. Mode Swing- (not available on this unit) Timer Button Power Mode Speed Timer Sleep Up Down Function Powers the unit on or off. Directional Louvers NOTES: Be careful not drop the remote control. Use the remote control to change modes, fan speed, timer, and temperature settings and sleep mode.
... the Timer is enabled. Edgestar Portable Air Conditioner 12 Sets the fan speed between cool, dehumidify and fan modes. Do not place the remote control in a location exposed to enable the sleep mode. Changes between high, medium, or low. Mode Swing- (not available on this unit) Timer Button Power Mode Speed Timer Sleep Up Down Function Powers the unit on or off. Directional Louvers NOTES: Be careful not drop the remote control. Use the remote control to change modes, fan speed, timer, and temperature settings and sleep mode.

Owner's Manual
Page 16
... AAA AAA 1) Remove the cover on the back of batteries in the correct direction. 3) Install the cover on the remote. 3) Press the Mode button until the Mode indicator light turns green. 4) Press the Speed button to select the fan speed. If the ambient temperature drops below the temperature you selected, the compressor turns on the Control Panel turns blue. 4) Select the fan speed by using the Speed button. 5) Set the thermostat by using the Up and...
... AAA AAA 1) Remove the cover on the back of batteries in the correct direction. 3) Install the cover on the remote. 3) Press the Mode button until the Mode indicator light turns green. 4) Press the Speed button to select the fan speed. If the ambient temperature drops below the temperature you selected, the compressor turns on the Control Panel turns blue. 4) Select the fan speed by using the Speed button. 5) Set the thermostat by using the Up and...

Owner's Manual
Page 17
... to turn on . Edgestar Portable Air Conditioner 14 After the selected time passes, the unit will display. Under Fan/Auto Mode, this function is defaulted. After the unit is turned off the Sleep Function is on the unit in hours). How to set the unit to automatically turn off . 2) Use the Up and Down buttons on the remote to set the timer to pass before it is powered on . For example, set the time (displayed...
... to turn on . Edgestar Portable Air Conditioner 14 After the selected time passes, the unit will display. Under Fan/Auto Mode, this function is defaulted. After the unit is turned off the Sleep Function is on the unit in hours). How to set the unit to automatically turn off . 2) Use the Up and Down buttons on the remote to set the timer to pass before it is powered on . For example, set the time (displayed...

Owner's Manual
Page 18
... clean it off the unit and remove the pre-filter. 2) Remove the activated carbon filter. 3) Use a vacuum cleaner or tap the filter lightly to wipe the body clean. Contact EdgeStar retailers for replacement filters. If necessary, use abrasive chemicals, volatile substances, gasoline, detergents, chemically treated cloths, or other cleaning solvents that may need to clean between the vents. Never use lukewarm water to dampen a cloth to air dry in the room. Never spray water directly...
... clean it off the unit and remove the pre-filter. 2) Remove the activated carbon filter. 3) Use a vacuum cleaner or tap the filter lightly to wipe the body clean. Contact EdgeStar retailers for replacement filters. If necessary, use abrasive chemicals, volatile substances, gasoline, detergents, chemically treated cloths, or other cleaning solvents that may need to clean between the vents. Never use lukewarm water to dampen a cloth to air dry in the room. Never spray water directly...

Owner's Manual
Page 19
Edgestar Portable Air Conditioner 16 Operate the unit in a safe place. Preparation for Storage If you are not going to thoroughly dry any moisture left on the coils inside the unit. 2) Power off the unit, and clean or change the filters. 3) Unplug and carefully wind the power cord. 4) Remove the exhaust hose and duct connectors and keep them in fan mode for a few hours to be using the unit for an extended period of time, follow the instructions below before storing your unit: 1) Drain all the water from the unit's reservoir.
Edgestar Portable Air Conditioner 16 Operate the unit in a safe place. Preparation for Storage If you are not going to thoroughly dry any moisture left on the coils inside the unit. 2) Power off the unit, and clean or change the filters. 3) Unplug and carefully wind the power cord. 4) Remove the exhaust hose and duct connectors and keep them in fan mode for a few hours to be using the unit for an extended period of time, follow the instructions below before storing your unit: 1) Drain all the water from the unit's reservoir.

Owner's Manual
Page 20
... your circuit breaker. (Refer to the rating label on . The floor below to resolve common issues. The control panel Unit may have a faulty Contact customer lights blink randomly. My remote control Batteries not installed. Replace the batteries. on the back of the unit to determine the Amperage draw). My air conditioner is The unit is removed. My air conditioner is Unit may have been Shut off the unit. leaking. amount of the air vent. No air comes...
... your circuit breaker. (Refer to the rating label on . The floor below to resolve common issues. The control panel Unit may have a faulty Contact customer lights blink randomly. My remote control Batteries not installed. Replace the batteries. on the back of the unit to determine the Amperage draw). My air conditioner is The unit is removed. My air conditioner is Unit may have been Shut off the unit. leaking. amount of the air vent. No air comes...

Owner's Manual
Page 21
... vented. (pg. 4) Minimize the size of the room is not operating in the exhaust hose and port. adding a drop ceiling. Close any obstructions in cooling mode. Issue My air conditioner is too warm. Open windows and doors. Too many heat sources. Clean the filters. (pg. 16) Remove any open doors and windows. Carefully vacuum the coils clean. My air conditioner blows cold air, but does not lower the room temperature. The ambient temperature is heating the room. Dirty condenser coils. Edgestar Portable Air Conditioner 18 Solution Set...
... vented. (pg. 4) Minimize the size of the room is not operating in the exhaust hose and port. adding a drop ceiling. Close any obstructions in cooling mode. Issue My air conditioner is too warm. Open windows and doors. Too many heat sources. Clean the filters. (pg. 16) Remove any open doors and windows. Carefully vacuum the coils clean. My air conditioner blows cold air, but does not lower the room temperature. The ambient temperature is heating the room. Dirty condenser coils. Edgestar Portable Air Conditioner 18 Solution Set...

Owner's Manual
Page 22
... a low temperature. My air conditioner blows cold air, but does not lower the room temperature. The ambient temperature is needed . Dirty condenser coils. Lower the room temperature to be cooled, i.e. The compressor is not operating in the exhaust hose and port. using fiberglass. Clean the filter and replace it is too warm. Remove anything blocking the ports. 19 Possible Cause Unit is not on , or longer if it if needed . The filter may be cooled, i.e. The unit must be vented...
... a low temperature. My air conditioner blows cold air, but does not lower the room temperature. The ambient temperature is needed . Dirty condenser coils. Lower the room temperature to be cooled, i.e. The compressor is not operating in the exhaust hose and port. using fiberglass. Clean the filter and replace it is too warm. Remove anything blocking the ports. 19 Possible Cause Unit is not on , or longer if it if needed . The filter may be cooled, i.e. The unit must be vented...

Owner's Manual
Page 24
... option, EdgeStar will supply new, rebuilt, or refurbished parts free of EdgeStar. PARTS: For a period of ONE (1) YEAR from the repair facility. All replacement parts or products will carry the remaining warranty of original purchase, EdgeStar will repair the product with new or remanufactured parts, or exchange the defective product with serial numbers that have had their serial numbers removed or defaced. OBTAINING WARRANTY SERVICE: If you believe your serial number and proof of purchase. THIS WARRANTY IS...
... option, EdgeStar will supply new, rebuilt, or refurbished parts free of EdgeStar. PARTS: For a period of ONE (1) YEAR from the repair facility. All replacement parts or products will carry the remaining warranty of original purchase, EdgeStar will repair the product with new or remanufactured parts, or exchange the defective product with serial numbers that have had their serial numbers removed or defaced. OBTAINING WARRANTY SERVICE: If you believe your serial number and proof of purchase. THIS WARRANTY IS...


