Owner s Manual
Page 1
Beverage Cooler BWC120SLD Owner's Manual For more information on other great EdgeStar products on the web, go to http://www.edgestar.com
Beverage Cooler BWC120SLD Owner's Manual For more information on other great EdgeStar products on the web, go to http://www.edgestar.com
Owner s Manual
Page 2
Please review the ratings label located on the rear panel of the unit for electrical and other technical data related to repair the unit yourself. Contact customer service for service options if the unit needs service. Do not modify the power cord's length or share the outlet with other types of injuries, use at an angle off level. Do not move and install the beverage cooler...
Please review the ratings label located on the rear panel of the unit for electrical and other technical data related to repair the unit yourself. Contact customer service for service options if the unit needs service. Do not modify the power cord's length or share the outlet with other types of injuries, use at an angle off level. Do not move and install the beverage cooler...
Owner s Manual
Page 3
... FRONT VIEW ...2 INSTALLING THE BEVERAGE COOLER 3 TYPE OF INSTALLATION 3 Free-standing installation 3 INSTALLATION CLEARANCE REQUIREMENTS 3 ELECTRICAL REQUIREMENTS 4 Recommended grounding method 4 LEVELING THE BEVERAGE COOLER 4 REVERSING THE DOOR SWING 5 OPERATION...5 INSTALLATION CHECK LIST BEFORE OPERATION 5 USING THE TEMPERATURE CONTROL PANEL 5 NORMAL SOUNDS 6 DEFROSTING ...6 PREPARING THE BEVERAGE COOLER FOR STORAGE 6 CLEANING AND MAINTENANCE 7 EXTERIOR CLEANING 7 INTERIOR CLEANING 7 TROUBLESHOOTING 7 TROUBLESHOOTING CONTINUED 8 SPECIFICATIONS 9 EDGESTAR LIMITED WARRANTY...
... FRONT VIEW ...2 INSTALLING THE BEVERAGE COOLER 3 TYPE OF INSTALLATION 3 Free-standing installation 3 INSTALLATION CLEARANCE REQUIREMENTS 3 ELECTRICAL REQUIREMENTS 4 Recommended grounding method 4 LEVELING THE BEVERAGE COOLER 4 REVERSING THE DOOR SWING 5 OPERATION...5 INSTALLATION CHECK LIST BEFORE OPERATION 5 USING THE TEMPERATURE CONTROL PANEL 5 NORMAL SOUNDS 6 DEFROSTING ...6 PREPARING THE BEVERAGE COOLER FOR STORAGE 6 CLEANING AND MAINTENANCE 7 EXTERIOR CLEANING 7 INTERIOR CLEANING 7 TROUBLESHOOTING 7 TROUBLESHOOTING CONTINUED 8 SPECIFICATIONS 9 EDGESTAR LIMITED WARRANTY...
Owner s Manual
Page 4
... http://www.edgestar.com to register your product, download product guides, additional troubleshooting resources and up-to-date information. If you need to safely transport your beverage cooler. For Your Records: Please write down the model number and serial number below for future reference. We believe that relationship. Both numbers are needed for service under your warranty. Model Number: Serial Number: Date of this instruction manual carefully to nurture...
... http://www.edgestar.com to register your product, download product guides, additional troubleshooting resources and up-to-date information. If you need to safely transport your beverage cooler. For Your Records: Please write down the model number and serial number below for future reference. We believe that relationship. Both numbers are needed for service under your warranty. Model Number: Serial Number: Date of this instruction manual carefully to nurture...
Owner s Manual
Page 5
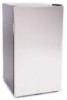
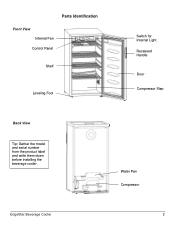
Water Pan Compressor EdgeStar Beverage Cooler 2 Parts Identification Front View Internal Fan Control Panel Shelf Leveling Foot Switch for Internal Light Recessed Handle Door Compressor Step Back View Tip: Gather the model and serial number from the product label and write them down before installing the beverage cooler.
Water Pan Compressor EdgeStar Beverage Cooler 2 Parts Identification Front View Internal Fan Control Panel Shelf Leveling Foot Switch for Internal Light Recessed Handle Door Compressor Step Back View Tip: Gather the model and serial number from the product label and write them down before installing the beverage cooler.
Owner s Manual
Page 6
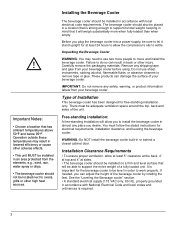
... a power supply, be adequate ventilation space around the top, back and sides of the beverage cooler by rotating the feet. Remove any place you can adjust the height of the unit. Type of Installation This beverage cooler has been designed for the beverage cooler to be installed in accordance with National Electrical Code and local codes and ordinances is strong enough to support...
... a power supply, be adequate ventilation space around the top, back and sides of the beverage cooler by rotating the feet. Remove any place you can adjust the height of the unit. Type of Installation This beverage cooler has been designed for the beverage cooler to be installed in accordance with National Electrical Code and local codes and ordinances is strong enough to support...
Owner s Manual
Page 7
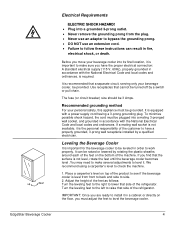
... National Electrical Code and local codes and ordinances, is required. If you have a properly grounded, 3-prong wall receptacle installed by a qualified electrician. We recommend using a carpenter's level to level it is the personal responsibility of the machine. Turn the leveling feet to the left to raise that side of the refrigerator. EdgeStar Beverage Cooler 4 The fuse (or circuit breaker) size should be provided. Adjust the height...
... National Electrical Code and local codes and ordinances, is required. If you have a properly grounded, 3-prong wall receptacle installed by a qualified electrician. We recommend using a carpenter's level to level it is the personal responsibility of the machine. Turn the leveling feet to the left to raise that side of the refrigerator. EdgeStar Beverage Cooler 4 The fuse (or circuit breaker) size should be provided. Adjust the height...
Owner s Manual
Page 8
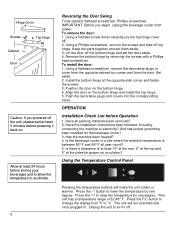
Keep the parts together and set the door aside. 4. To install the door: 1. Position the door on the bottom hinge and install the top hinge. 5. Using the Temperature Control Panel Pressing the temperature buttons will run automatically once plugged in a site where the ambient temperature is between 50º F and 95º F all packing materials been removed? 2. Press the F/C button to change the display from °F to electricity? The unit will make the unit colder...
Keep the parts together and set the door aside. 4. To install the door: 1. Position the door on the bottom hinge and install the top hinge. 5. Using the Temperature Control Panel Pressing the temperature buttons will run automatically once plugged in a site where the ambient temperature is between 50º F and 95º F all packing materials been removed? 2. Press the F/C button to change the display from °F to electricity? The unit will make the unit colder...
Owner s Manual
Page 9
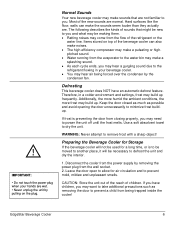
... also make noises. The high efficiency compressor may make a pulsating or highpitched sound. Water running from the evaporator to the water bin may make a splashing sound. As each cycle ends, you may hear a gurgling sound due to you and what may be new to the refrigerant flowing in a colder environment and settings, frost may build up frequently. If you may need...
... also make noises. The high efficiency compressor may make a pulsating or highpitched sound. Water running from the evaporator to the water bin may make a splashing sound. As each cycle ends, you may hear a gurgling sound due to you and what may be new to the refrigerant flowing in a colder environment and settings, frost may build up frequently. If you may need...
Owner s Manual
Page 10
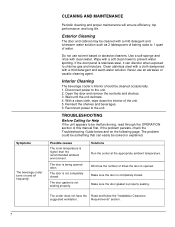
... a mild detergent and warm water solution. Disconnect power to the unit. Open the door and remove the contents and shelves. 3. Make sure the door is not completely closed . The cooler does not have the Read and follow the "Installation Clearance suggested ventilation. Interior Cleaning The beverage cooler's interior should be cleaned with clean water. Wait until the unit defrosts. 4. Reconnect power to the unit. 2. TROUBLESHOOTING Before Calling for Help...
... a mild detergent and warm water solution. Disconnect power to the unit. Open the door and remove the contents and shelves. 3. Make sure the door is not completely closed . The cooler does not have the Read and follow the "Installation Clearance suggested ventilation. Interior Cleaning The beverage cooler's interior should be cleaned with clean water. Wait until the unit defrosts. 4. Reconnect power to the unit. 2. TROUBLESHOOTING Before Calling for Help...
Owner s Manual
Page 11
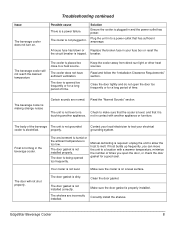
... installed correctly. Frost is opened too frequently. The shelves are normal. breaker. Keep the cooler away from direct sun light or other heat sources. Read the "Normal Sounds" section. Contact your local electrician to a location with another appliance. EdgeStar Beverage Cooler 8 The cooler is plugged in . Issue The beverage cooler does not turn on a level surface. The door is required; Manual defrosting...
... installed correctly. Frost is opened too frequently. The shelves are normal. breaker. Keep the cooler away from direct sun light or other heat sources. Read the "Normal Sounds" section. Contact your local electrician to a location with another appliance. EdgeStar Beverage Cooler 8 The cooler is plugged in . Issue The beverage cooler does not turn on a level surface. The door is required; Manual defrosting...
Owner s Manual
Page 12
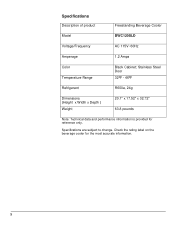
Stainless Steel Door 32ºF - 46ºF Refrigerant R600a, 24g Dimensions (Height x Width x Depth ) Weight 20.1" x 17.52" x 32.72" 63.8 pounds Note: Technical data and performance information is provided for the most accurate information. 9 Specifications Description of product Freestanding Beverage Cooler Model BWC120SLD Voltage/Frequency AC 115V~60Hz Amperage 1.2 Amps Color Temperature Range Black Cabinet; Check the rating label on the beverage cooler for reference only. Specifications are subject to change.
Stainless Steel Door 32ºF - 46ºF Refrigerant R600a, 24g Dimensions (Height x Width x Depth ) Weight 20.1" x 17.52" x 32.72" 63.8 pounds Note: Technical data and performance information is provided for the most accurate information. 9 Specifications Description of product Freestanding Beverage Cooler Model BWC120SLD Voltage/Frequency AC 115V~60Hz Amperage 1.2 Amps Color Temperature Range Black Cabinet; Check the rating label on the beverage cooler for reference only. Specifications are subject to change.
Owner s Manual
Page 13
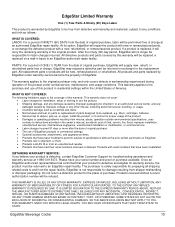
..., EdgeStar will repair the product with new or remanufactured parts, or exchange the defective product with serial numbers that your product is defective and eligible for warranty service, the product must be returned to an EdgeStar repair facility. filters, cartridges, batteries. Service trips to deliver, pick-up, or repair, install the product, or to instruct in proper usage of the product. Damages or operating problems resulting...
..., EdgeStar will repair the product with new or remanufactured parts, or exchange the defective product with serial numbers that your product is defective and eligible for warranty service, the product must be returned to an EdgeStar repair facility. filters, cartridges, batteries. Service trips to deliver, pick-up, or repair, install the product, or to instruct in proper usage of the product. Damages or operating problems resulting...

Owner s Manual
Page 14
All rights reserved. Capital of TX Hwy, Bldg 5 Austin, TX 78746 Toll Free: 1-866-319-5473 Web: http://www.edgestar.com E-mail: service@edgestar.com Register your product, download owner's manuals, access additional troubleshooting resources, and obtain more information on other great EdgeStar products on the web at: http://www.edgestar.com Product contents and specifications may change without notice. EdgeStar Products 500 N. Copyright © 2015 Living Direct, Inc.
All rights reserved. Capital of TX Hwy, Bldg 5 Austin, TX 78746 Toll Free: 1-866-319-5473 Web: http://www.edgestar.com E-mail: service@edgestar.com Register your product, download owner's manuals, access additional troubleshooting resources, and obtain more information on other great EdgeStar products on the web at: http://www.edgestar.com Product contents and specifications may change without notice. EdgeStar Products 500 N. Copyright © 2015 Living Direct, Inc.

