Owner's Manual
Page 1
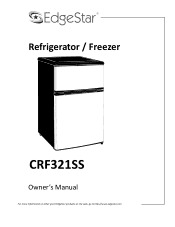
Refrigerator / Freezer CRF321SS Owner's Manual For more information on other great EdgeStar products on the web, go to http://www.edgestar.com
Refrigerator / Freezer CRF321SS Owner's Manual For more information on other great EdgeStar products on the web, go to http://www.edgestar.com
Owner's Manual
Page 2
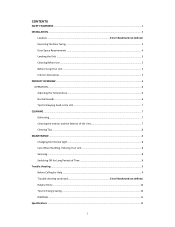
......3 Door Space Requirements ...4 Leveling the Unit ...5 Cleaning Before Use ...5 Before Using Your Unit ...5 Interior Accessories ...5 PRODUCT OVERVIEW ...6 OPERATION...6 Adjusting the Temperature...6 Normal Sounds ...6 Tips for Keeping Food in the Unit 7 CLEANING ...7 Defrosting...7 Cleaning the Interior and the Exterior of the Unit 7 Cleaning Tips ...8 MAINTENANCE ...8 Changing the Internal Light...8 Care When Handling / Moving Your Unit 8 Servicing ...8 Switching Off for Long Periods of Time 8 Trouble shooting ...9 Before Calling for Energy Saving...10 DISPOSAL...11 Specifications...
......3 Door Space Requirements ...4 Leveling the Unit ...5 Cleaning Before Use ...5 Before Using Your Unit ...5 Interior Accessories ...5 PRODUCT OVERVIEW ...6 OPERATION...6 Adjusting the Temperature...6 Normal Sounds ...6 Tips for Keeping Food in the Unit 7 CLEANING ...7 Defrosting...7 Cleaning the Interior and the Exterior of the Unit 7 Cleaning Tips ...8 MAINTENANCE ...8 Changing the Internal Light...8 Care When Handling / Moving Your Unit 8 Servicing ...8 Switching Off for Long Periods of Time 8 Trouble shooting ...9 Before Calling for Energy Saving...10 DISPOSAL...11 Specifications...
Owner's Manual
Page 3
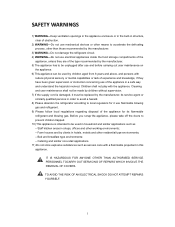
... OTHER THAN AUTHORISED SERVICE PERSONNEL TOCARRY OUT SERVICING OF REPAIRS WHICH INVOLVE THE REMOVAL OF COVERS. Cleaning and user maintenance shall not be made by children without supervision. 7) If the supply cord is intended to local regulators for its service agent or similarly qualified persons in order to avoid a hazard. 8) Please abandon the refrigerator according to be used by children aged...
... OTHER THAN AUTHORISED SERVICE PERSONNEL TOCARRY OUT SERVICING OF REPAIRS WHICH INVOLVE THE REMOVAL OF COVERS. Cleaning and user maintenance shall not be made by children without supervision. 7) If the supply cord is intended to local regulators for its service agent or similarly qualified persons in order to avoid a hazard. 8) Please abandon the refrigerator according to be used by children aged...
Owner's Manual
Page 4
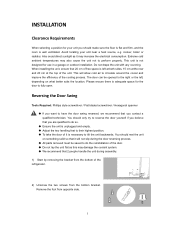
... allow cold air to fully open. Reversing the Door Swing Tools Required: Phillips style screwdriver / Flat bladed screwdriver / Hexagonal spanner ◆ If you want to tilt the unit backwards. Extreme cold ambient temperatures may increase the electrical consumption. Remove the foot from the bottom bracket. Do not drape the unit with any covering. This will not slip during assembly. 1) Start by removing...
... allow cold air to fully open. Reversing the Door Swing Tools Required: Phillips style screwdriver / Flat bladed screwdriver / Hexagonal spanner ◆ If you want to tilt the unit backwards. Extreme cold ambient temperatures may increase the electrical consumption. Remove the foot from the bottom bracket. Do not drape the unit with any covering. This will not slip during assembly. 1) Start by removing...
Owner's Manual
Page 5
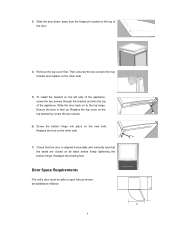
... closed on the new side. Door Space Requirements The unit's door must be able to the top hinge. W×D≥800mm×780mm W 4 D Replace the foot on the other side. 5) To install the bracket on to open fully as shown. Slide the door back on the left side of the ...finally tightening the bottom hinge. Replace the top cover on the top bracket by screw the two screws. 6) Screw the bottom hinge into the top of the door. 4) Remove the top cover first. Then unscrew the two screws from the hinge pin located on the top of the appliance. Readjust the leveling feet.
... closed on the new side. Door Space Requirements The unit's door must be able to the top hinge. W×D≥800mm×780mm W 4 D Replace the foot on the other side. 5) To install the bracket on to open fully as shown. Slide the door back on the left side of the ...finally tightening the bottom hinge. Replace the top cover on the top bracket by screw the two screws. 6) Screw the bottom hinge into the top of the door. 4) Remove the top cover first. Then unscrew the two screws from the hinge pin located on the top of the appliance. Readjust the leveling feet.
Owner's Manual
Page 6
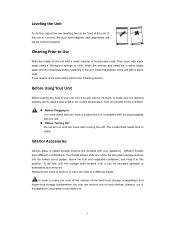
..., the user can be covered properly. If you have different combinations. Wash the shelves and salad bin in warm soapy water and dry completely before replacing in reverse to make the most of the volume of the unit. Interior Accessories Various glass or plastic storage shelves are included with warm water using a 'Wrung-out' sponge or cloth. different models have a socket which is not level, the door and...
..., the user can be covered properly. If you have different combinations. Wash the shelves and salad bin in warm soapy water and dry completely before replacing in reverse to make the most of the volume of the unit. Interior Accessories Various glass or plastic storage shelves are included with warm water using a 'Wrung-out' sponge or cloth. different models have a socket which is not level, the door and...

Owner's Manual
Page 7
... Temppeerraatut UrereCcoonntrtorlol GGlalsasssShelves bBotottltelerRaacckk VeFgrueittaabnldeVaengdetfarbuliet cCrriissppeerr *All images in this instruction manual are perfectly normal, but you purchase should be placed in the cooling system. OPERATION Adjusting the Temperature When using the refrigerator-freezer for the first time or after defrosting, OFF turn the temperature control to avoid MAX MIN the frozen food from defrosting. This is the compressor motor working, as possible to setting "MAX" for details.
... Temppeerraatut UrereCcoonntrtorlol GGlalsasssShelves bBotottltelerRaacckk VeFgrueittaabnldeVaengdetfarbuliet cCrriissppeerr *All images in this instruction manual are perfectly normal, but you purchase should be placed in the cooling system. OPERATION Adjusting the Temperature When using the refrigerator-freezer for the first time or after defrosting, OFF turn the temperature control to avoid MAX MIN the frozen food from defrosting. This is the compressor motor working, as possible to setting "MAX" for details.

Owner's Manual
Page 8
.... Ensure all the shelves and the salad bin. Cleaning the Interior and the Exterior of the Unit ◆ Remove all parts of the unit are kept cool. ◆ To prevent transfer of times you need to collect juices and cover it will evaporate. Make sure that you only open the door when you open the door. Water is large enough to be vacuumed using a"wrung-out" sponge...
.... Ensure all the shelves and the salad bin. Cleaning the Interior and the Exterior of the Unit ◆ Remove all parts of the unit are kept cool. ◆ To prevent transfer of times you need to collect juices and cover it will evaporate. Make sure that you only open the door when you open the door. Water is large enough to be vacuumed using a"wrung-out" sponge...

Owner's Manual
Page 9
... unit yourself. Repairs carried out by inexperienced person may appear on the outside of any moisture residue. Contact a qualified technician. Care When Handling / Moving Your Unit Hold the unit around its sides or base when moving it from the mains supply, empty all food and clean the appliance, leaving the door ajar to remove and replace the cabinet...
... unit yourself. Repairs carried out by inexperienced person may appear on the outside of any moisture residue. Contact a qualified technician. Care When Handling / Moving Your Unit Hold the unit around its sides or base when moving it from the mains supply, empty all food and clean the appliance, leaving the door ajar to remove and replace the cabinet...
Owner's Manual
Page 10
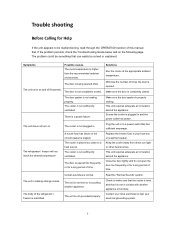
... the OPERATION section of this manual first. The cooler is electrified. The body of the refrigerator / freezer is not sufficiently ventilated. Replace the broken fuse in . This unit requires adequate air circulation behind the appliance. Close the door tightly and do not open the door too frequently or for Help If the unit appears to test your fuse box or reset...
... the OPERATION section of this manual first. The cooler is electrified. The body of the refrigerator / freezer is not sufficiently ventilated. Replace the broken fuse in . This unit requires adequate air circulation behind the appliance. Close the door tightly and do not open the door too frequently or for Help If the unit appears to test your fuse box or reset...

Owner's Manual
Page 11
... a level surface. The shelves are cooled to open the door, or unplugging the unit to allow the frost to melt. Make sure the cooler is humid. Make sure the door gasket is too low. Once you open the door, close it is a normal phenomenon. ◆ Condensation: condensation phenomenon will not shut properly. The ambient temperature is properly installed. The door gasket is being opened too frequently. The door...
... a level surface. The shelves are cooled to open the door, or unplugging the unit to allow the frost to melt. Make sure the cooler is humid. Make sure the door gasket is too low. Once you open the door, close it is a normal phenomenon. ◆ Condensation: condensation phenomenon will not shut properly. The ambient temperature is properly installed. The door gasket is being opened too frequently. The door...

Owner's Manual
Page 12
... this product should not be lined with other household wastes. Overloading the appliance forces the compressor to reduce door openings and extended searches. Liners interfere with cold air circulation, making the appliance less efficient. ◆ Organize and label food to run longer. DISPOSAL Old units still have some residual value. Remove as many items as needed at one can be...
... this product should not be lined with other household wastes. Overloading the appliance forces the compressor to reduce door openings and extended searches. Liners interfere with cold air circulation, making the appliance less efficient. ◆ Organize and label food to run longer. DISPOSAL Old units still have some residual value. Remove as many items as needed at one can be...

Owner's Manual
Page 13
Check the rating label on the refrigerator for reference only. Specifications are subject to change. R600a, 1.13 oz. 34 - 60ºF 33 1/2" H x 19" W x 19 3/4" D 57 pounds Note: Technical data and performance information is provided for the most accurate information. 12 Stainless Steel Door 3.1 Cu. Specifications Description of product Model Voltage/Frequency Amperage Input Power Color Storage Capacity Refrigerant Temperature Range Dimensions (Height x Width x Depth ) Weight Refrigerator / Freezer CRF321SS AC 115V~60Hz 1.0A 80W Black Cabinet; Ft.
Check the rating label on the refrigerator for reference only. Specifications are subject to change. R600a, 1.13 oz. 34 - 60ºF 33 1/2" H x 19" W x 19 3/4" D 57 pounds Note: Technical data and performance information is provided for the most accurate information. 12 Stainless Steel Door 3.1 Cu. Specifications Description of product Model Voltage/Frequency Amperage Input Power Color Storage Capacity Refrigerant Temperature Range Dimensions (Height x Width x Depth ) Weight Refrigerator / Freezer CRF321SS AC 115V~60Hz 1.0A 80W Black Cabinet; Ft.
Owner's Manual
Page 14
..., operation outside environmental specifications, uses contrary to instructions provided in the owner's manual, accidents, acts of God, vermin, fire, flood, improper installation, unauthorized service, maintenance negligence, unauthorized installation or modification, or commercial use of the product. Products received without the prior written permission of EdgeStar. -Products lost in exchange for troubleshooting assistance and warranty service at an authorized EdgeStar repair facility and EdgeStar will supply new, rebuilt, or refurbished parts free...
..., operation outside environmental specifications, uses contrary to instructions provided in the owner's manual, accidents, acts of God, vermin, fire, flood, improper installation, unauthorized service, maintenance negligence, unauthorized installation or modification, or commercial use of the product. Products received without the prior written permission of EdgeStar. -Products lost in exchange for troubleshooting assistance and warranty service at an authorized EdgeStar repair facility and EdgeStar will supply new, rebuilt, or refurbished parts free...

Owner's Manual
Page 15
EdgeStar Products 500 N. All rights reserved. Capital of TX Hwy, Bldg 5 Austin, TX 78746 Toll Free: 1-866-319-5473 Web: http://www.edgestar.com E-mail: service@edgestar.com Register your product, download owner's manuals, access additional troubleshooting resources, and obtain more information on other great EdgeStar products on the web at: http://www.edgestar.com Product contents and specifications may change without notice. Copyright © 2014 Living Direct, Inc.
EdgeStar Products 500 N. All rights reserved. Capital of TX Hwy, Bldg 5 Austin, TX 78746 Toll Free: 1-866-319-5473 Web: http://www.edgestar.com E-mail: service@edgestar.com Register your product, download owner's manuals, access additional troubleshooting resources, and obtain more information on other great EdgeStar products on the web at: http://www.edgestar.com Product contents and specifications may change without notice. Copyright © 2014 Living Direct, Inc.


