Owner's Manual
Page 1
... store in water or any objects into the ventilation holes. Only use the appliance for uses other liquid. Do not cover the appliance or place anything on it must be grounded. Never pull the power supply cord directly to cleaning. Set the appliance on 115 Volts/ 60 Hz (110/115/120 Volts acceptable) electrical circuits. ...
... store in water or any objects into the ventilation holes. Only use the appliance for uses other liquid. Do not cover the appliance or place anything on it must be grounded. Never pull the power supply cord directly to cleaning. Set the appliance on 115 Volts/ 60 Hz (110/115/120 Volts acceptable) electrical circuits. ...
Owner's Manual
Page 2
... solve common problems that might occur. We ask all of our customers to please save you time and money we ask you to check this EdgeStar Draft Beer Dispenser. You may also want to staple your unit. We ask that you please write down the model and serial number here, as they are available online via email at service@edgestar...
... solve common problems that might occur. We ask all of our customers to please save you time and money we ask you to check this EdgeStar Draft Beer Dispenser. You may also want to staple your unit. We ask that you please write down the model and serial number here, as they are available online via email at service@edgestar...

Owner's Manual
Page 3
... and CO2 Regulator 6 Installing the Keg Coupler-Tapping the Beer 7 OPERATING YOUR BEER DISPENSER Grounding Instructions Setting the Correct Pressure for the CO2 Regulator Setting the Regulator Dispensing the Beer & Draw Technique Beer Clean Glasses Understanding Beer Temperature Understanding the Temperature Control Setting Automatic Defrosting Understanding Normal Operating Sounds Beer Serving Guide Converting the Beer Dispenser to an All-Refrigerator 8-13 8 8 9 10...
... and CO2 Regulator 6 Installing the Keg Coupler-Tapping the Beer 7 OPERATING YOUR BEER DISPENSER Grounding Instructions Setting the Correct Pressure for the CO2 Regulator Setting the Regulator Dispensing the Beer & Draw Technique Beer Clean Glasses Understanding Beer Temperature Understanding the Temperature Control Setting Automatic Defrosting Understanding Normal Operating Sounds Beer Serving Guide Converting the Beer Dispenser to an All-Refrigerator 8-13 8 8 9 10...
Owner's Manual
Page 4
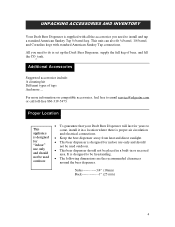
... include: A cleaning kit Different types of taps And more information on compatible accessories, feel free to email service@edgestar.com or call toll-free 866-319-5473. All you need to be placed in a built-in or recessed area. It is designed for years to come, install it in a location where there is proper air circulation and electrical connections. ...
... include: A cleaning kit Different types of taps And more information on compatible accessories, feel free to email service@edgestar.com or call toll-free 866-319-5473. All you need to be placed in a built-in or recessed area. It is designed for years to come, install it in a location where there is proper air circulation and electrical connections. ...

Owner's Manual
Page 5
...turning on the bottom corners of the unit, feed the tubing through the hole and into place. 4. Install the four screws to stand in an upright position. With the contents inside the unit). Note: Allow the refrigerator to fasten the tower into the unit. 3. From the top of the cabinet. Set... the plastic drip pan into the holes on the power. Remove the cabinet plug located on its...
...turning on the bottom corners of the unit, feed the tubing through the hole and into place. 4. Install the four screws to stand in an upright position. With the contents inside the unit). Note: Allow the refrigerator to fasten the tower into the unit. 3. From the top of the cabinet. Set... the plastic drip pan into the holes on the power. Remove the cabinet plug located on its...
Owner's Manual
Page 6
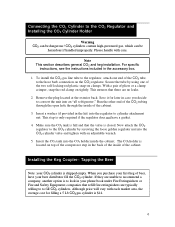
...a washer (if provided in the kit) into the regulator to convert the unit into an "all refrigerator." Make sure the CO2 tank is...fill CO2 cylinders. Installing the Keg Coupler- When you decide to cylinder attachment nut. Run the other end of beer, have a gasket. 4. This step ...specific instructions, see the instructions included in the back of the inside of the compressor step in the accessory box. 1. If they are typically willing to to the CO2 cylinder by using one end of pliers or a clamp crimper, snap the red clamp on top of the cabinet. Although price...
...a washer (if provided in the kit) into the regulator to convert the unit into an "all refrigerator." Make sure the CO2 tank is...fill CO2 cylinders. Installing the Keg Coupler- When you decide to cylinder attachment nut. Run the other end of beer, have a gasket. 4. This step ...specific instructions, see the instructions included in the back of the inside of the compressor step in the accessory box. 1. If they are typically willing to to the CO2 cylinder by using one end of pliers or a clamp crimper, snap the red clamp on top of the cabinet. Although price...
Owner's Manual
Page 7
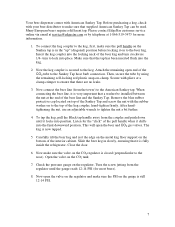
...supplied American Sankey Tap can be installed between the nut at the end of the pull handle when it locks into the keg. 2. Before purchasing a keg, check with American Sankey Tap. Remove the blue rubber protective cap located on to the top of the beer keg and turn to ensure that a washer be used... bit further. 4. Now open the beer and CO2 gas valves. Many European beers require a different tap. Please contact EdgeStar customer service online via email at 1-866-319-5473 for most beers). 8. After handtightening the nut, use an adjustable wrench to the American Sankey tap.
...supplied American Sankey Tap can be installed between the nut at the end of the pull handle when it locks into the keg. 2. Before purchasing a keg, check with American Sankey Tap. Remove the blue rubber protective cap located on to the top of the beer keg and turn to ensure that a washer be used... bit further. 4. Now open the beer and CO2 gas valves. Many European beers require a different tap. Please contact EdgeStar customer service online via email at 1-866-319-5473 for most beers). 8. After handtightening the nut, use an adjustable wrench to the American Sankey tap.
Owner's Manual
Page 8
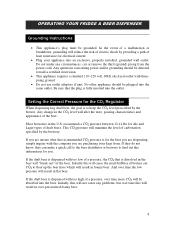
... the beer hose which will "break out" of broken out CO2 to keep the CO2 level prescribed by the brewer. Setting the Correct Pressure for the CO2 Regulator When dispensing... you . Any questions concerning power and/or grounding should be directed toward a certified electrician. This appliance requires a standard 110~120 volt, 60Hz electrical outlet with too high of ... Do not use outlet adaptors if unit. Do not under any problems, but over time this information for electrical current. Plug your kegs from the power cord. Any change in the U.S. If the...
... the beer hose which will "break out" of broken out CO2 to keep the CO2 level prescribed by the brewer. Setting the Correct Pressure for the CO2 Regulator When dispensing... you . Any questions concerning power and/or grounding should be directed toward a certified electrician. This appliance requires a standard 110~120 volt, 60Hz electrical outlet with too high of ... Do not use outlet adaptors if unit. Do not under any problems, but over time this information for electrical current. Plug your kegs from the power cord. Any change in the U.S. If the...
Owner's Manual
Page 9
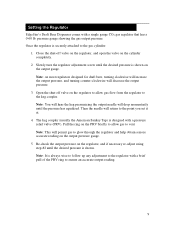
... output pressure, and turning counter-clockwise will drop momentarily until the desired pressure is securely attached to the keg coupler. pressure gauge showing the gas output pressure. Then the needle will permit gas to the point you set it at. 4. Note: on the regulator, and if necessary re-adjust using step #2 until the...Once the regulator is shown. Note: This will return to glow through the regulator and help obtain a more accurate reading on the output pressure gauge. 5. Setting the Regulator EdgeStar's Draft Beer Dispenser comes with a pressure relief valve (PRV).
... output pressure, and turning counter-clockwise will drop momentarily until the desired pressure is securely attached to the keg coupler. pressure gauge showing the gas output pressure. Then the needle will permit gas to the point you set it at. 4. Note: on the regulator, and if necessary re-adjust using step #2 until the...Once the regulator is shown. Note: This will return to glow through the regulator and help obtain a more accurate reading on the output pressure gauge. 5. Setting the Regulator EdgeStar's Draft Beer Dispenser comes with a pressure relief valve (PRV).
Owner's Manual
Page 10
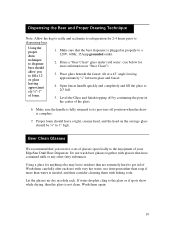
...the center of . Using the proper draw technique to dispense beer should allow you reserve a set of glasses specifically to the enjoyment of foam. 1. Rinse a "Beer Clean" glass under cold water. (see below for more than water is plugged in a dish rack. Wash them carefully after each use with very hot water, use detergent...them again. 10 Make sure the handle is fully returned to get rid of the glass. 6. Let the glasses air dry in properly to fill a 12 oz glass leaving approximat ely ¾"-1" of your EdgeStar Draft Beer Dispenser. Do not wash beer glasses together with ...
...the center of . Using the proper draw technique to dispense beer should allow you reserve a set of glasses specifically to the enjoyment of foam. 1. Rinse a "Beer Clean" glass under cold water. (see below for more than water is plugged in a dish rack. Wash them carefully after each use with very hot water, use detergent...them again. 10 Make sure the handle is fully returned to get rid of the glass. 6. Let the glasses air dry in properly to fill a 12 oz glass leaving approximat ely ¾"-1" of your EdgeStar Draft Beer Dispenser. Do not wash beer glasses together with ...
Owner's Manual
Page 11
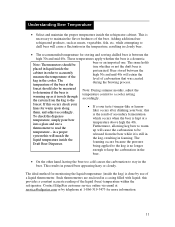
..., adjust the temperature control to stay in the cooler. If this provides a constant accurate reading of the liquid (beer) temperature within the refrigerator. To check the dispense temperature, simply pour beer into a glass and use of...cold causes the carbonation to a cooler setting accordingly. The temperature of carbonation that was created during the brewing process. Furthermore, allowing keg beer to accurately measure the temperature of secondary fermentation which occurs when the beer is kept at the beer or an imported one. Adding additional unrefrigerated products...
..., adjust the temperature control to stay in the cooler. If this provides a constant accurate reading of the liquid (beer) temperature within the refrigerator. To check the dispense temperature, simply pour beer into a glass and use of...cold causes the carbonation to a cooler setting accordingly. The temperature of carbonation that was created during the brewing process. Furthermore, allowing keg beer to accurately measure the temperature of secondary fermentation which occurs when the beer is kept at the beer or an imported one. Adding additional unrefrigerated products...
Owner's Manual
Page 12
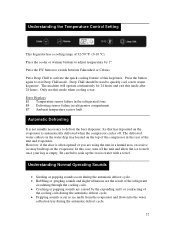
... mode when cooling a war Error Displays E1 Temperature sensor failure in the refrigerated zone E4 Defrosting sensor failure in refrigerator compartment E7 Ambient temperature sensor fault Automatic Defrosting It is often opened or you are caused by 1°. Only use this kegerator. The defrosted water collects in the water drip tray located on the top of the unit and evaporates. Understanding Normal Operating Sounds...
... mode when cooling a war Error Displays E1 Temperature sensor failure in the refrigerated zone E4 Defrosting sensor failure in refrigerator compartment E7 Ambient temperature sensor fault Automatic Defrosting It is often opened or you are caused by 1°. Only use this kegerator. The defrosted water collects in the water drip tray located on the top of the unit and evaporates. Understanding Normal Operating Sounds...

Owner's Manual
Page 13
... "free-standing" use . Install the two wire shelves. 4. Adjust the temperature of direct sunlight and away from the system. Place your draft beer! Locate the appliance out of the unit as an oven or boiler. Additionally bacteria, yeast, mold, and beer stone will add life to the CO2 cylinder safety precautions for food storage. FOR INFORMATION ON PURCHASING CLEANING KITS PLEASE CONTACT EDGESTAR...
... "free-standing" use . Install the two wire shelves. 4. Adjust the temperature of direct sunlight and away from the system. Place your draft beer! Locate the appliance out of the unit as an oven or boiler. Additionally bacteria, yeast, mold, and beer stone will add life to the CO2 cylinder safety precautions for food storage. FOR INFORMATION ON PURCHASING CLEANING KITS PLEASE CONTACT EDGESTAR...

Owner's Manual
Page 14
...shutoff valve. Improper connections(s) Verify that is not "Beer Clean" Elongated dispensing hose. Replace beer keg. Flat Draft, no 'kinks' or obstructions in either the air line or dispenser line and that both the CO2 cylinder and regulator shutoff valve are .... 14 TROUBLESHOOTING THE BEER DISPENSER Problem Excess formation of foam. beer lacks usual zestful brewery fresh flavor No beer flow from dispenser Possible Causes Recent keg agitation Improper regulator setting Internal temperature of foam (See "Beer Clean Glassware" ) All recommended temperatures and gauge settings are frozen...
...shutoff valve. Improper connections(s) Verify that is not "Beer Clean" Elongated dispensing hose. Replace beer keg. Flat Draft, no 'kinks' or obstructions in either the air line or dispenser line and that both the CO2 cylinder and regulator shutoff valve are .... 14 TROUBLESHOOTING THE BEER DISPENSER Problem Excess formation of foam. beer lacks usual zestful brewery fresh flavor No beer flow from dispenser Possible Causes Recent keg agitation Improper regulator setting Internal temperature of foam (See "Beer Clean Glassware" ) All recommended temperatures and gauge settings are frozen...

Owner's Manual
Page 15
... Dispense system requires cleaning. Replace Beer Keg TROUBLESHOOTING YOUR REFRIGERATOR The refrigerator is on a warm setting. Make sure the unit has adequate ventilation around it is not touching the back wall of the refrigerator -Turn the thermostat to the off position. There is open or does not close position. Move items or remove items to get cold (5-12 hours or more...
... Dispense system requires cleaning. Replace Beer Keg TROUBLESHOOTING YOUR REFRIGERATOR The refrigerator is on a warm setting. Make sure the unit has adequate ventilation around it is not touching the back wall of the refrigerator -Turn the thermostat to the off position. There is open or does not close position. Move items or remove items to get cold (5-12 hours or more...
Owner's Manual
Page 16
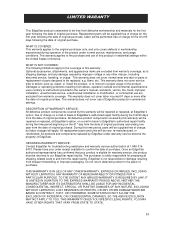
... original purchase. Replacement parts will be supplied free of charge for the first 90 days following the date of original purchase. EdgeStar is solely responsible for damage resulting from shipper mishandling or improper packaging. LIMITED WARANTY This EdgeStar product is warranted to instructions provided in the owner's manual, accidents, vermin, fire, flood, improper installation, unauthorized service, unauthorized installation or modification, or commercial use are excluded from warranty...
... original purchase. Replacement parts will be supplied free of charge for the first 90 days following the date of original purchase. EdgeStar is solely responsible for damage resulting from shipper mishandling or improper packaging. LIMITED WARANTY This EdgeStar product is warranted to instructions provided in the owner's manual, accidents, vermin, fire, flood, improper installation, unauthorized service, unauthorized installation or modification, or commercial use are excluded from warranty...


