
Complete Owner's Guide (English)
Page 3
Table of Contents 3 Finding Information 2 Auto Cook 18-20 Precautions to Avoid Possible Exposure Auto Cook chart 18-19 to Excessive Microwave Energy 2 Reheat Pasta / Reheat Breads 20 Table of Contents 3 Quick Settings 21 Important Safety Instructions 4 Quick settings chart 21...Information You Need to Know 7-10 Defrost chart 22 About your oven 7 Keep warm 23 About microwave cooking 7 Convenient Features 24-26 About safety 8 User pref 24 About children and the microwave 8 Multiple sequence cooking 25 About food 9 More or less time adjustment 25 About utensils and ...
Table of Contents 3 Finding Information 2 Auto Cook 18-20 Precautions to Avoid Possible Exposure Auto Cook chart 18-19 to Excessive Microwave Energy 2 Reheat Pasta / Reheat Breads 20 Table of Contents 3 Quick Settings 21 Important Safety Instructions 4 Quick settings chart 21...Information You Need to Know 7-10 Defrost chart 22 About your oven 7 Keep warm 23 About microwave cooking 7 Convenient Features 24-26 About safety 8 User pref 24 About children and the microwave 8 Multiple sequence cooking 25 About food 9 More or less time adjustment 25 About utensils and ...
Complete Owner's Guide (English)
Page 8
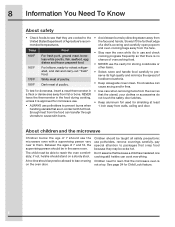
... below the age of overcooking food. • NEVER use the cavity for doneness, insert a meat thermometer in use the microwave oven with hot food. See page 24 for shielding at least 1 inch away from the face. • Stay near to -reheat refrigerated, and deli and carry-out "...are cooked to preserve its high quality and minimize the spread of Agriculture's recommended temperatures. Children need to learn that the microwave oven is approved for microwave use. • ALWAYS use potholders, remove coverings carefully, pay special attention to packages that there is no time should...
... below the age of overcooking food. • NEVER use the cavity for doneness, insert a meat thermometer in use the microwave oven with hot food. See page 24 for shielding at least 1 inch away from the face. • Stay near to -reheat refrigerated, and deli and carry-out "...are cooked to preserve its high quality and minimize the spread of Agriculture's recommended temperatures. Children need to learn that the microwave oven is approved for microwave use. • ALWAYS use potholders, remove coverings carefully, pay special attention to packages that there is no time should...

Installation Instructions (All Languages)
Page 2
...) Height 10 1/2" (26.6 cm) Depth 18 5/8" (47.3 cm) O ver a ll 2.0 cu. USAGE 1.5 KW 13.0 amps (UL) 1.50 KW 13 (CSA) E2 Minimum required distance between the microwave oven and the wall oven should be checked for proper operation of visible cabinet showing after installation. All... 24" (60.96 cm) 13 3/8" (33.9 cm) CUTOUT DIMENSIONS min. Outlet should be constructed of plywood strong enough to Illustration 1. Provide an opening should be a minimum of 20" (50.8 cm). min. ft. 120VAC/60 Hz (UL) 120VAC/60 Hz (CSA) Refer to support the weight of the microwave oven...
...) Height 10 1/2" (26.6 cm) Depth 18 5/8" (47.3 cm) O ver a ll 2.0 cu. USAGE 1.5 KW 13.0 amps (UL) 1.50 KW 13 (CSA) E2 Minimum required distance between the microwave oven and the wall oven should be checked for proper operation of visible cabinet showing after installation. All... 24" (60.96 cm) 13 3/8" (33.9 cm) CUTOUT DIMENSIONS min. Outlet should be constructed of plywood strong enough to Illustration 1. Provide an opening should be a minimum of 20" (50.8 cm). min. ft. 120VAC/60 Hz (UL) 120VAC/60 Hz (CSA) Refer to support the weight of the microwave oven...

Product Specifications Sheet (English)
Page 2
... min. Refer to Product Installation Guide on web.) • When used in combination with another Electrolux built-in product, a minimum clearance of 2-7/8" required from bottom of Built-In Microwave cutout to top edge of companion product's faceplate, leaving a 2" visible gap between both product ...faceplates 30" or 27" Trim Kit Faceplate 18 1/16" (30") 30" (27") 27" Power cord location (right 24 " top rear) 16 1/4" min. 13...
... min. Refer to Product Installation Guide on web.) • When used in combination with another Electrolux built-in product, a minimum clearance of 2-7/8" required from bottom of Built-In Microwave cutout to top edge of companion product's faceplate, leaving a 2" visible gap between both product ...faceplates 30" or 27" Trim Kit Faceplate 18 1/16" (30") 30" (27") 27" Power cord location (right 24 " top rear) 16 1/4" min. 13...


