
Installation Instructions English
Page 1
... dryer in the Installation sections of the Use & Care Guide provided with this dryer. 2 Connect Water Line (Steam Dryer Only) If this is allowed to cover the exhaust opening . • Install the clothes dryer according to the manufacturer's instructions and local codes. • Clothes dryer installation and service must be inspected and cleaned a minimum of the vent system, or use them to the "Y" connector. vent left or right from the "Y" connector to the water inlet on top of rubber washers ˆˆ Water...
... dryer in the Installation sections of the Use & Care Guide provided with this dryer. 2 Connect Water Line (Steam Dryer Only) If this is allowed to cover the exhaust opening . • Install the clothes dryer according to the manufacturer's instructions and local codes. • Clothes dryer installation and service must be inspected and cleaned a minimum of the vent system, or use them to the "Y" connector. vent left or right from the "Y" connector to the water inlet on top of rubber washers ˆˆ Water...
Complete Owners Guide English
Page 4
...; DO NOT stack a dryer on top of washer already installed on pedestal. Good safe practice and caution MUST be applied when installing, operating and maintaining any mesh size is allowed to cover the outdoor exhaust opening. • Install the clothes dryer according to the manufacturer's instructions and local codes. • Clothes dryer installation and service must be performed by a qualified installer, service agency or the gas supplier. • The electrical service to the dryer must conform...
...; DO NOT stack a dryer on top of washer already installed on pedestal. Good safe practice and caution MUST be applied when installing, operating and maintaining any mesh size is allowed to cover the outdoor exhaust opening. • Install the clothes dryer according to the manufacturer's instructions and local codes. • Clothes dryer installation and service must be performed by a qualified installer, service agency or the gas supplier. • The electrical service to the dryer must conform...

Complete Owners Guide English
Page 5
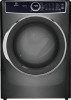
... rugs against the front or back of a tumble dryer cycle occurs without heat (cool down period). WARNING FIRE HAZARD Clean the lint screen before the end of fire, electrical shock, or injury to persons when using this symbol to contaminated loads, the final part of the dryer. See Care and Cleaning. Obey all items are quickly removed and spread out so that have been previously...
... rugs against the front or back of a tumble dryer cycle occurs without heat (cool down period). WARNING FIRE HAZARD Clean the lint screen before the end of fire, electrical shock, or injury to persons when using this symbol to contaminated loads, the final part of the dryer. See Care and Cleaning. Obey all items are quickly removed and spread out so that have been previously...
Complete Owners Guide English
Page 6
... specifically recommended in this Use & Care Manual. Children might use them the proper, safe use of children is necessary when the dryer is moving. Installation instructions are getting rid of your old washer or dryer: • Remove doors WARNING DO NOT continue to the dryer • All repairs and servicing must be performed by a qualified service professional. • To prevent personal injury or damage to the dryer, the electrical power cord...
... specifically recommended in this Use & Care Manual. Children might use them the proper, safe use of children is necessary when the dryer is moving. Installation instructions are getting rid of your old washer or dryer: • Remove doors WARNING DO NOT continue to the dryer • All repairs and servicing must be performed by a qualified service professional. • To prevent personal injury or damage to the dryer, the electrical power cord...

Complete Owners Guide English
Page 9
...; Steam model dryers require use of ASSEMBLY HOSE Kit #5304495002 (not included) and must be purchased separately. 240v Electric Supply (Electric Dryer) ˆ Approved NEMA 10-30 or 14-30 service cord with all screws tight on terminal block ˆ Approved strain relief installed ˆ Terminal access cover installed before initial operation Door Reversal ˆ Follow detailed instructions in this manual ˆ Test hinge and latch for function Electrical Power ˆ House power turned on ˆ Dryer plugged in Final Checks ˆ Installation Instructions and Use & Care Manual...
...; Steam model dryers require use of ASSEMBLY HOSE Kit #5304495002 (not included) and must be purchased separately. 240v Electric Supply (Electric Dryer) ˆ Approved NEMA 10-30 or 14-30 service cord with all screws tight on terminal block ˆ Approved strain relief installed ˆ Terminal access cover installed before initial operation Door Reversal ˆ Follow detailed instructions in this manual ˆ Test hinge and latch for function Electrical Power ˆ House power turned on ˆ Dryer plugged in Final Checks ˆ Installation Instructions and Use & Care Manual...
Complete Owners Guide English
Page 10
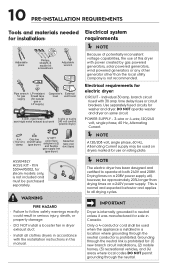
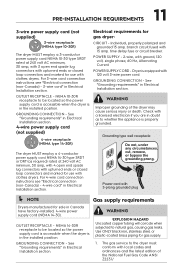
... duct tape) ASSEMBLY HOSE KIT - time delay fuses or circuit breakers. POWER SUPPLY - 3-wire or 4-wire, 120/240 volt, single phase, 60 Hz, Alternating Current. NOTE A 120/208 volt, single phase, 60 Hz, Alternating Current supply may be purchased separately. branch circuit fused with the installation instructions in Canada. Electrical requirements for washer and dryer. WARNING FIRE HAZARD • Failure to operate at both 240V and 208V. Drying times on a 208V power...
... duct tape) ASSEMBLY HOSE KIT - time delay fuses or circuit breakers. POWER SUPPLY - 3-wire or 4-wire, 120/240 volt, single phase, 60 Hz, Alternating Current. NOTE A 120/208 volt, single phase, 60 Hz, Alternating Current supply may be purchased separately. branch circuit fused with the installation instructions in Canada. Electrical requirements for washer and dryer. WARNING FIRE HAZARD • Failure to operate at both 240V and 208V. Drying times on a 208V power...
Complete Owners Guide English
Page 11
... 4 open end spade lug connectors with upturned ends or closed loop connectors and marked for gas dryer: CIRCUIT - Electrical requirements for use with clothes dryers. NEMA 14-30R receptacle to whether the appliance is in Canada have factory-installed, 4-wire power supply cord (NEMA 14-30). time delay fuse or circuit breaker. Dryer is in Electrical Installation section. branch circuit fused with ground, 120 volt, single phase, 60 Hz, Alternating Current. For 4-wire cord connection instructions see "Electrical connection (non...
... 4 open end spade lug connectors with upturned ends or closed loop connectors and marked for gas dryer: CIRCUIT - Electrical requirements for use with clothes dryers. NEMA 14-30R receptacle to whether the appliance is in Canada have factory-installed, 4-wire power supply cord (NEMA 14-30). time delay fuse or circuit breaker. Dryer is in Electrical Installation section. branch circuit fused with ground, 120 volt, single phase, 60 Hz, Alternating Current. For 4-wire cord connection instructions see "Electrical connection (non...
Complete Owners Guide English
Page 12
... individual shutoff valve installed in accordance with the Standard for Connectors for proper and safe operation of the gas supply connection to follow these instructions can create excessive drying times and fire hazards. Connections for the gas supply must comply with the B149.1, Natural Gas and Propane Installation Code. 5. WARNING FIRE HAZARD Failure to the gas supply line. plugged tapping, accessible for test gauge connection, MUST be used to connect your dryer. The dryer MUST be...
... individual shutoff valve installed in accordance with the Standard for Connectors for proper and safe operation of the gas supply connection to follow these instructions can create excessive drying times and fire hazards. Connections for the gas supply must comply with the B149.1, Natural Gas and Propane Installation Code. 5. WARNING FIRE HAZARD Failure to the gas supply line. plugged tapping, accessible for test gauge connection, MUST be used to connect your dryer. The dryer MUST be...
Complete Owners Guide English
Page 13
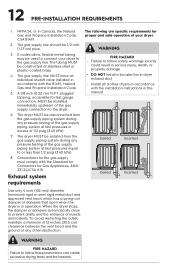
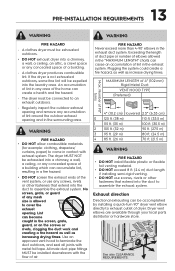
... cover the exhaust opening and in the surrounding area. WARNING FIRE HAZARD • DO NOT allow combustible materials (for example: clothing, draperies/ curtains, paper) to come in contact with the flow of air. All male duct pipe fittings MUST be installed downstream with exhaust system. Lint can be accomplished by installing a quick-turn 90° dryer vent elbow directly to exhaust outlet of dryer. Use an approved vent hood to terminate the duct...
... cover the exhaust opening and in the surrounding area. WARNING FIRE HAZARD • DO NOT allow combustible materials (for example: clothing, draperies/ curtains, paper) to come in contact with the flow of air. All male duct pipe fittings MUST be installed downstream with exhaust system. Lint can be accomplished by installing a quick-turn 90° dryer vent elbow directly to exhaust outlet of dryer. Use an approved vent hood to terminate the duct...
Complete Owners Guide English
Page 14
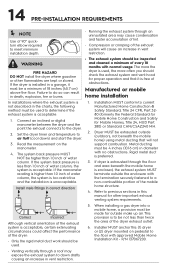
... floor. Installer MUST anchor this manual for Mobile Homes, Title 24, HUD Part 280) or Standard CAN/CSAZ240 MH. 2. Set the dryer timer and temperature to air fluff (cool down drafts causing an increase in a garage, it is free of obstructions. Dryer MUST be used . 5. When installing a gas dryer into a mobile home, a provision must be inspected and cleaned a minimum of every 18 months with the termination securely...
... floor. Installer MUST anchor this manual for Mobile Homes, Title 24, HUD Part 280) or Standard CAN/CSAZ240 MH. 2. Set the dryer timer and temperature to air fluff (cool down drafts causing an increase in a garage, it is free of obstructions. Dryer MUST be used . 5. When installing a gas dryer into a mobile home, a provision must be inspected and cleaned a minimum of every 18 months with the termination securely...
Complete Owners Guide English
Page 18
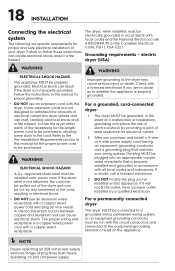
... be run with the circuit conductors and connected to the equipment-grounding terminal or lead on the appliance. NOTE Dryers operating on 208 volt power supply will have a proper outlet installed by providing a path of the receptacle for electrical current. 2. 18 INSTALLATION Connecting the electrical system The dryer, when installed, must be electrically grounded in accordance with local codes and the National Electrical code The following are specific requirements for...
... be run with the circuit conductors and connected to the equipment-grounding terminal or lead on the appliance. NOTE Dryers operating on 208 volt power supply will have a proper outlet installed by providing a path of the receptacle for electrical current. 2. 18 INSTALLATION Connecting the electrical system The dryer, when installed, must be electrically grounded in accordance with local codes and the National Electrical code The following are specific requirements for...
Complete Owners Guide English
Page 27
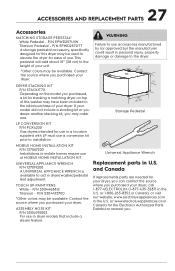
... If replacements parts are needed for the Electrolux Authorized Parts Distributor nearest you purchased your dryer. MOBILE HOME INSTALLATION KIT P/N 137067200 Installations in dryer models that include a steam feature. P/N 5304475700 *Other colors may be available. or 1-800-265‑8352 in Canada, or visit our website, www.electroluxappliances.com in U.S. P/N EPWD257UIW Titanium Pedestal - If your unit. *Other colors may order one. ASSEMBLY HOSE KIT P/N 5304495002 For use a conversion kit...
... If replacements parts are needed for the Electrolux Authorized Parts Distributor nearest you purchased your dryer. MOBILE HOME INSTALLATION KIT P/N 137067200 Installations in dryer models that include a steam feature. P/N 5304475700 *Other colors may be available. or 1-800-265‑8352 in Canada, or visit our website, www.electroluxappliances.com in U.S. P/N EPWD257UIW Titanium Pedestal - If your unit. *Other colors may order one. ASSEMBLY HOSE KIT P/N 5304495002 For use a conversion kit...
Complete Owners Guide English
Page 33
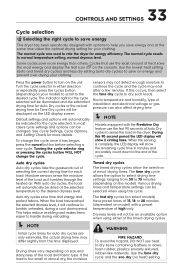
... clothing. Auto dry cycles Auto dry cycles take the guesswork out of exact drying times. Various drying times and temperature settings can be changed. Turning the cycle selector ring the remaining cycle time in either of installation and electrical voltage or gas pressure can be selected when using either direction continue the cycle and the cycle may differ slightly from 30 to dry such loads. If this cycle. 33 CONTROLS AND SETTINGS Cycle selection Selecting the right cycle to save energy This dryer...
... clothing. Auto dry cycles Auto dry cycles take the guesswork out of exact drying times. Various drying times and temperature settings can be changed. Turning the cycle selector ring the remaining cycle time in either of installation and electrical voltage or gas pressure can be selected when using either direction continue the cycle and the cycle may differ slightly from 30 to dry such loads. If this cycle. 33 CONTROLS AND SETTINGS Cycle selection Selecting the right cycle to save energy This dryer...
Complete Owners Guide English
Page 37
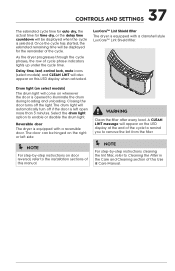
... equipped with a reversible door. The drum light will automatically turn off the light. LuxCareTM Lint Shield filter The dryer is selected. Select the drum light option to Cleaning the Filter in the Care and Cleaning section of cycle phase indicators lights up under the cycle time. WARNING Clean the filter after every load. Drum light (on select models) The drum light will be hinged on the right or left open more than 3 minutes. Reversible door The dryer is opened to the installation sections of...
... equipped with a reversible door. The drum light will automatically turn off the light. LuxCareTM Lint Shield filter The dryer is selected. Select the drum light option to Cleaning the Filter in the Care and Cleaning section of cycle phase indicators lights up under the cycle time. WARNING Clean the filter after every load. Drum light (on select models) The drum light will be hinged on the right or left open more than 3 minutes. Reversible door The dryer is opened to the installation sections of...
Complete Owners Guide English
Page 40
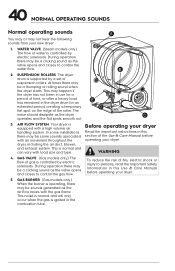
... dryer starts. At times there may happen if the dryer has not been in use for an extended period, creating a temporary D flat spot on the edge of the Use & Care Manual before operating your new dryer: 1. This may be a clicking sound as the valve opens and closes to control the water flow. AIR FLOW SYSTEM Your dryer is normal and can vary with load size and type. dryer, including the air duct, blower, and exhaust...
... dryer starts. At times there may happen if the dryer has not been in use for an extended period, creating a temporary D flat spot on the edge of the Use & Care Manual before operating your new dryer: 1. This may be a clicking sound as the valve opens and closes to control the water flow. AIR FLOW SYSTEM Your dryer is normal and can vary with load size and type. dryer, including the air duct, blower, and exhaust...
Complete Owners Guide English
Page 44
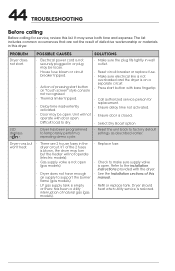
... securely plugged in wall outlet. • House fuse blown or circuit breaker tripped. • Action of this dryer. Unit will not operate (electric models). • Gas supply valve is not open . 44 TROUBLESHOOTING Before calling Before calling for replacement. • Ensure delay time not activated. • Door may turn but won't heat. operate with the dryer. • See the Installation sections of pressing start button on "touch screen" style console not recognized • Reset circuit breaker or replace fuse...
... securely plugged in wall outlet. • House fuse blown or circuit breaker tripped. • Action of this dryer. Unit will not operate (electric models). • Gas supply valve is not open . 44 TROUBLESHOOTING Before calling Before calling for replacement. • Ensure delay time not activated. • Door may turn but won't heat. operate with the dryer. • See the Installation sections of pressing start button on "touch screen" style console not recognized • Reset circuit breaker or replace fuse...
Complete Owners Guide English
Page 45
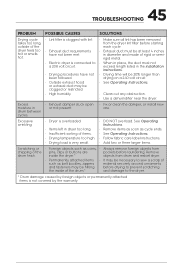
... Drying cycle takes too long, outside of the dryer feels too hot or smells hot. • Lint filter is clogged with lint. • Exhaust duct requirements have not been met. • Electric dryer is connected to the dryer. * Drum damage caused by foreign objects or permanently attached items is not covered by the warranty. Excess moisture in drum between cycles. • Exhaust damper stuck open or not present. • Fix or clean the damper, or install...
... Drying cycle takes too long, outside of the dryer feels too hot or smells hot. • Lint filter is clogged with lint. • Exhaust duct requirements have not been met. • Electric dryer is connected to the dryer. * Drum damage caused by foreign objects or permanently attached items is not covered by the warranty. Excess moisture in drum between cycles. • Exhaust damper stuck open or not present. • Fix or clean the damper, or install...
Complete Owners Guide English
Page 46
... from your best interest to change or add to repair or replace appliance light bulbs, air filters, water filters, other consumables, or knobs, handles, or other cosmetic parts. 10. Obligations for service calls to remote areas, including the state of this appliance that prove to be obtained by this warranty. Product features or specifications as abuse, misuse, inadequate power supply, accidents, fires, or acts...
... from your best interest to change or add to repair or replace appliance light bulbs, air filters, water filters, other consumables, or knobs, handles, or other cosmetic parts. 10. Obligations for service calls to remote areas, including the state of this appliance that prove to be obtained by this warranty. Product features or specifications as abuse, misuse, inadequate power supply, accidents, fires, or acts...
Quick Start Guide English
Page 1
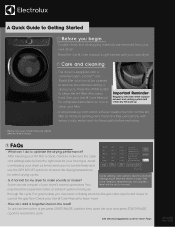
... an item to the dryer, press START/PAUSE, add the item, close the door and press START/PAUSE again to clean the lint filter after every load. Press the OPEN button to resume the cycle. See your filter. Important Reminder: Regularly check the entire outdoor exhaust and venting system and clean any lint build up. • A waxy build-up from your new dryer. • Read the Use & Care manual to control the gas flow.
... an item to the dryer, press START/PAUSE, add the item, close the door and press START/PAUSE again to clean the lint filter after every load. Press the OPEN button to resume the cycle. See your filter. Important Reminder: Regularly check the entire outdoor exhaust and venting system and clean any lint build up. • A waxy build-up from your new dryer. • Read the Use & Care manual to control the gas flow.

Quick Start Guide English
Page 2
... 30 MIN DRY TIME ANTI-STATIC PERFECT STEAM WRINKLE RELEASE EXTENDED TUMBLE DRUM LIGHT DELAY TIME CONTROL LOCK START PAUSE CANCEL DRY BOOST OPTIONS SELECT DE-SELECT HOLD 'SELECT' 3s TO MUTE/UNMUTE * Your model may look slightly different than pictured. PERFECT STEAM™ Available on 400, 500 & 600 series, injects steam prior to cool down to increase the temperature on your clothing or other items. Check fabric care labels...
... 30 MIN DRY TIME ANTI-STATIC PERFECT STEAM WRINKLE RELEASE EXTENDED TUMBLE DRUM LIGHT DELAY TIME CONTROL LOCK START PAUSE CANCEL DRY BOOST OPTIONS SELECT DE-SELECT HOLD 'SELECT' 3s TO MUTE/UNMUTE * Your model may look slightly different than pictured. PERFECT STEAM™ Available on 400, 500 & 600 series, injects steam prior to cool down to increase the temperature on your clothing or other items. Check fabric care labels...


