
Complete Owner's Guide (English)
Page 2
...serving you, please use this guide Thank you . We view your Hood 6 Optional Accessories 6 Tools/Materials required 6 Installing the hood 7-14 Installing preparation 7 Wall framing for adequate support 7 Removing the packaging 7 Examples of Materials 6 Parts Included with Electrolux enhances our ability to serve you for location) NOTE Registering your ... accessories 17 Heat sensor 17 For Best results 18 Care and cleaning 19 Filters 19 Lights 19 Optional Charcoal Filters 20 Hood Surface 20 Warranty Information 21 ©2007 Electrolux Home Products, Inc.
...serving you, please use this guide Thank you . We view your Hood 6 Optional Accessories 6 Tools/Materials required 6 Installing the hood 7-14 Installing preparation 7 Wall framing for adequate support 7 Removing the packaging 7 Examples of Materials 6 Parts Included with Electrolux enhances our ability to serve you for location) NOTE Registering your ... accessories 17 Heat sensor 17 For Best results 18 Care and cleaning 19 Filters 19 Lights 19 Optional Charcoal Filters 20 Hood Surface 20 Warranty Information 21 ©2007 Electrolux Home Products, Inc.

Complete Owner's Guide (English)
Page 4
.... Install this unit only in the event of the surface element. To Reduce The Risk Of Fire Or Electric Shock, Do Not Use This Hood With Any External Solid State Speed Control Device. TO REDUCE THE RISK OF FIRE, ELECTRIC SHOCK, OR INJURY TO PERSONS, OBSERVE THE FOLLOWING: ...department is being switched on low or medium settings. Without these components, operating blowers could catch onto hair, fingers and loose clothing. Use this hood in place. Sufficient air is equpeed with a close-fitting lid, cookie sheet, or other hidden utilities. a) Never leave surface units unattended at...
.... Install this unit only in the event of the surface element. To Reduce The Risk Of Fire Or Electric Shock, Do Not Use This Hood With Any External Solid State Speed Control Device. TO REDUCE THE RISK OF FIRE, ELECTRIC SHOCK, OR INJURY TO PERSONS, OBSERVE THE FOLLOWING: ...department is being switched on low or medium settings. Without these components, operating blowers could catch onto hair, fingers and loose clothing. Use this hood in place. Sufficient air is equpeed with a close-fitting lid, cookie sheet, or other hidden utilities. a) Never leave surface units unattended at...

Complete Owner's Guide (English)
Page 5
... are necessary for specific requirements in the neutral or ground circuit. Check with National Electrical Code, ANSI/NFPA 70 - The range hood should be as close as possible to outside temperatures as possible. The break should be connected with Screws and Drywall Anchors suitable for... edition*, or CSA Standards C22.1-94, Canadian Electrical Code Part 1 and C22.2 No. 0-M91 - At least two people are not sure range hood is the customer's responsibility: To contact a qualified electrical installer. The damper should have a fuse in your cabinet/wall. 4. Do not have an...
... are necessary for specific requirements in the neutral or ground circuit. Check with National Electrical Code, ANSI/NFPA 70 - The range hood should be as close as possible to outside temperatures as possible. The break should be connected with Screws and Drywall Anchors suitable for... edition*, or CSA Standards C22.1-94, Canadian Electrical Code Part 1 and C22.2 No. 0-M91 - At least two people are not sure range hood is the customer's responsibility: To contact a qualified electrical installer. The damper should have a fuse in your cabinet/wall. 4. Do not have an...

Complete Owner's Guide (English)
Page 6
6 List of Materials List of Materials Parts Included with your Hood • Hood canopy assembly with blower, transition. • Lamp already installed. • Grease filter. • Glass Canopy • Duct cover. &#...Duct cover support bracket (1 piece) • Use, care and installation guide • Glass bracket (2 pieces) • Wood screws (6 pieces - 3/16" x 1" 3/4) • Hood attachment anchors screws (6 pieces - 1/8" x 3/8") • Assembly screws (8 pieces) Optional accessories • Re circulation KIT • Charcoal filter Tools/Materials required • Duct tape &#...
6 List of Materials List of Materials Parts Included with your Hood • Hood canopy assembly with blower, transition. • Lamp already installed. • Grease filter. • Glass Canopy • Duct cover. &#...Duct cover support bracket (1 piece) • Use, care and installation guide • Glass bracket (2 pieces) • Wood screws (6 pieces - 3/16" x 1" 3/4) • Hood attachment anchors screws (6 pieces - 1/8" x 3/8") • Assembly screws (8 pieces) Optional accessories • Re circulation KIT • Charcoal filter Tools/Materials required • Duct tape &#...

Complete Owner's Guide (English)
Page 7
... building, only. • On avarage 2 to 3 hours are necessary to complete installation (without considering cut to be easier if the vent hood is heavy. 'Adequate structure and support must be secure to protect against sharp edges. Removing the packaging Remove carton carefully, Wear gloves to vertical... and a nonmetallic thermal break to minimize conduction of outside of the thermal break. Advance planning • Determine the exact location of the vent hood. • Plan the route for most efficient air flow exhaust, use a straight run or as few elbows as part of ducts , conduit...
... building, only. • On avarage 2 to 3 hours are necessary to complete installation (without considering cut to be easier if the vent hood is heavy. 'Adequate structure and support must be secure to protect against sharp edges. Removing the packaging Remove carton carefully, Wear gloves to vertical... and a nonmetallic thermal break to minimize conduction of outside of the thermal break. Advance planning • Determine the exact location of the vent hood. • Plan the route for most efficient air flow exhaust, use a straight run or as few elbows as part of ducts , conduit...

Complete Owner's Guide (English)
Page 8
8 Installing the hood Examples of the cooktop. Keep duct runs as short and straight as is determined by the following image. Duct fittings (elbows and transitions) reduce air ... locations • Determine the exact location of the remote blower gives the best delivery. A short straight length of duct at the inlet of the vent hood. • Locate the template packed with gravity damper Deflector Pipe Transition Vertical Discharge Recirculating Ductwork installation guidelines For safety reasons, ducting should only be used...
8 Installing the hood Examples of the cooktop. Keep duct runs as short and straight as is determined by the following image. Duct fittings (elbows and transitions) reduce air ... locations • Determine the exact location of the remote blower gives the best delivery. A short straight length of duct at the inlet of the vent hood. • Locate the template packed with gravity damper Deflector Pipe Transition Vertical Discharge Recirculating Ductwork installation guidelines For safety reasons, ducting should only be used...

Complete Owner's Guide (English)
Page 9
... marked locations. • Install wall fastener anchors. • Drive wood screws, by hand, into the fastener to allow anchors to the wall with the hood). . House wiring location • The junction box is located on the top left side of the centerline. 4-3/4" circle center to the circle center of...Hole may be installed against the back wall and flush with the centerline on the elbow used) above the marked bottom pencil line. Installing the hood 9 Mounting the duct cover bracket The duct bracket should enter the back wall at least 23 - 12/16" (the measure might vary depending ...
... marked locations. • Install wall fastener anchors. • Drive wood screws, by hand, into the fastener to allow anchors to the wall with the hood). . House wiring location • The junction box is located on the top left side of the centerline. 4-3/4" circle center to the circle center of...Hole may be installed against the back wall and flush with the centerline on the elbow used) above the marked bottom pencil line. Installing the hood 9 Mounting the duct cover bracket The duct bracket should enter the back wall at least 23 - 12/16" (the measure might vary depending ...

Complete Owner's Guide (English)
Page 10
...location indicated by hand. Install two horizontal supports at least 4" X 2" between the screw head and the wall. • Remove the grease filter and mount the hood onto the "upper" screws. 8-1/2"min. Remove the template. • Cut away enough drywall to expose 2 vertical studs at the bottom and upper mounting holes ... location. • The horizontal support must be flush with the centerline. • Mark "upper" screw holes locations in the wall using a pencil. opening for hood support • If drywall is leveled and centered with the room side of the studs. 10 Installing the...
...location indicated by hand. Install two horizontal supports at least 4" X 2" between the screw head and the wall. • Remove the grease filter and mount the hood onto the "upper" screws. 8-1/2"min. Remove the template. • Cut away enough drywall to expose 2 vertical studs at the bottom and upper mounting holes ... location. • The horizontal support must be flush with the centerline. • Mark "upper" screw holes locations in the wall using a pencil. opening for hood support • If drywall is leveled and centered with the room side of the studs. 10 Installing the...

Complete Owner's Guide (English)
Page 11
Remove screws. • Mount the hood onto the "upper" screws. • Drive and tighten the "upper" wood screws, by hand. • Drive and tighten the "lower" wood screws, by hand. 11 Installing the hood • Remove the hood. • Drive "lower" wood screws, by hand. • Install the plastic gasket to the front hood flange.
Remove screws. • Mount the hood onto the "upper" screws. • Drive and tighten the "upper" wood screws, by hand. • Drive and tighten the "lower" wood screws, by hand. 11 Installing the hood • Remove the hood. • Drive "lower" wood screws, by hand. • Install the plastic gasket to the front hood flange.

Complete Owner's Guide (English)
Page 12
... Slip the duct onto the bottom of the deflector. • Place the assembled deflector and duct over seam • Measure from the hood. • Assemble the air deflector to the bottom of airflow as illustrated. • Push duct over the exhaust outlet. • Wrap... all duct joints and the flange connections with 4 assembly screws provided as shown. 12 Installing the hood Connecting the ductwork • Install ductwork, making connections in the wall or ceiling vent exit. Airflow Air deflector installation (Recirculating accessories) &#...
... Slip the duct onto the bottom of the deflector. • Place the assembled deflector and duct over seam • Measure from the hood. • Assemble the air deflector to the bottom of airflow as illustrated. • Push duct over the exhaust outlet. • Wrap... all duct joints and the flange connections with 4 assembly screws provided as shown. 12 Installing the hood Connecting the ductwork • Install ductwork, making connections in the wall or ceiling vent exit. Airflow Air deflector installation (Recirculating accessories) &#...

Complete Owner's Guide (English)
Page 13
Failure to the electrical diagram found inside the hood. • Close j-box cover and reapply screws. 13 Installing the hood Making the electrical connections Electrical Shock Hazard Warning: Turn off power at the service panel before wiring this unit. 120 VAC, 15 or 20 Amp... j-box respectively. • These connections should be done always making reference to do so can result in j-box. Mounting the glass canopy • With the hood mounted on the wall slide the glass canopy over the glass supports. • Insert the glass brackets. • Insert two screws into the bracket holes...
Failure to the electrical diagram found inside the hood. • Close j-box cover and reapply screws. 13 Installing the hood Making the electrical connections Electrical Shock Hazard Warning: Turn off power at the service panel before wiring this unit. 120 VAC, 15 or 20 Amp... j-box respectively. • These connections should be done always making reference to do so can result in j-box. Mounting the glass canopy • With the hood mounted on the wall slide the glass canopy over the glass supports. • Insert the glass brackets. • Insert two screws into the bracket holes...

Complete Owner's Guide (English)
Page 14
IMPORTANT: If the hood doesn't switch ON, before calling for service, check if the internal General ON/ OFF Pushb-utton Switch is used, grab the upper part of the ... provided. General ON/OFF Push button Switch Frontside of the hood Back side of the hood. If a telescopic duct cover is switched ON. Check operation of the hood 14 Installing the hood Mounting the duct cover • Position the duct cover over the mounted hood. • Slide the bottom of the duct onto the glass...
IMPORTANT: If the hood doesn't switch ON, before calling for service, check if the internal General ON/ OFF Pushb-utton Switch is used, grab the upper part of the ... provided. General ON/OFF Push button Switch Frontside of the hood Back side of the hood. If a telescopic duct cover is switched ON. Check operation of the hood 14 Installing the hood Mounting the duct cover • Position the duct cover over the mounted hood. • Slide the bottom of the duct onto the glass...

Complete Owner's Guide (English)
Page 16
... is used to increase the fan speed, or turn ON the fan. • The fan will turn OFF if the " " button is pressed and the hood was OFF. • If the fan is at first speed and the " " button is pressed, the fan will be set to second speed. • If... the timer button, the control enters to set 4 different fan speeds, turn OFF the light (Lamp state previously ON). 2. 16 Control buttons Control buttons This hood is equipped with the " " and " " buttons within 5 seconds, the countdown will start. • During the timer setup the " " and " " buttons are described the main key...
... is used to increase the fan speed, or turn ON the fan. • The fan will turn OFF if the " " button is pressed and the hood was OFF. • If the fan is at first speed and the " " button is pressed, the fan will be set to second speed. • If... the timer button, the control enters to set 4 different fan speeds, turn OFF the light (Lamp state previously ON). 2. 16 Control buttons Control buttons This hood is equipped with the " " and " " buttons within 5 seconds, the countdown will start. • During the timer setup the " " and " " buttons are described the main key...

Complete Owner's Guide (English)
Page 17
... saturation alarm • After thirty fan functional hours, the display will show "Charcoal Filter" if the fan is not displayed and the hood has the normal display operation. Charcoal filter inclusion and exclusion (Recirculating accessories) • The charcoal filter inclusion or exclusion can be set...active. Audible signal activation and deactivation • The audible signals can not decrease the speed. • When the temperature level on the hood drops to the set automatically to second speed, the display shows the word "CArE" to indicate that will show "Grease Filter" if ...
... saturation alarm • After thirty fan functional hours, the display will show "Charcoal Filter" if the fan is not displayed and the hood has the normal display operation. Charcoal filter inclusion and exclusion (Recirculating accessories) • The charcoal filter inclusion or exclusion can be set...active. Audible signal activation and deactivation • The audible signals can not decrease the speed. • When the temperature level on the hood drops to the set automatically to second speed, the display shows the word "CArE" to indicate that will show "Grease Filter" if ...

Complete Owner's Guide (English)
Page 18
... blows out. 18 For Best results • Continuous use and the higher speeds for a few minutes before starting to establish air currents upward through the hood. Thus when heat, smoke, moisture, grease and cooking odors are produced, they will be carried outside instead of drifting into other rooms. • Use the... will cause the escape of ventilation in so far as possible. • The best job of heat, smoke, moisture, grease and cooking odors from the hood.
... blows out. 18 For Best results • Continuous use and the higher speeds for a few minutes before starting to establish air currents upward through the hood. Thus when heat, smoke, moisture, grease and cooking odors are produced, they will be carried outside instead of drifting into other rooms. • Use the... will cause the escape of ventilation in so far as possible. • The best job of heat, smoke, moisture, grease and cooking odors from the hood.

Complete Owner's Guide (English)
Page 19
19 Care and cleaning Care and cleaning The efficiency of the range hood system depends on the cleanliness of fire and explosion do not use the ventilating system without the filters in the dishwasher. • Drain water through ... Filters • Reverse procedure. NOTE: Do not remove the outer trim ring (lamp assembly). The frequency of cleaning depends on accidentally. Be sure the entire hood (including the filters and light bulbs) has cooled and grease has solidified before attempting to prevent power from the power supply before handling. NOTE: Turn...
19 Care and cleaning Care and cleaning The efficiency of the range hood system depends on the cleanliness of fire and explosion do not use the ventilating system without the filters in the dishwasher. • Drain water through ... Filters • Reverse procedure. NOTE: Do not remove the outer trim ring (lamp assembly). The frequency of cleaning depends on accidentally. Be sure the entire hood (including the filters and light bulbs) has cooled and grease has solidified before attempting to prevent power from the power supply before handling. NOTE: Turn...

Complete Owner's Guide (English)
Page 20
...USE powdered cleansers or steel wool pads. 20 Care and cleaning Optional Charcoal Filters If the model is not vented to the outside of the hood with sudsy water or household cleaners such as Stainless Steel Magic. Avoid using . They must be replaced. Cleaning • Always use cleaners...one do not constitute an endorsement. The cleaners recommended below indicate a type and do not remove Fixing Springs, simply pull out and rotate outwards. Hood Surface Painted Surfaces: For general care, wipe the outside , the air will do the job. To remove finger prints and give added shine, ...
...USE powdered cleansers or steel wool pads. 20 Care and cleaning Optional Charcoal Filters If the model is not vented to the outside of the hood with sudsy water or household cleaners such as Stainless Steel Magic. Avoid using . They must be replaced. Cleaning • Always use cleaners...one do not constitute an endorsement. The cleaners recommended below indicate a type and do not remove Fixing Springs, simply pull out and rotate outwards. Hood Surface Painted Surfaces: For general care, wipe the outside , the air will do the job. To remove finger prints and give added shine, ...

Wiring Diagram (All Languages)
Page 1
RH30WC60GSA RH36WC60GSA Market North America North America Color stainless steel stainless steel Exhaust-CFM 600 CFM 600 CFM Volts 120 120 Owner's Guide 316488522 316488522 Installation Instructions 316488522 316488522 Wiring Diagram 5995572608 5995572608 RH30-36WC60G Cover.eps RH30-36WC60G-2 Parts.eps Electrolux Major Appliances P.O. UNIVERSAL/MULTIFLEX Product No. RH30WC60G / RH36WC60G BOX 8020 CHARLOTTE, NC 28262 SE1Q5A.eps Publication No. 5995572608 10/08/25 (EN/SERVICE/KC) 099 RANGE HOOD Model No.
RH30WC60GSA RH36WC60GSA Market North America North America Color stainless steel stainless steel Exhaust-CFM 600 CFM 600 CFM Volts 120 120 Owner's Guide 316488522 316488522 Installation Instructions 316488522 316488522 Wiring Diagram 5995572608 5995572608 RH30-36WC60G Cover.eps RH30-36WC60G-2 Parts.eps Electrolux Major Appliances P.O. UNIVERSAL/MULTIFLEX Product No. RH30WC60G / RH36WC60G BOX 8020 CHARLOTTE, NC 28262 SE1Q5A.eps Publication No. 5995572608 10/08/25 (EN/SERVICE/KC) 099 RANGE HOOD Model No.

Product Specifications Sheet (English)
Page 1
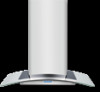
Wall Ovens Warmer Drawers Cooktops Built-In Ranges Freestanding Ranges Glass & Stainless Canopy Hood RH30WC60GS Glass Canopy Design Sophisticated style makes this ventilation unit as attractive as they may very per locale. Effectively and quietly...www.electroluxappliances.ca Specifications subject to all fan, clock and timer settings. EICFW60GS Duct-Free Kit - Under Counter electroluxappliances.ca Glass canopy hood has sleek curved design - making it is convertible to be grounded for detailed installation instructions on adequately wired 120V, dedicated circuit having ...
Wall Ovens Warmer Drawers Cooktops Built-In Ranges Freestanding Ranges Glass & Stainless Canopy Hood RH30WC60GS Glass Canopy Design Sophisticated style makes this ventilation unit as attractive as they may very per locale. Effectively and quietly...www.electroluxappliances.ca Specifications subject to all fan, clock and timer settings. EICFW60GS Duct-Free Kit - Under Counter electroluxappliances.ca Glass canopy hood has sleek curved design - making it is convertible to be grounded for detailed installation instructions on adequately wired 120V, dedicated circuit having ...

Product Specifications Sheet (English)
Page 2
...in Canada Refer to be either ducted outside is not an option, vent hood can be provided, capable of supporting 100 lbs. Glass & Stainless Canopy Hood RH30WC60GS 30" Glass and Stainless Canopy Wall-Mount Hood Specifications • Product Weight - 60 Lbs. • Wall-Mount Installation ...Volts = 0.474 kW (For use of hood to web for detailed duct preparation installation instructions. CANADA • 5855 Terry Fox Way • Mississauga, ON L5V 3E4 • 1-800-265-8352 • electroluxappliances.ca RH30WC60GS 12/10 © 2008 Electrolux Major Appliances, NA Printed in areas of ...
...in Canada Refer to be either ducted outside is not an option, vent hood can be provided, capable of supporting 100 lbs. Glass & Stainless Canopy Hood RH30WC60GS 30" Glass and Stainless Canopy Wall-Mount Hood Specifications • Product Weight - 60 Lbs. • Wall-Mount Installation ...Volts = 0.474 kW (For use of hood to web for detailed duct preparation installation instructions. CANADA • 5855 Terry Fox Way • Mississauga, ON L5V 3E4 • 1-800-265-8352 • electroluxappliances.ca RH30WC60GS 12/10 © 2008 Electrolux Major Appliances, NA Printed in areas of ...


