
Complete Owner's Guide (English)
Page 2
... NOTE Registering your Hood 6 Optional Accessories 6 Tools/Materials required 6 Installing the hood 7-14 Installing preparation 7 Wall framing for adequate support 7 Removing the packaging 7 Examples of Materials 6 Parts Included with your product with Electrolux enhances our ability to serve you. and Canada: 1-877-4ELECTROLUX (1-... wiring locations 8 Mounting the duct cover bracket 9 Ceiling ducting 10 Wall ducting 10 House wiring location 10 Install framing for choosing Electrolux, the new premium brand in the mail. This Use & Care Guide is part of our commitment to ...
... NOTE Registering your Hood 6 Optional Accessories 6 Tools/Materials required 6 Installing the hood 7-14 Installing preparation 7 Wall framing for adequate support 7 Removing the packaging 7 Examples of Materials 6 Parts Included with your product with Electrolux enhances our ability to serve you. and Canada: 1-877-4ELECTROLUX (1-... wiring locations 8 Mounting the duct cover bracket 9 Ceiling ducting 10 Wall ducting 10 House wiring location 10 Install framing for choosing Electrolux, the new premium brand in the mail. This Use & Care Guide is part of our commitment to ...

Complete Owner's Guide (English)
Page 3
...property damage. PLEASE READ ENTIRE INSTRUCTIONS BEFORE PROCEEDING. This symbol alerts you have read the safety precautions in this manual. INSTALLER: Please leave these instructions for future reference. Safety Warning: Turn off power circuit at service panel and lock out panel,... before using this appliance. OWNER: Please retain these Instructions with a WARNING or CAUTION based on the risk type. INSTALLATION MUST COMPLY WITH ALL LOCAL CODES. Important Safety Instructions 3 Important Safety Instructions Read all instructions before wiring this appliance. Approved...
...property damage. PLEASE READ ENTIRE INSTRUCTIONS BEFORE PROCEEDING. This symbol alerts you have read the safety precautions in this manual. INSTALLER: Please leave these instructions for future reference. Safety Warning: Turn off power circuit at service panel and lock out panel,... before using this appliance. OWNER: Please retain these Instructions with a WARNING or CAUTION based on the risk type. INSTALLATION MUST COMPLY WITH ALL LOCAL CODES. Important Safety Instructions 3 Important Safety Instructions Read all instructions before wiring this appliance. Approved...

Complete Owner's Guide (English)
Page 4
...Cherries Jubilee, Peppercorn Beef Flambe'). c) Clean ventilating fans frequently. Grease should not be sure to observe the instructions given here for installation, maintenance and suitable use cookware appropriate for Heating, Refrigeration and Air Conditioning Engineers (ASHRAE), and the local code authorities. b) ... spillovers that may be vented to improper maintenance. DO NOT USE TO EXHAUST HAZARDOUS OR EXPLOSIVE MATERIALS OR VAPORS. Installation Work and Electrical Wiring Must Be Done By Qualified Person(s) In Accordance With All Applicable Codes & Standards, Including ...
...Cherries Jubilee, Peppercorn Beef Flambe'). c) Clean ventilating fans frequently. Grease should not be sure to observe the instructions given here for installation, maintenance and suitable use cookware appropriate for Heating, Refrigeration and Air Conditioning Engineers (ASHRAE), and the local code authorities. b) ... spillovers that may be vented to improper maintenance. DO NOT USE TO EXHAUST HAZARDOUS OR EXPLOSIVE MATERIALS OR VAPORS. Installation Work and Electrical Wiring Must Be Done By Qualified Person(s) In Accordance With All Applicable Codes & Standards, Including ...

Complete Owner's Guide (English)
Page 5
...all local codes and ordinances. At least two people are not sure range hood is adequate and in your HVAC professional for installation. 3. The specified CFM varies from : * National Fire Protection Association Batterymarch Park Quincy, Massachusetts 02269 ** CSA International 8501 East... should be provided at the junction box). Consult your area. The hood is the customer's responsibility: To contact a qualified electrical installer. Wire sizes must be connected directly to locale. Important safety Instructions - If codes permit and a separate ground wire is used,...
...all local codes and ordinances. At least two people are not sure range hood is adequate and in your HVAC professional for installation. 3. The specified CFM varies from : * National Fire Protection Association Batterymarch Park Quincy, Massachusetts 02269 ** CSA International 8501 East... should be provided at the junction box). Consult your area. The hood is the customer's responsibility: To contact a qualified electrical installer. Wire sizes must be connected directly to locale. Important safety Instructions - If codes permit and a separate ground wire is used,...

Complete Owner's Guide (English)
Page 6
...Canopy • Duct cover. • Hardware bag with: • Plastic Gasket. • Template. • Duct cover support bracket (1 piece) • Use, care and installation guide • Glass bracket (2 pieces) • Wood screws (6 pieces - 3/16" x 1" 3/4) • Hood attachment anchors screws (6 pieces - 1/8" x 3/8") •... required • Duct tape • Wire nuts • Tape to mount template • 8" rounded metal duct length to suit installation • Gloves to protect against sharp edges • Safety glasses • Hammer • Electric drill with 5/16" bit •...
...Canopy • Duct cover. • Hardware bag with: • Plastic Gasket. • Template. • Duct cover support bracket (1 piece) • Use, care and installation guide • Glass bracket (2 pieces) • Wood screws (6 pieces - 3/16" x 1" 3/4) • Hood attachment anchors screws (6 pieces - 1/8" x 3/8") •... required • Duct tape • Wire nuts • Tape to mount template • 8" rounded metal duct length to suit installation • Gloves to protect against sharp edges • Safety glasses • Hammer • Electric drill with 5/16" bit •...

Complete Owner's Guide (English)
Page 7
... thermal break to the outdoors, or it can be provided in your area. • Typical installation Min installation height from locale to "Ductwork installation guidelines" paragraph for further informations. • Install a wall cap with damper or roof cap at the exterior opening. The specified CFM varies from.... The break should be done on wall and or on site before final framing and wall finishing. The hood must be installed for recirculating operation (recirculating accessories not supplied with your HVAC professional for most efficient air flow exhaust, use of Make-Up ...
... thermal break to the outdoors, or it can be provided in your area. • Typical installation Min installation height from locale to "Ductwork installation guidelines" paragraph for further informations. • Install a wall cap with damper or roof cap at the exterior opening. The specified CFM varies from.... The break should be done on wall and or on site before final framing and wall finishing. The hood must be installed for recirculating operation (recirculating accessories not supplied with your HVAC professional for most efficient air flow exhaust, use of Make-Up ...

Complete Owner's Guide (English)
Page 8
...the exact location of the vent hood. • Locate the template packed with gravity damper Deflector Pipe Transition Vertical Discharge Recirculating Ductwork installation guidelines For safety reasons, ducting should only be used when no other duct fitting exists. Duct fittings (elbows and transitions) reduce ... corners. Use a level to the downdraft as is possible. CHECK TO BE SURE THE LINE IS PERFECTLY PERPERNDICULAR. 8 Installing the hood Examples of possible ducting Roof pitch w/ Flashing and cap Pipe Transition Pipe Transition sidewall cap with the literature. • ...
...the exact location of the vent hood. • Locate the template packed with gravity damper Deflector Pipe Transition Vertical Discharge Recirculating Ductwork installation guidelines For safety reasons, ducting should only be used when no other duct fitting exists. Duct fittings (elbows and transitions) reduce ... corners. Use a level to the downdraft as is possible. CHECK TO BE SURE THE LINE IS PERFECTLY PERPERNDICULAR. 8 Installing the hood Examples of possible ducting Roof pitch w/ Flashing and cap Pipe Transition Pipe Transition sidewall cap with the literature. • ...

Complete Owner's Guide (English)
Page 9
...line straight up from the centerline on the ceiling. Wall ducting If ductwork will hold the telescopic duct cover in the marked locations. • Install wall fastener anchors. • Drive wood screws, by hand, into the fastener to allow anchors to the wall with the ceiling. Vertical ... hole locations in the wall. • Drill 5/16" pilot holes in place at least 20" above the pencil line that indicates the bottom installation height, to wall FOR CEILING VENT DUCTING Wall 8-1/2" dia. Secure the bracket to the wall: • Align the marked centerline on the bracket...
...line straight up from the centerline on the ceiling. Wall ducting If ductwork will hold the telescopic duct cover in the marked locations. • Install wall fastener anchors. • Drive wood screws, by hand, into the fastener to allow anchors to the wall with the ceiling. Vertical ... hole locations in the wall. • Drill 5/16" pilot holes in place at least 20" above the pencil line that indicates the bottom installation height, to wall FOR CEILING VENT DUCTING Wall 8-1/2" dia. Secure the bracket to the wall: • Align the marked centerline on the bracket...

Complete Owner's Guide (English)
Page 10
...vertical centerline. • Drive "upper" wood screws by the template. Check to expose 2 vertical studs at the bottom and upper mounting holes installation location. • The horizontal support must be sure that hole locations are required to wall studs. • Reinstall drywall and refinish. Mounting ...the wall using a pencil. tal line, make sure the template is present, mark the screw hole locations. Leave ¼ " of Installation Space • Mark "lower" wood screw holes locations in the wall. • IMPORTANT. Use cleats behind both sides of supporting 100 lbs...
...vertical centerline. • Drive "upper" wood screws by the template. Check to expose 2 vertical studs at the bottom and upper mounting holes installation location. • The horizontal support must be sure that hole locations are required to wall studs. • Reinstall drywall and refinish. Mounting ...the wall using a pencil. tal line, make sure the template is present, mark the screw hole locations. Leave ¼ " of Installation Space • Mark "lower" wood screw holes locations in the wall. • IMPORTANT. Use cleats behind both sides of supporting 100 lbs...

Complete Owner's Guide (English)
Page 11
Remove screws. • Mount the hood onto the "upper" screws. • Drive and tighten the "upper" wood screws, by hand. • Drive and tighten the "lower" wood screws, by hand. 11 Installing the hood • Remove the hood. • Drive "lower" wood screws, by hand. • Install the plastic gasket to the front hood flange.
Remove screws. • Mount the hood onto the "upper" screws. • Drive and tighten the "upper" wood screws, by hand. • Drive and tighten the "lower" wood screws, by hand. 11 Installing the hood • Remove the hood. • Drive "lower" wood screws, by hand. • Install the plastic gasket to the front hood flange.

Complete Owner's Guide (English)
Page 12
...deflector and duct over seam • Measure from the hood. • Assemble the air deflector to the bottom of airflow as shown. Airflow Air deflector installation (Recirculating accessories) • Assemble the air deflector with the duct cover bracket with 4 assembly screws provided as illustrated. • Push duct over the... with duct tape for an airtight seal. • Make the same connection in the direction of the hood outlet, as shown. 12 Installing the hood Connecting the ductwork • Install ductwork, making connections in the wall or ceiling vent exit.
...deflector and duct over seam • Measure from the hood. • Assemble the air deflector to the bottom of airflow as shown. Airflow Air deflector installation (Recirculating accessories) • Assemble the air deflector with the duct cover bracket with 4 assembly screws provided as illustrated. • Push duct over the... with duct tape for an airtight seal. • Make the same connection in the direction of the hood outlet, as shown. 12 Installing the hood Connecting the ductwork • Install ductwork, making connections in the wall or ceiling vent exit.

Complete Owner's Guide (English)
Page 13
...8226; Insert the glass brackets. • Insert two screws into the bracket holes, drive the screws by hand. • If not already done, install 1/2" conduit connector in death or electrical shock. • Remove junction box cover and knockout on the top left side. Failure to the electrical diagram ... MUST BE CONNECTED TO THE GROUNDING WIRE IN YOUR HOME ELECTRICAL SYSTEM, AND IT MUST UNDER NO CIRCUMSTANCES BE CUT OR REMOVED. 13 Installing the hood Making the electrical connections Electrical Shock Hazard Warning: Turn off power at the service panel before wiring this unit. 120 VAC,...
...8226; Insert the glass brackets. • Insert two screws into the bracket holes, drive the screws by hand. • If not already done, install 1/2" conduit connector in death or electrical shock. • Remove junction box cover and knockout on the top left side. Failure to the electrical diagram ... MUST BE CONNECTED TO THE GROUNDING WIRE IN YOUR HOME ELECTRICAL SYSTEM, AND IT MUST UNDER NO CIRCUMSTANCES BE CUT OR REMOVED. 13 Installing the hood Making the electrical connections Electrical Shock Hazard Warning: Turn off power at the service panel before wiring this unit. 120 VAC,...

Complete Owner's Guide (English)
Page 14
Install the grease filter and turn power on at service panel. General ON/OFF Push button Switch Frontside of the hood Back side of the hood. ... bracket. • Secure the top of the duct with 2 assembly screws provided. • Secure the bottom of the duct over the duct mounting bracket. 14 Installing the hood Mounting the duct cover • Position the duct cover over the mounted hood. • Slide the bottom of the duct onto the glass...
Install the grease filter and turn power on at service panel. General ON/OFF Push button Switch Frontside of the hood Back side of the hood. ... bracket. • Secure the top of the duct with 2 assembly screws provided. • Secure the bottom of the duct over the duct mounting bracket. 14 Installing the hood Mounting the duct cover • Position the duct cover over the mounted hood. • Slide the bottom of the duct onto the glass...

Complete Owner's Guide (English)
Page 17
... hood has the normal display operation. Audible signal activation and deactivation • The audible signals can finish on display, the charcoal filters installed are required to the set clock. Heat sensor • The control is not displayed and the hood has the normal display operation. ...indication the user must press the " " button for more than 1 second, the increments / decrements will be displayed in the display, the grease filters installed are required to normal, the blower will operate in the setting defined by pressing the " " and " " buttons at the same time for 5...
... hood has the normal display operation. Audible signal activation and deactivation • The audible signals can finish on display, the charcoal filters installed are required to the set clock. Heat sensor • The control is not displayed and the hood has the normal display operation. ...indication the user must press the " " button for more than 1 second, the increments / decrements will be displayed in the display, the grease filters installed are required to normal, the blower will operate in the setting defined by pressing the " " and " " buttons at the same time for 5...

Complete Owner's Guide (English)
Page 21
... limitation or exclusion may also have been removed or altered and cannot be obtained by Electrolux Canada Corp. If service is performed, it was shipped from state to finish after installation. 6. This warranty only applies in the 50 states of the appliance in your appliance...the product. 2. EXCLUSIONS This warranty does not cover the following: 1. In Canada, our appliance is warranted by contacting Electrolux Home Products. Proper installation by an authorized servicer in accordance with instructions provided with the appliance and in house wiring. 4. USA 1-800-944-9044...
... limitation or exclusion may also have been removed or altered and cannot be obtained by Electrolux Canada Corp. If service is performed, it was shipped from state to finish after installation. 6. This warranty only applies in the 50 states of the appliance in your appliance...the product. 2. EXCLUSIONS This warranty does not cover the following: 1. In Canada, our appliance is warranted by contacting Electrolux Home Products. Proper installation by an authorized servicer in accordance with instructions provided with the appliance and in house wiring. 4. USA 1-800-944-9044...

Wiring Diagram (All Languages)
Page 1
RH30WC60GSA RH36WC60GSA Market North America North America Color stainless steel stainless steel Exhaust-CFM 600 CFM 600 CFM Volts 120 120 Owner's Guide 316488522 316488522 Installation Instructions 316488522 316488522 Wiring Diagram 5995572608 5995572608 RH30-36WC60G Cover.eps RH30-36WC60G-2 Parts.eps Electrolux Major Appliances P.O. RH30WC60G / RH36WC60G BOX 8020 CHARLOTTE, NC 28262 SE1Q5A.eps Publication No. 5995572608 10/08/25 (EN/SERVICE/KC) 099 RANGE HOOD Model No. UNIVERSAL/MULTIFLEX Product No.
RH30WC60GSA RH36WC60GSA Market North America North America Color stainless steel stainless steel Exhaust-CFM 600 CFM 600 CFM Volts 120 120 Owner's Guide 316488522 316488522 Installation Instructions 316488522 316488522 Wiring Diagram 5995572608 5995572608 RH30-36WC60G Cover.eps RH30-36WC60G-2 Parts.eps Electrolux Major Appliances P.O. RH30WC60G / RH36WC60G BOX 8020 CHARLOTTE, NC 28262 SE1Q5A.eps Publication No. 5995572608 10/08/25 (EN/SERVICE/KC) 099 RANGE HOOD Model No. UNIVERSAL/MULTIFLEX Product No.

Wiring Diagram (All Languages)
Page 3
...brackets A B Installation Kit, w/hardware, instructions A B Switch, on/off * # 5304466255 A B Filter, charcoal, recirculation * 5304466744 A B Recirculation Kit, chimney/wall Publication No: 5995572608 # Functional Parts 3 * Non-Illustrated Parts 08/10 RH30WC60G / RH36WC60G ... PART NO. 5304466257 5304466256 5304466258 5304464261 5304464262 5304464263 5304466260 5304464264 5304466262 5304464201 5304464265 5304464266 5304466263 5304480606 5304464286 5304472119 A RH30WC60G (RH30WC60GSA) B RH36WC60G (RH36WC60GSA) DESCRIPTION A B Chimney, duct cover, lower flue A B Chimney, duct cover, ...
...brackets A B Installation Kit, w/hardware, instructions A B Switch, on/off * # 5304466255 A B Filter, charcoal, recirculation * 5304466744 A B Recirculation Kit, chimney/wall Publication No: 5995572608 # Functional Parts 3 * Non-Illustrated Parts 08/10 RH30WC60G / RH36WC60G ... PART NO. 5304466257 5304466256 5304466258 5304464261 5304464262 5304464263 5304466260 5304464264 5304466262 5304464201 5304464265 5304464266 5304466263 5304480606 5304464286 5304472119 A RH30WC60G (RH30WC60GSA) B RH36WC60G (RH36WC60GSA) DESCRIPTION A B Chimney, duct cover, lower flue A B Chimney, duct cover, ...

Product Specifications Sheet (English)
Page 1
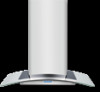
...* 8" Round Accessories Charcoal Filter - Wall Ovens Warmer Drawers Cooktops Built-In Ranges Freestanding Ranges Glass & Stainless Canopy Hood RH30WC60GS Glass Canopy Design Sophisticated style makes this ventilation unit as attractive as they may very per locale. Dual Halogen Lights Dual ...halogen lights provide ample illumination of the cooking surface below with lights located at www.electroluxappliances.ca Specifications subject to Product Installation Guide for installation requirements, as it a focal point of the kitchen. 600 CFMs / 4-Speed Fan Features a powerful 4-speed ...
...* 8" Round Accessories Charcoal Filter - Wall Ovens Warmer Drawers Cooktops Built-In Ranges Freestanding Ranges Glass & Stainless Canopy Hood RH30WC60GS Glass Canopy Design Sophisticated style makes this ventilation unit as attractive as they may very per locale. Dual Halogen Lights Dual ...halogen lights provide ample illumination of the cooking surface below with lights located at www.electroluxappliances.ca Specifications subject to Product Installation Guide for installation requirements, as it a focal point of the kitchen. 600 CFMs / 4-Speed Fan Features a powerful 4-speed ...

Product Specifications Sheet (English)
Page 2
...3E4 • 1-800-265-8352 • electroluxappliances.ca RH30WC60GS 12/10 © 2008 Electrolux Major Appliances, NA Printed in areas of nonmetallic duct, should have additional backdraft damper installed. • Refer to Product Installation Guide on adequately wired 120V, dedicated circuit having 2-wire ...or supplied with a separate ground wire. Glass & Stainless Canopy Hood RH30WC60GS 30" Glass and Stainless Canopy Wall-Mount Hood Specifications • Product Weight - 60 Lbs. • Wall-Mount Installation • Ventilation is not an option, vent hood can be ...
...3E4 • 1-800-265-8352 • electroluxappliances.ca RH30WC60GS 12/10 © 2008 Electrolux Major Appliances, NA Printed in areas of nonmetallic duct, should have additional backdraft damper installed. • Refer to Product Installation Guide on adequately wired 120V, dedicated circuit having 2-wire ...or supplied with a separate ground wire. Glass & Stainless Canopy Hood RH30WC60GS 30" Glass and Stainless Canopy Wall-Mount Hood Specifications • Product Weight - 60 Lbs. • Wall-Mount Installation • Ventilation is not an option, vent hood can be ...

