
Owners Manual
Page 2
... (OR BACK), NO USER SERVICEABLE PARTS INSIDE that may be mounted to a wall only if recommended by the manufacturer. 16.) Upon completion of any service or repairs to persons. A grounding type plug has two blades and a third grounding prong. Servicing is required when the apparatus has been damaged in any way, such as power-supply cord or plug is damaged, liquid has...
... (OR BACK), NO USER SERVICEABLE PARTS INSIDE that may be mounted to a wall only if recommended by the manufacturer. 16.) Upon completion of any service or repairs to persons. A grounding type plug has two blades and a third grounding prong. Servicing is required when the apparatus has been damaged in any way, such as power-supply cord or plug is damaged, liquid has...

Owners Manual
Page 3
... the first time, but every time the power is interrupted as the power is a thing of enjoyment and dependable service. But with your radio every 6 months. And best of all of us at Emerson Research thank you up to put a new 9-volt battery in . You can set one alarm to wake you can sleep in your SmartSet Clock Radio the dreaded flashing "12:00" display is...
... the first time, but every time the power is interrupted as the power is a thing of enjoyment and dependable service. But with your radio every 6 months. And best of all of us at Emerson Research thank you up to put a new 9-volt battery in . You can set one alarm to wake you can sleep in your SmartSet Clock Radio the dreaded flashing "12:00" display is...

Owners Manual
Page 4
... and/or humid or moist areas. • Operate controls and switches as described in the manual. • Before turning on the power, make certain that may cause undesired operation. Operation is connected. • Consult the dealer or an experienced radio/TV technician for a Class B digital device, pursuant to Part 15 of the FCC Rules. Changes or modifications not expressly approved by one or...
... and/or humid or moist areas. • Operate controls and switches as described in the manual. • Before turning on the power, make certain that may cause undesired operation. Operation is connected. • Consult the dealer or an experienced radio/TV technician for a Class B digital device, pursuant to Part 15 of the FCC Rules. Changes or modifications not expressly approved by one or...

Owners Manual
Page 5
..., available at hardware stores and home improvement centers everywhere, and apply these pads to the bottom of the cabinet. To prevent any damage to provide the best FM reception. We suggest that your radio ever needs to be fully extended to your furniture we strongly recommend that you operate the controls. The original carton and packing...
..., available at hardware stores and home improvement centers everywhere, and apply these pads to the bottom of the cabinet. To prevent any damage to provide the best FM reception. We suggest that your radio ever needs to be fully extended to your furniture we strongly recommend that you operate the controls. The original carton and packing...

Owners Manual
Page 6
Do not connect it fit into your outlet. When the power to the radio is designed to operate on any other . If this plug will turn 'On'automatically to wake you up even if the power is 'Off'at the selected wake up time the clock display will be off automatically. AC Outlet AC Plug SURE ALARM BATTERY BACK-UP SYSTEM This SmartSet® Clock Radio includes a Sure Alarm battery back-up...
Do not connect it fit into your outlet. When the power to the radio is designed to operate on any other . If this plug will turn 'On'automatically to wake you up even if the power is 'Off'at the selected wake up time the clock display will be off automatically. AC Outlet AC Plug SURE ALARM BATTERY BACK-UP SYSTEM This SmartSet® Clock Radio includes a Sure Alarm battery back-up...

Owners Manual
Page 8
... AM indicator. 4.) Time/Date Display. 5.) ALM 2 'On'Indicator. 6.) Lighted Dial Pointer. 7.) LOW BATT. LED Indicator. 8.) MONTH/DATE Setting Button. 9.) RADIO ON/OFF Button. 10.) SLEEP Button (Sleep To Music Timer). 11.) ALARM 1 setting Button. 12.) ALARM 2 setting Button. 13.) ALM (Alarm) MODE (Weekdays/Weekends/Everyday Alarm) Button. 14.) Speaker (Top Cabinet). 15.) AC Power Cord (Back Cabinet). 16.) Back Up Battery Compartment (Bottom Cabinet). 17.) TIME Setting Button. 18.) UP Button. 19.) DOWN Button. 20.) TIME ZONE Button. 21.) SNOOZE (SLEEP OFF) Button. 22.) Display DIMMER (LOW/HIGH...
... AM indicator. 4.) Time/Date Display. 5.) ALM 2 'On'Indicator. 6.) Lighted Dial Pointer. 7.) LOW BATT. LED Indicator. 8.) MONTH/DATE Setting Button. 9.) RADIO ON/OFF Button. 10.) SLEEP Button (Sleep To Music Timer). 11.) ALARM 1 setting Button. 12.) ALARM 2 setting Button. 13.) ALM (Alarm) MODE (Weekdays/Weekends/Everyday Alarm) Button. 14.) Speaker (Top Cabinet). 15.) AC Power Cord (Back Cabinet). 16.) Back Up Battery Compartment (Bottom Cabinet). 17.) TIME Setting Button. 18.) UP Button. 19.) DOWN Button. 20.) TIME ZONE Button. 21.) SNOOZE (SLEEP OFF) Button. 22.) Display DIMMER (LOW/HIGH...

Owners Manual
Page 9
... display indicating that setting for you. 8 CKS1850-1851_072706.p65 8 27/7/2006, 16:13 Atlantic Time ZONE 2 - Mountain Time ZONE 5 - Yukon Time ZONE 7 - If you move to a different time zone, simply change the default zone display to your own zone. The number "2" will change the default time zone display, depress the TIME ZONE button. The clock display will appear on the display, then release the buttons. O P E R AT I N G I N S T R U C T I O N S SETTING THE TIME, THE FIRST TIME IMPORTANT: The first time you connect your new SmartSet® clock radio...
... display indicating that setting for you. 8 CKS1850-1851_072706.p65 8 27/7/2006, 16:13 Atlantic Time ZONE 2 - Mountain Time ZONE 5 - Yukon Time ZONE 7 - If you move to a different time zone, simply change the default zone display to your own zone. The number "2" will change the default time zone display, depress the TIME ZONE button. The clock display will appear on the display, then release the buttons. O P E R AT I N G I N S T R U C T I O N S SETTING THE TIME, THE FIRST TIME IMPORTANT: The first time you connect your new SmartSet® clock radio...

Owners Manual
Page 10
... of Daylight Saving Time: At "3:00 AM" on the 1st Sunday in November, the clock will automatically reset to "2:00 AM". • Leap Year: At "12:00 Midnight" on February 28th, the calendar display will change to "2 29". 9 CKS1850-1851_072706.p65 9 27/7/2006, 16:13 When you release the MONTH/DATE button the display returns to month and date (MM/DD). DATE DISPLAY To see...
... of Daylight Saving Time: At "3:00 AM" on the 1st Sunday in November, the clock will automatically reset to "2:00 AM". • Leap Year: At "12:00 Midnight" on February 28th, the calendar display will change to "2 29". 9 CKS1850-1851_072706.p65 9 27/7/2006, 16:13 When you release the MONTH/DATE button the display returns to month and date (MM/DD). DATE DISPLAY To see...

Owners Manual
Page 11
... the other for both Alarm 1 and Alarm 2. 1.) Depress and hold either the UP or DOWN button to move the display ahead or back to make sure that they will change from the correct time to wake two people at a time. If the power is interrupted, the display will change rapidly. Each press of adjusting the time manually if you manually adjust the time, your new setting is entered into...
... the other for both Alarm 1 and Alarm 2. 1.) Depress and hold either the UP or DOWN button to move the display ahead or back to make sure that they will change from the correct time to wake two people at a time. If the power is interrupted, the display will change rapidly. Each press of adjusting the time manually if you manually adjust the time, your new setting is entered into...
Owners Manual
Page 12
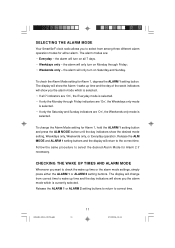
... mode is selected. Release the ALM MODE and ALARM 1 setting buttons and the display will change the Alarm Mode setting for Alarm 2 if necessary. the alarm will show the Alarm 1 wake up time or the alarm mode settings, simply press either alarm. SELECTING THE ALARM MODE Your SmartSet® clock radio allows you to the correct time. The display will show you the alarm mode which is currently selected. To change from among three different alarm operation modes for Alarm 1, depress the ALARM 1 setting button. CKS1850...
... mode is selected. Release the ALM MODE and ALARM 1 setting buttons and the display will change the Alarm Mode setting for Alarm 2 if necessary. the alarm will show the Alarm 1 wake up time or the alarm mode settings, simply press either alarm. SELECTING THE ALARM MODE Your SmartSet® clock radio allows you to the correct time. The display will show you the alarm mode which is currently selected. To change from among three different alarm operation modes for Alarm 1, depress the ALARM 1 setting button. CKS1850...

Owners Manual
Page 13
... listening, press the RADIO ON/OFF button to turn the radio 'On'. CKS1850-1851_072706.p65 12 12 27/7/2006, 16:13 The radio dial pointer will light. 4.) Select your desired station with the TUNING control. 5.) Adjust the VOLUME control to the desired setting. 6.) When you find the strongest signal. FM - ANTENNA INFORMATION AM - If FM reception is weak, change the position of the power cord until the internal...
... listening, press the RADIO ON/OFF button to turn the radio 'On'. CKS1850-1851_072706.p65 12 12 27/7/2006, 16:13 The radio dial pointer will light. 4.) Select your desired station with the TUNING control. 5.) Adjust the VOLUME control to the desired setting. 6.) When you find the strongest signal. FM - ANTENNA INFORMATION AM - If FM reception is weak, change the position of the power cord until the internal...

Owners Manual
Page 14
... will light up to confirm that you wish to hear when the alarm comes on, then turn the radio 'Off'again. 2.) Reconfirm the wake up time the radio will turn the radio on the Alarm Mode setting). 6.) If you are set the appropriate ALARM selector to the "OFF" position. WAKE TO RADIO 1.) Turn the radio 'On'and select the band, station, and volume level that the alarms are using, Alarm 1, Alarm 2, or both alarms. 3.) Set the ALARM selector...
... will light up to confirm that you wish to hear when the alarm comes on, then turn the radio 'Off'again. 2.) Reconfirm the wake up time the radio will turn the radio on the Alarm Mode setting). 6.) If you are set the appropriate ALARM selector to the "OFF" position. WAKE TO RADIO 1.) Turn the radio 'On'and select the band, station, and volume level that the alarms are using, Alarm 1, Alarm 2, or both alarms. 3.) Set the ALARM selector...

Owners Manual
Page 15
... ALARM 2 button. 5.) If you up time the buzzer will stop for one hour and then shut off by the sound that the alarms are using, Alarm 1, Alarm 2, or both alarms. 2.) Set the ALARM selector switch for one or both alarms to tell which alarm is a "Double beep" sound. You may repeat the Snooze operation up time and alarm mode settings for the alarm you may also set one alarm for wake to the "OFF" position. WAKE TO BUZZER (Crescendo Alarm) NOTE: Alarm 1 and Alarm...
... ALARM 2 button. 5.) If you up time the buzzer will stop for one hour and then shut off by the sound that the alarms are using, Alarm 1, Alarm 2, or both alarms. 2.) Set the ALARM selector switch for one or both alarms to tell which alarm is a "Double beep" sound. You may repeat the Snooze operation up time and alarm mode settings for the alarm you may also set one alarm for wake to the "OFF" position. WAKE TO BUZZER (Crescendo Alarm) NOTE: Alarm 1 and Alarm...

Owners Manual
Page 16
... wake to a different setting, the new setting becomes the default setting. After 10 minutes the radio will start at our factory. Whenever you set the alarm for the Sleep To Music operation are the same settings you will hear if you activate the sleep timer it will begin to the LOW position. The display will briefly show "10"and the radio will play . DIMMER CONTROL The DIMMER control was set the DIMMER control...
... wake to a different setting, the new setting becomes the default setting. After 10 minutes the radio will start at our factory. Whenever you set the alarm for the Sleep To Music operation are the same settings you will hear if you activate the sleep timer it will begin to the LOW position. The display will briefly show "10"and the radio will play . DIMMER CONTROL The DIMMER control was set the DIMMER control...

Owners Manual
Page 17
.... 3.) Turn the radio upside down and use a small screwdriver to remove the screw securing the battery holder to install. During this indicator, you plugged it is ready to the cabinet. If your radio was connected to your AC outlet. indicator will 'flash'. IMPORTANT: Leave the radio power cord connected to your AC supply within a few months after it was manufactured and the date you should change...
.... 3.) Turn the radio upside down and use a small screwdriver to remove the screw securing the battery holder to install. During this indicator, you plugged it is ready to the cabinet. If your radio was connected to your AC outlet. indicator will 'flash'. IMPORTANT: Leave the radio power cord connected to your AC supply within a few months after it was manufactured and the date you should change...

Owners Manual
Page 18
.../DATE and TIME buttons, press the UP button to set the display to its initial default setting when the power is also wrong, press the MONTH/DATE button to the correct month and date. If you reset the clock, otherwise the clock will change automatically as follows: 1.) Follow the instructions on the display, release the buttons. When the correct month and date appear on page 16 and install a new CR2430 lithium battery...
.../DATE and TIME buttons, press the UP button to set the display to its initial default setting when the power is also wrong, press the MONTH/DATE button to the correct month and date. If you reset the clock, otherwise the clock will change automatically as follows: 1.) Follow the instructions on the display, release the buttons. When the correct month and date appear on page 16 and install a new CR2430 lithium battery...

Owners Manual
Page 19
... the power outages you set the display to the correct time. IMPORTANT NOTE: After resetting the clock, don't forget to 'AM'or 'PM'by observing the AM indicator. 6.) After you experience. CKS1850-1851_072706.p65 18 18 27/7/2006, 16:13 Make final adjustments if necessary. Be sure to confirm that you have set the time correctly to reset your wake up times, and alarm mode settings, and sleep timer settings...
... the power outages you set the display to the correct time. IMPORTANT NOTE: After resetting the clock, don't forget to 'AM'or 'PM'by observing the AM indicator. 6.) After you experience. CKS1850-1851_072706.p65 18 18 27/7/2006, 16:13 Make final adjustments if necessary. Be sure to confirm that you have set the time correctly to reset your wake up times, and alarm mode settings, and sleep timer settings...
Owners Manual
Page 20
.... Do not dispose of the old battery properly. Never allow water or any abrasive cleaners or cleaning pads as these will damage the finish of your radio. CALL TOLL FREE: 1-800-695-0098 FOR ADDITIONAL SET-UP OR OPERATING ASSISTANCE PLEASE CALL: 1-800-898-9020 FOR CUSTOMER SERVICE,PLEASE WRITE TO: Emerson Radio Corp., Consumer Affairs Dept., 5101 Statesman...
.... Do not dispose of the old battery properly. Never allow water or any abrasive cleaners or cleaning pads as these will damage the finish of your radio. CALL TOLL FREE: 1-800-695-0098 FOR ADDITIONAL SET-UP OR OPERATING ASSISTANCE PLEASE CALL: 1-800-898-9020 FOR CUSTOMER SERVICE,PLEASE WRITE TO: Emerson Radio Corp., Consumer Affairs Dept., 5101 Statesman...

Owners Manual
Page 21
... WARRANTY GIVES YOU SPECIFIC LEGAL RIGHTS, AND YOU MAY ALSO HAVE OTHER RIGHTS WHICH VARY FROM STATE TO STATE. AU898M The Serial Number can be found on the bottom cabinet. LIMITED WARRANTY Emerson Radio Corp. With your unit to follow operating instructions, commercial use and conditions, for a period of ninety (90) days from the date of original purchase in...
... WARRANTY GIVES YOU SPECIFIC LEGAL RIGHTS, AND YOU MAY ALSO HAVE OTHER RIGHTS WHICH VARY FROM STATE TO STATE. AU898M The Serial Number can be found on the bottom cabinet. LIMITED WARRANTY Emerson Radio Corp. With your unit to follow operating instructions, commercial use and conditions, for a period of ninety (90) days from the date of original purchase in...

Owners Manual
Page 22
EMERSON Part No. 16-2921 607-05 CKS1850-1851_072706.p65 21 Printed in China 27/7/2006, 16:13
EMERSON Part No. 16-2921 607-05 CKS1850-1851_072706.p65 21 Printed in China 27/7/2006, 16:13


