
Owners Manual
Page 1
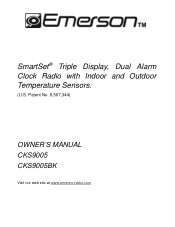
SmartSet® Triple Display, Dual Alarm Clock Radio with Indoor and Outdoor Temperature Sensors. (U.S. Patent No. 6,567,344) OWNER'S MANUAL CKS9005 CKS9005BK Visit our web site at www.emersonradio.com
SmartSet® Triple Display, Dual Alarm Clock Radio with Indoor and Outdoor Temperature Sensors. (U.S. Patent No. 6,567,344) OWNER'S MANUAL CKS9005 CKS9005BK Visit our web site at www.emersonradio.com
Owners Manual
Page 2
... all warnings. 2.) Do not use this apparatus during intended use attachments/ accessories specified by the manufacturer, or sold with the apparatus combination to avoid injury from being walked on apparatus. 13.) Main plug is provided for long periods of important operating and maintenance (servicing) instructions in accordance with the manufacture's instructions. 5.) Do not install near water. 3.) Clean only with...
... all warnings. 2.) Do not use this apparatus during intended use attachments/ accessories specified by the manufacturer, or sold with the apparatus combination to avoid injury from being walked on apparatus. 13.) Main plug is provided for long periods of important operating and maintenance (servicing) instructions in accordance with the manufacture's instructions. 5.) Do not install near water. 3.) Clean only with...

Owners Manual
Page 3
...;, MP3 player or other audio source. In addition all changes from Emerson. This clock radio is a long life lithium battery installed in perfect working order when it . We have taken every precaution to Standard Time, are dual alarms that can be set and used independently, and both of this clock radio when you buy it left our factory. Before We Begin Thank you for everyday operation...
...;, MP3 player or other audio source. In addition all changes from Emerson. This clock radio is a long life lithium battery installed in perfect working order when it . We have taken every precaution to Standard Time, are dual alarms that can be set and used independently, and both of this clock radio when you buy it left our factory. Before We Begin Thank you for everyday operation...
Owners Manual
Page 4
... the serial number on the bottom of your radio and write this number in the space provided on the Warranty page of this manual. • Place your radio on a level surface such as described in the manual. • Before turning on the power, make certain that the AC power cord is properly installed. • When moving the set up • Remove the radio from...
... the serial number on the bottom of your radio and write this number in the space provided on the Warranty page of this manual. • Place your radio on a level surface such as described in the manual. • Before turning on the power, make certain that the AC power cord is properly installed. • When moving the set up • Remove the radio from...

Owners Manual
Page 5
... on normal 120V 60Hz AC power only. Power Source This radio is 'off' at the selected wake up time the clock display will be off and the radio will not operate, but a separate mini-buzzer will be sure to set the ALARM 1 and ALARM 2 switches to the radio is always 'live'. This is equipment with a polarized AC power plug having one blade wider than...
... on normal 120V 60Hz AC power only. Power Source This radio is 'off' at the selected wake up time the clock display will be off and the radio will not operate, but a separate mini-buzzer will be sure to set the ALARM 1 and ALARM 2 switches to the radio is always 'live'. This is equipment with a polarized AC power plug having one blade wider than...

Owners Manual
Page 6
LOCATION OF CONTROLS AND INDICATORS Top Panel Side Panel Front Panel 5
LOCATION OF CONTROLS AND INDICATORS Top Panel Side Panel Front Panel 5

Owners Manual
Page 7
... of Thermo Sensor) 34) RESET Button 35) SYNC Button 6 Back Panel T Wireless Thermo Sensor Bottom Panel 1) RADIO ON/OFF Button 2) TIME Setting Button 3) MONTH/DATE Setting Button 4) TIME ZONE Button 5) SET Button 6) SET Button 7) MODE Button 8) ALARM 1 setting button 9) ALARM 2 setting button 10) SLEEP Button (Sleep To Music Timer) 11) SNOOZE Button 12) ALARM 1 (BUZZER/RADIO/OFF) Selector Switch 13) ALARM 2 (BUZZER/RADIO/OFF) Selector Switch 14) DIMMER (HIGH/LOW) Selector Switch 15) VOLUME Control 16) BAND (FM/AM) Selector Switch 17) TUNING Control 18) AM Time Indicator 19) AL1...
... of Thermo Sensor) 34) RESET Button 35) SYNC Button 6 Back Panel T Wireless Thermo Sensor Bottom Panel 1) RADIO ON/OFF Button 2) TIME Setting Button 3) MONTH/DATE Setting Button 4) TIME ZONE Button 5) SET Button 6) SET Button 7) MODE Button 8) ALARM 1 setting button 9) ALARM 2 setting button 10) SLEEP Button (Sleep To Music Timer) 11) SNOOZE Button 12) ALARM 1 (BUZZER/RADIO/OFF) Selector Switch 13) ALARM 2 (BUZZER/RADIO/OFF) Selector Switch 14) DIMMER (HIGH/LOW) Selector Switch 15) VOLUME Control 16) BAND (FM/AM) Selector Switch 17) TUNING Control 18) AM Time Indicator 19) AL1...
Owners Manual
Page 8
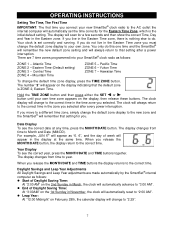
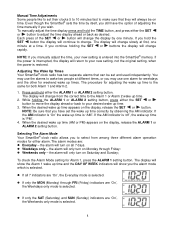
... display changes from time to Month and Date (MM/DD). Daylight Savings and Leap Year Adjustments All Daylight Savings and Leap Year adjustments are 7 time zones programmed into your SmartSet® clock radio as follows: z Start of Daylight Saving Time: At "2:00 AM" on the display, then release these buttons. You only do . OPERATING INSTRUCTIONS Setting The Time, The First Time IMPORTANT: The first time you connect your new SmartSet...
... display changes from time to Month and Date (MM/DD). Daylight Savings and Leap Year Adjustments All Daylight Savings and Leap Year adjustments are 7 time zones programmed into your SmartSet® clock radio as follows: z Start of Daylight Saving Time: At "2:00 AM" on the display, then release these buttons. You only do . OPERATING INSTRUCTIONS Setting The Time, The First Time IMPORTANT: The first time you connect your new SmartSet...
Owners Manual
Page 9
... only - The display will change slowly at different times, or you hold the SET button the display will return to your new setting, not the original setting, when the power is restored. When the desired wake up time appears on the display, release the SET or button. Selecting The Alarm Mode Your SmartSet® clock radio allows you wish. the alarm will always be set and used independently. z If all...
... only - The display will change slowly at different times, or you hold the SET button the display will return to your new setting, not the original setting, when the power is restored. When the desired wake up time appears on the display, release the SET or button. Selecting The Alarm Mode Your SmartSet® clock radio allows you wish. the alarm will always be set and used independently. z If all...
Owners Manual
Page 10
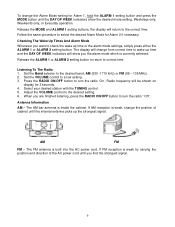
... wake up the strongest signal. Radio frequency will change the position of the AC power cord until the DAY OF WEEK indicators show you the alarm mode which is weak try varying the position and direction of cabinet until the internal antenna picks up time or the alarm mode settings, simply press either the ALARM 1 or ALARM 2 setting button. Checking The Wake Up Times And Alarm Mode Whenever you want to...
... wake up the strongest signal. Radio frequency will change the position of the AC power cord until the DAY OF WEEK indicators show you the alarm mode which is weak try varying the position and direction of cabinet until the internal antenna picks up time or the alarm mode settings, simply press either the ALARM 1 or ALARM 2 setting button. Checking The Wake Up Times And Alarm Mode Whenever you want to...
Owners Manual
Page 11
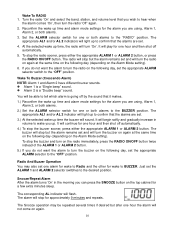
... sound. Turn the radio 'On' and select the band, station, and volume level that it makes. 1.) Reconfirm the wake up time, the radio will turn on the Alarm Mode setting). The appropriate AL1 and/or AL 2 indicators will not come on the following day, set one alarm for wake to Radio and the other for one or both alarms to confirm that the alarms are using , Alarm 1, Alarm 2, or both alarms. 2.) Set...
... sound. Turn the radio 'On' and select the band, station, and volume level that it makes. 1.) Reconfirm the wake up time, the radio will turn on the Alarm Mode setting). The appropriate AL1 and/or AL 2 indicators will not come on the following day, set one alarm for wake to Radio and the other for one or both alarms to confirm that the alarms are using , Alarm 1, Alarm 2, or both alarms. 2.) Set...
Owners Manual
Page 12
... the clock display is never connected to an AC power supply. A number of factors, such as the factory default setting. Press the SLEEP button. NOTE: When you plugged it was set the DIMMER control to the LO (Low) position. The Sleep operation may last for the first time determine the amount of time between the date the radio was manufactured and the date you change the display to...
... the clock display is never connected to an AC power supply. A number of factors, such as the factory default setting. Press the SLEEP button. NOTE: When you plugged it was set the DIMMER control to the LO (Low) position. The Sleep operation may last for the first time determine the amount of time between the date the radio was manufactured and the date you change the display to...
Owners Manual
Page 13
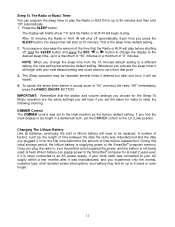
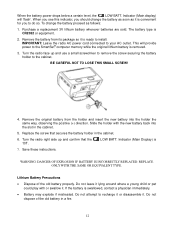
... positive (+) direction. Do not leave it is removed. 3. Purchase a replacement 3V lithium battery wherever batteries are sold. This will 'flash'. Do not dispose of the old battery properly. IMPORTANT: Leave the radio AC power cord connected to the cabinet. Turn the radio right side up and use a small screwdriver to remove the screw securing the battery holder to your AC outlet. Indicator (Main Display) is...
... positive (+) direction. Do not leave it is removed. 3. Purchase a replacement 3V lithium battery wherever batteries are sold. This will 'flash'. Do not dispose of the old battery properly. IMPORTANT: Leave the radio AC power cord connected to the cabinet. Turn the radio right side up and use a small screwdriver to remove the screw securing the battery holder to your AC outlet. Indicator (Main Display) is...
Owners Manual
Page 14
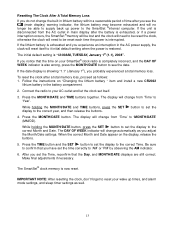
Follow the instructions on "Changing the lithium battery " item and install a new CR2032 lithium battery in main display after the battery is exhausted, or if a power interruption occurs, the SmartSet ®memory will be lost and the clock will need to be reset the clock, otherwise the clock will change from 'Time' to supply back up times, and alarm mode settings, and sleep timer settings as well. 13 The display will need to...
Follow the instructions on "Changing the lithium battery " item and install a new CR2032 lithium battery in main display after the battery is exhausted, or if a power interruption occurs, the SmartSet ®memory will be lost and the clock will need to be reset the clock, otherwise the clock will change from 'Time' to supply back up times, and alarm mode settings, and sleep timer settings as well. 13 The display will need to...
Owners Manual
Page 15
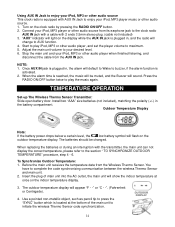
... activated. 2. Install two "AAA" size batteries (not included), matching the polarity (+/-) in , and the radio will appear "F - -" or "C - -". (Fahrenheit or Centrigade). 4. Before the main unit receives the temperature data from the Wireless Thermo Sensor. Insert the plug of the main unit to play iPod, MP3 or other audio player, and set the player volume to maximum. 5. The outdoor temperature display will change to AUX function. 4. When the alarm time is...
... activated. 2. Install two "AAA" size batteries (not included), matching the polarity (+/-) in , and the radio will appear "F - -" or "C - -". (Fahrenheit or Centrigade). 4. Before the main unit receives the temperature data from the Wireless Thermo Sensor. Insert the plug of the main unit to play iPod, MP3 or other audio player, and set the player volume to maximum. 5. The outdoor temperature display will change to AUX function. 4. When the alarm time is...
Owners Manual
Page 16
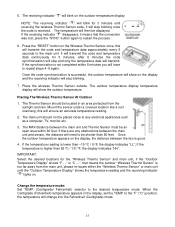
.... 6. The receiving indicator " " will blink on the Wireless Thermo Sensor once, this will change into the Fahrenheit (Centigrade) mode. 15 Press the "RESET" button on the outdoor temperature display. The main unit should be shorter than 80 feet. IMPORTANT: Select the desired locations for the "Wireless Thermo Sensor" and main unit, if the "Outdoor Temperature Display" shows "F - -" or "C - -", that the connection was lost...
.... 6. The receiving indicator " " will blink on the Wireless Thermo Sensor once, this will change into the Fahrenheit (Centigrade) mode. 15 Press the "RESET" button on the outdoor temperature display. The main unit should be shorter than 80 feet. IMPORTANT: Select the desired locations for the "Wireless Thermo Sensor" and main unit, if the "Outdoor Temperature Display" shows "F - -" or "C - -", that the connection was lost...
Owners Manual
Page 17
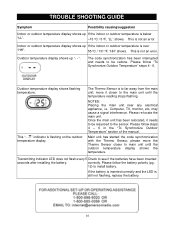
... main unit until the temperature reading stops flashing. This "- - The code synchronization has been interrupted and needs to install battery. ". " indicator is not an error. Please follow steps 4 - 6 in the "To Synchronize Outdoor Temperature" section of the manual. correctly. This is flashing on the outdoor temperature display. move the Thermo Sensor closer to far away from the main unit; TROUBLE SHOOTING GUIDE Symptom...
... main unit until the temperature reading stops flashing. This "- - The code synchronization has been interrupted and needs to install battery. ". " indicator is not an error. Please follow steps 4 - 6 in the "To Synchronize Outdoor Temperature" section of the manual. correctly. This is flashing on the outdoor temperature display. move the Thermo Sensor closer to far away from the main unit; TROUBLE SHOOTING GUIDE Symptom...

Owners Manual
Page 18
CARE AND MAINTENANCE Care Of Cabinets If the cabinet becomes dusty, wipe it with a soft cloth. If the cabinet becomes smudged or dirty, clean it with a soft, slightly dampened cloth. Never use any liquid to get inside the cabinet. Never allow water or any abrasive cleaners or cleaning pads as these will damage the finish of your radio. 17
CARE AND MAINTENANCE Care Of Cabinets If the cabinet becomes dusty, wipe it with a soft cloth. If the cabinet becomes smudged or dirty, clean it with a soft, slightly dampened cloth. Never use any liquid to get inside the cabinet. Never allow water or any abrasive cleaners or cleaning pads as these will damage the finish of your radio. 17
Owners Manual
Page 19
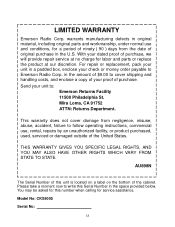
... provided below. AU898N The Serial Number of this number when calling for this unit is located on a label on the bottom of $9.00 to follow operating instructions, commercial use and conditions, for labor and parts or replace the product at our discretion. You may be asked for service assistance. Mira Loma, CA 91752 ATTN: Returns Department. Model No: CKS9005 Serial No: 18 Please...
... provided below. AU898N The Serial Number of this number when calling for this unit is located on a label on the bottom of $9.00 to follow operating instructions, commercial use and conditions, for labor and parts or replace the product at our discretion. You may be asked for service assistance. Mira Loma, CA 91752 ATTN: Returns Department. Model No: CKS9005 Serial No: 18 Please...

Owners Manual
Page 20
CKS9005-906-01 Printed in China 19
CKS9005-906-01 Printed in China 19
